
Town centre renewal: a 3D site checklist GenAnywhere supports
A checklist for reading vacancy, public realm and frontage in one street.
A town centre renewal usually starts with a street that has lost tenants and a list of sites nobody agrees on. The checklist below works outward from vacancy to public realm, access, heritage frontage and phasing, and it marks the places where a 3D site scene carries the argument and where another kind of evidence has to take over.
1 Fix the boundary and the question
1.1 Which block is under review?
Pick the street or block the decision will touch, then draw a boundary a little wider than it. A renewal area often includes the car park behind the shops and the service lane nobody names, and both change what is possible. Write the question in one sentence, such as whether a vacant department store can be split into smaller units.
Put the boundary and the imagery date in the file. A renewal that begins with a fuzzy edge tends to end in a debate about the edge rather than the street. Where two teams draw different lines, keep both and record why.
1.2 What counts as the town centre here?
Town centres have edges that resist drawing. One street can feel busy while the next is empty, and the difference often comes from a crossing, a bus stop or a supermarket entrance. Mark where footfall starts and stops before settling the boundary. That line, more than any designation, is what the renewal has to work with.
2 Read vacancy and ground-floor use
2.1 Which units stand empty, and for how long?
Count the vacant units on both sides of the street and note how long each has stood empty. A unit empty for two years and one empty for two months need different responses. Check whether the upper floors are in use, since a building can be fully let above an empty shop. Valuation records, letting boards and a walk along the pavement answer most of it.
Vacancy is uneven along a street. Three empty units in the middle do more damage than one at each end, because they break the walk. Map the empty units in order, then look at what sits between them: a bank, a charity shop, a takeaway. That pattern usually suggests which end of the street to work on before the rest.
2.2 What does the ground floor look like at eye level?
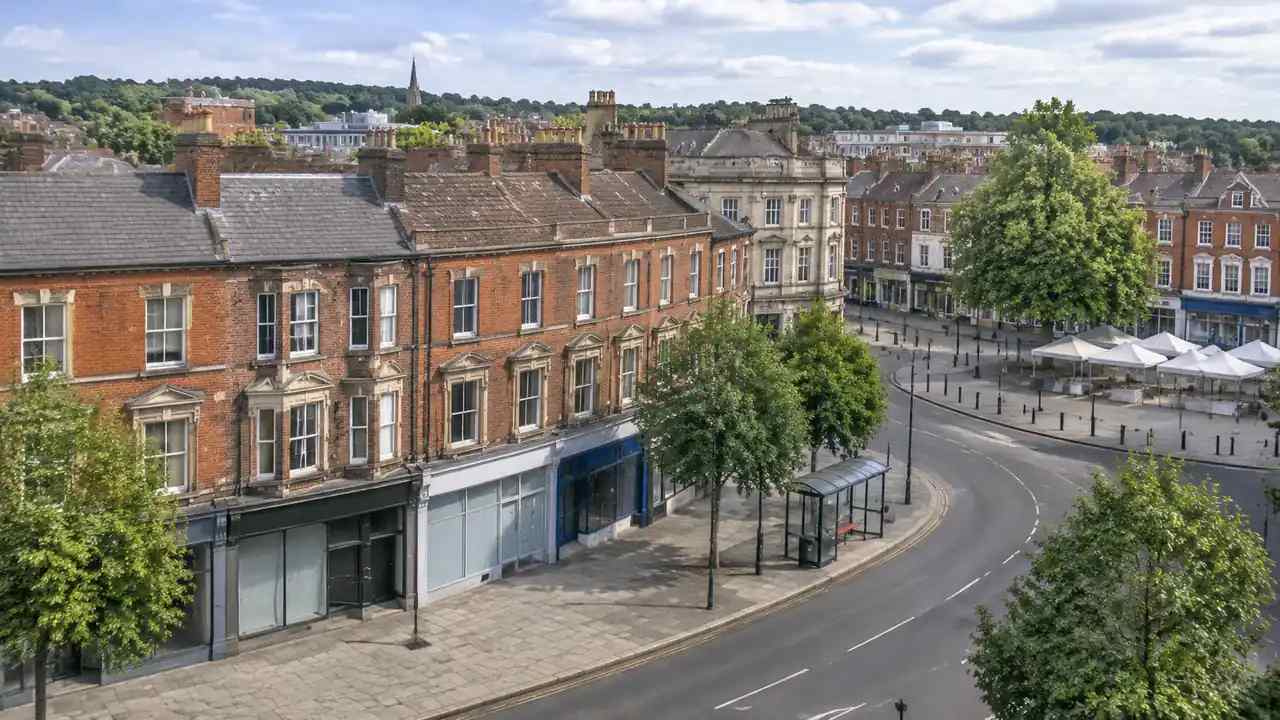
Ground floors decide whether a street feels alive, and they are the part a plan drawing shows least. Look at the height of the shopfront, the depth of the reveal, the amount of glass and the number of doors. Then look at what interrupts them: roller shutters, blank panels, cash machines, bin stores. A view from pavement height keeps that rhythm in front of the team while options are tested.
3 Test public realm and access
3.1 Where do people already gather?
Watch the street at two different times of day. Benches, a low wall, a bus shelter and a wide pavement corner collect people without any design intention. Those spots are the assets a renewal can build on, and a new layout can erase them without noticing. Project for Public Spaces has published observation methods for this kind of survey, though a notepad and half an hour often do the same work.
Public realm improves most where something already works. A wide pavement outside a bakery, a churchyard wall, a patch of shade at a junction: these places need small changes rather than a new square. Test a proposal against the gathering points and ask whether it adds a seat or takes one away.
3.2 How do deliveries and buses reach the street?
Servicing is the part of a town centre that residents notice and drawings hide. Note the delivery times, the vehicles, the turning space and the rear yards lorries use. Check where the bus stops sit relative to the crossings, and how a coach or a refuse vehicle turns. A street that works for pedestrians and fails for deliveries loses its shops slowly and then all at once.
4 Protect heritage frontage through change
4.1 Which frontages carry the character?
Some frontages carry a town's identity: a terrace of brick shops, a market hall, a cinema with a retained facade. Photograph them square-on and note the details that repeat, such as window spacing, cornices and pilasters. Those repeats are what a new building has to answer. Mark them in the scene before any massing option is tested, so the constraint stays visible from the start.
Materials and colour belong to the frontage too, and a scene will not settle them. Use the photographs for that judgment and keep the scene for height, alignment and the gaps between buildings. Where the two disagree, the photograph wins on detail and the scene wins on arrangement.
4.2 How much can change behind them?
Behind a retained frontage, the depth of the plot and the party walls set the limits. A deep retail block may take a new structure inside; a shallow one may struggle. Check where the stairs and the frame sit, and how an extra floor would meet the roof line. The scene can show the mass, while structural and fire questions belong to the design team.

5 Stage the phasing and read it in a scene
5.1 How does phasing look from the pavement?
Renewal usually happens unit by unit, and the street has to keep working while it does. Test the view from the pavement at each stage: the hoarding, the scaffold, the temporary route past the works. Ask what a shopper sees at the point where the street is hardest to use. If the answer is a blank wall for sixty metres, the phasing needs another look.
Temporary uses help at this stage. A market stall, a bench and a planted barrier can hold a vacant plot together while the works run. Put them in the scene as simple blocks, so the phasing views show a street that still functions rather than a row of hoardings.
5.2 What does a generated scene cover, and where does it stop?
GenAnywhere turns the street into an editable site model from satellite and map data, using AI 3D generation for the opening pass. Footprints, heights and building types are read from that data, and buildings, terrain, water and vegetation sit on separate layers. For a town centre the useful part is the street: frontage lines, gaps and roof heights can be read together, and a single building can be replaced or re-scaled to test a change.
The scene stops where a tenancy, a structure or a consent begins. It does not hold lease information or floor areas, and it will not show a shopfront in detail. When the team needs to work in another tool, the district can leave as a general GLB file, with terms set out in the GenAnywhere authorization statement.
Preview the street before any file leaves the platform, because a missing block is easier to spot in a familiar view than in a list of layers. Where a frontage matters, replace the mass and check how the street reads at pavement height. Note what changed, so the next reviewer knows which view is a proposal and which is the site as found.
Open the street in the GenAnywhere app and test one frontage option before the next meeting.
6 Close the checklist with a decision record
6.1 What should the record show?
One page per street, with the boundary, the vacancy count, the marked frontages and the phasing views. Add the date of the imagery and the name of the person who walked the street. A reader should see which check produced which finding, and which checks were skipped.
6.2 Who owns each check?
Give every check an owner: the vacancy list to the estates team, the servicing note to the highways officer, the frontage record to the conservation lead. Ownership matters more than the format, because a check with no name behind it disappears quietly. Review the list together once, then keep it short.
6.3 When does the checklist stop being useful?
Stop when the open questions need a structural survey, a valuation or a planning application. The checklist prepares those steps, and it loses value when it becomes a substitute for them. Keep the last agreed version with the decision record, so a later team can see what was known and what was still open.
Compare the stages from drawn boundary to shared file in the GenAnywhere workflow overview.
7 FAQ
FAQ-1 Does the checklist replace a site visit?
No. A walk along the street is how vacancy, condition and the feel of the place get recorded, and the checklist is organised around what you see there. Use the scene to hold those observations in one picture and to test options between visits. Plan a second visit once the options narrow, because the street reads differently when you know what is proposed.
FAQ-2 Can the scene show shopfront detail?
Not at the level of mouldings, glazing bars or signage. Generated geometry reads building masses and rooflines, and a shopfront is a thin layer on the front of one of them. Use street photographs for detail and the scene for arrangement: how the frontage lines up, how a new entrance sits, how much blank wall appears at eye level.
FAQ-3 How much of a town centre should one scene cover?
One street, or two if they meet at a junction that people use. A wider area turns every shop into a shape and makes the pavement view unusable. Keep the wider town as a second, looser scene for context when a view or a landmark depends on it. Two scenes that answer different questions work better than one that answers neither.
FAQ-4 What can leave the platform for other teams?
A general GLB file, which design, GIS and visualization teams can open in their own software. The file carries the geometry and the layer split, not the notes or the photographs. Test one export in the receiving tool before a meeting, and keep the exported version beside the record so everyone is looking at the same street.
Content and technical notes
This article was prepared by the GenAnywhere team with AI-assisted drafting and human review.
Product features, formats, and availability change as the platform evolves; refer to the official GenAnywhere website for current details.
For technical questions or corrections, contact support@genanywhere.com.
Last reviewed: 2026-11-06.