
How to Import Models Generated by GenAnywhere into Wings Engine
GenAnywhere is an AI 3D model generation platform. By simply selecting an area on the map, it automatically generates a 3D site model that includes buildings, terrain, trees, and more. Combining AI recognition with fine-grained manual editing, it enables rapid construction from map data to a deliverable 3D model. The generated models can be imported into multiple platforms and are widely used in digital twins, GIS, game engines, BIM, and many other fields, making 3D scene creation more efficient and convenient.
After selecting an area on the map in GenAnywhere and successfully generating a model, there are two export options available if you want to import it into Wings Engine.
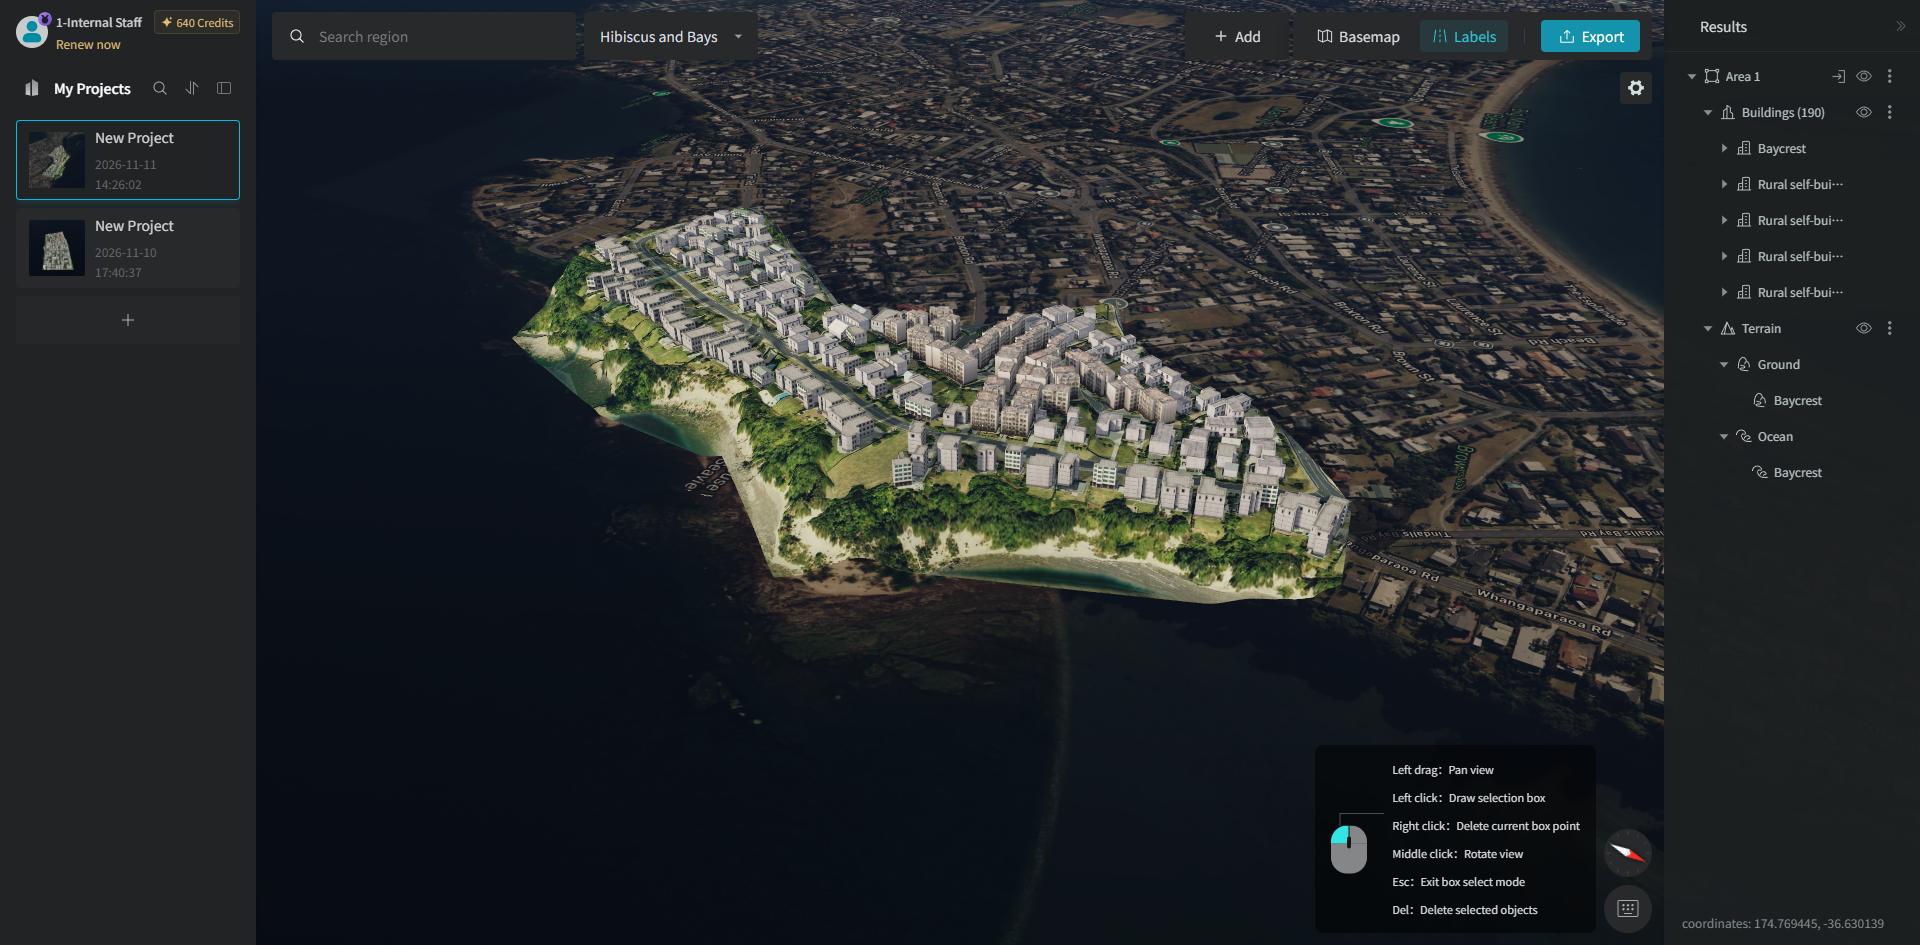
1. Export as DTA Format
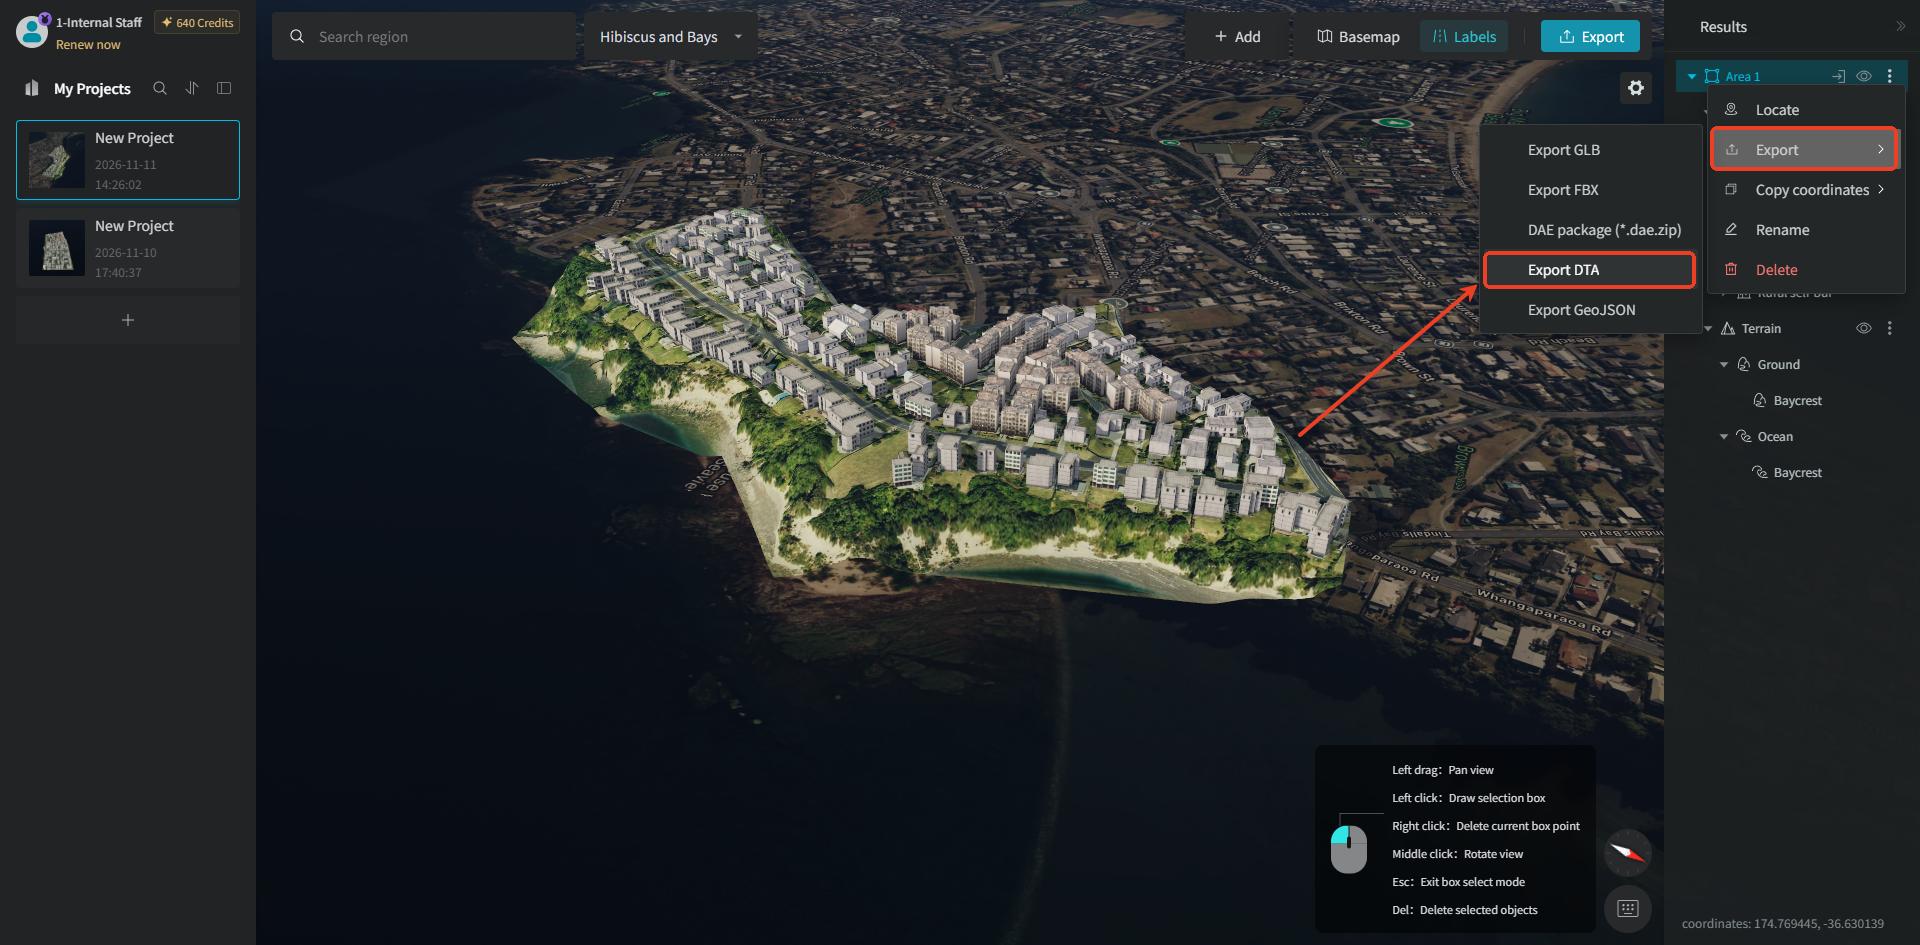
In the layer management panel on the right side of the GenAnywhere software, right-click the model's "Area" layer, and select the "Export" option in the popup, then choose "Export DTA."
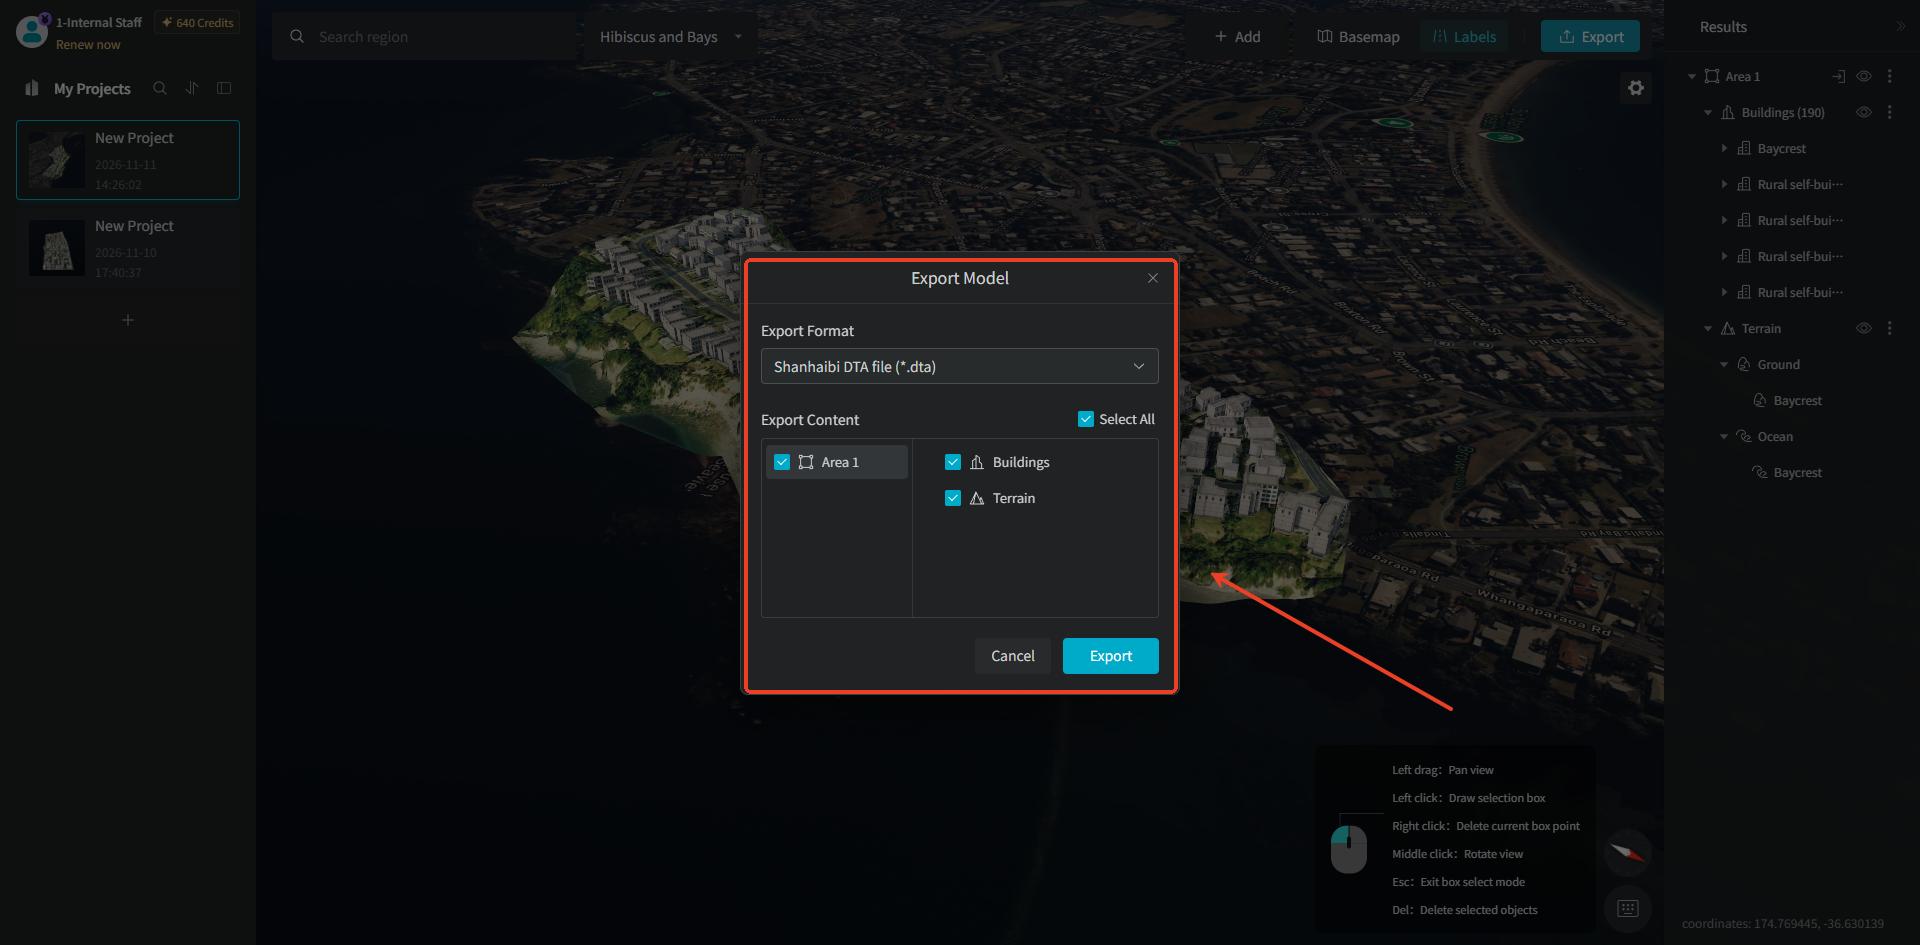
After clicking the "Export DTA" option, in the corresponding popup that appears, the "DTA" export format is selected by default. You can click to switch to other export format types, and you can also customize the model content to be exported (it supports both exporting a single-area model individually and merging multiple-area models for export).
After the model is exported successfully, open the Wings Engine software, select the "Asset Library" option in the left navigation bar, and on its corresponding screen click the "Add" button, then select the "Import Assets" option.
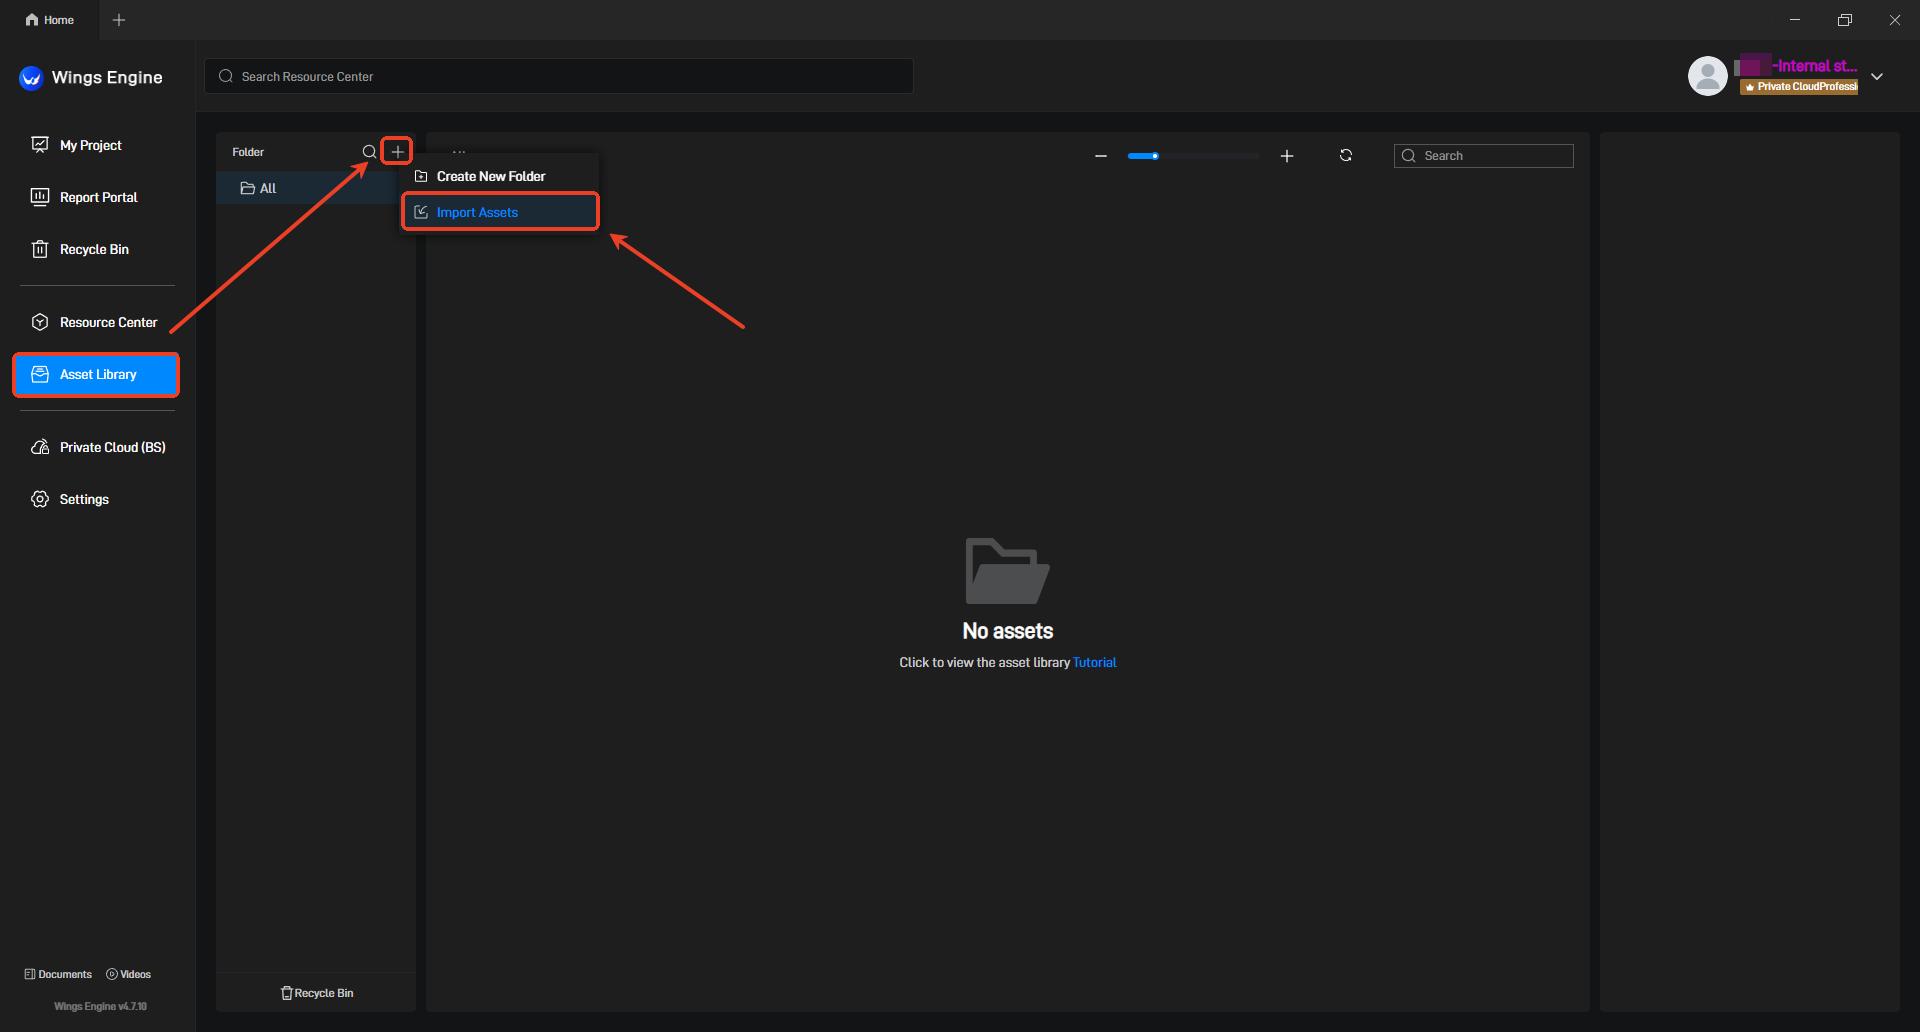
In the "Import Asset" popup that appears, click to select the "DTA" file saved locally.
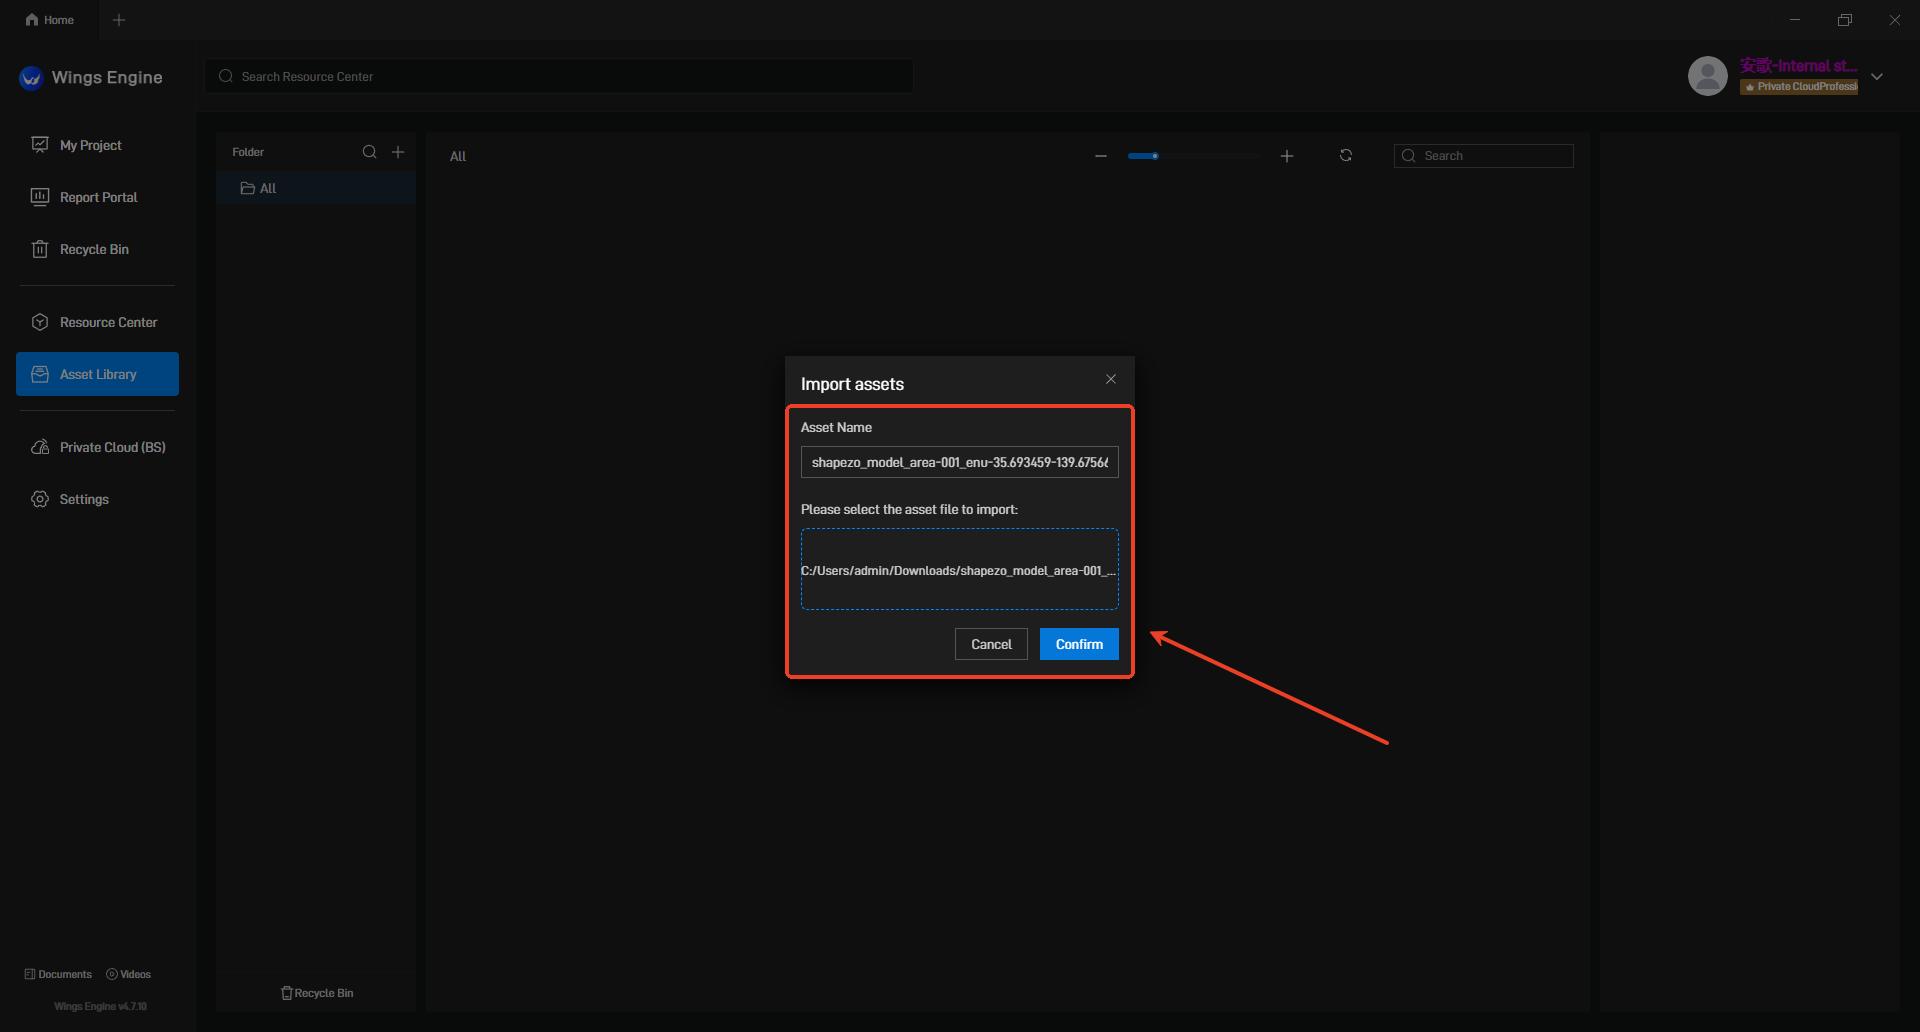
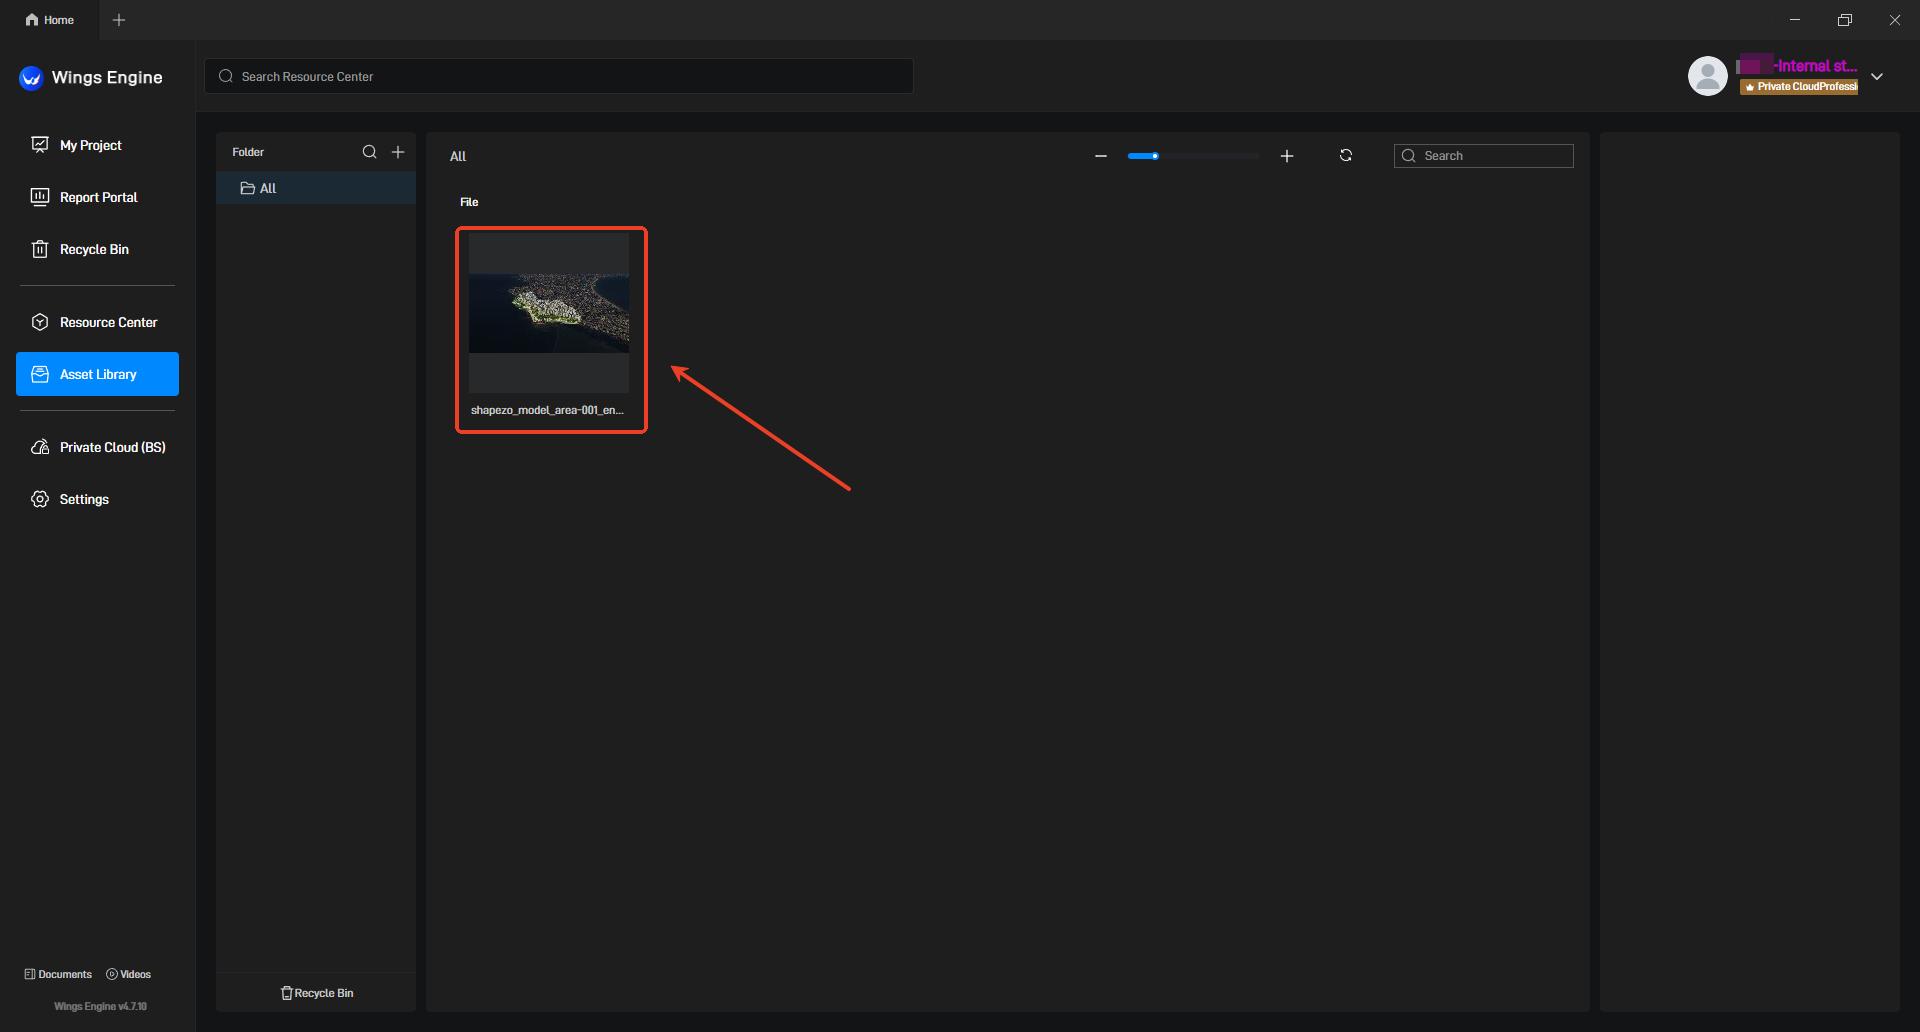
After the model is imported successfully, the corresponding model asset will be displayed on the Asset Library screen.
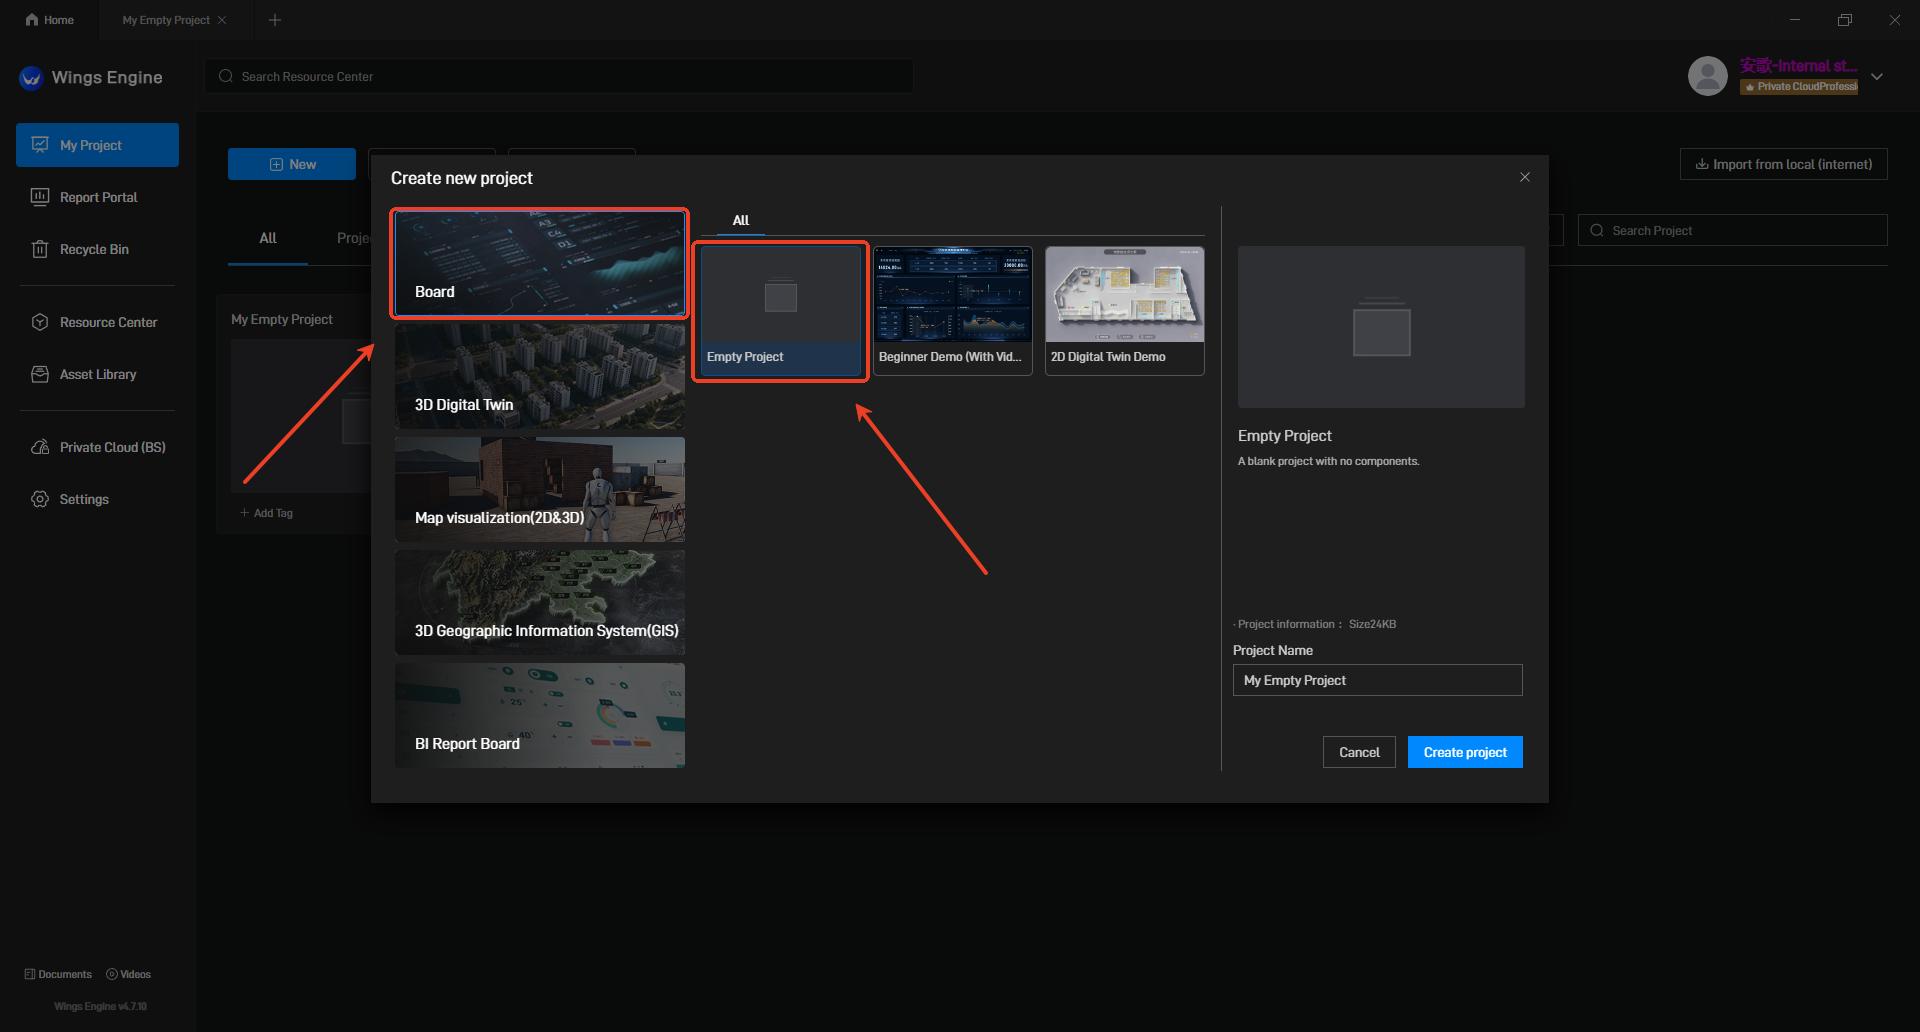
Then select the "My Projects" option in the left navigation bar, and on its corresponding screen click the "New" button.
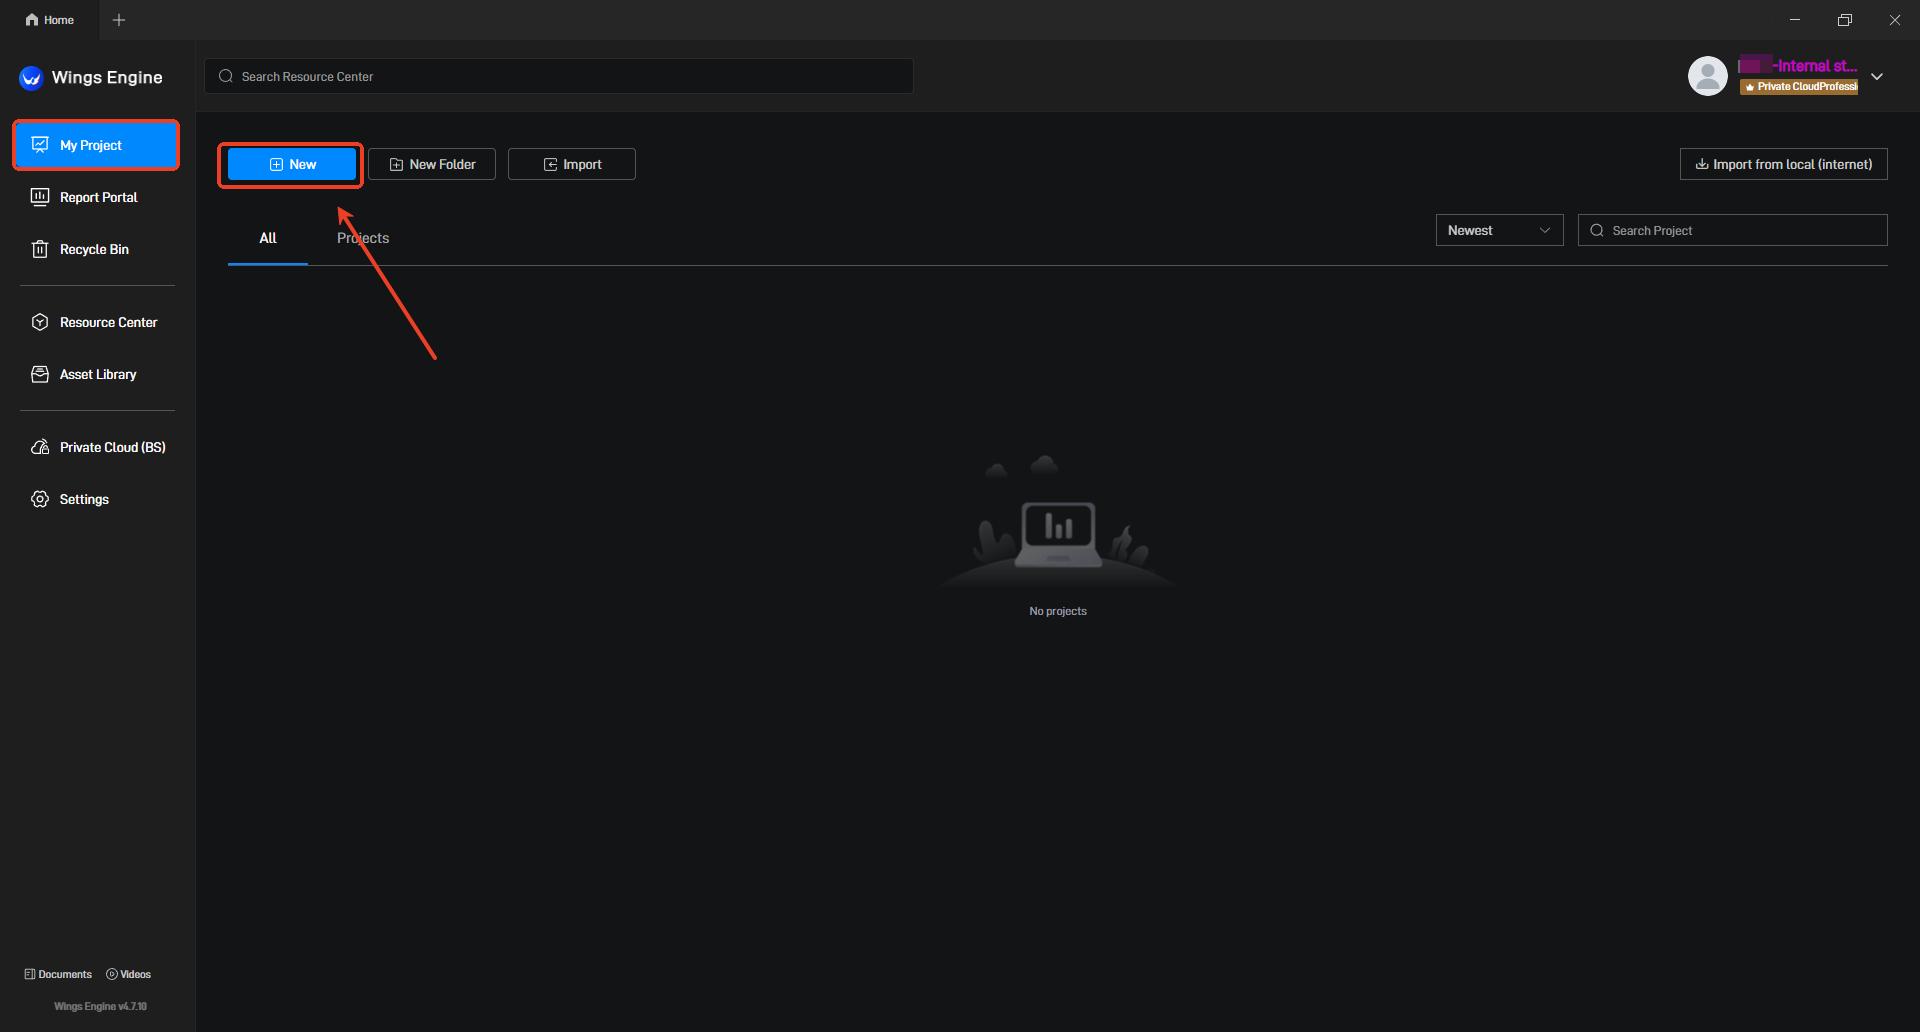
After clicking the "New" button, select "Board" on the left and create a "Empty Project."
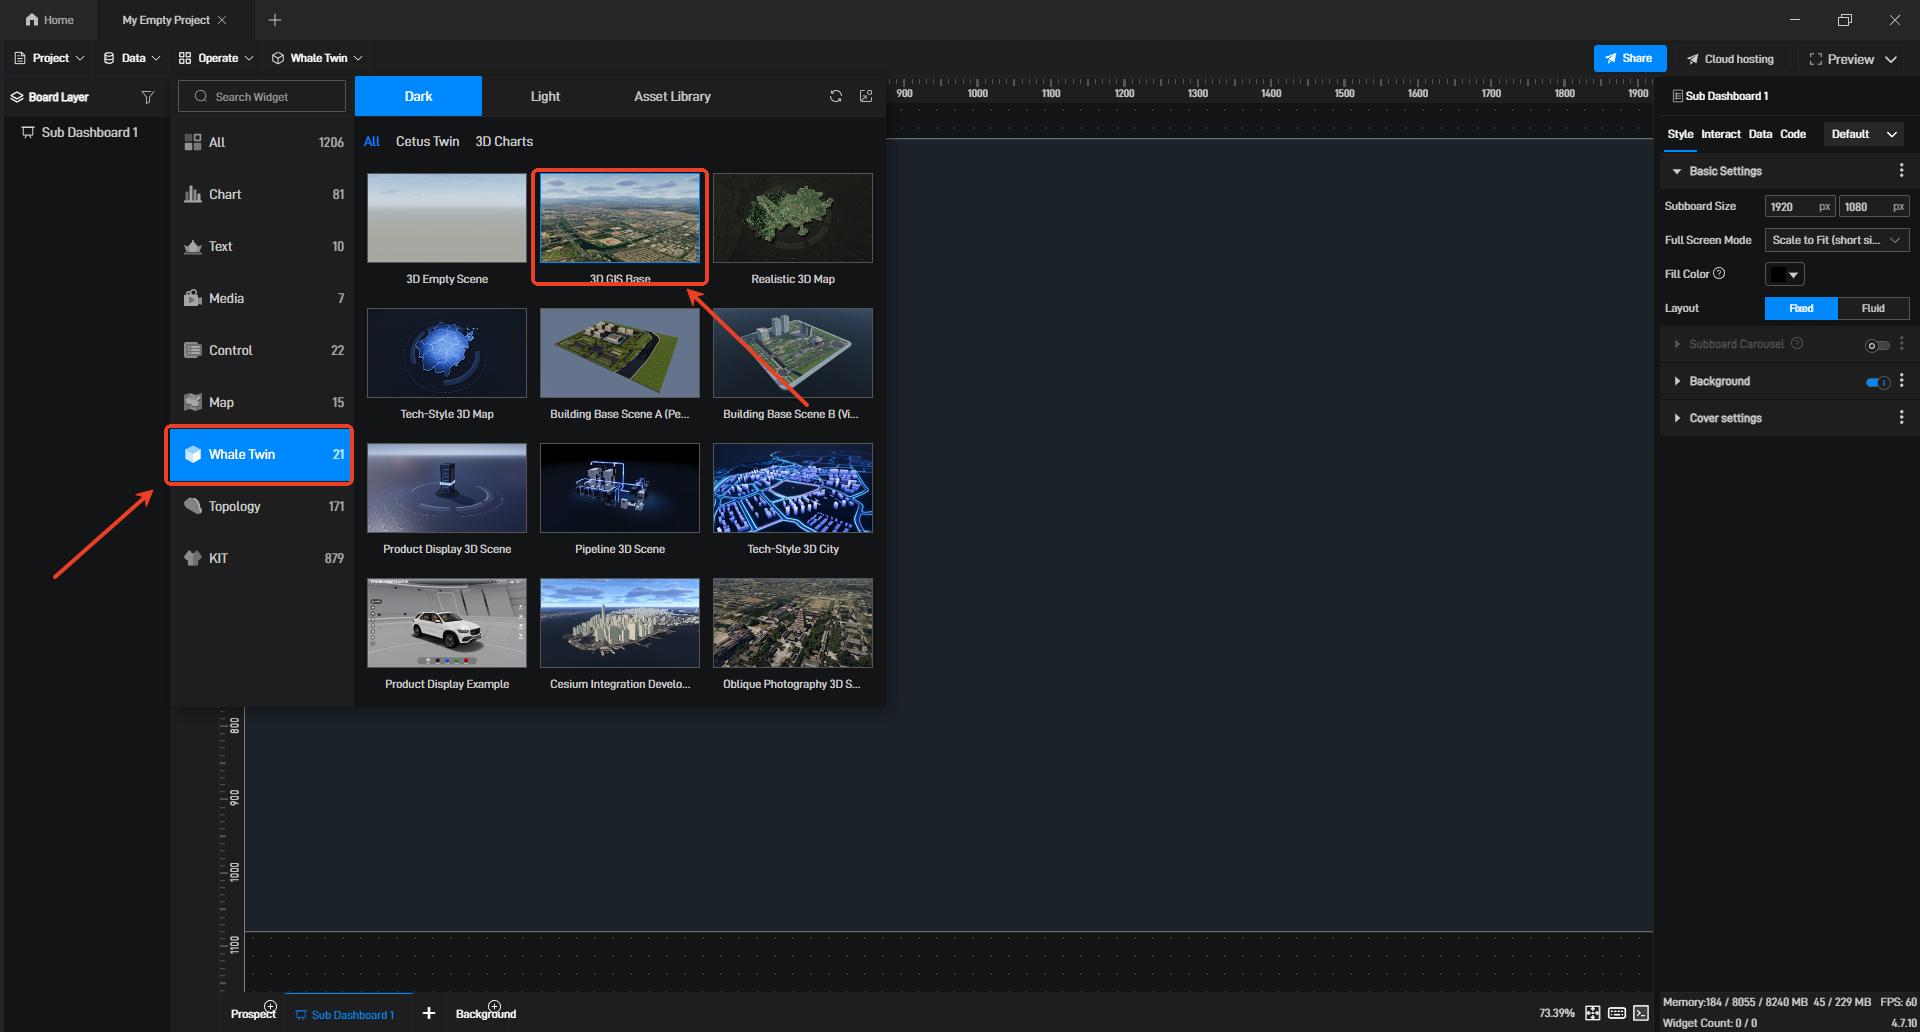
After opening the empty project, select "3D GIS Base" in "Whale Twin."
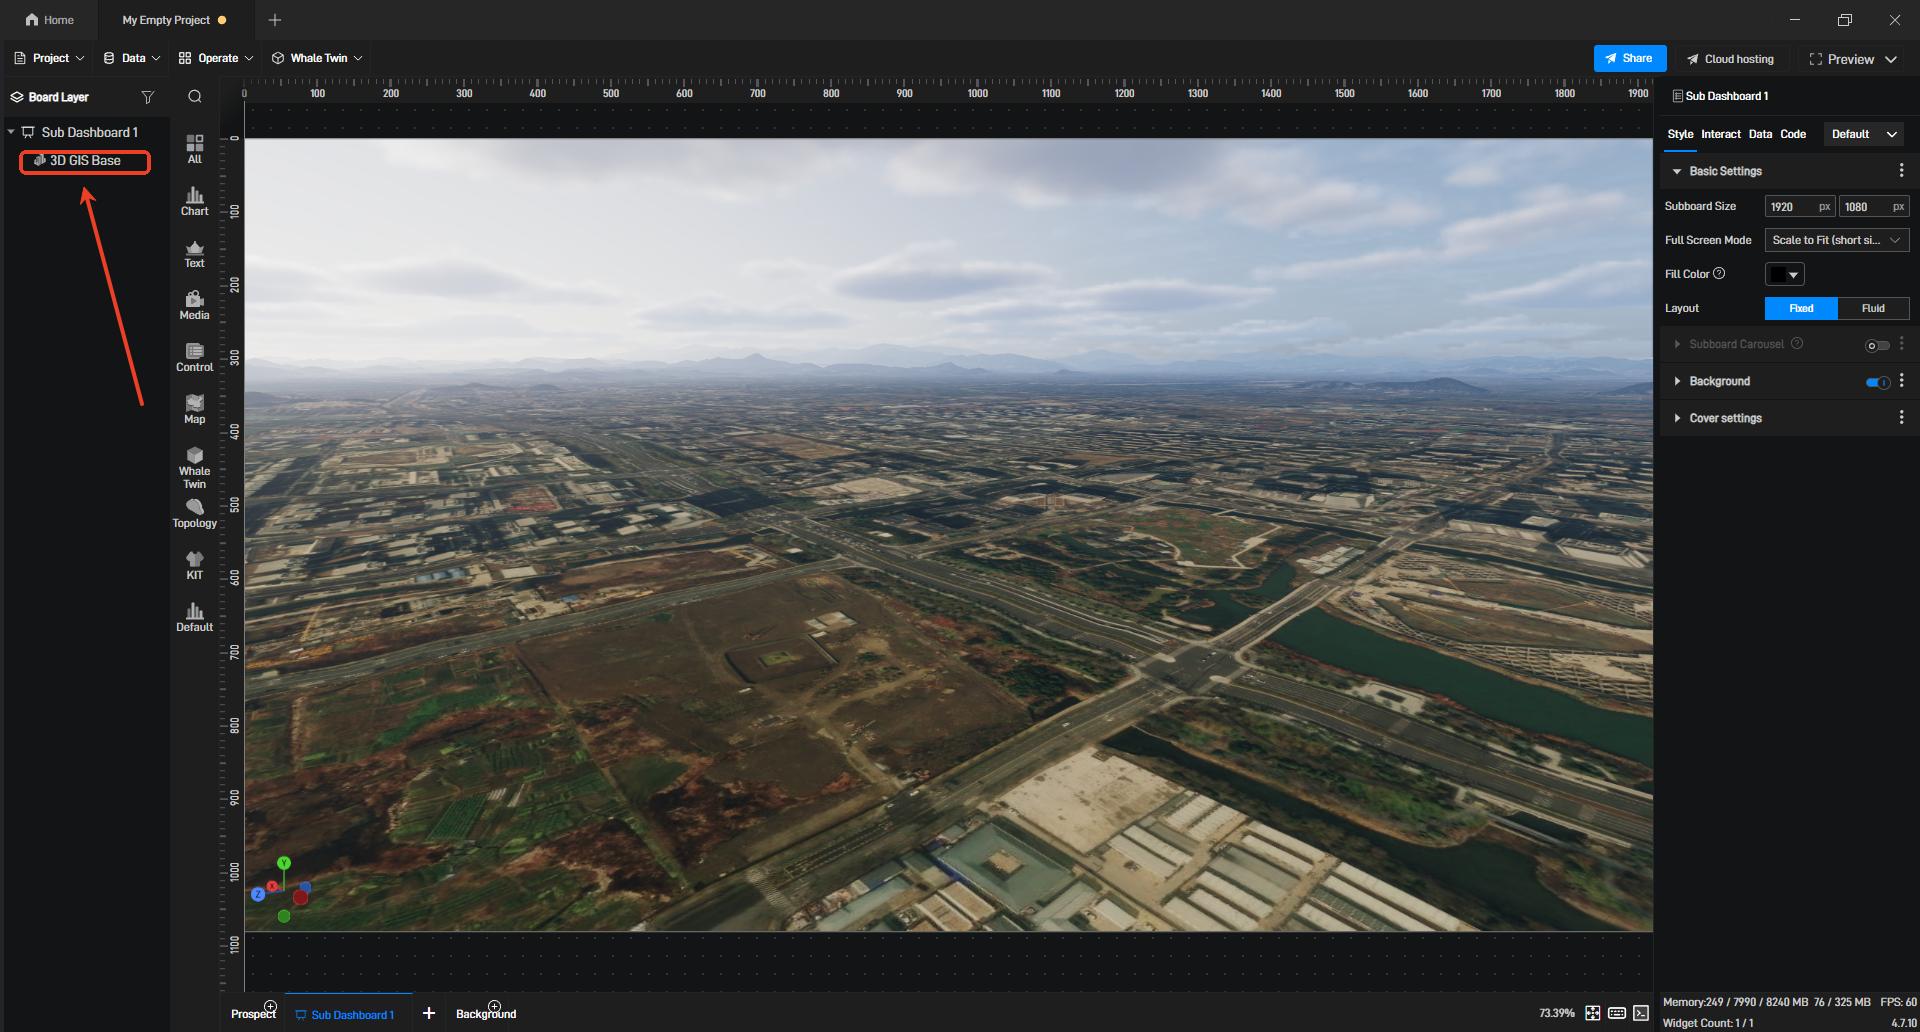
After entering the scene, confirm that the Whale Twin layer exists in the left layer panel, then double-click the preview viewport to enter the editing state.
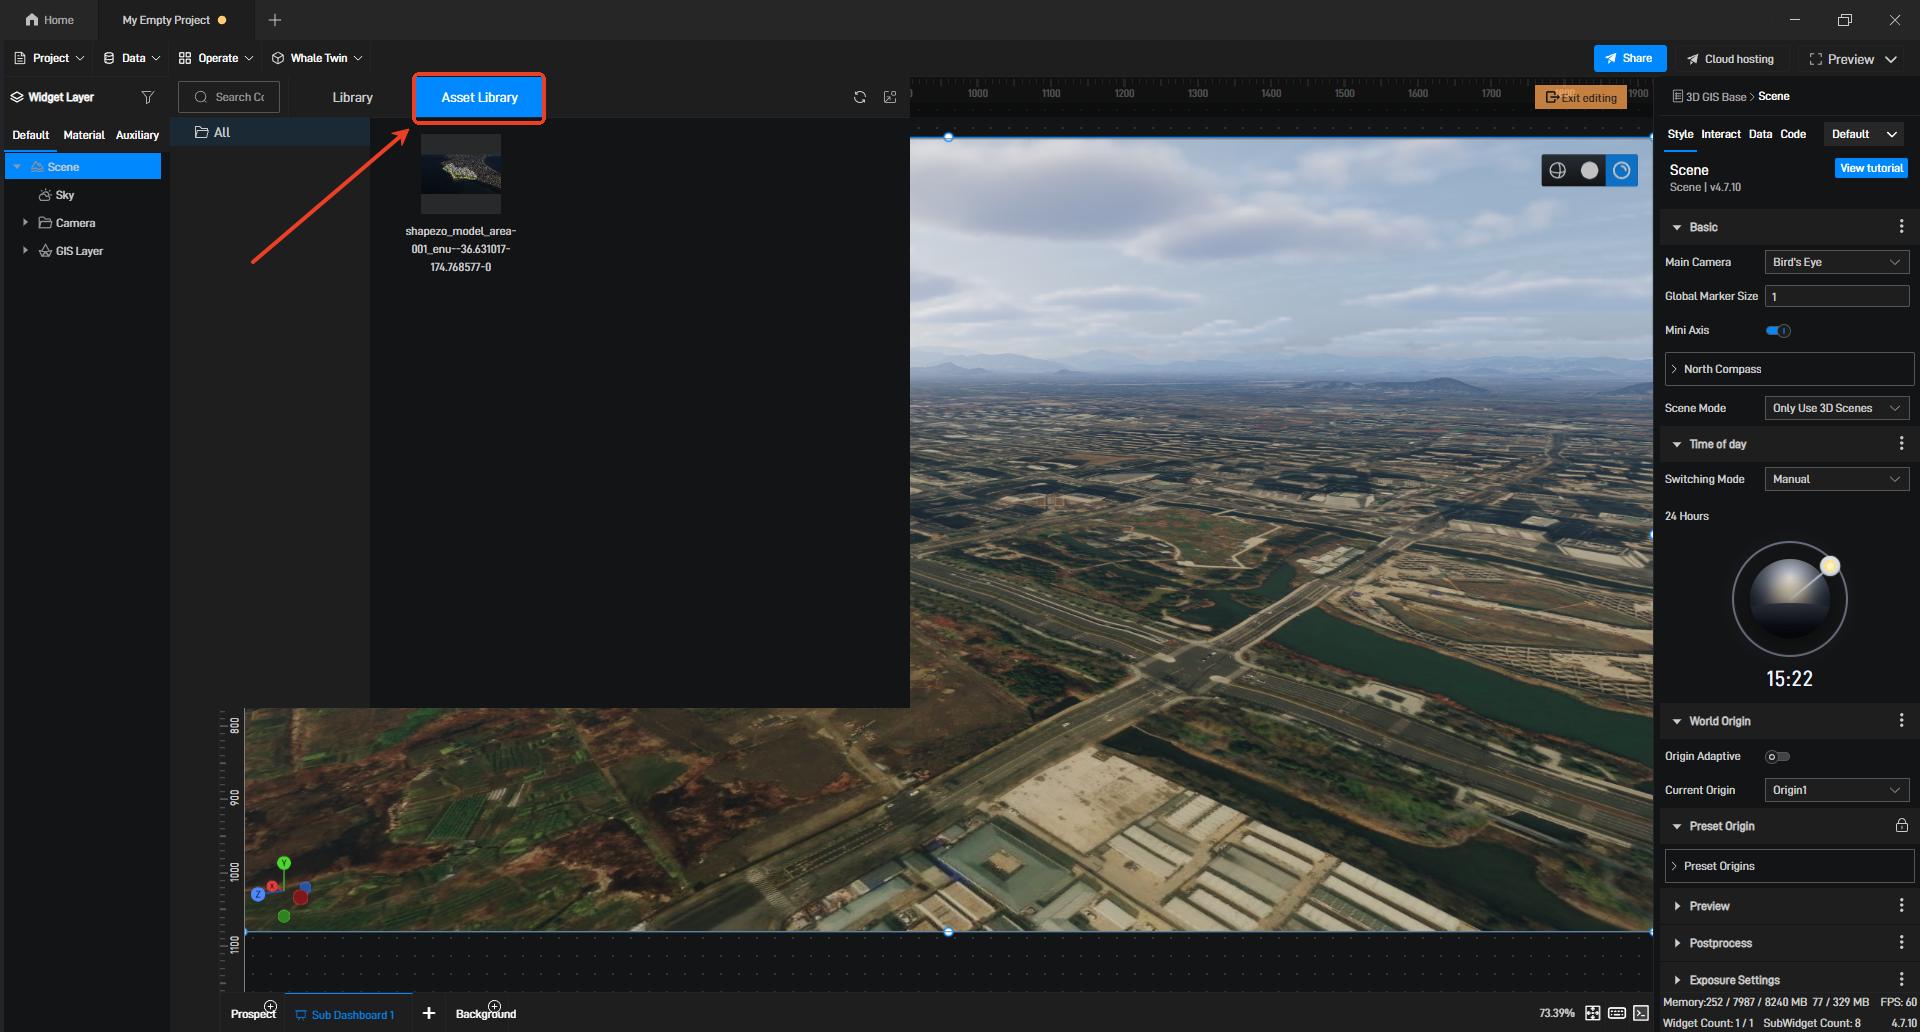
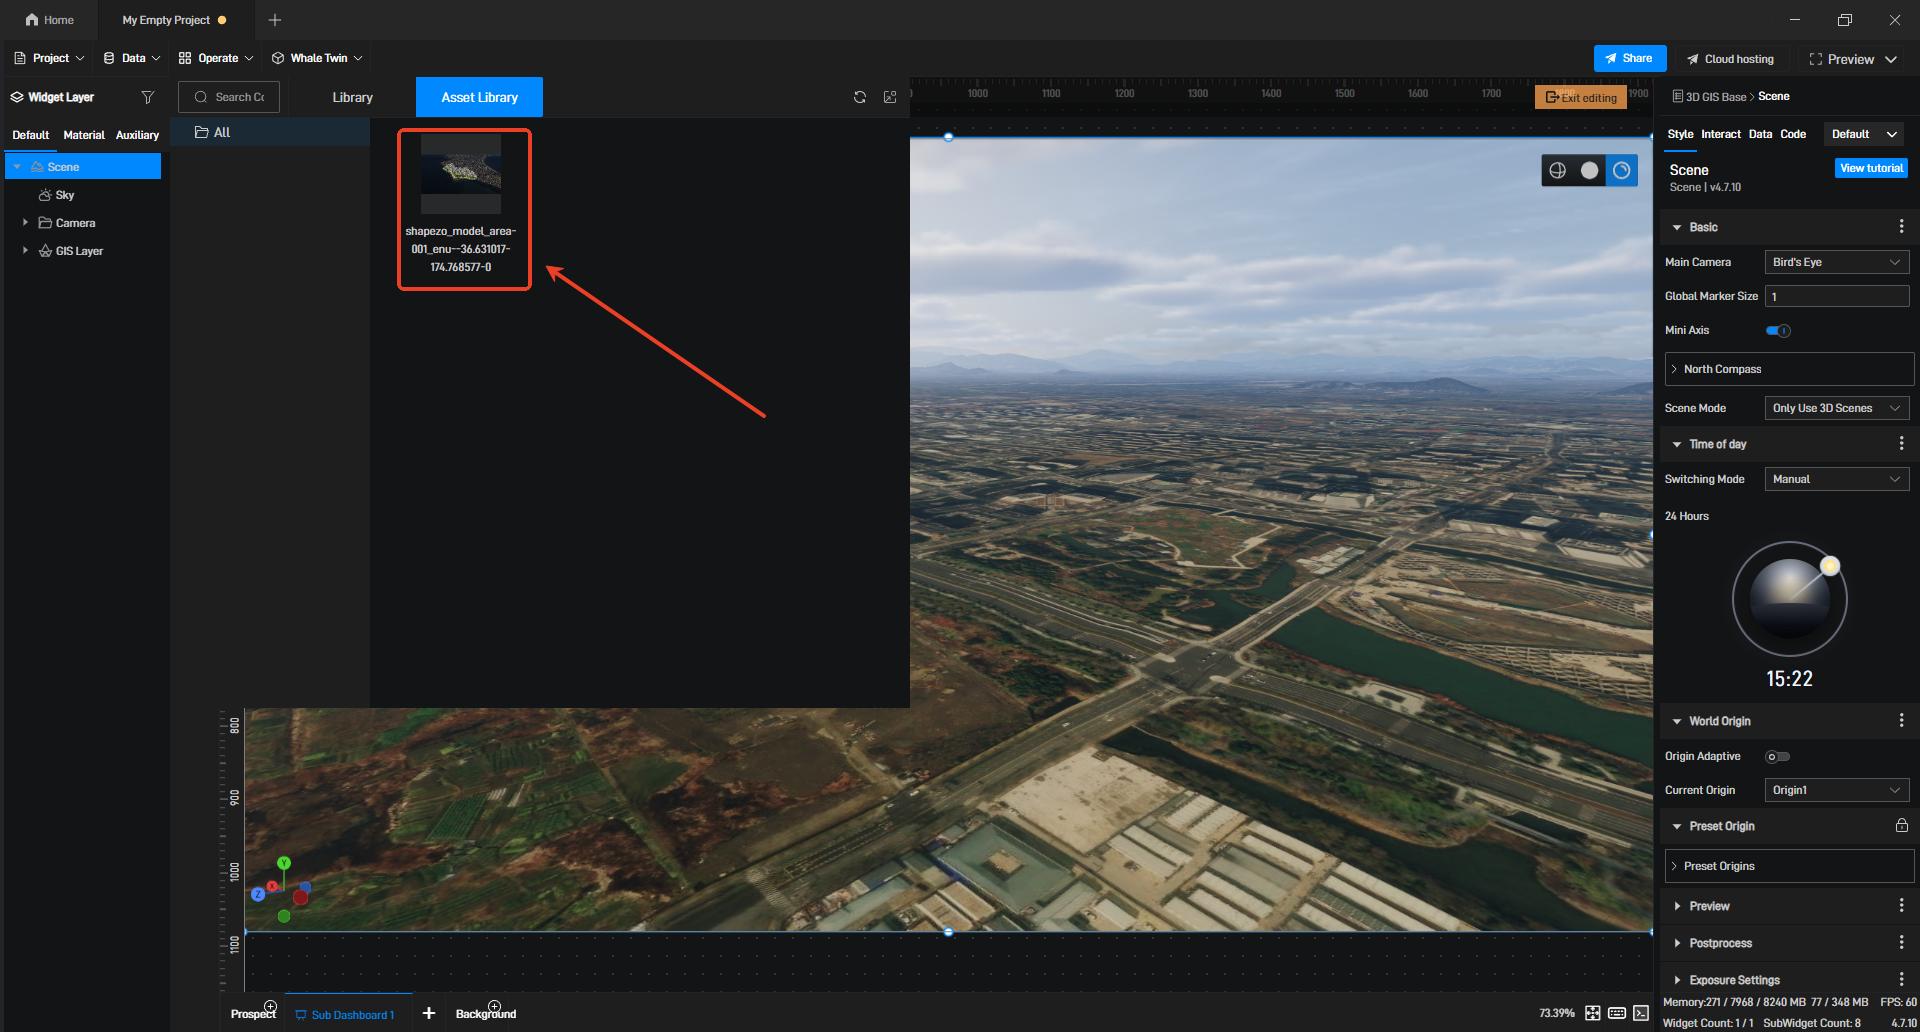
In the editing state, select the "All" option, click "Asset Library," and select the previously imported model asset on the corresponding "Asset Library" screen.
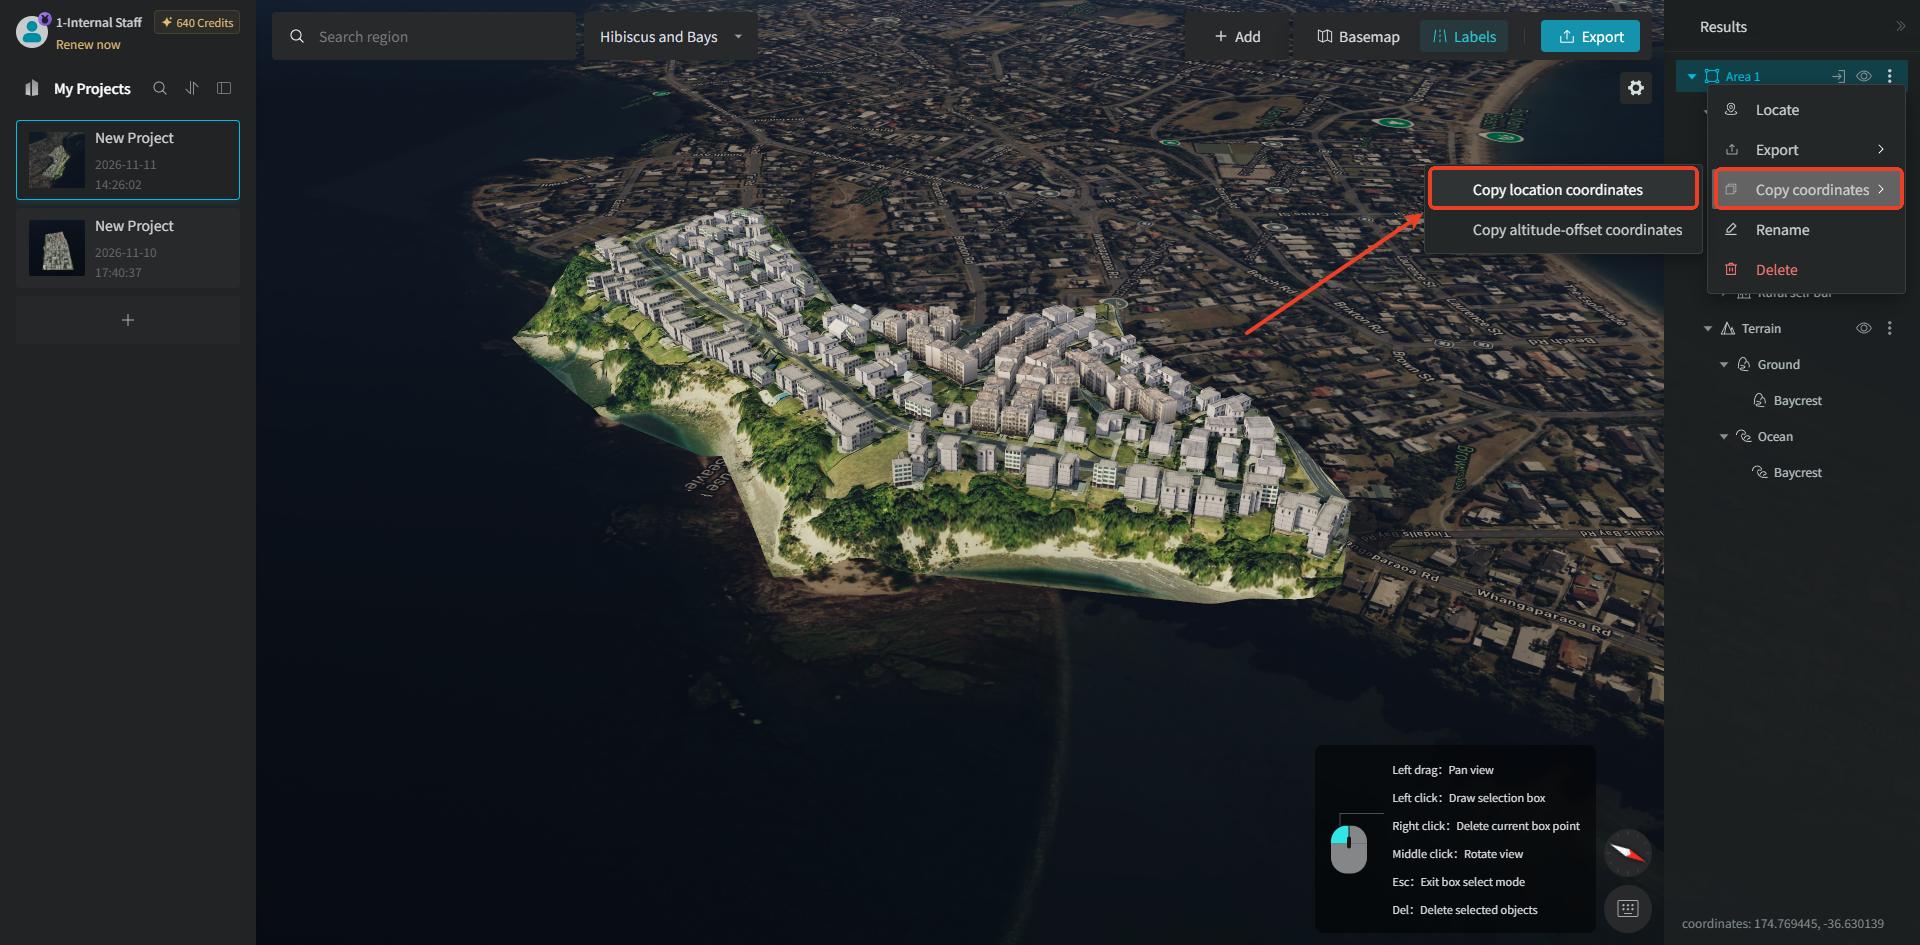
If you need to align the imported model with its actual map position, right-click the model's "Area" layer in the GenAnywhere software and select the "Copy Coordinates" option in the popup. You will see that there are two sub-options. If you only need to place the model at the corresponding map position, click the "Copy Location Coordinates" option, which copies the horizontal coordinate information of the model's location.
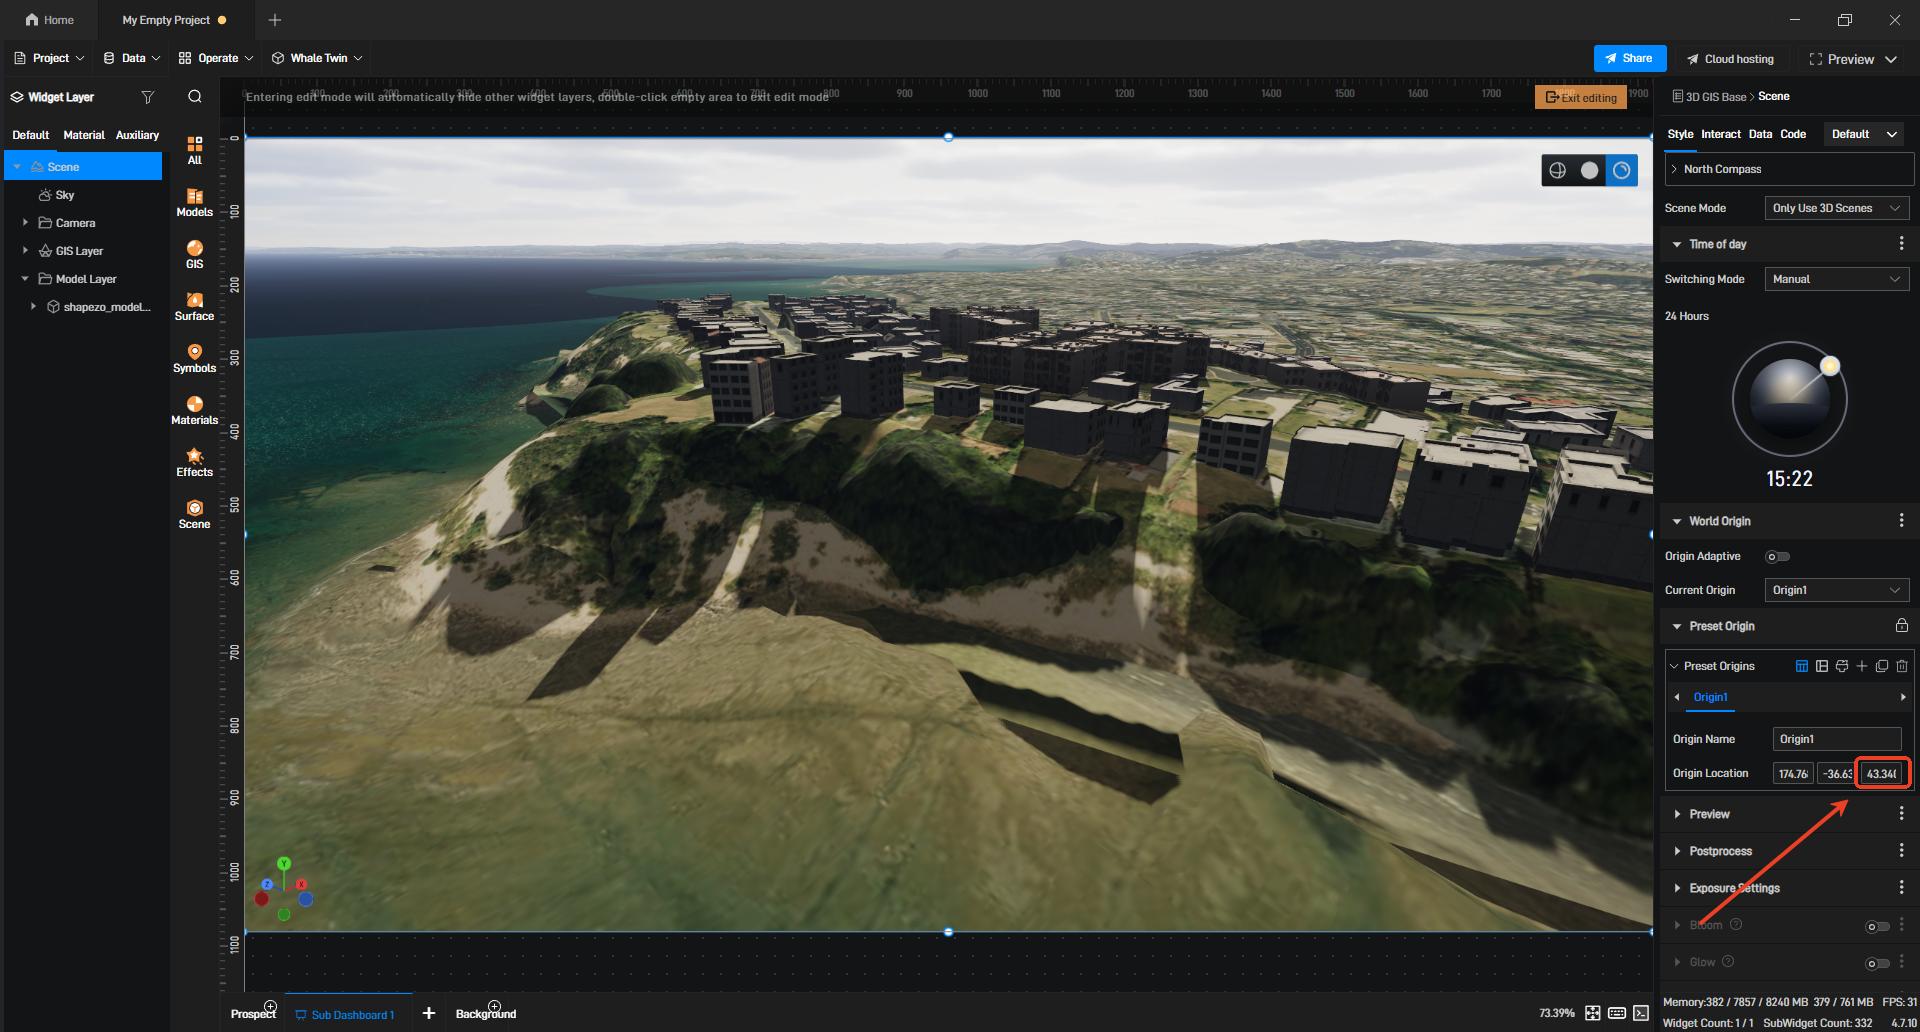
Then return to the Wings Engine software, select the "Scene" layer in the left layer panel on the scene editing screen, find the "Preset Origins" setting in the right-side operation panel corresponding to that layer, and fill in the corresponding longitude and latitude coordinates to complete the position alignment.
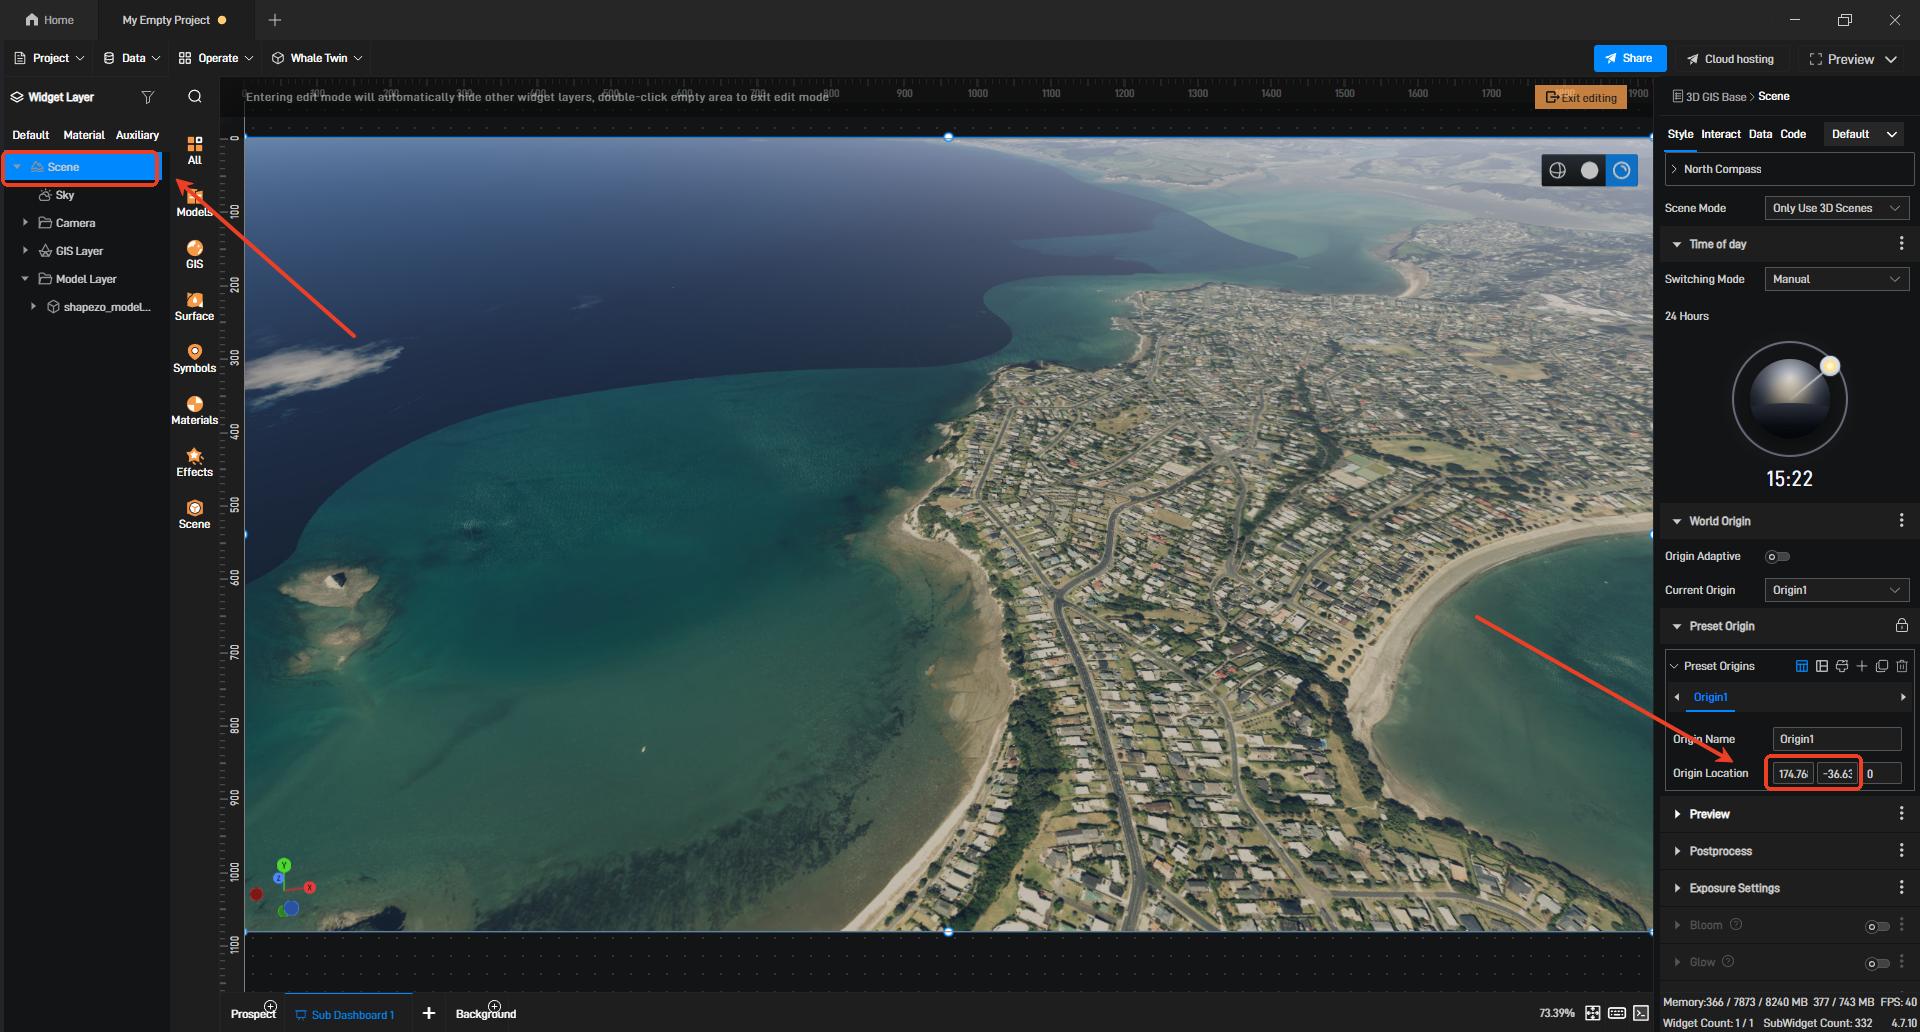
【Note】The longitude and latitude coordinates must correspond correctly. The coordinate order copied by GenAnywhere is ENU: longitude, latitude.
If you need to fully align the model with the actual geographic position and altitude, click the "Copy Altitude-Offset Coordinates" option among the sub-options of "Copy Coordinates" to copy the coordinates and altitude-offset data.
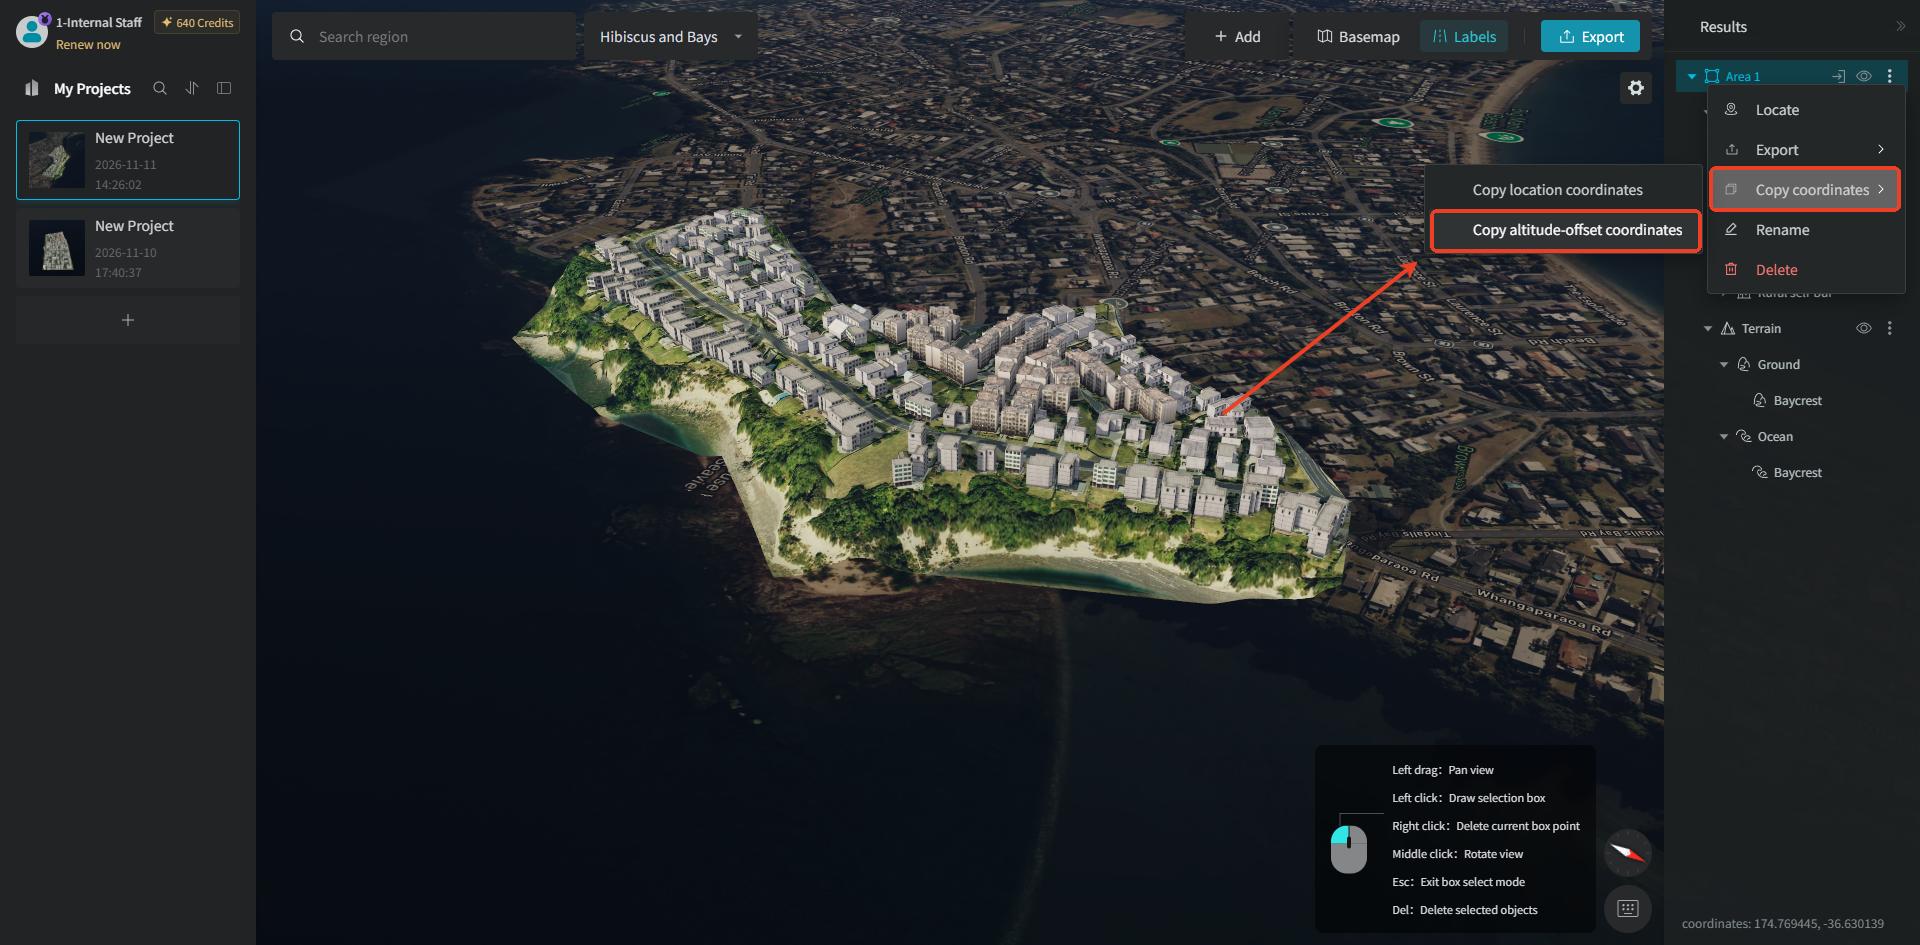
Then return to Wings Engine, and paste the altitude data into the altitude field of the "Preset Origins" setting in the right-side operation panel to complete the alignment.
2. Export as GLB Format
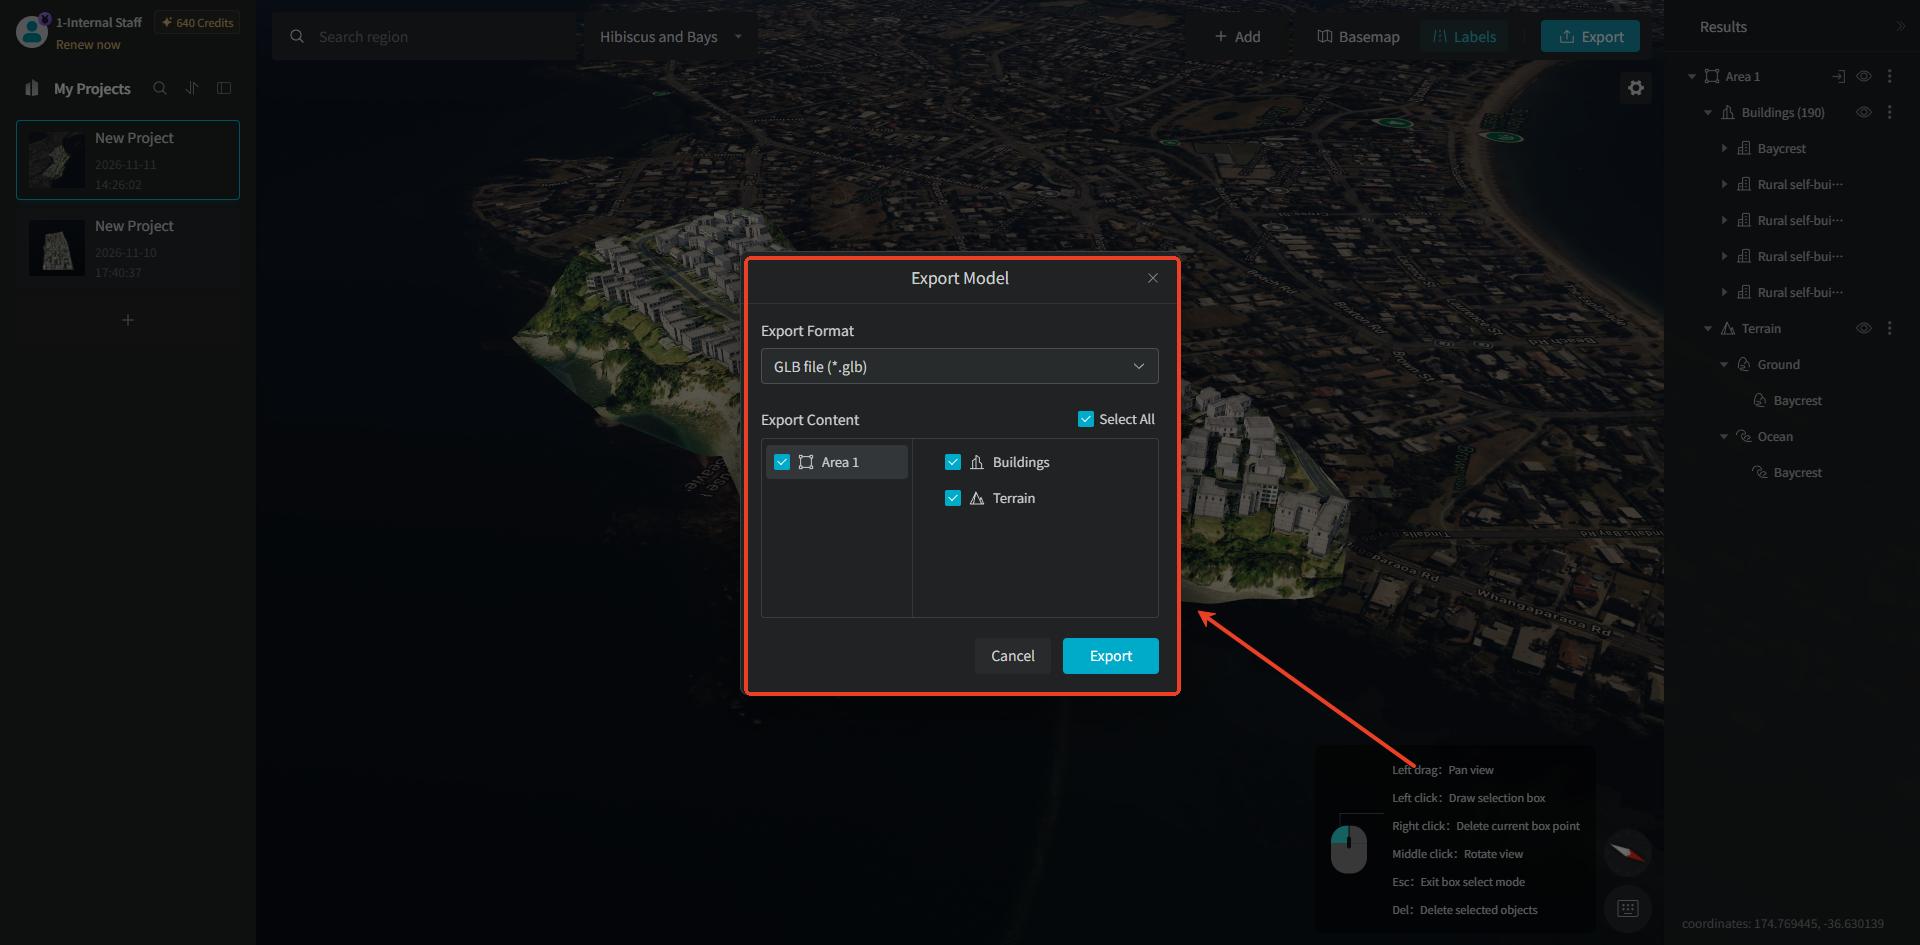
You can click the "Export" button at the top. In the corresponding popup, you can customize the export format and the model content to be exported (it supports both exporting a single-area model individually and merging multiple-area models for export).
Open the Wings Engine visualization software, select the "My Projects" option in the left navigation bar, and on its corresponding screen click the "New" button.
After clicking the "New" button, select "Board" on the left and create a "Empty Project."
After opening the empty project, select "3D GIS Base" in "Whale Twin."
After entering the scene, confirm that the Whale Twin layer exists in the left layer panel, then double-click the preview viewport to enter the editing state.
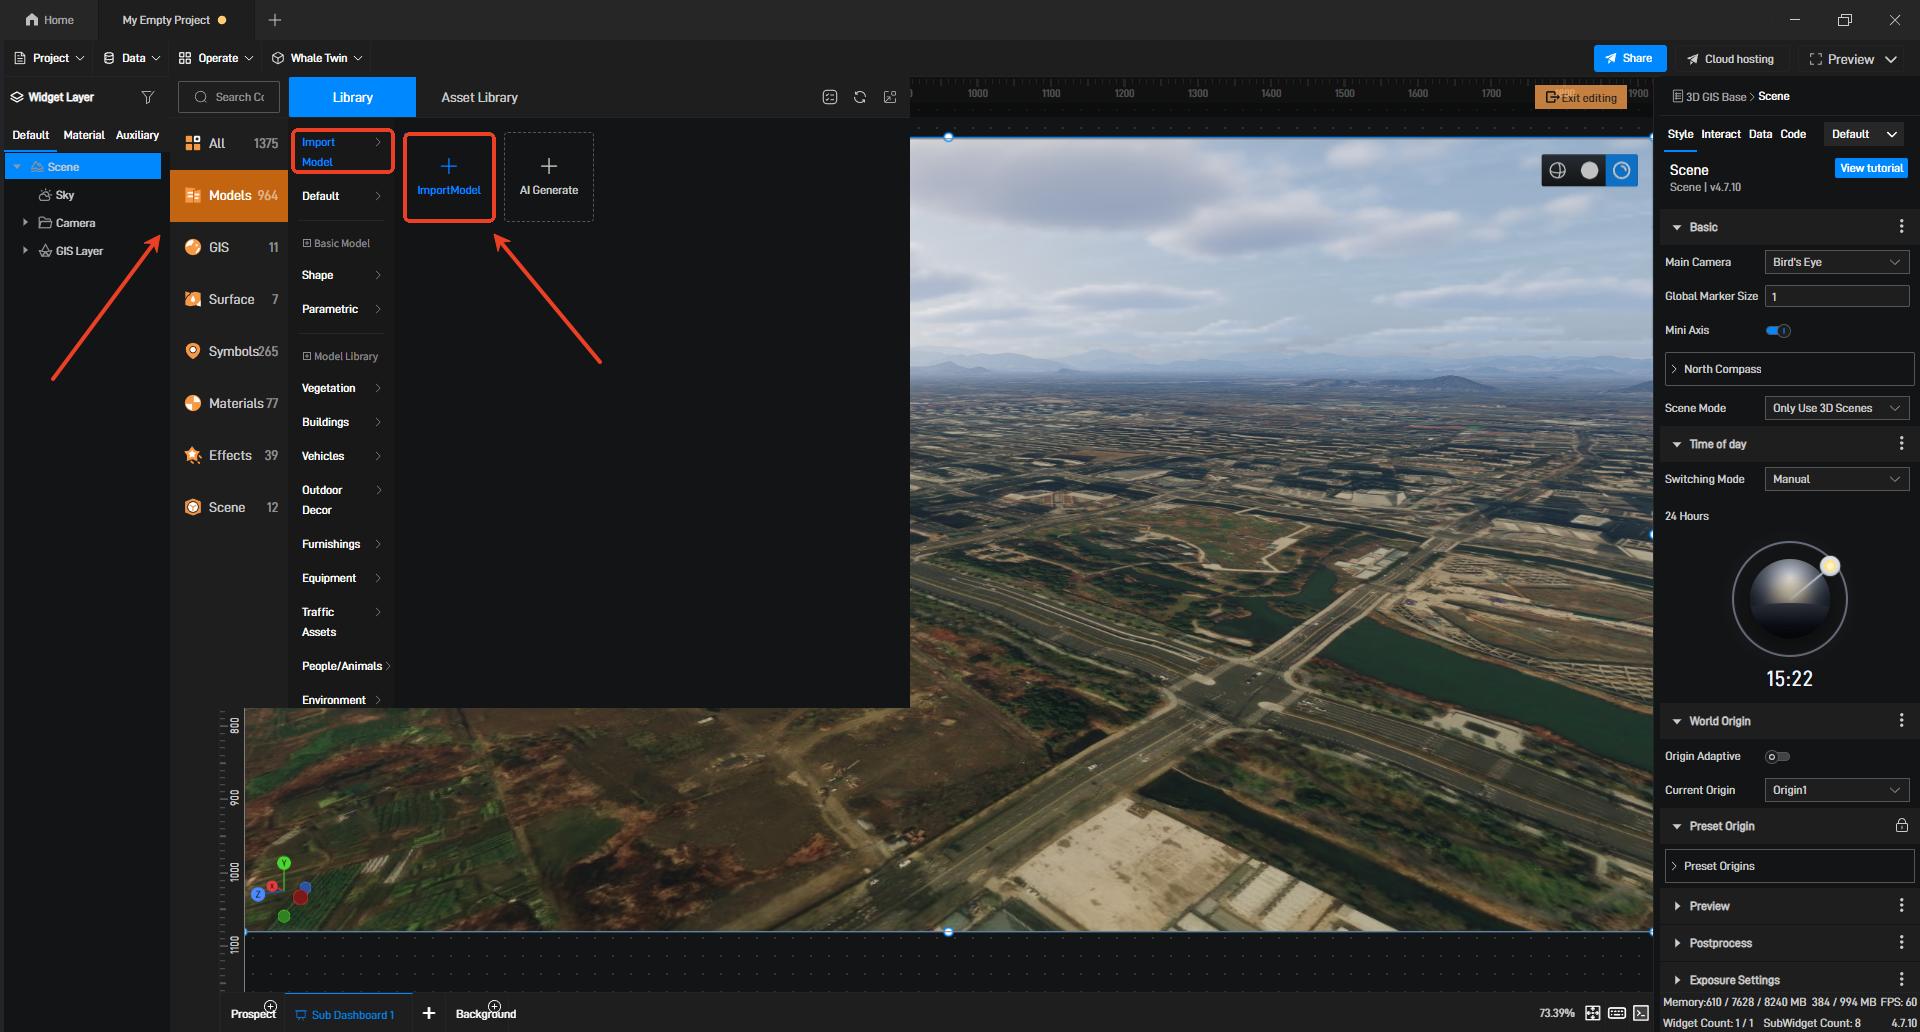
In the editing state, select the "Model" option, click "Import Model," and import the locally stored model into the scene.
After the model is imported successfully, a model category layer will be generated in the left layer panel, and the imported model layer will be selected.
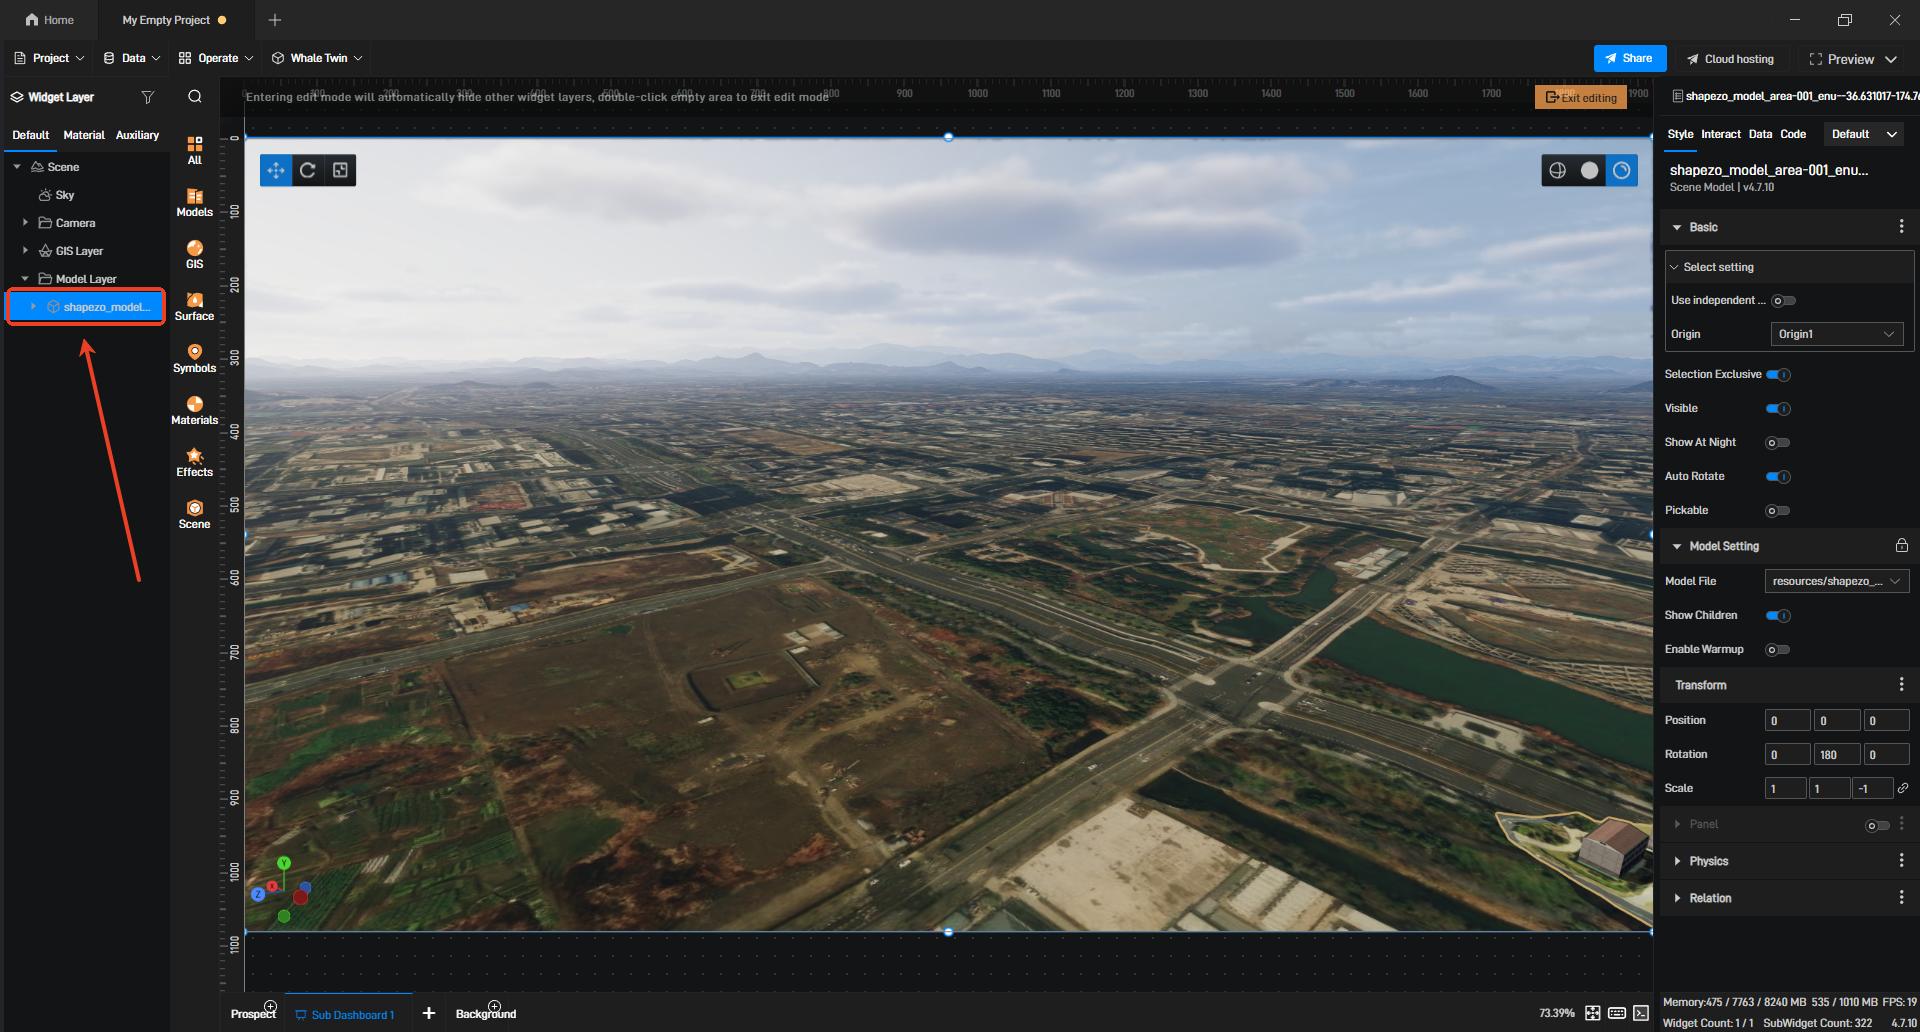
【Note】If the imported model is not visible in the preview viewport, you can double-click the corresponding model layer to locate the model.
If you need to align the imported model with its actual map position, right-click the model's "Area" layer in the GenAnywhere software and select the "Copy Coordinates" option in the popup. You will see that "Copy Coordinates" has two sub-options. If you only need to place the model at the corresponding map position, click the "Copy Location Coordinates" option, which copies the horizontal coordinate information of the model's location.
Then return to the Wings Engine software, select the "Scene" layer in the left layer panel on the scene editing screen, find the "Preset Origins" setting in the right-side operation panel corresponding to that layer, and fill in the corresponding longitude and latitude coordinates to complete the position alignment.
【Note】The longitude and latitude coordinates must correspond correctly. The coordinate order copied by GenAnywhere is ENU: longitude, latitude.
If you need to fully align the model with the actual geographic position and altitude, click the "Copy Altitude-Offset Coordinates" option among the sub-options of "Copy Coordinates" to copy the coordinates and altitude-offset data.
Then return to Wings Engine, and paste the altitude data into the altitude field of the "Preset Origins" setting in the right-side operation panel to complete the alignment.