Explanation of Selected Area Layer Settings
After selecting an area, the "Recognition Results" panel will appear on the right side of the GenAnywhere interface. Below it, you will see the layers of the selected area, including buildings, terrain, water surfaces, roads, trees, and more.
In this tutorial, we'll walk you through the settings available for selected area layers and show you how to preview or delete each layer individually.
1. Select an Area and Generate a Model
In the workspace, select the area on the map where you want to generate buildings.
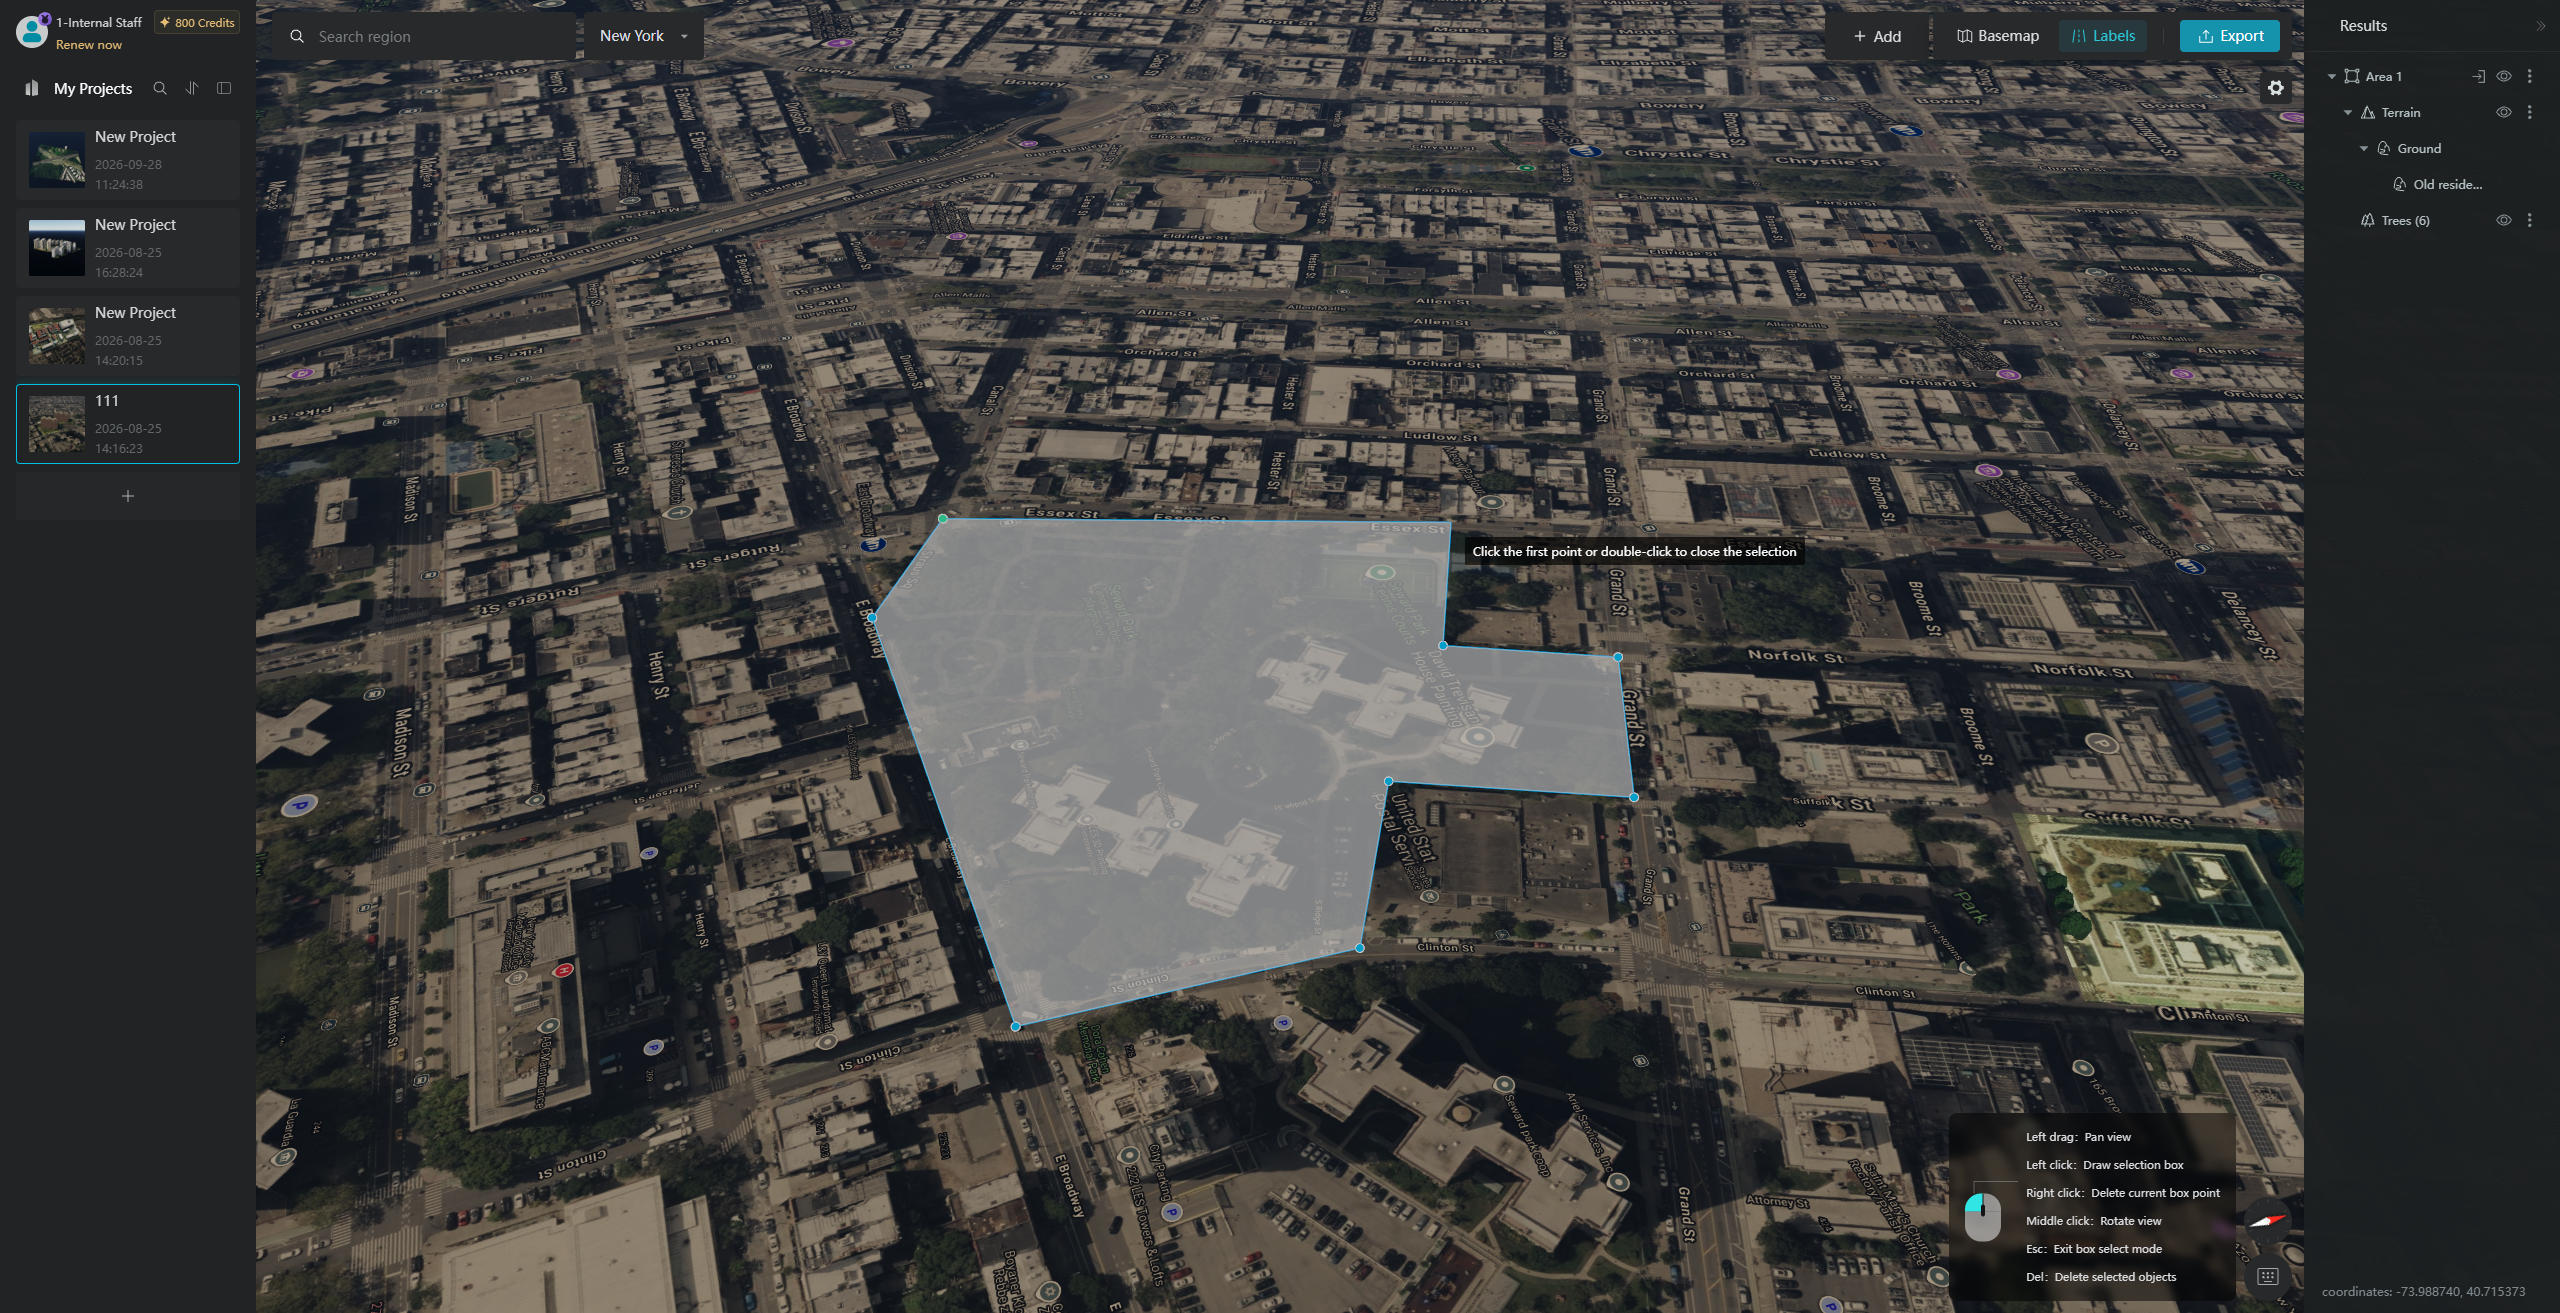
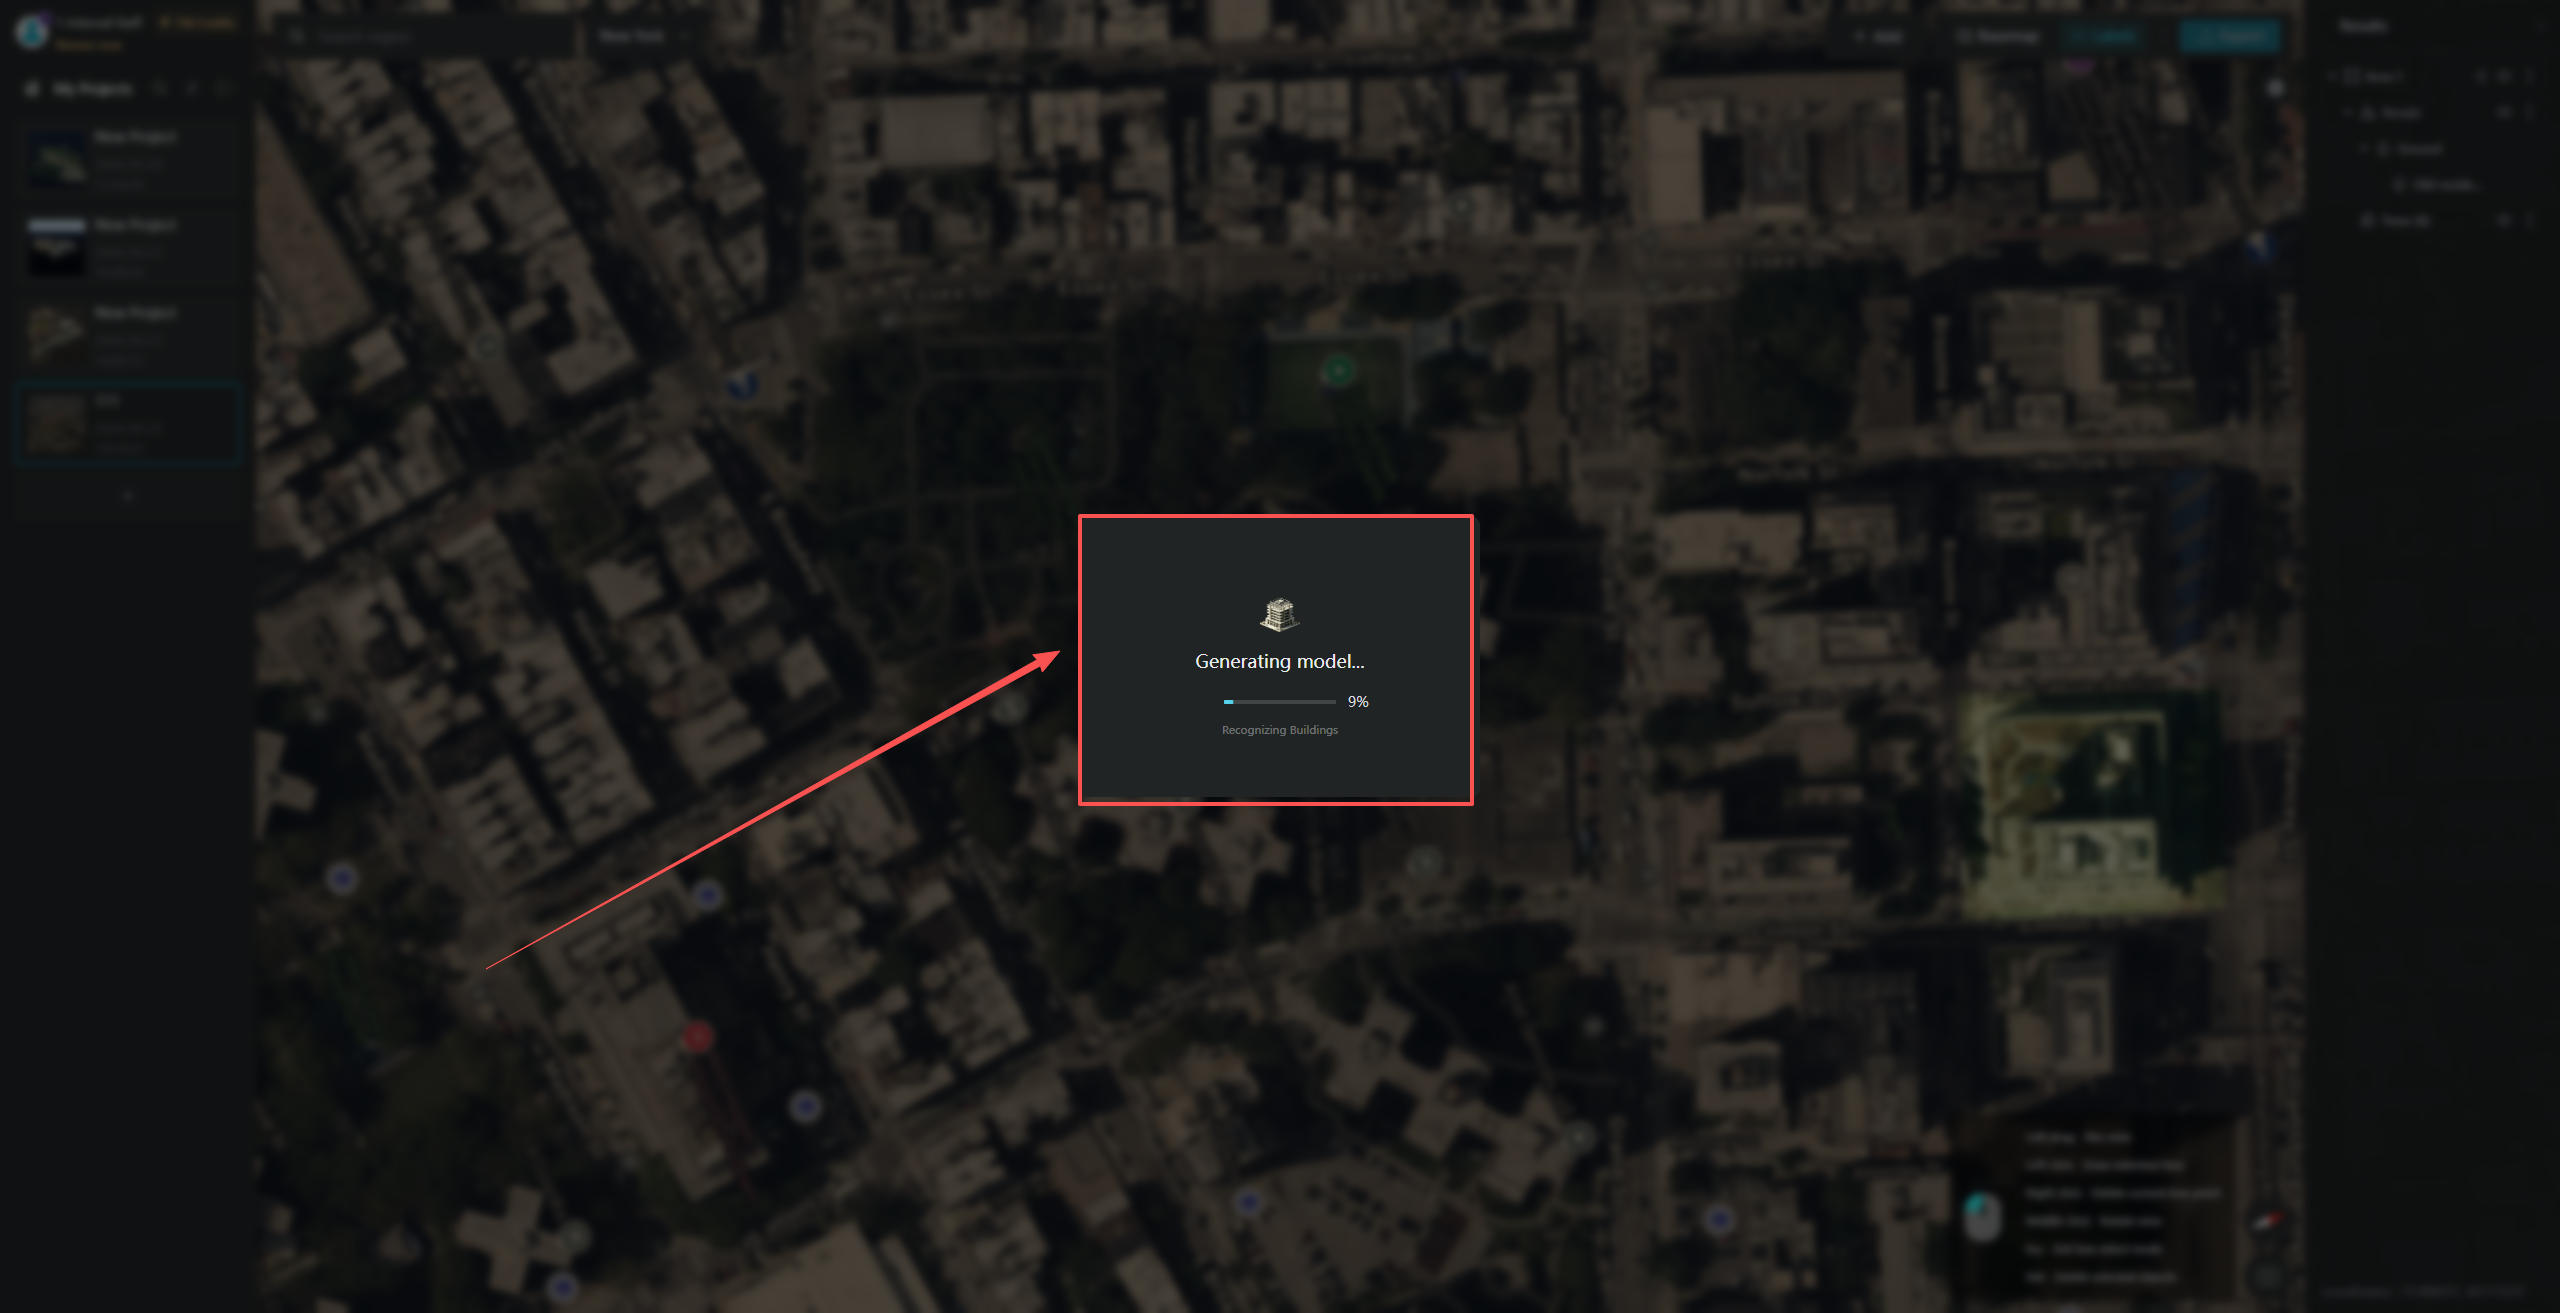
After selecting the area, click "Generate Model" in the "Generate Buildings" pop-up window. Please wait patiently while the model is being generated.
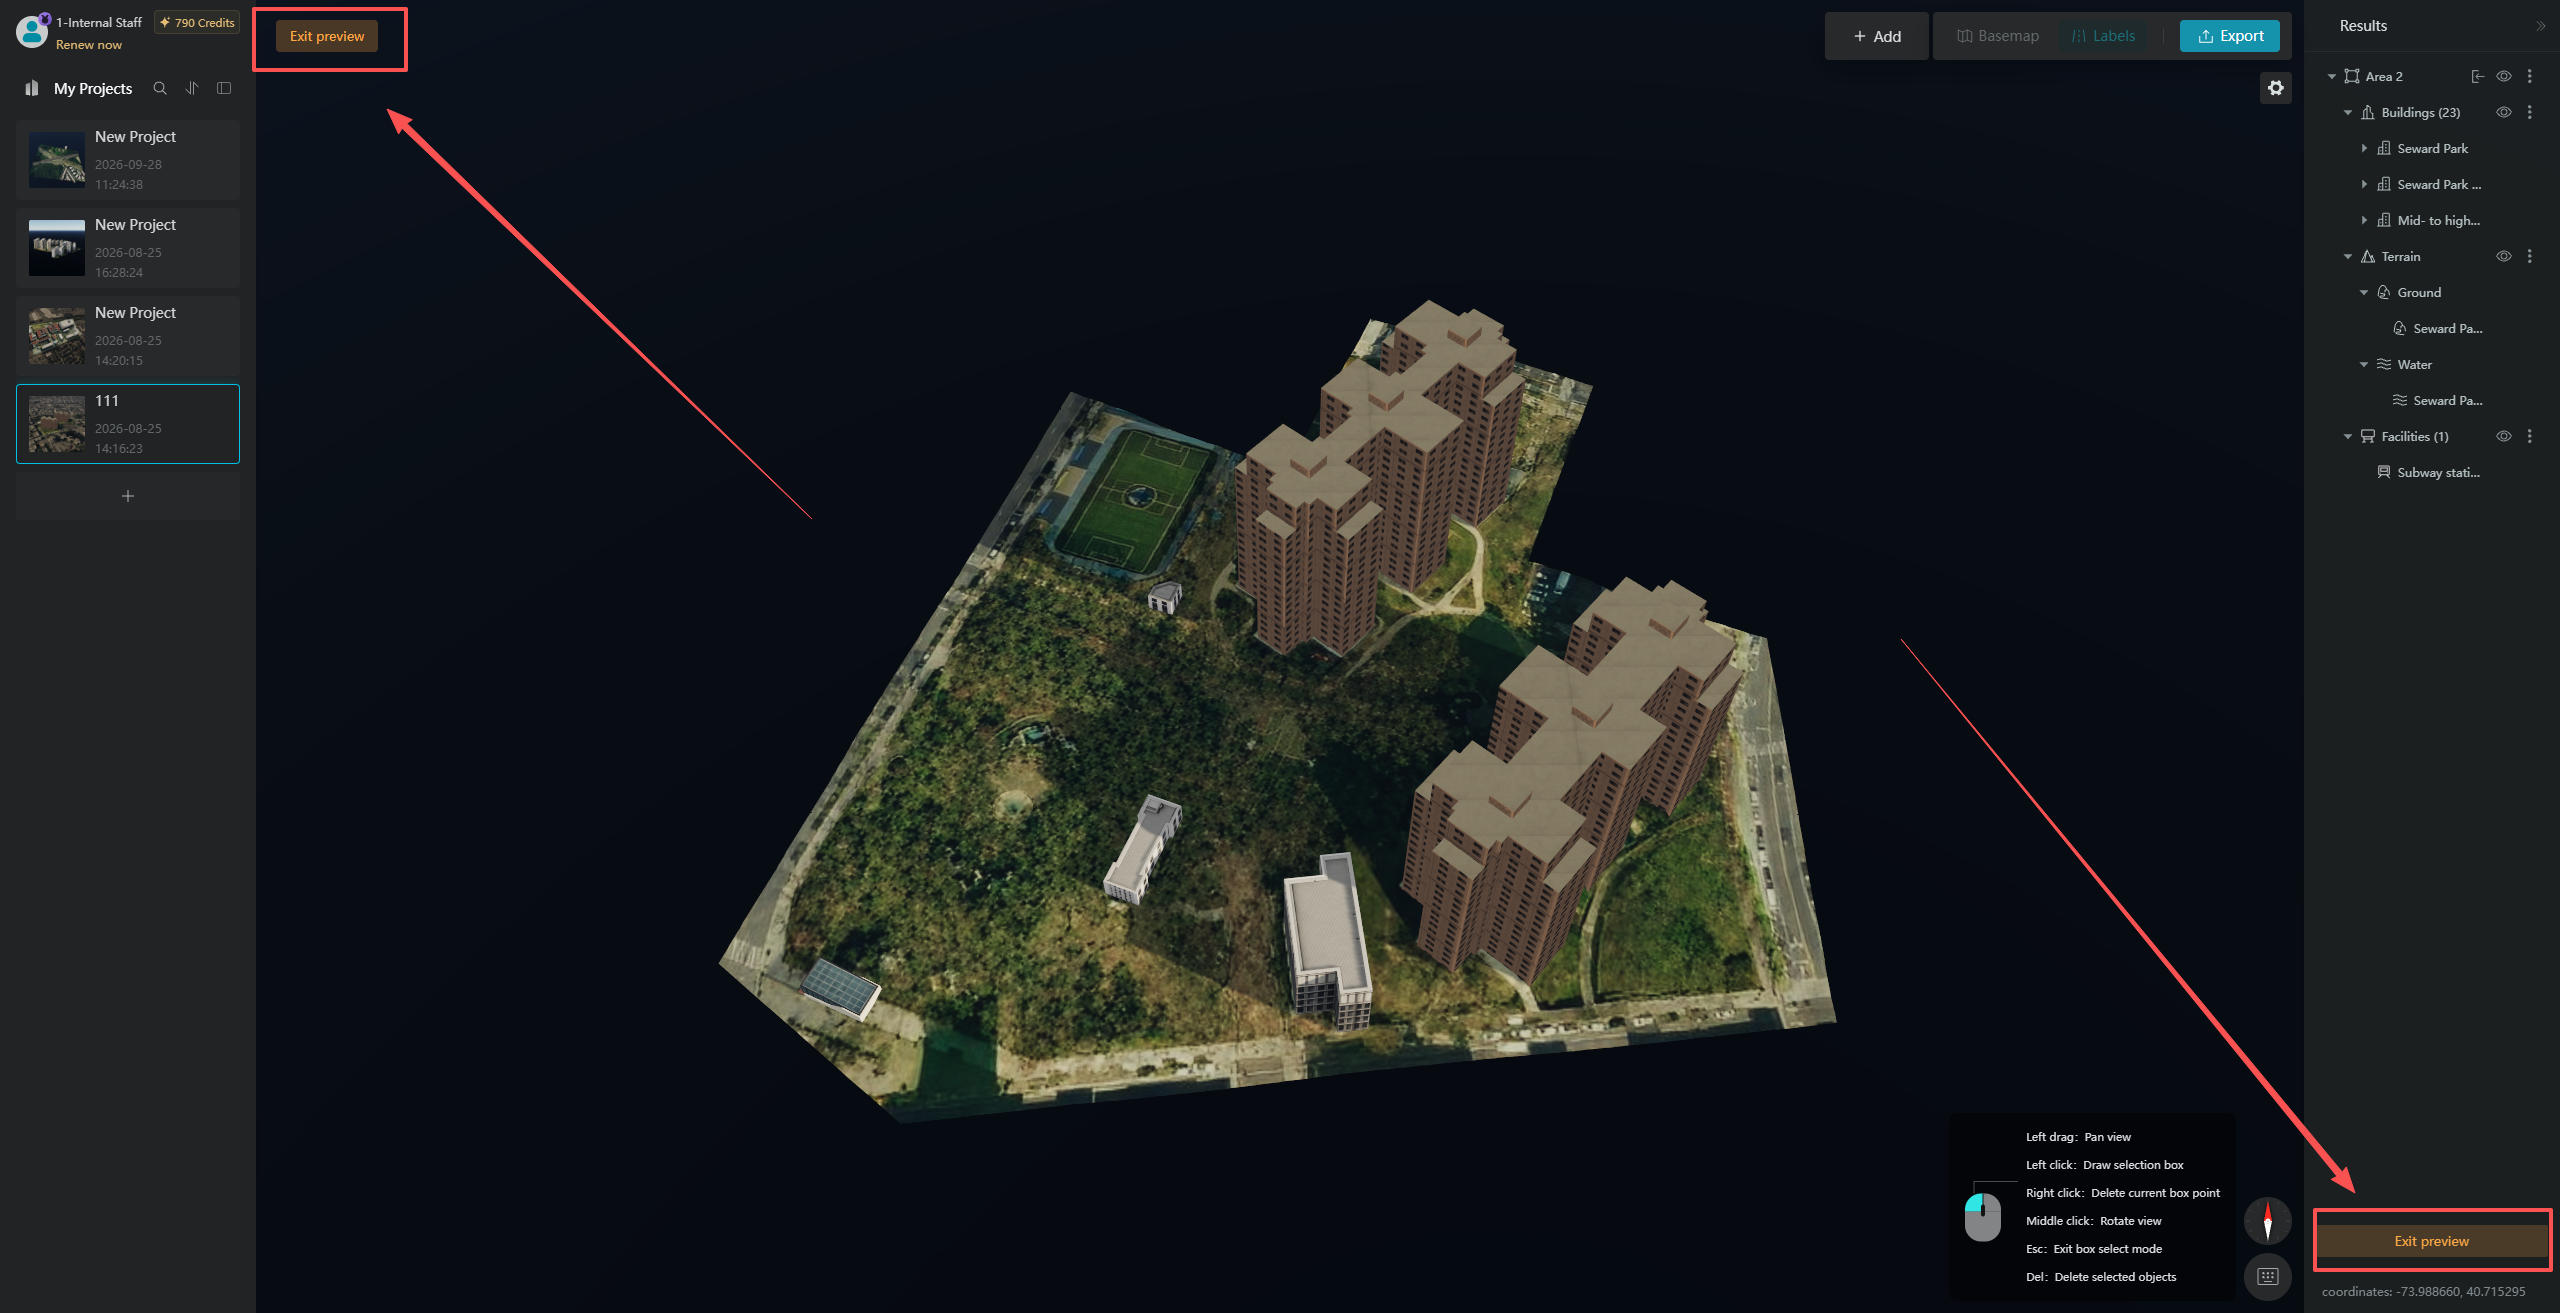
Once the model has been generated, the system will automatically enter "Individual Model Preview" mode. Click the "Exit Individual Model Preview" button in the upper-left or lower-right corner to return to Earth Preview mode, where you can view how the generated model integrates with the surrounding environment on the map.
2. Selected Area Layer Settings
After the model is successfully generated, the "Recognition Results" panel will appear on the right side, displaying the generated building, terrain, water surface, road surface, and tree layers. You can also click the "Collapse Generated Area" button in the upper-right corner to collapse the panel.
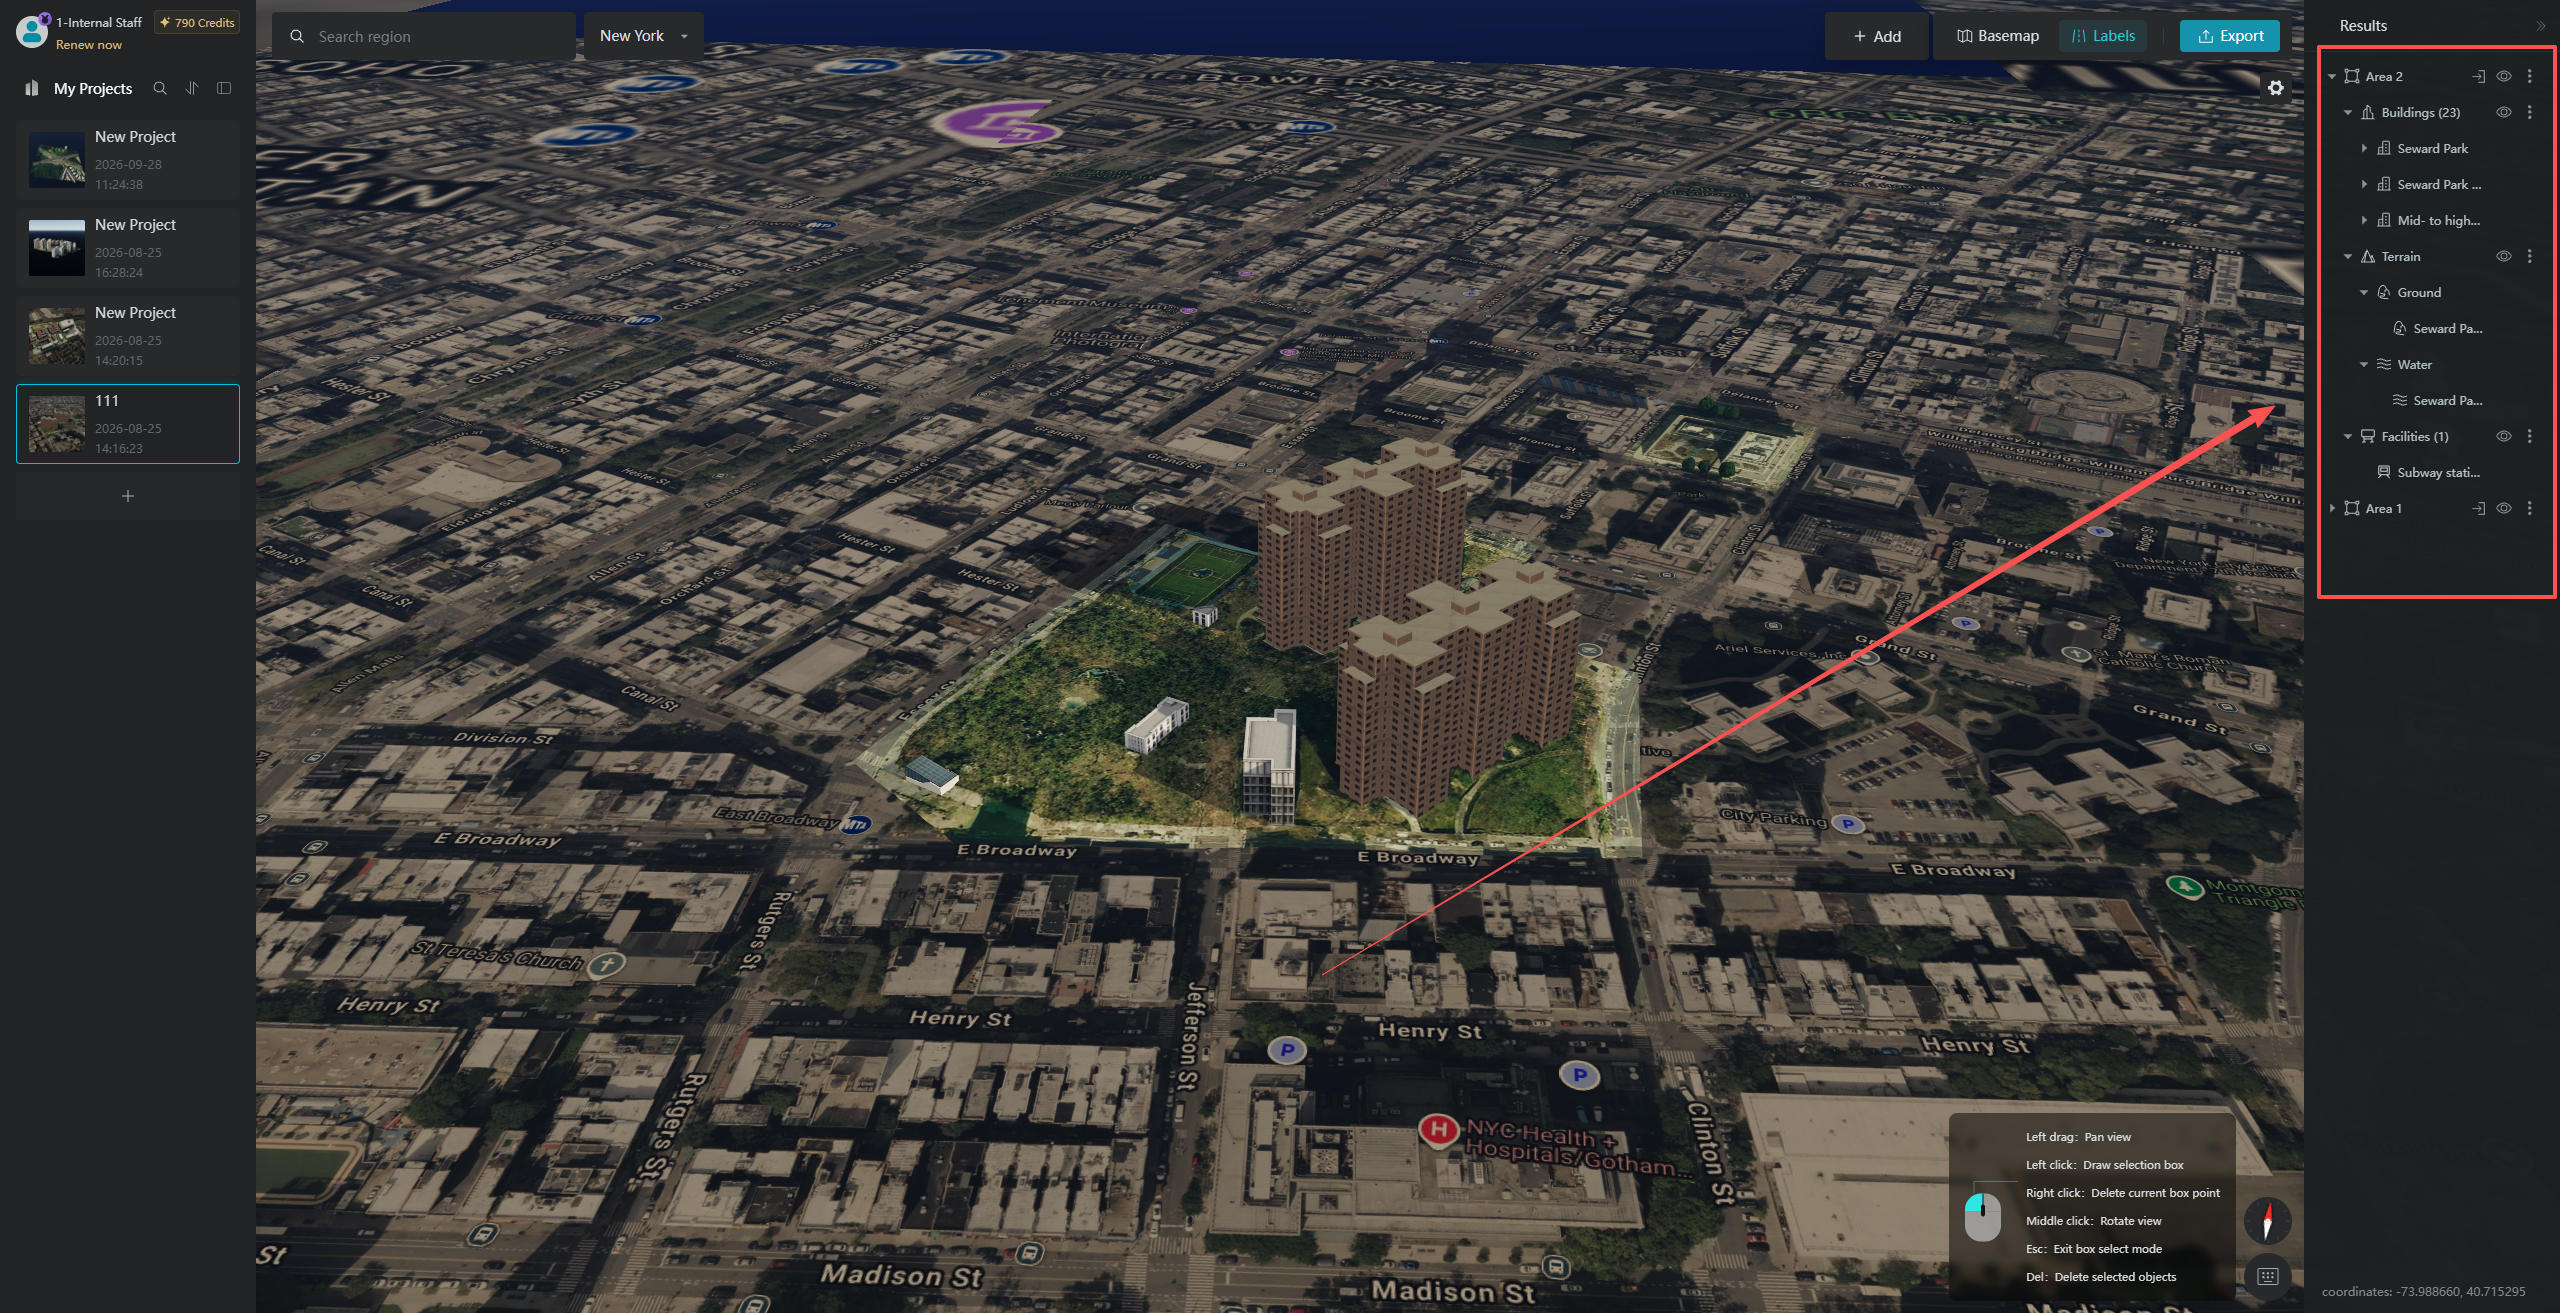
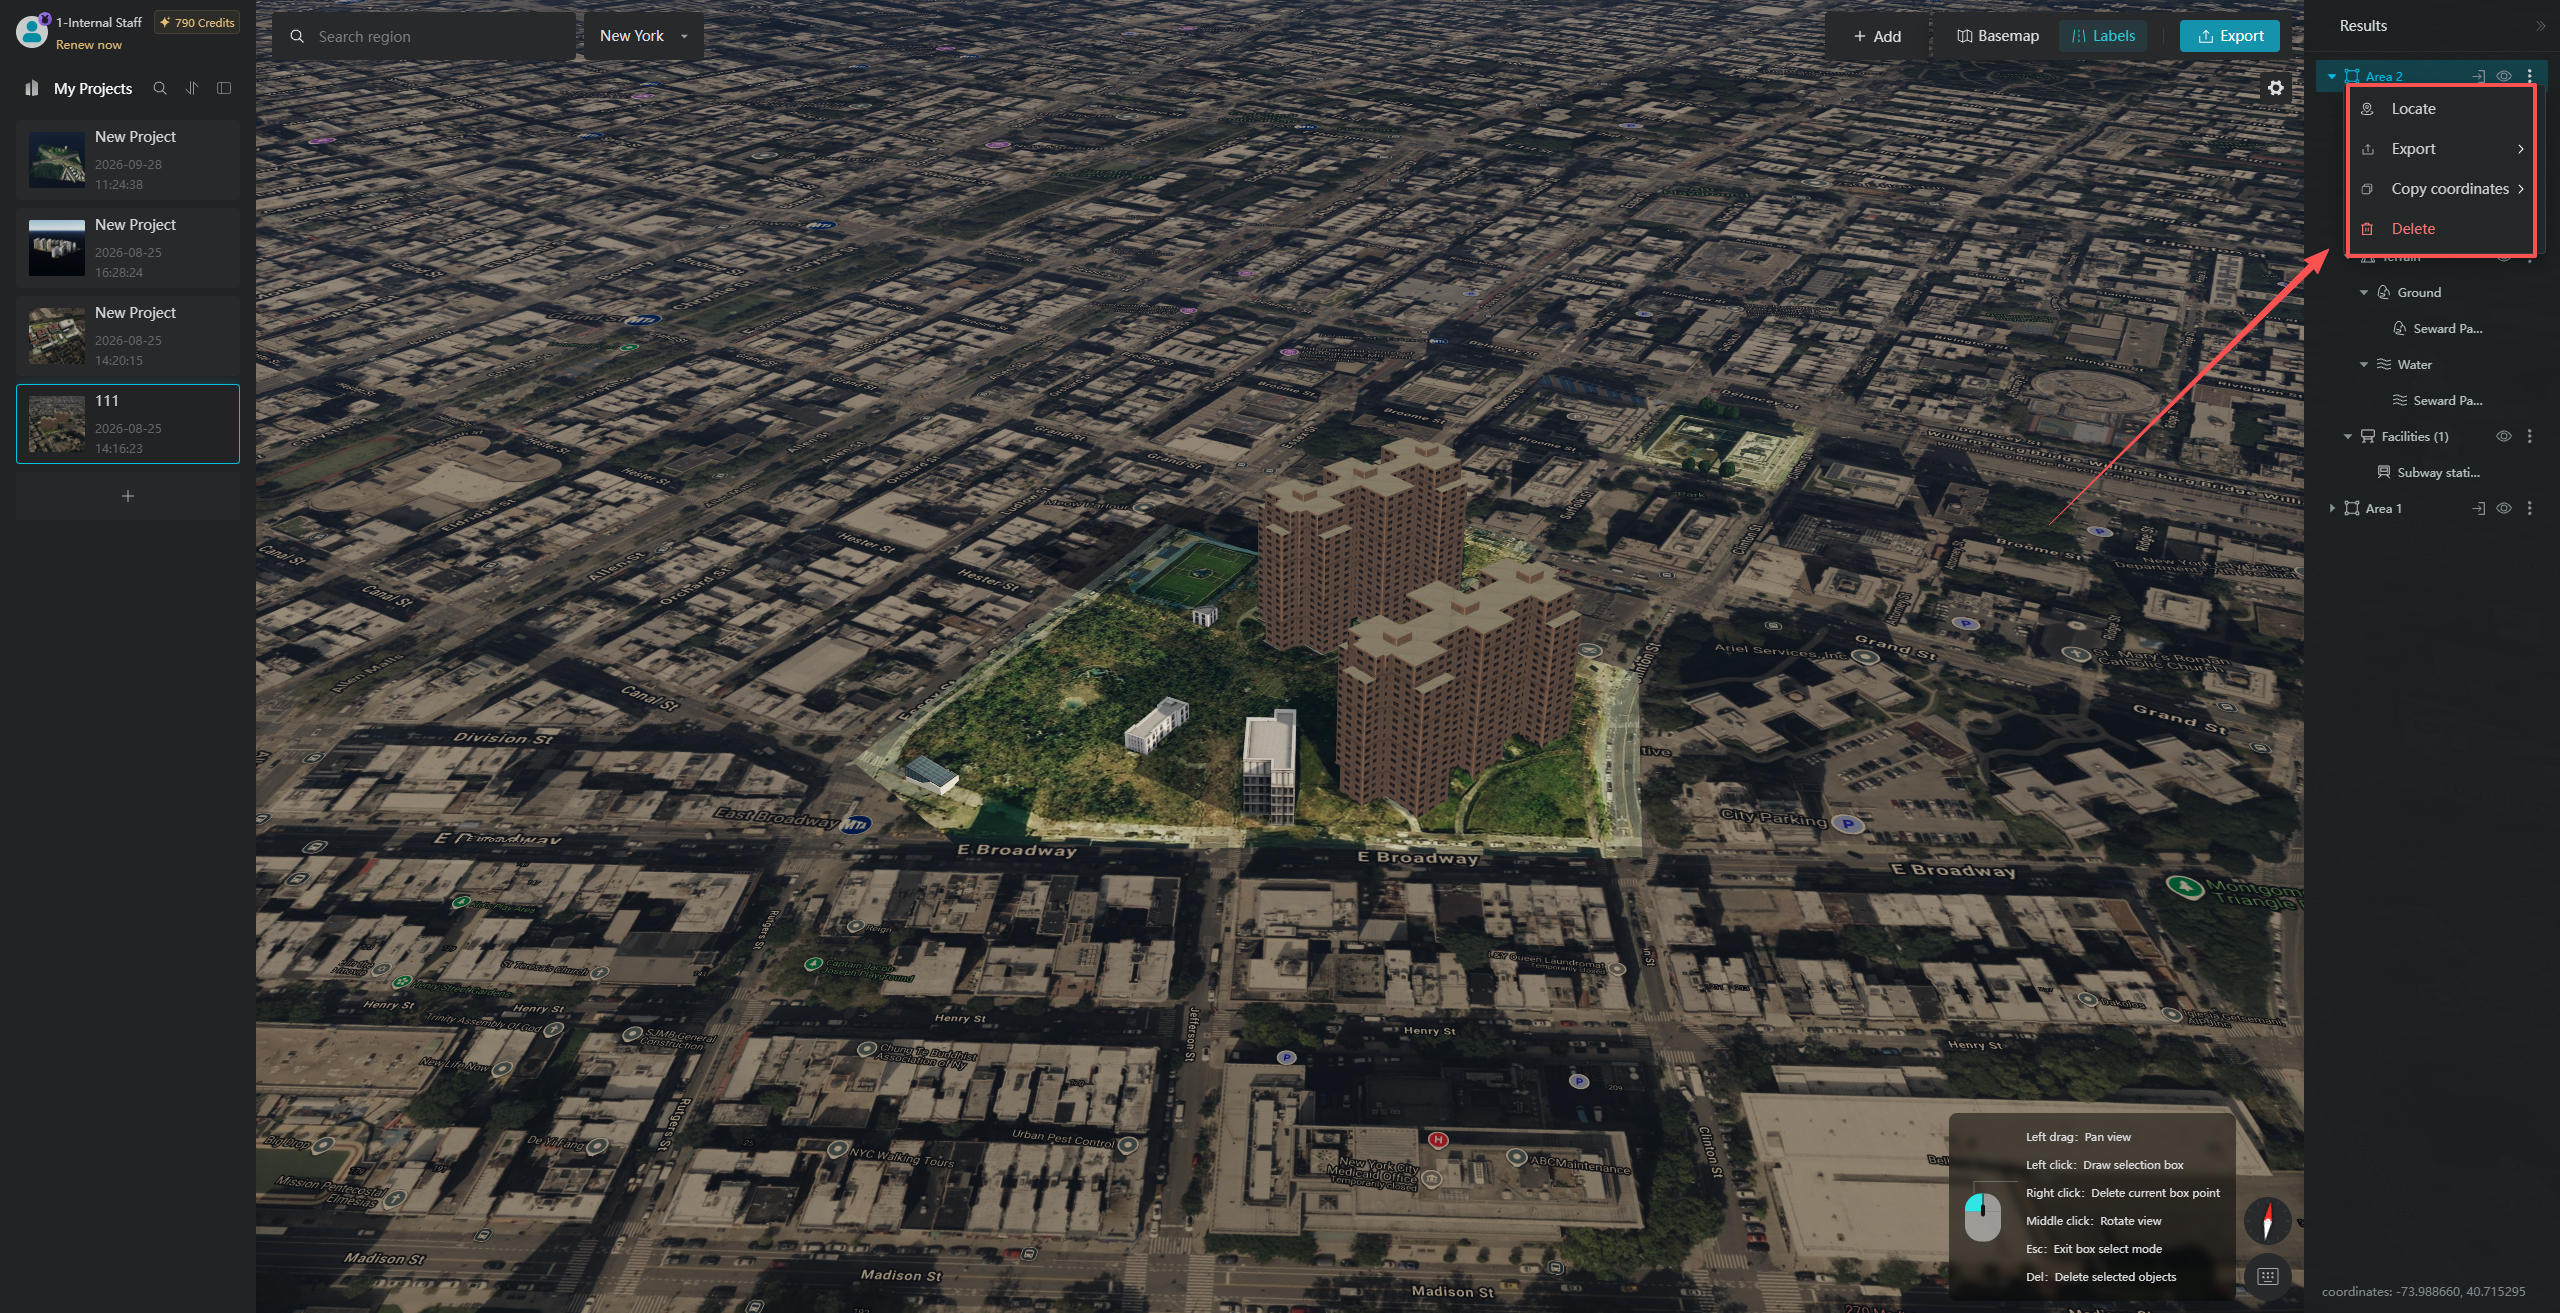
The "Selected Area" layer in the "Recognition Results" panel provides several operation buttons, including "Enter Individual Model Preview" and "Visibility". Click the "More Actions" button to access additional options in the pop-up menu, including "Export Model", "Locate Model", "Copy Coordinates", and "Delete".
2.1 Individual Model Preview
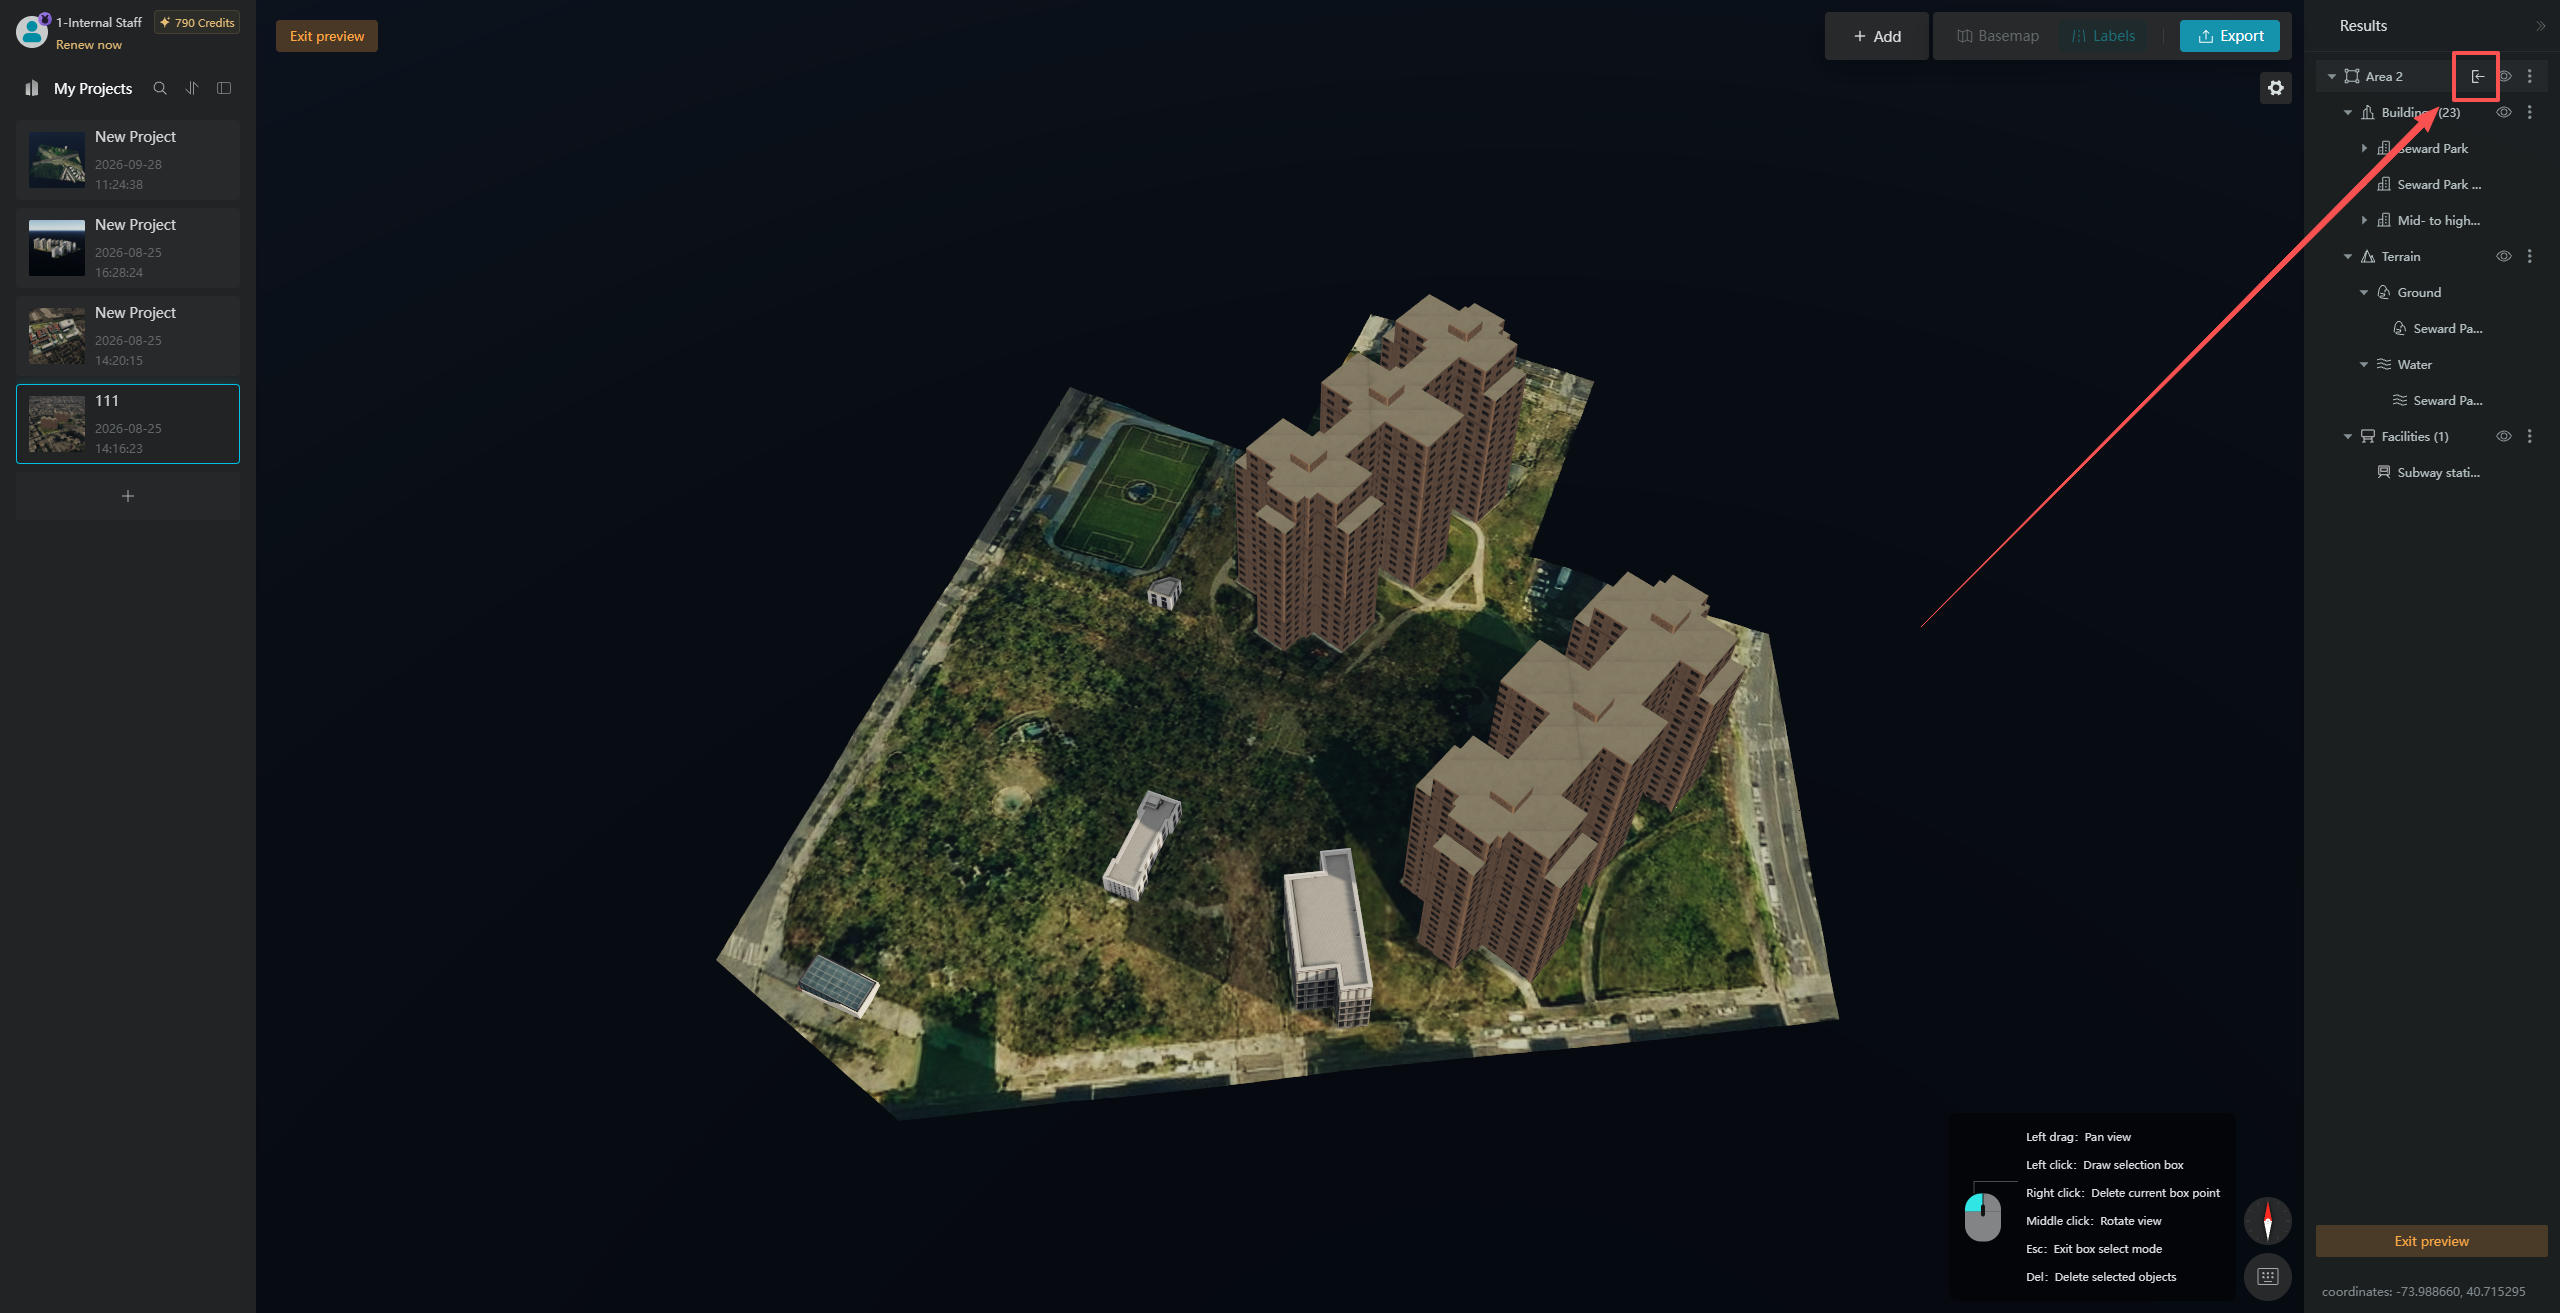
Click the "Individual Model Preview" button to switch to Individual Model Preview mode. You can also right-click the "Selected Area" layer and click "Exit Individual Model Preview" to leave this mode.
2.2 Visibility Settings
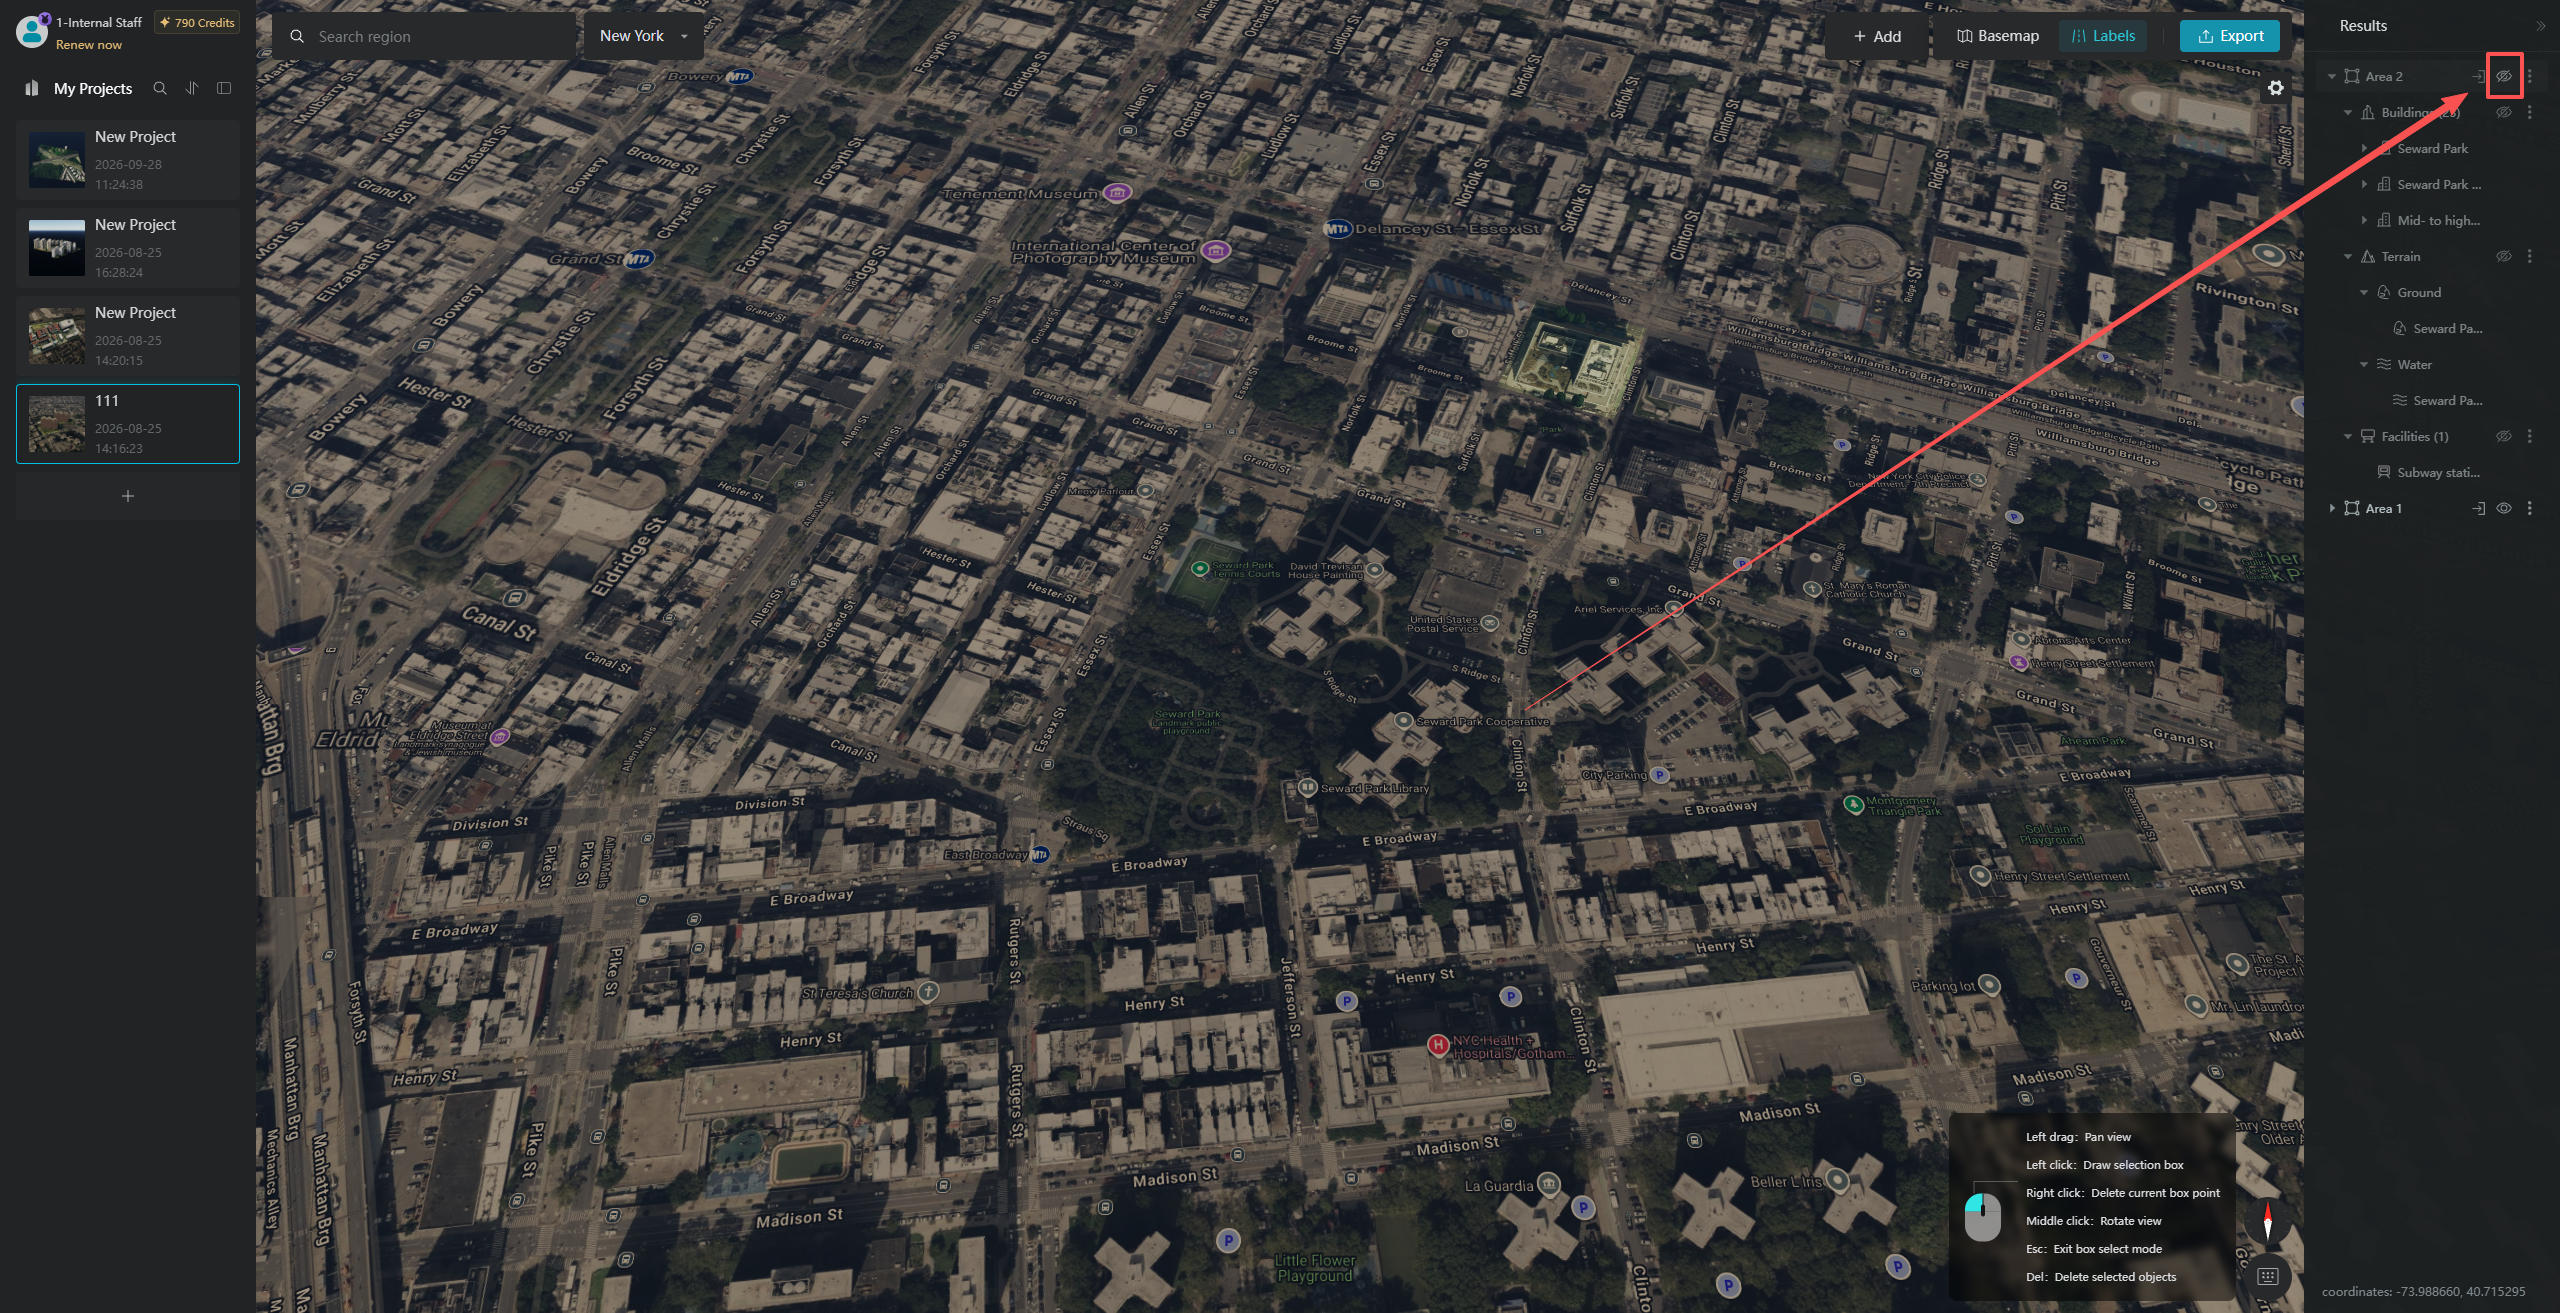
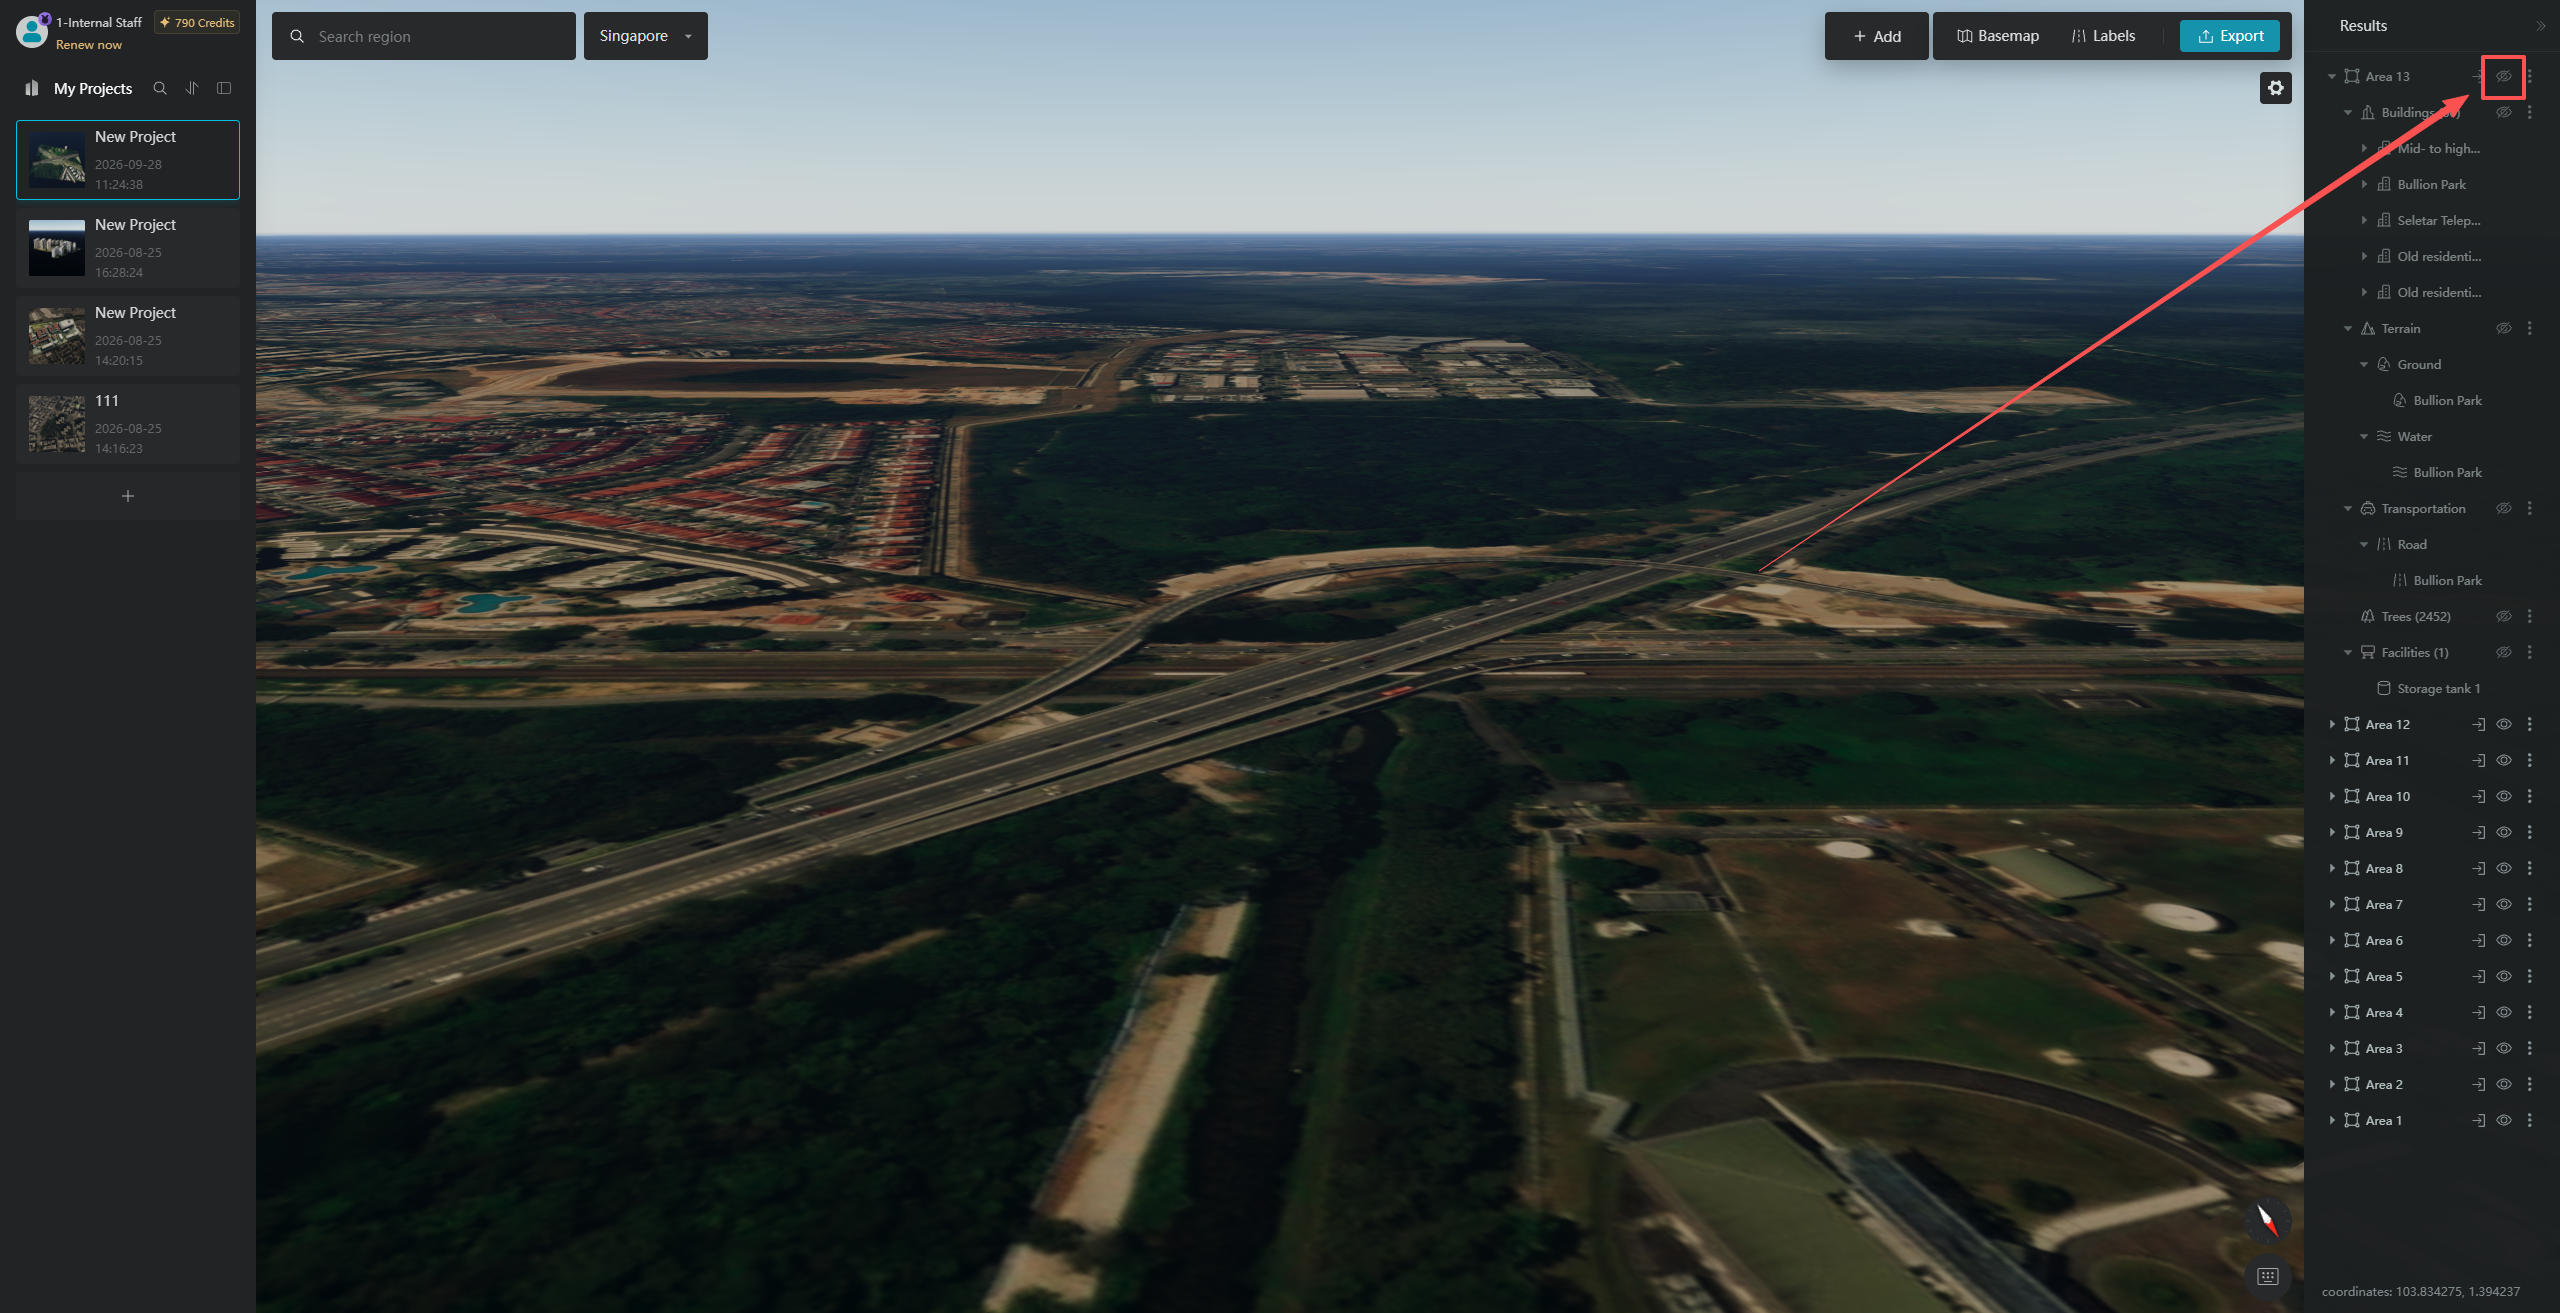
Click the "Visibility" icon to hide the entire area generated from your selection.
2.3 Export Model
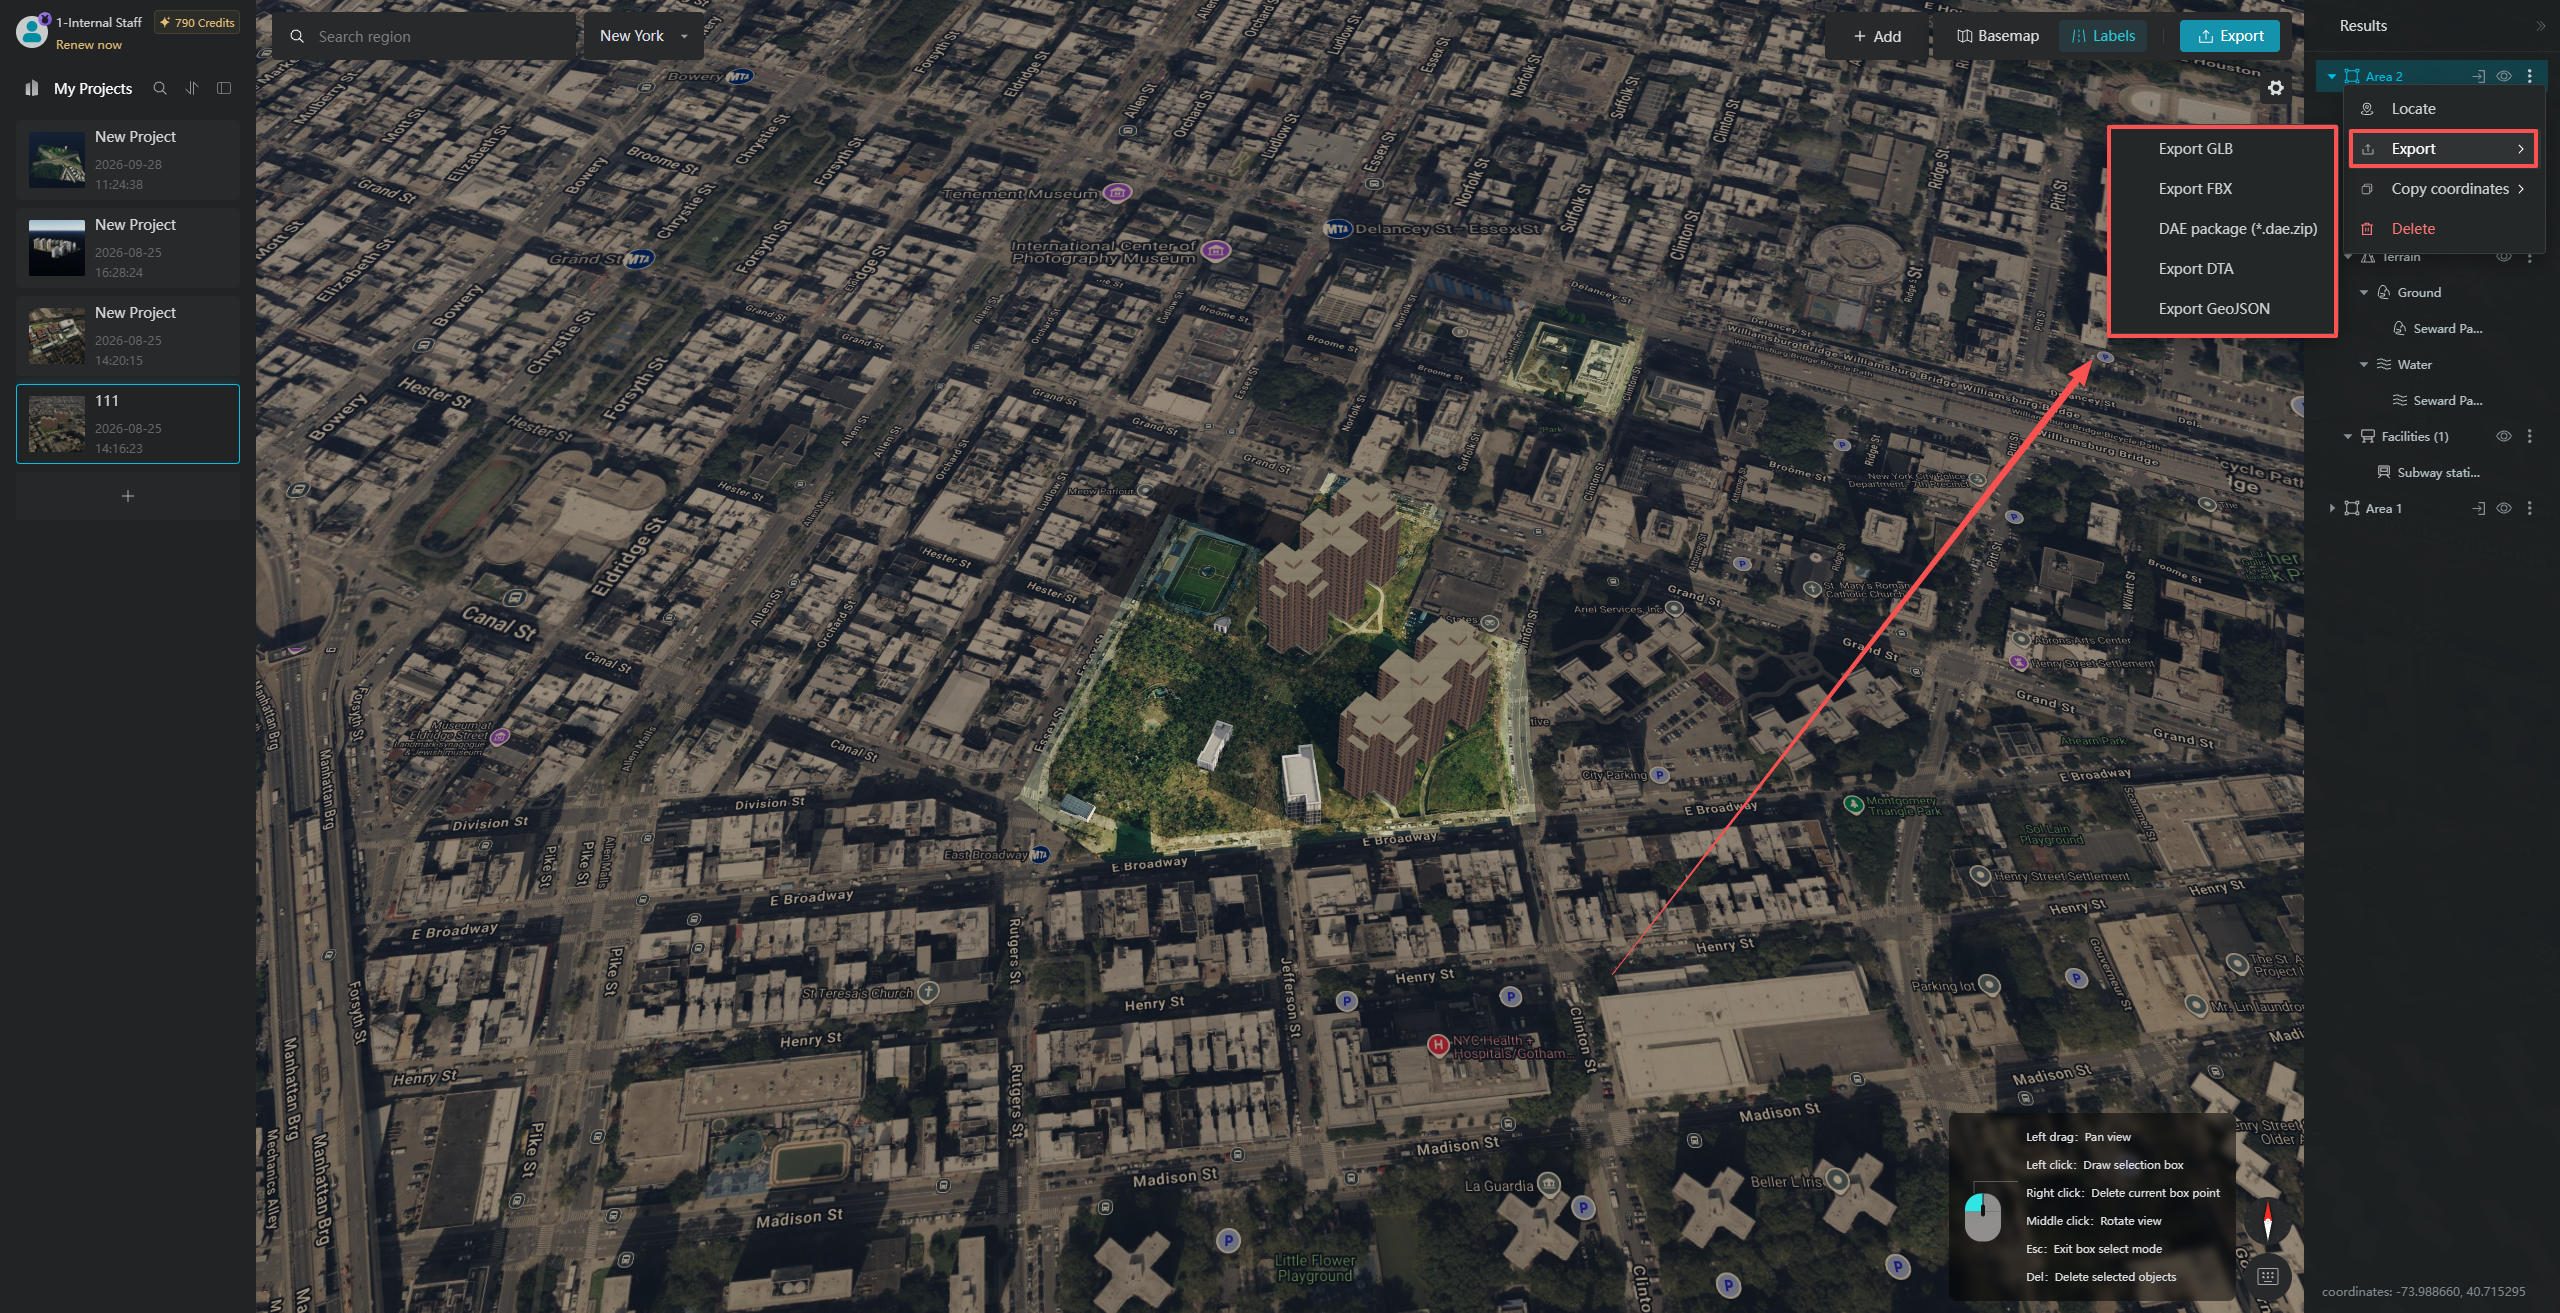
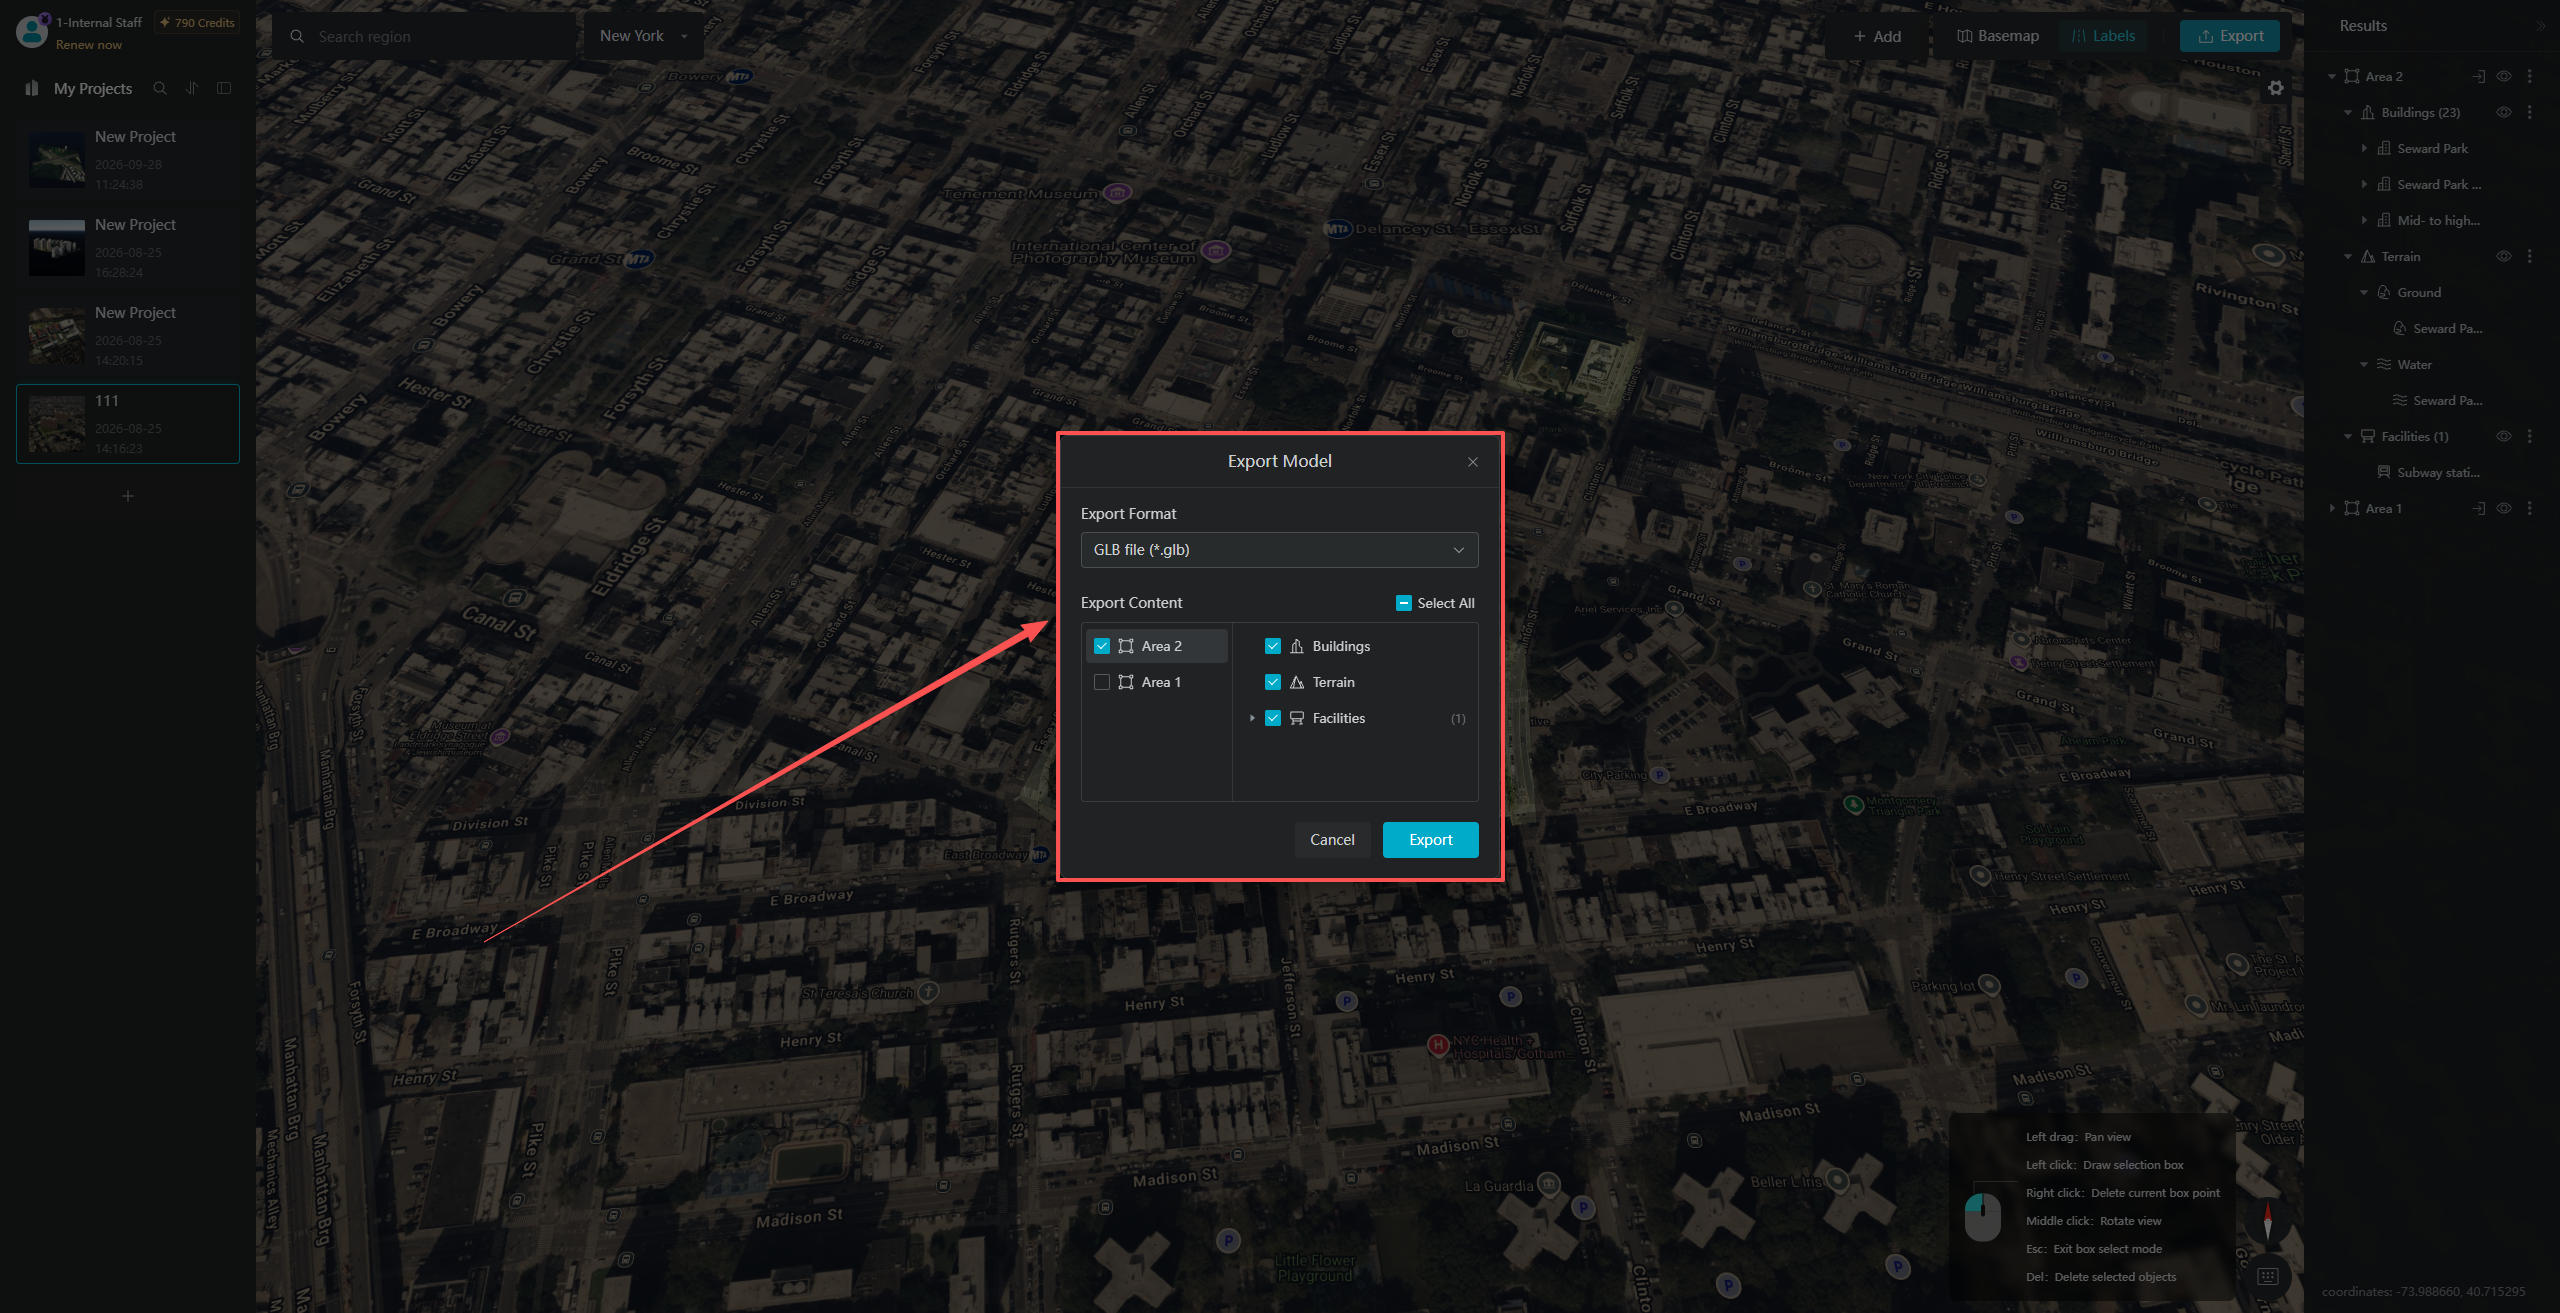
After clicking the "More Actions" button, select "Export Model" from the corresponding pop-up menu. In the next dialog box, select the desired format. You can then switch between export formats and select the model components you want to include in the export window.
2.4 Locate Model
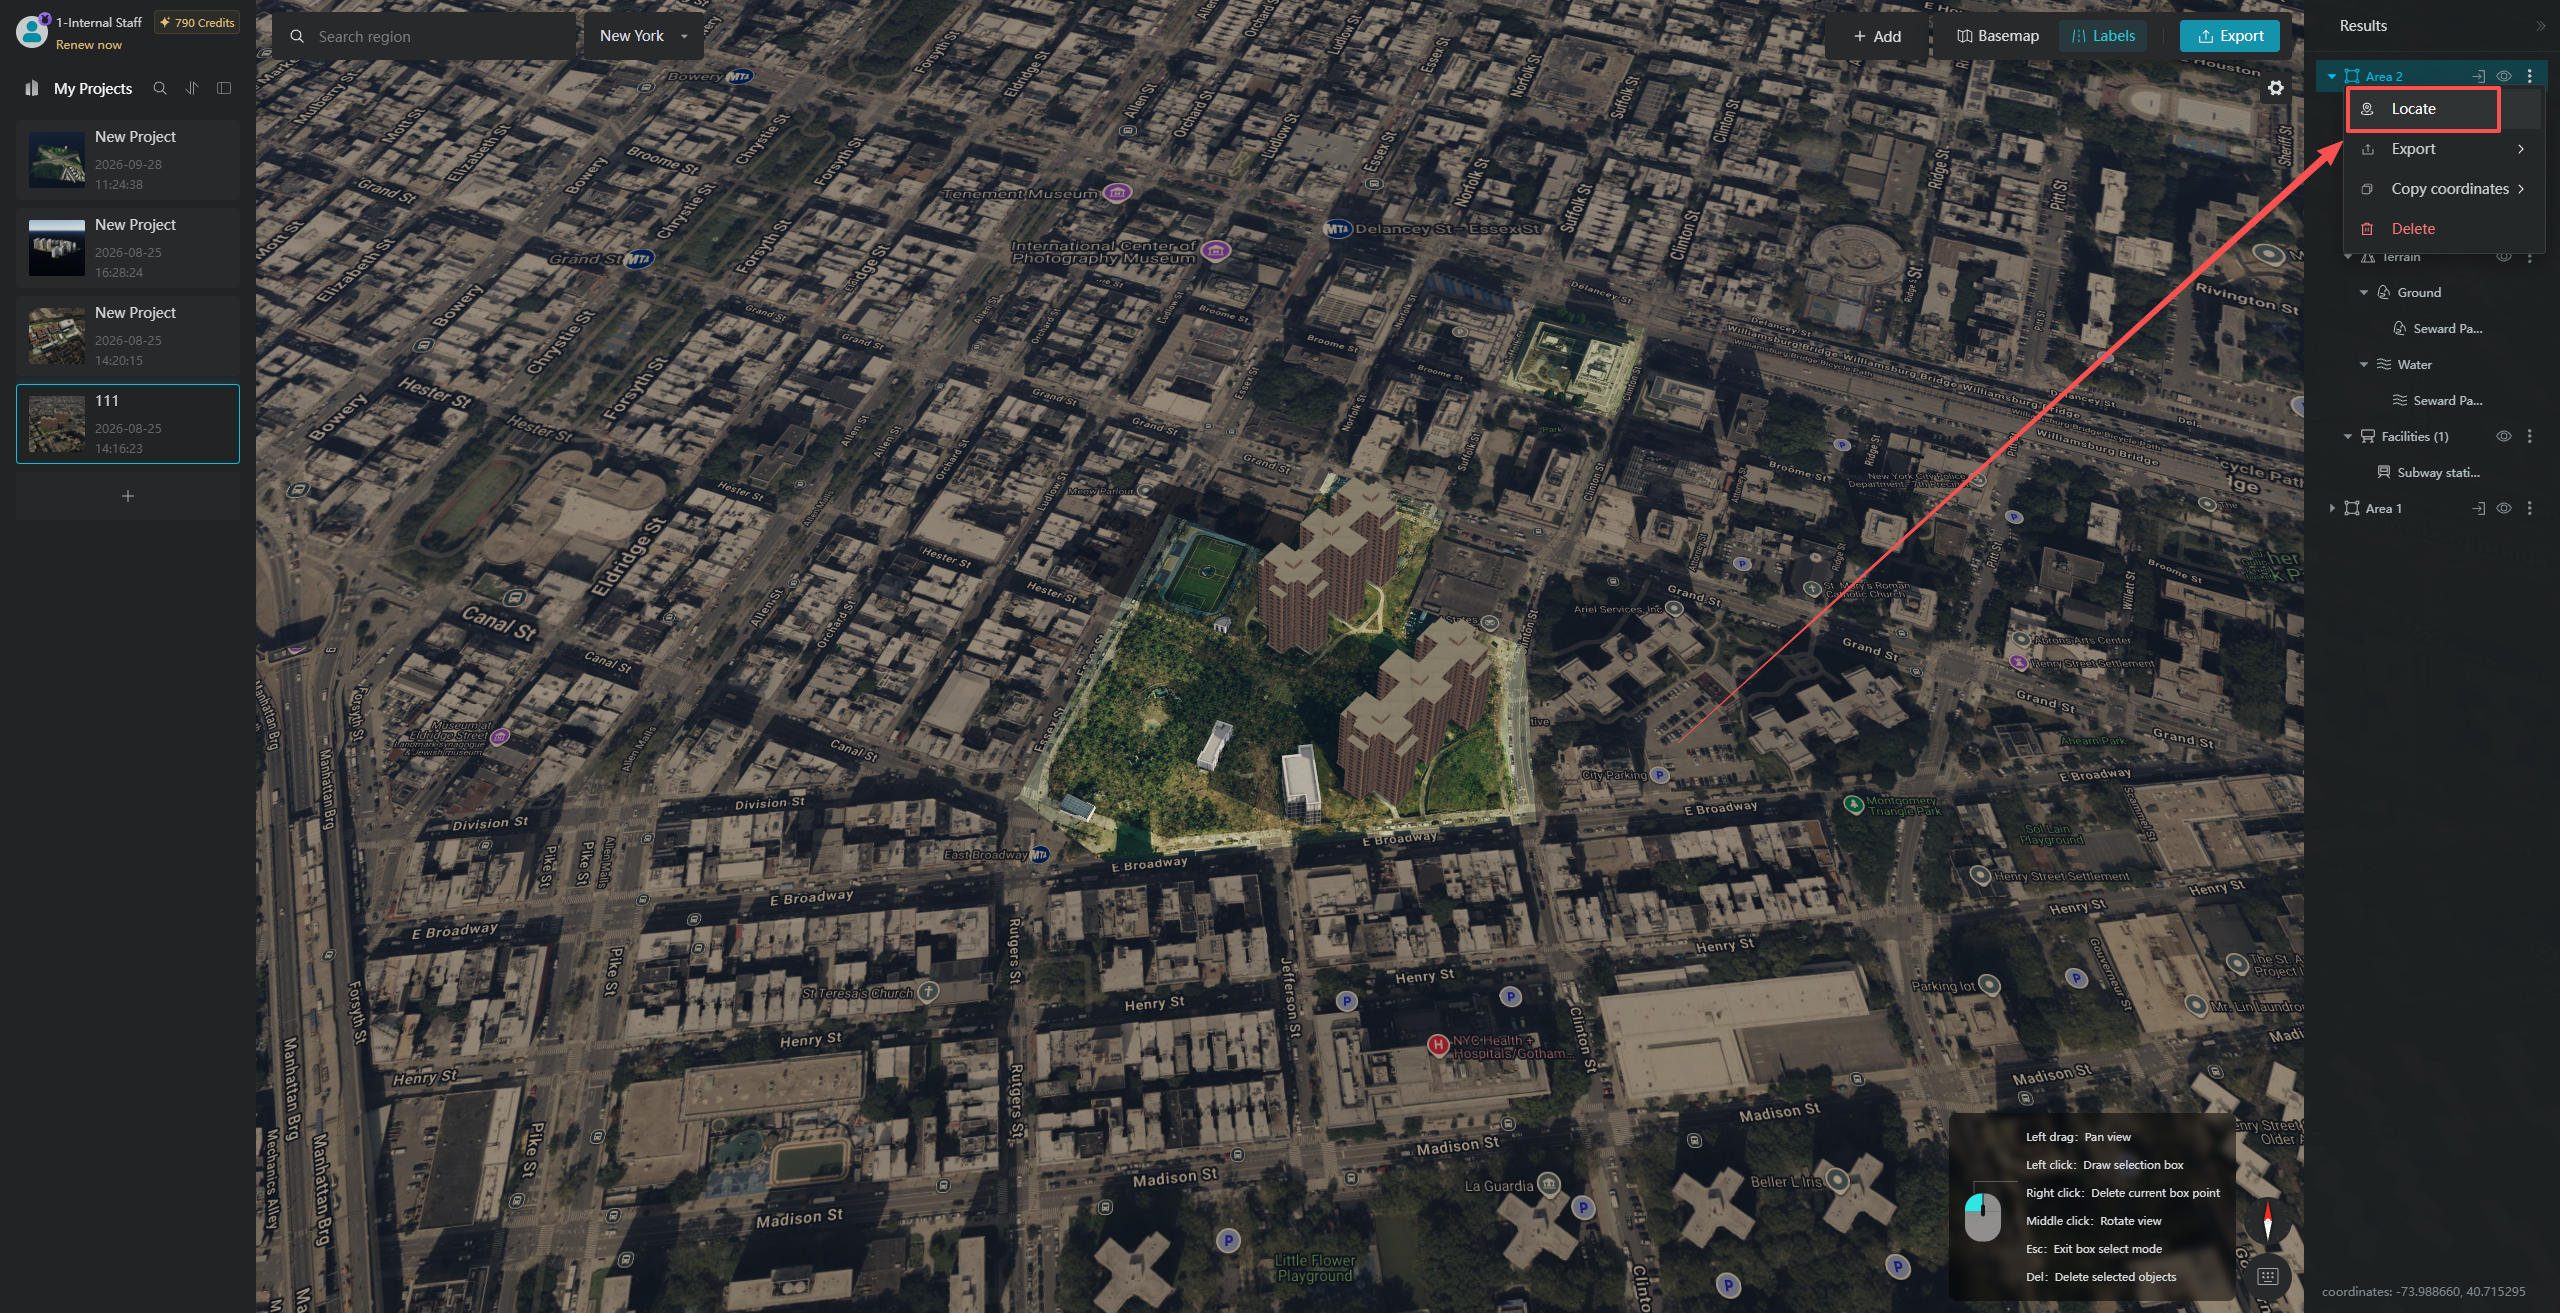
When a model has been zoomed out of view or moved outside the current viewport, click "Locate Model" to automatically navigate to and focus on the target model. This eliminates the need to search manually by dragging the view and improves model navigation efficiency in large scenes.
2.5 Copy Coordinates
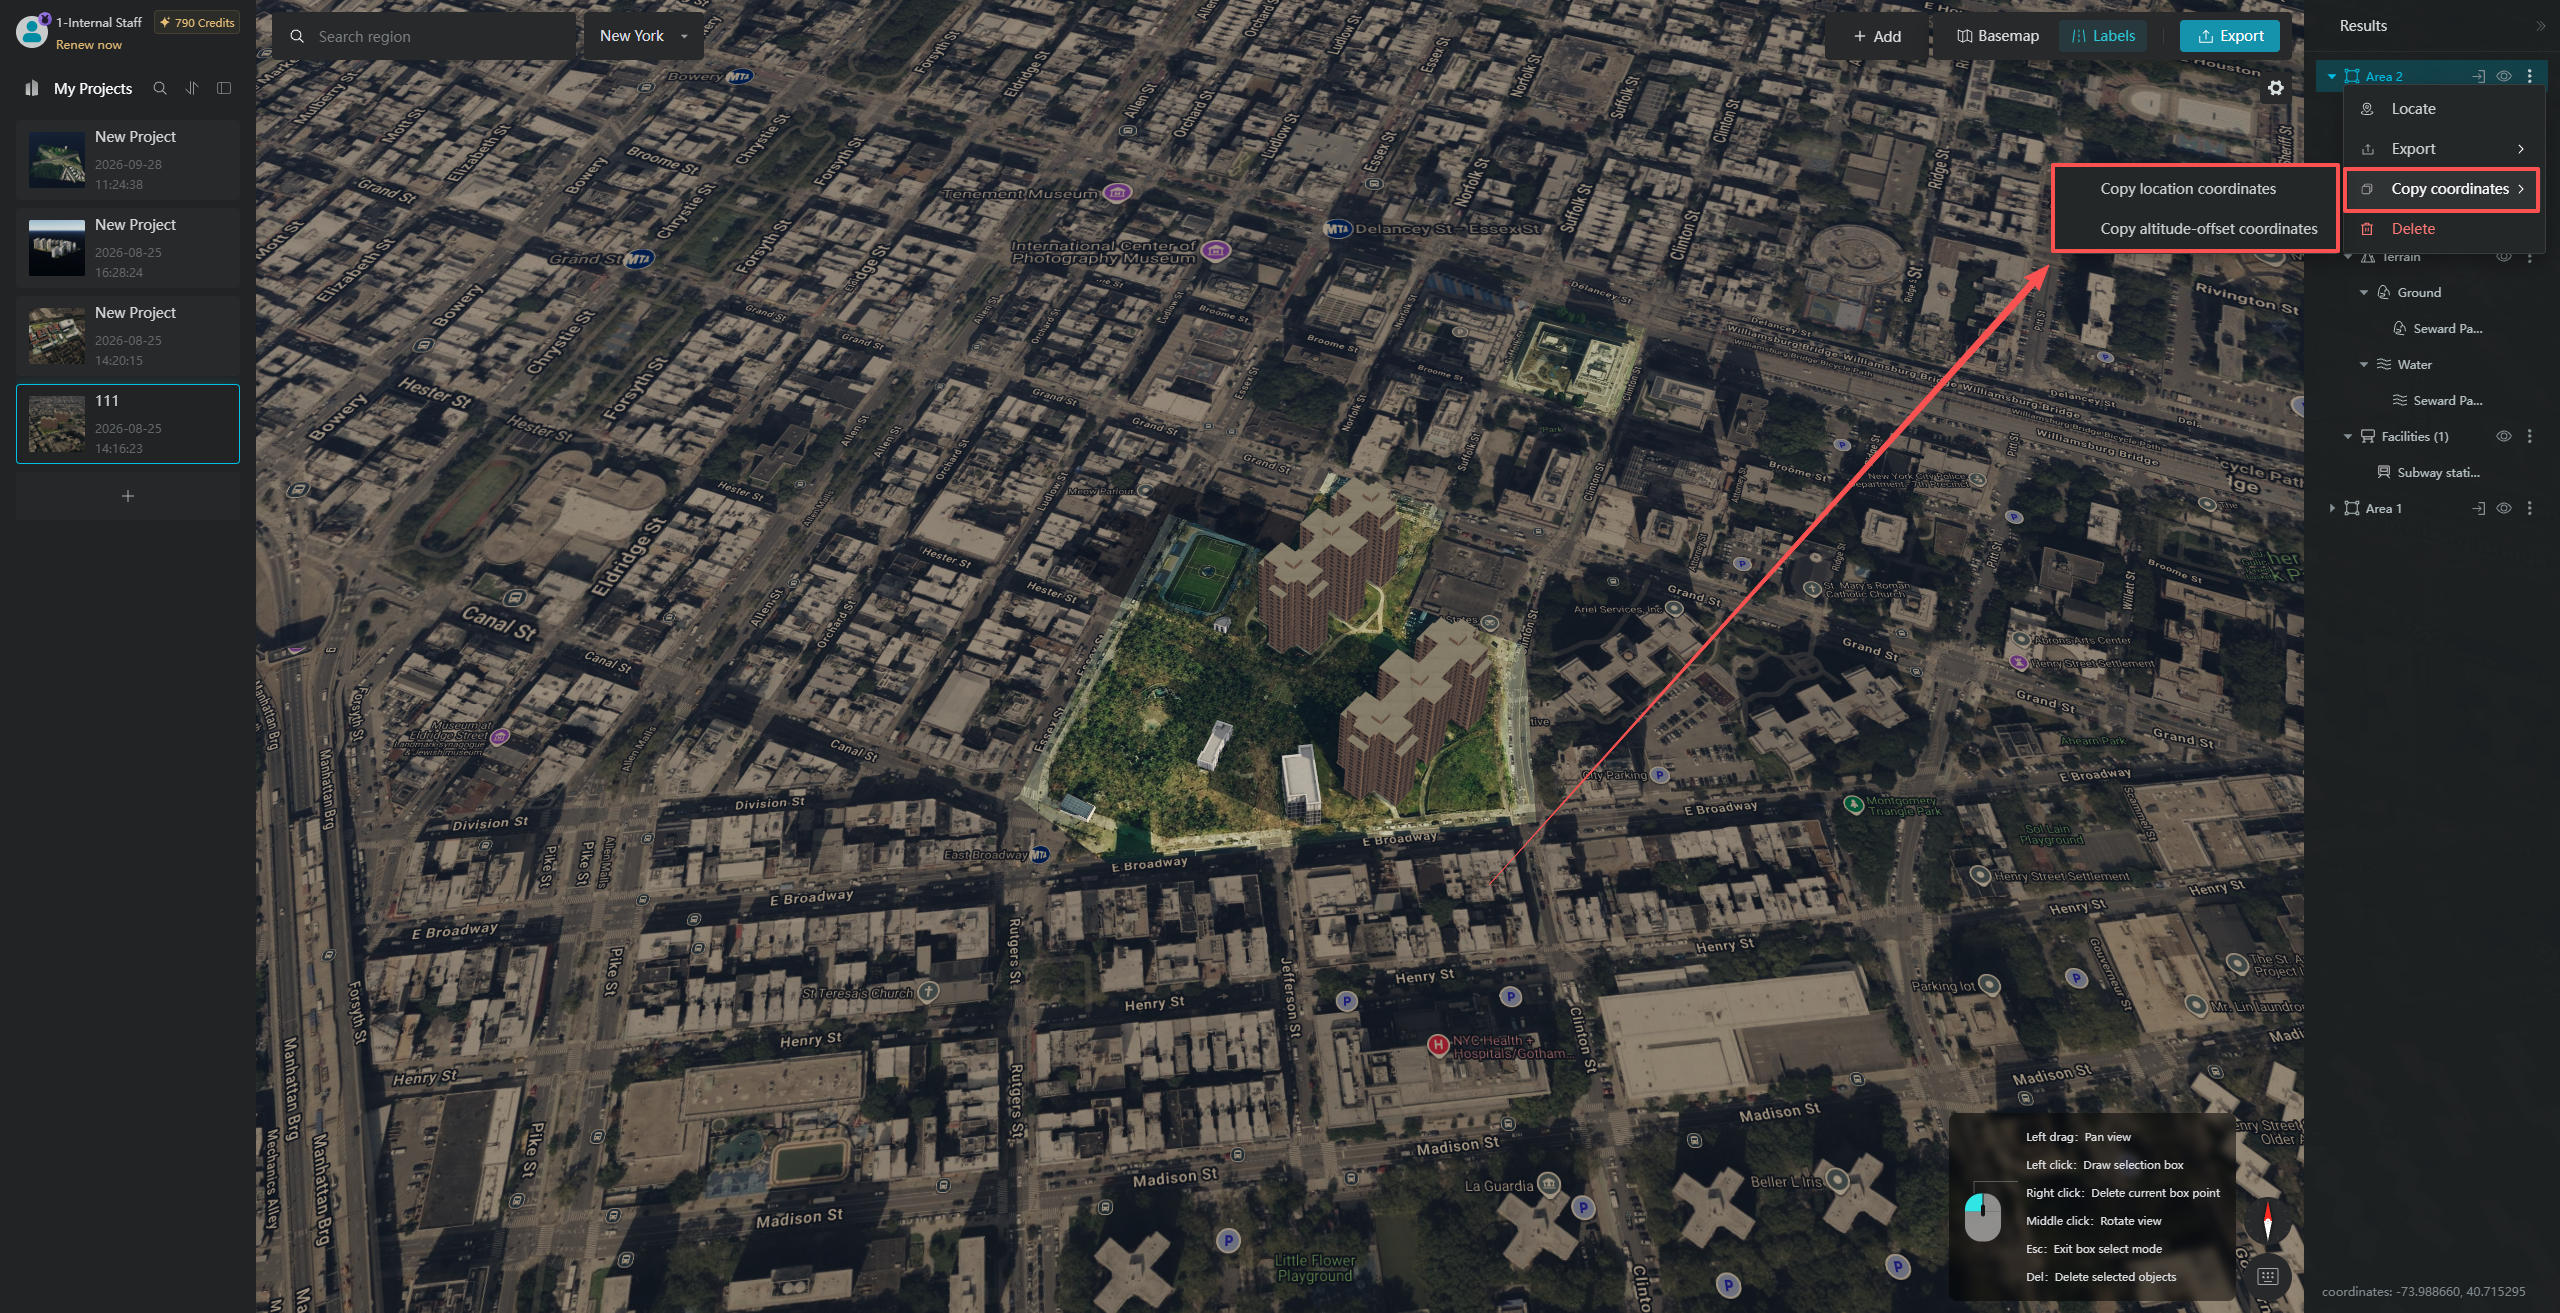
Click "Copy Coordinates" to access the options for copying "Original Coordinates" and "Elevation Offset Coordinates" in the corresponding secondary pop-up window. "Copy Original Coordinates" copies the model's longitude and latitude coordinates, while "Copy Elevation Offset Coordinates" copies the model's longitude, latitude, and elevation coordinates. If you need to import the model into GIS software and align it with its geographic location, this feature will come in handy.
2.6 Delete
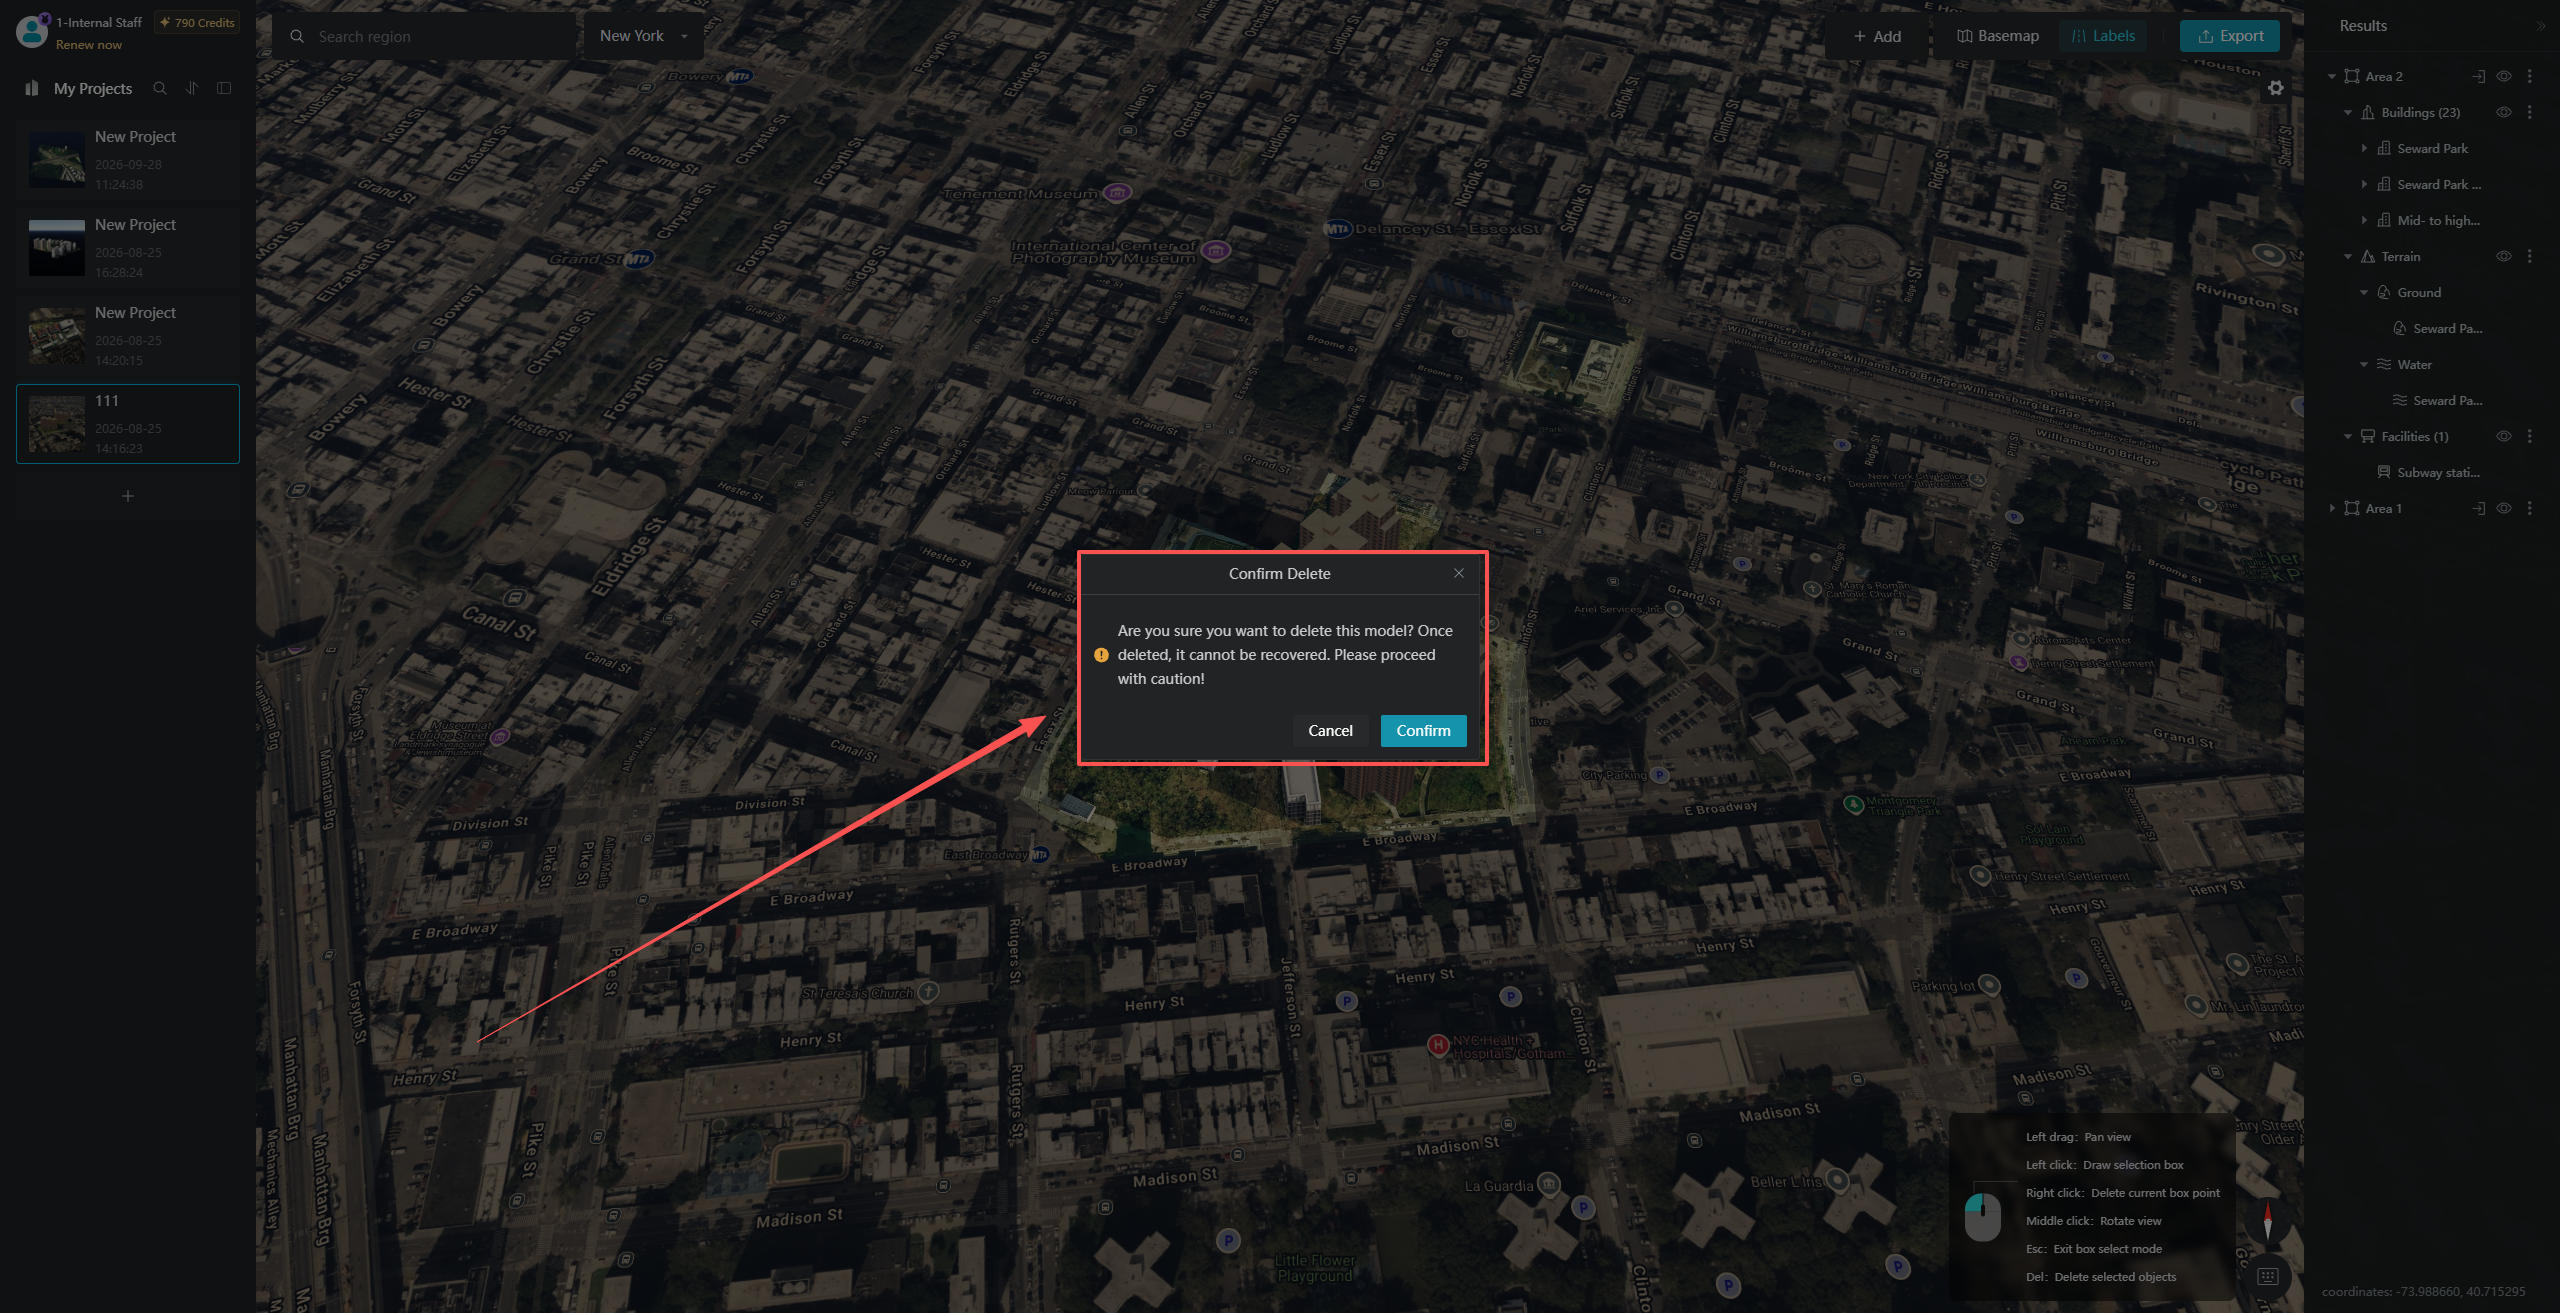
After clicking the "Delete" button, a "Confirm Deletion" dialog box will appear. It will remind you that deleted content cannot be recovered, so please proceed with caution!
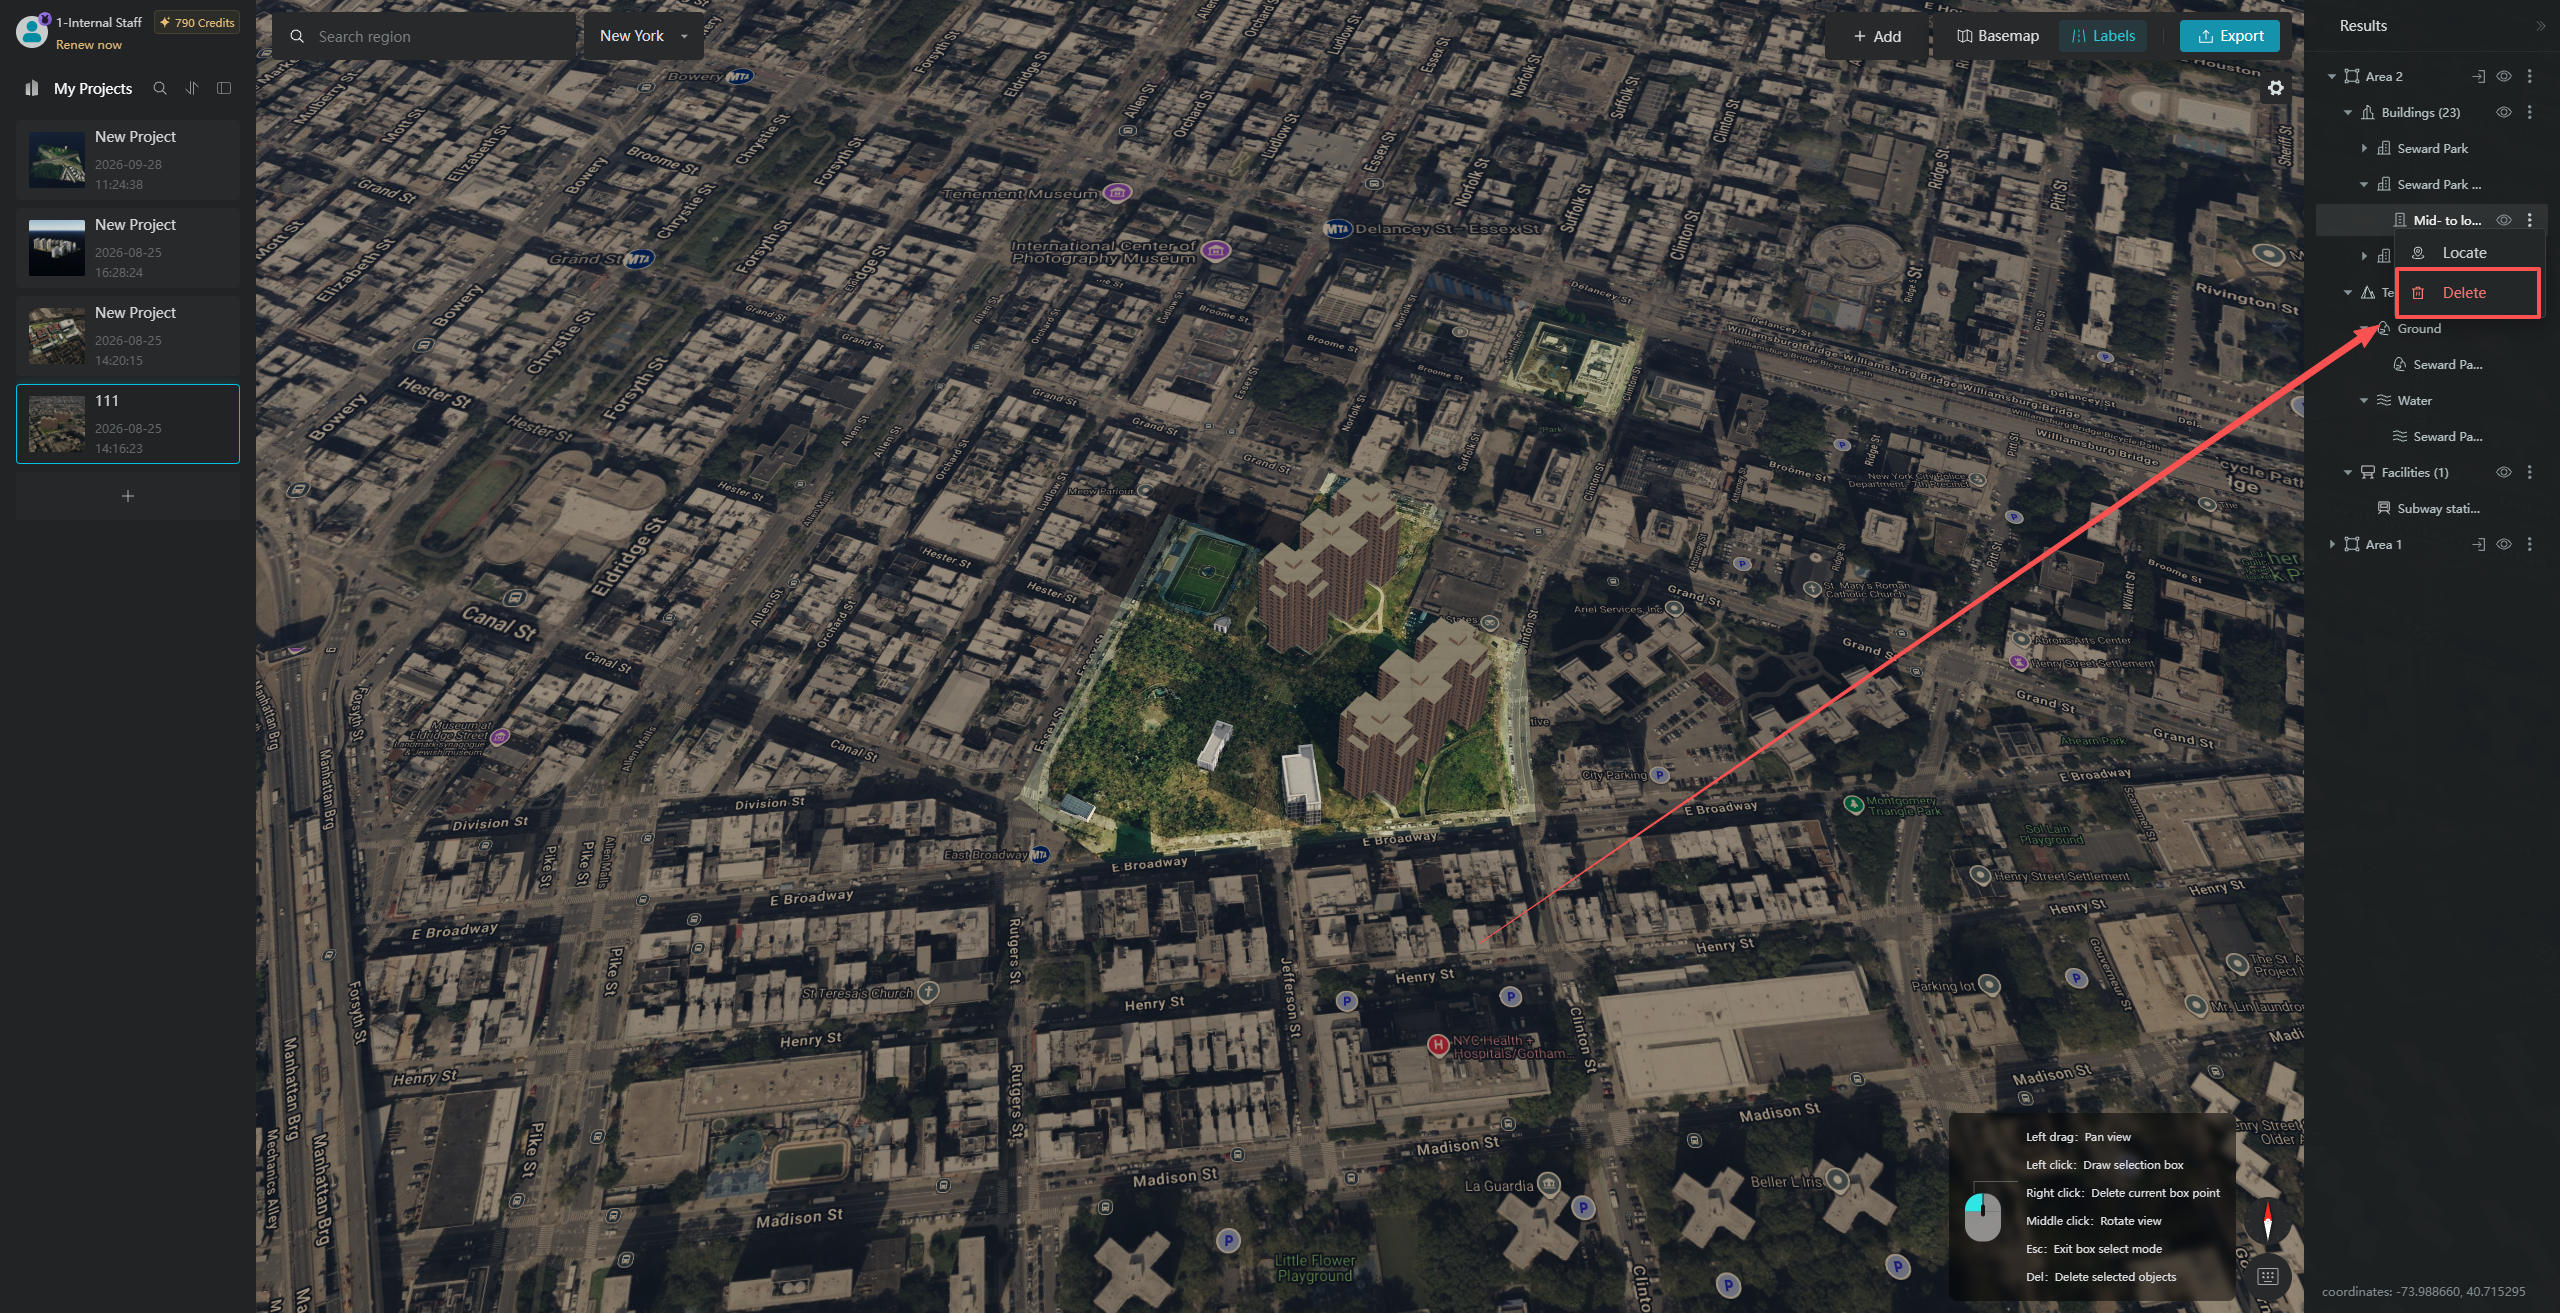
If you want to delete an individual building, tree, or other object, simply locate its corresponding model layer in the layer panel, right-click it, and select "Delete".
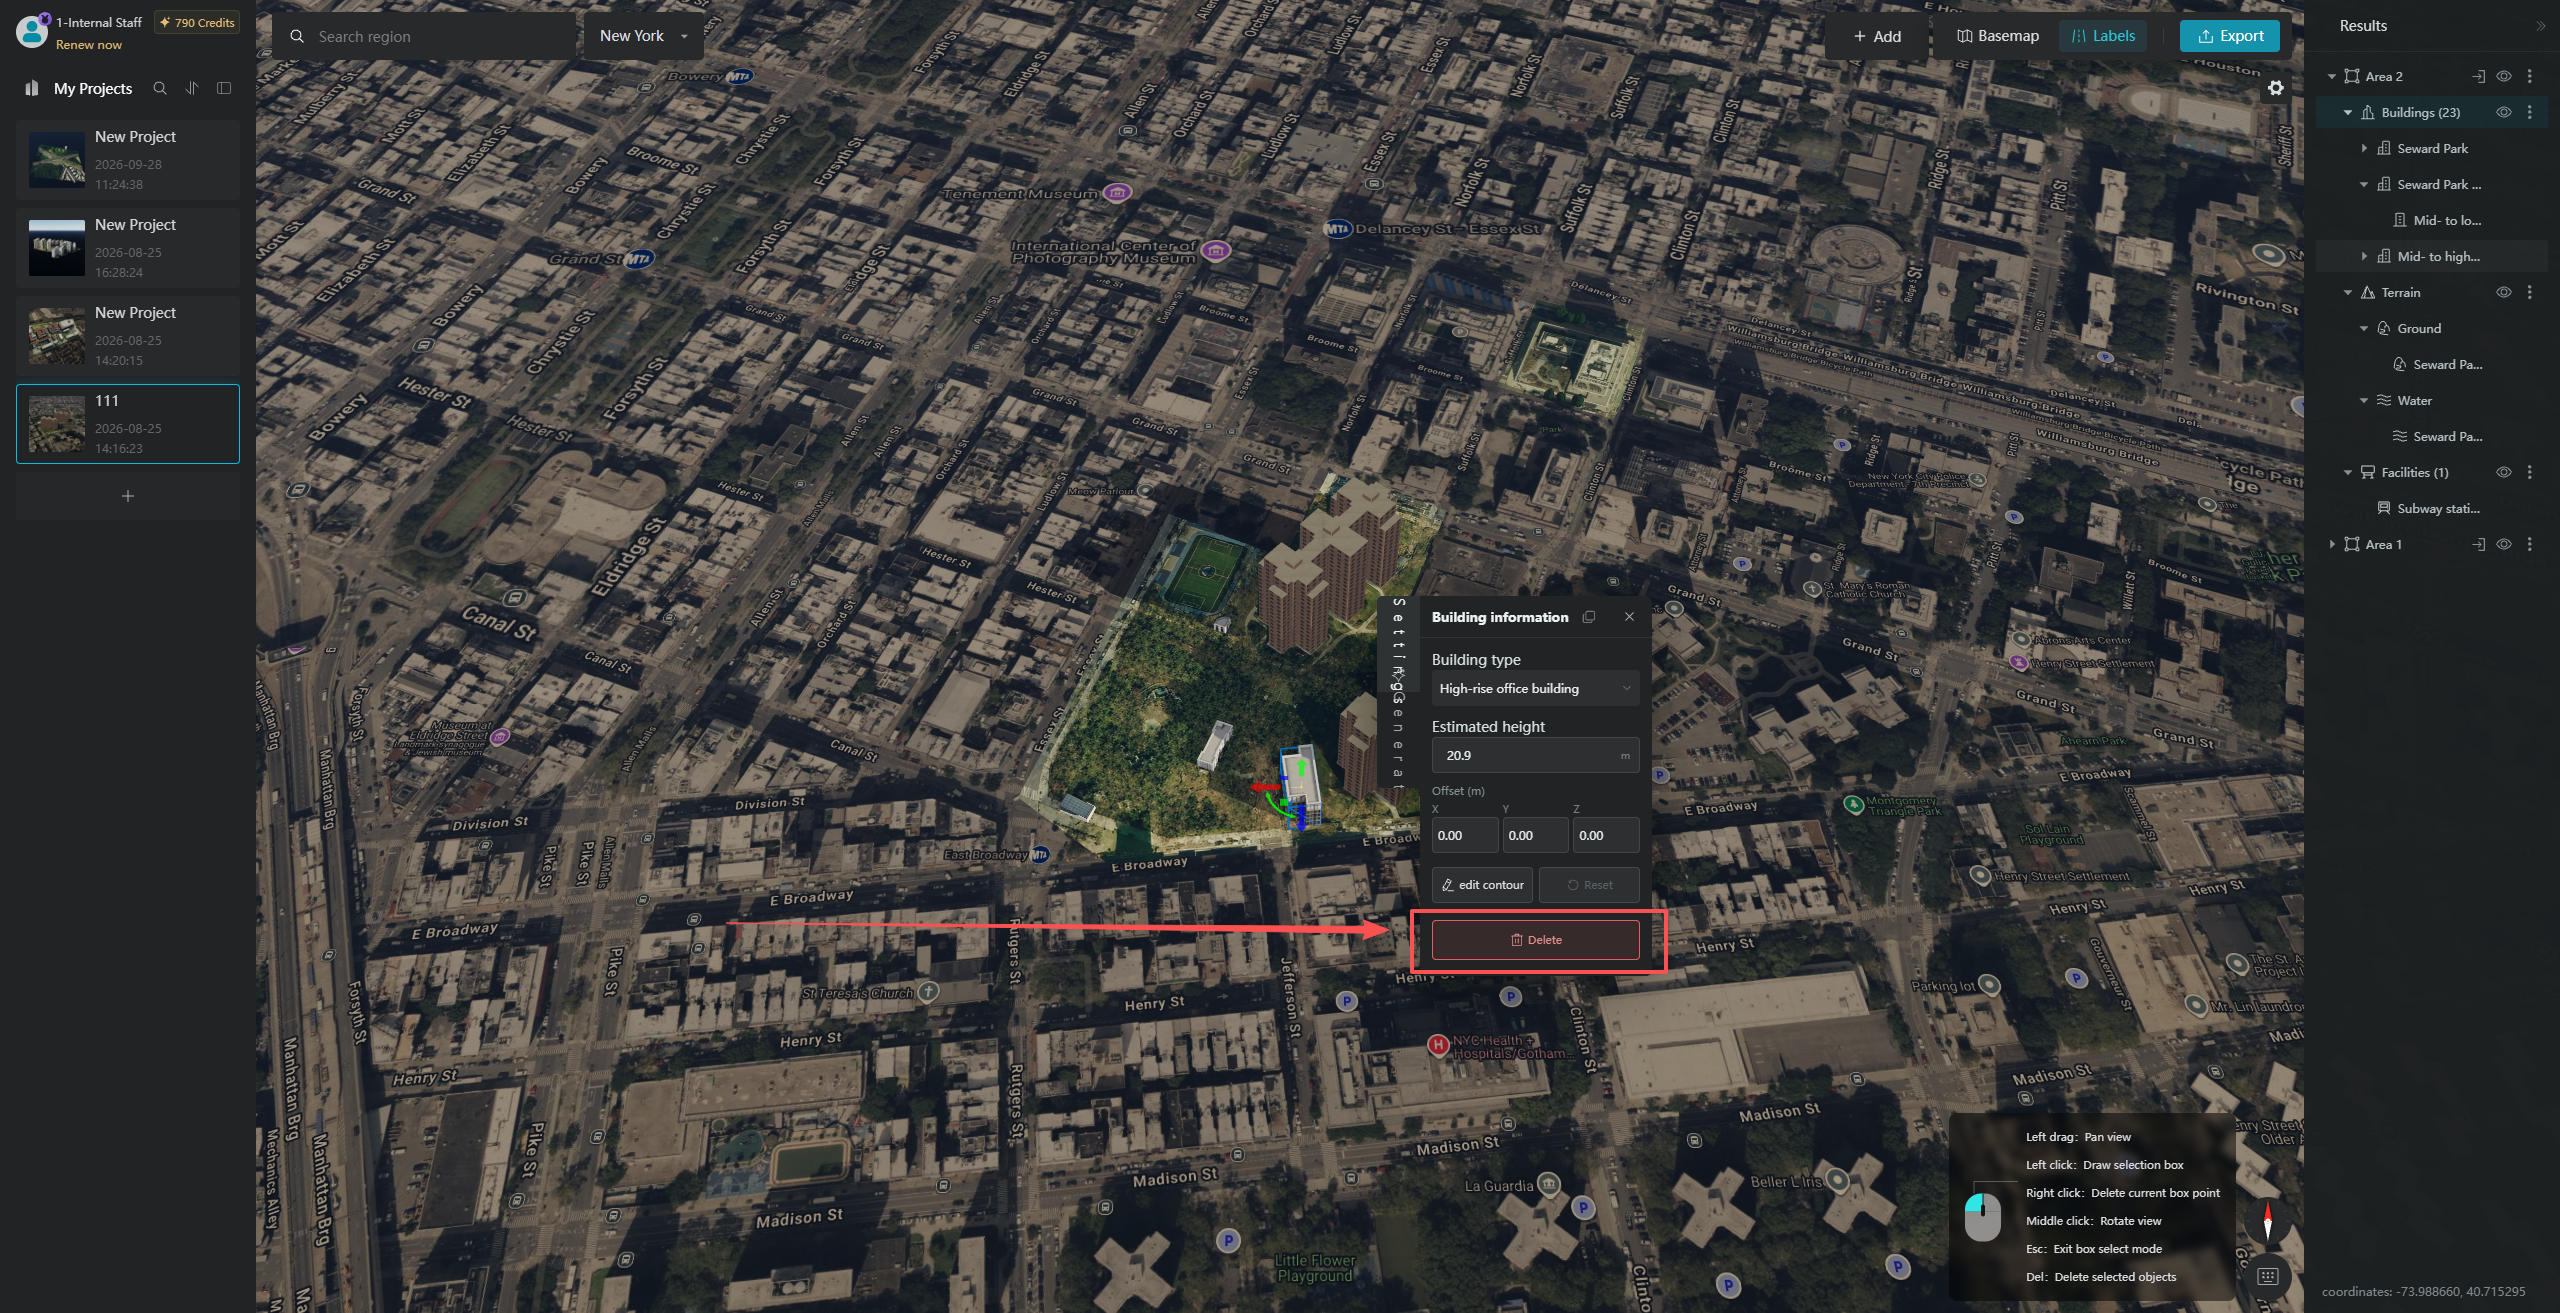
Alternatively, you can click directly on the model. In the pop-up "Building Information" window, click the "Delete Building" button in the lower-right corner.
3. Hide Individual Layers
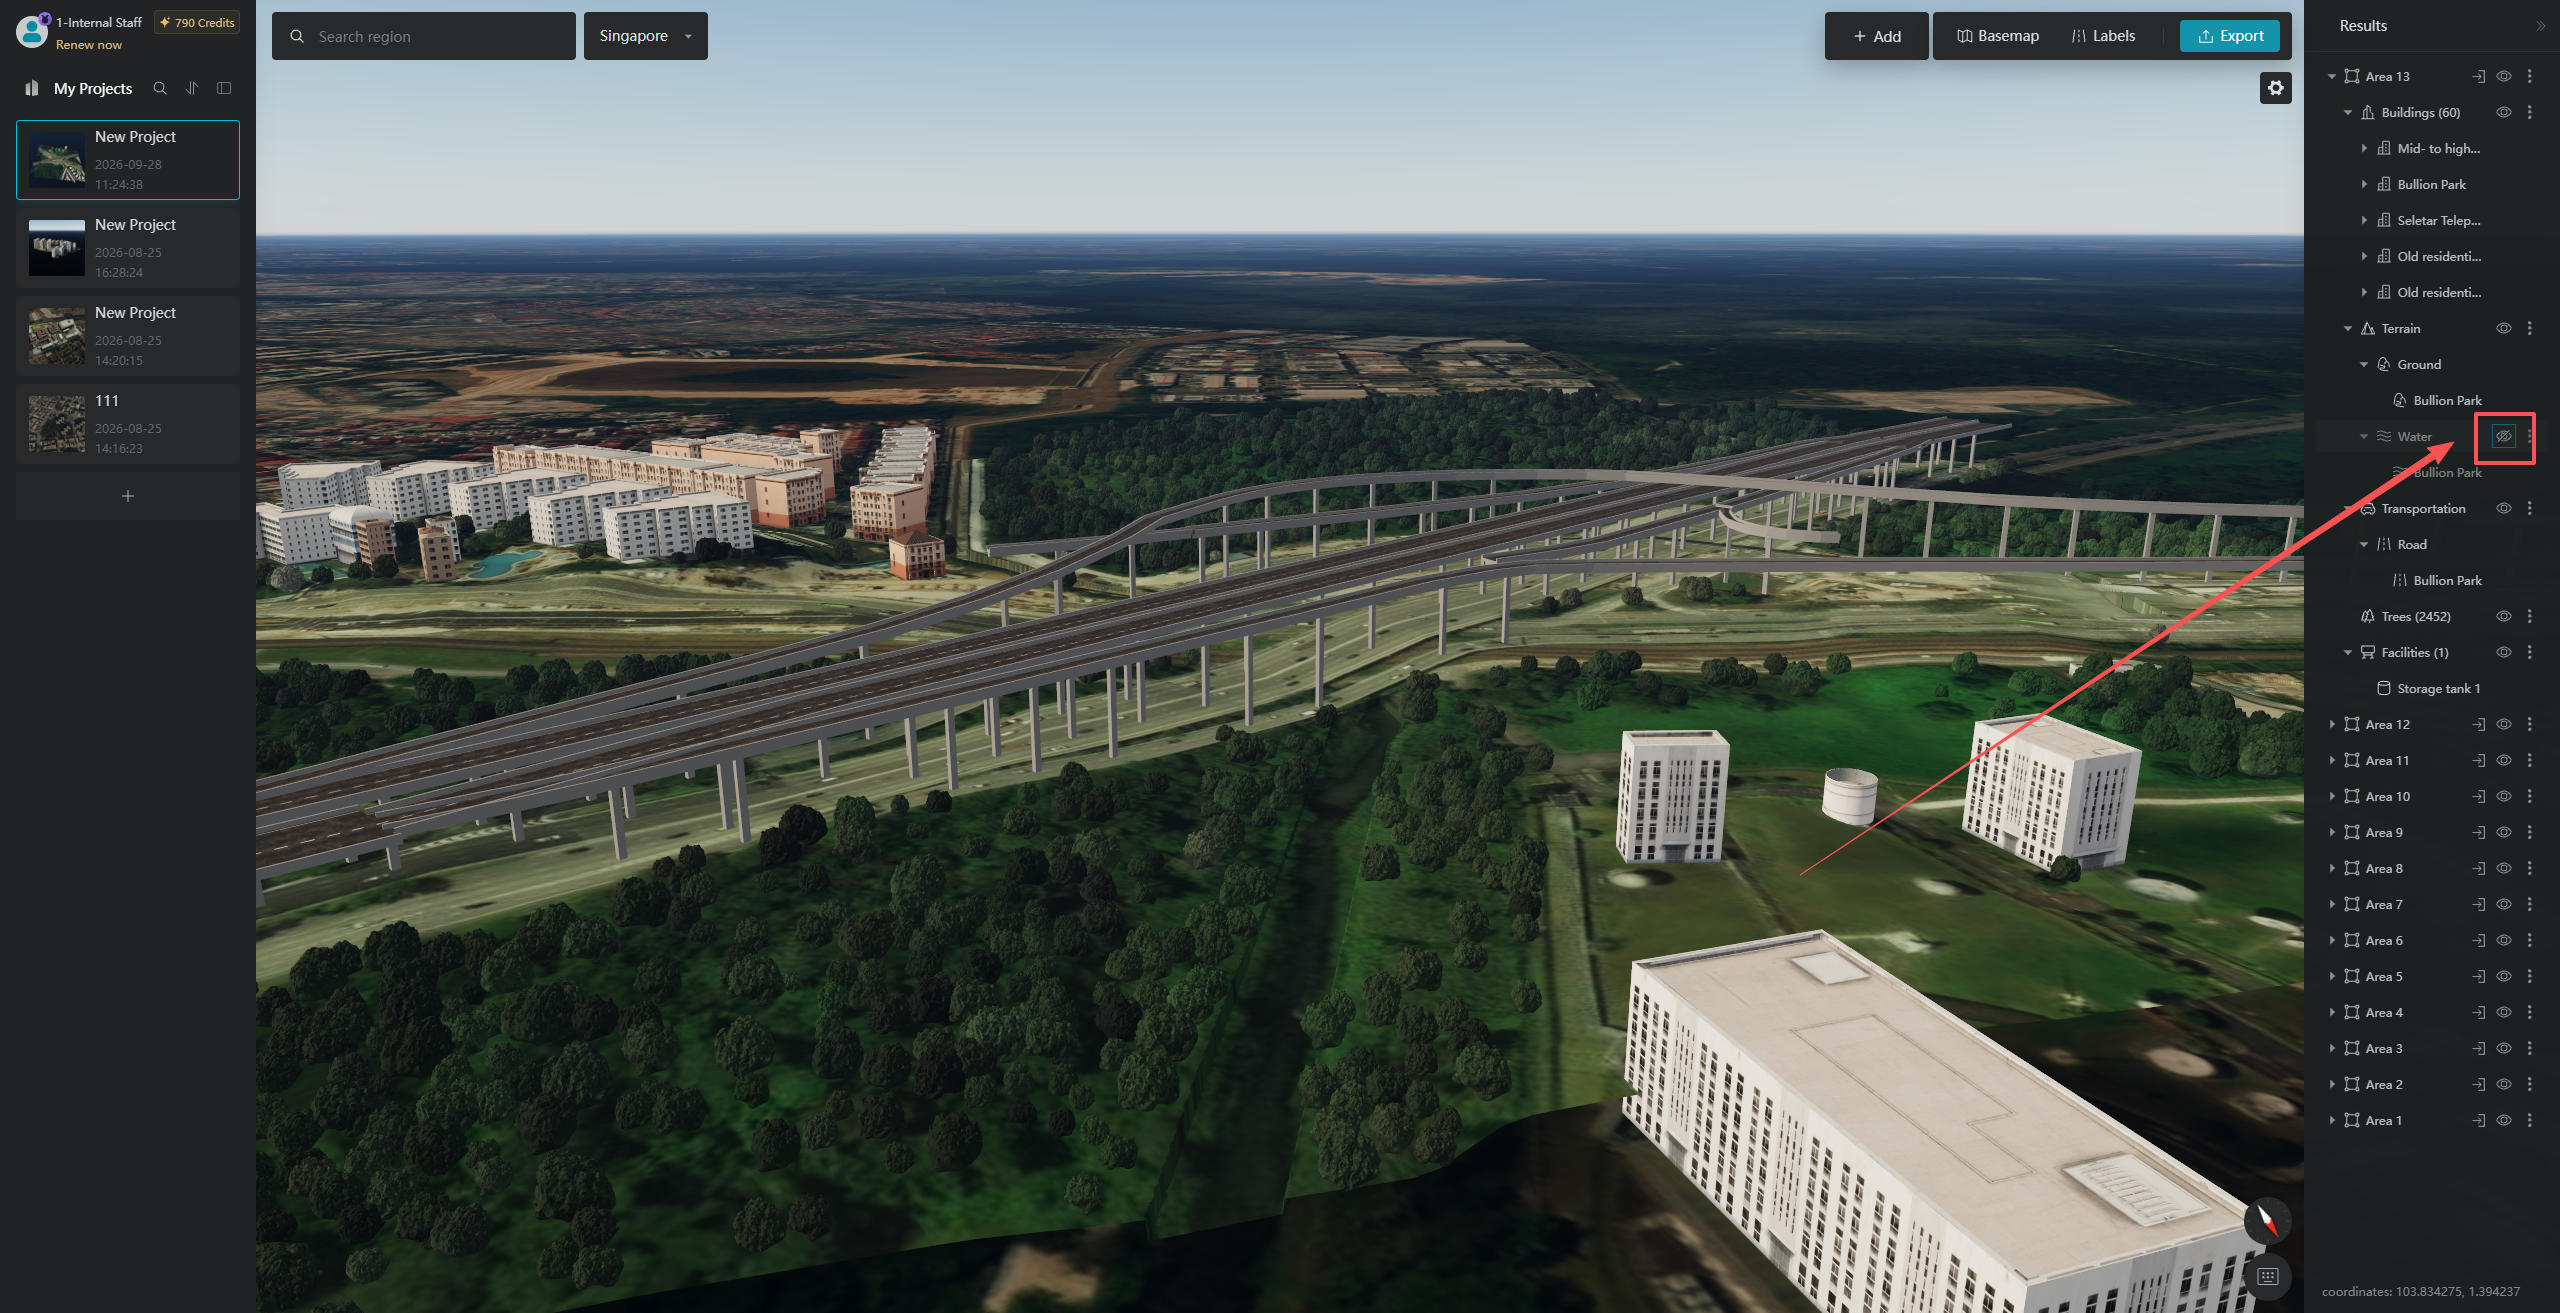
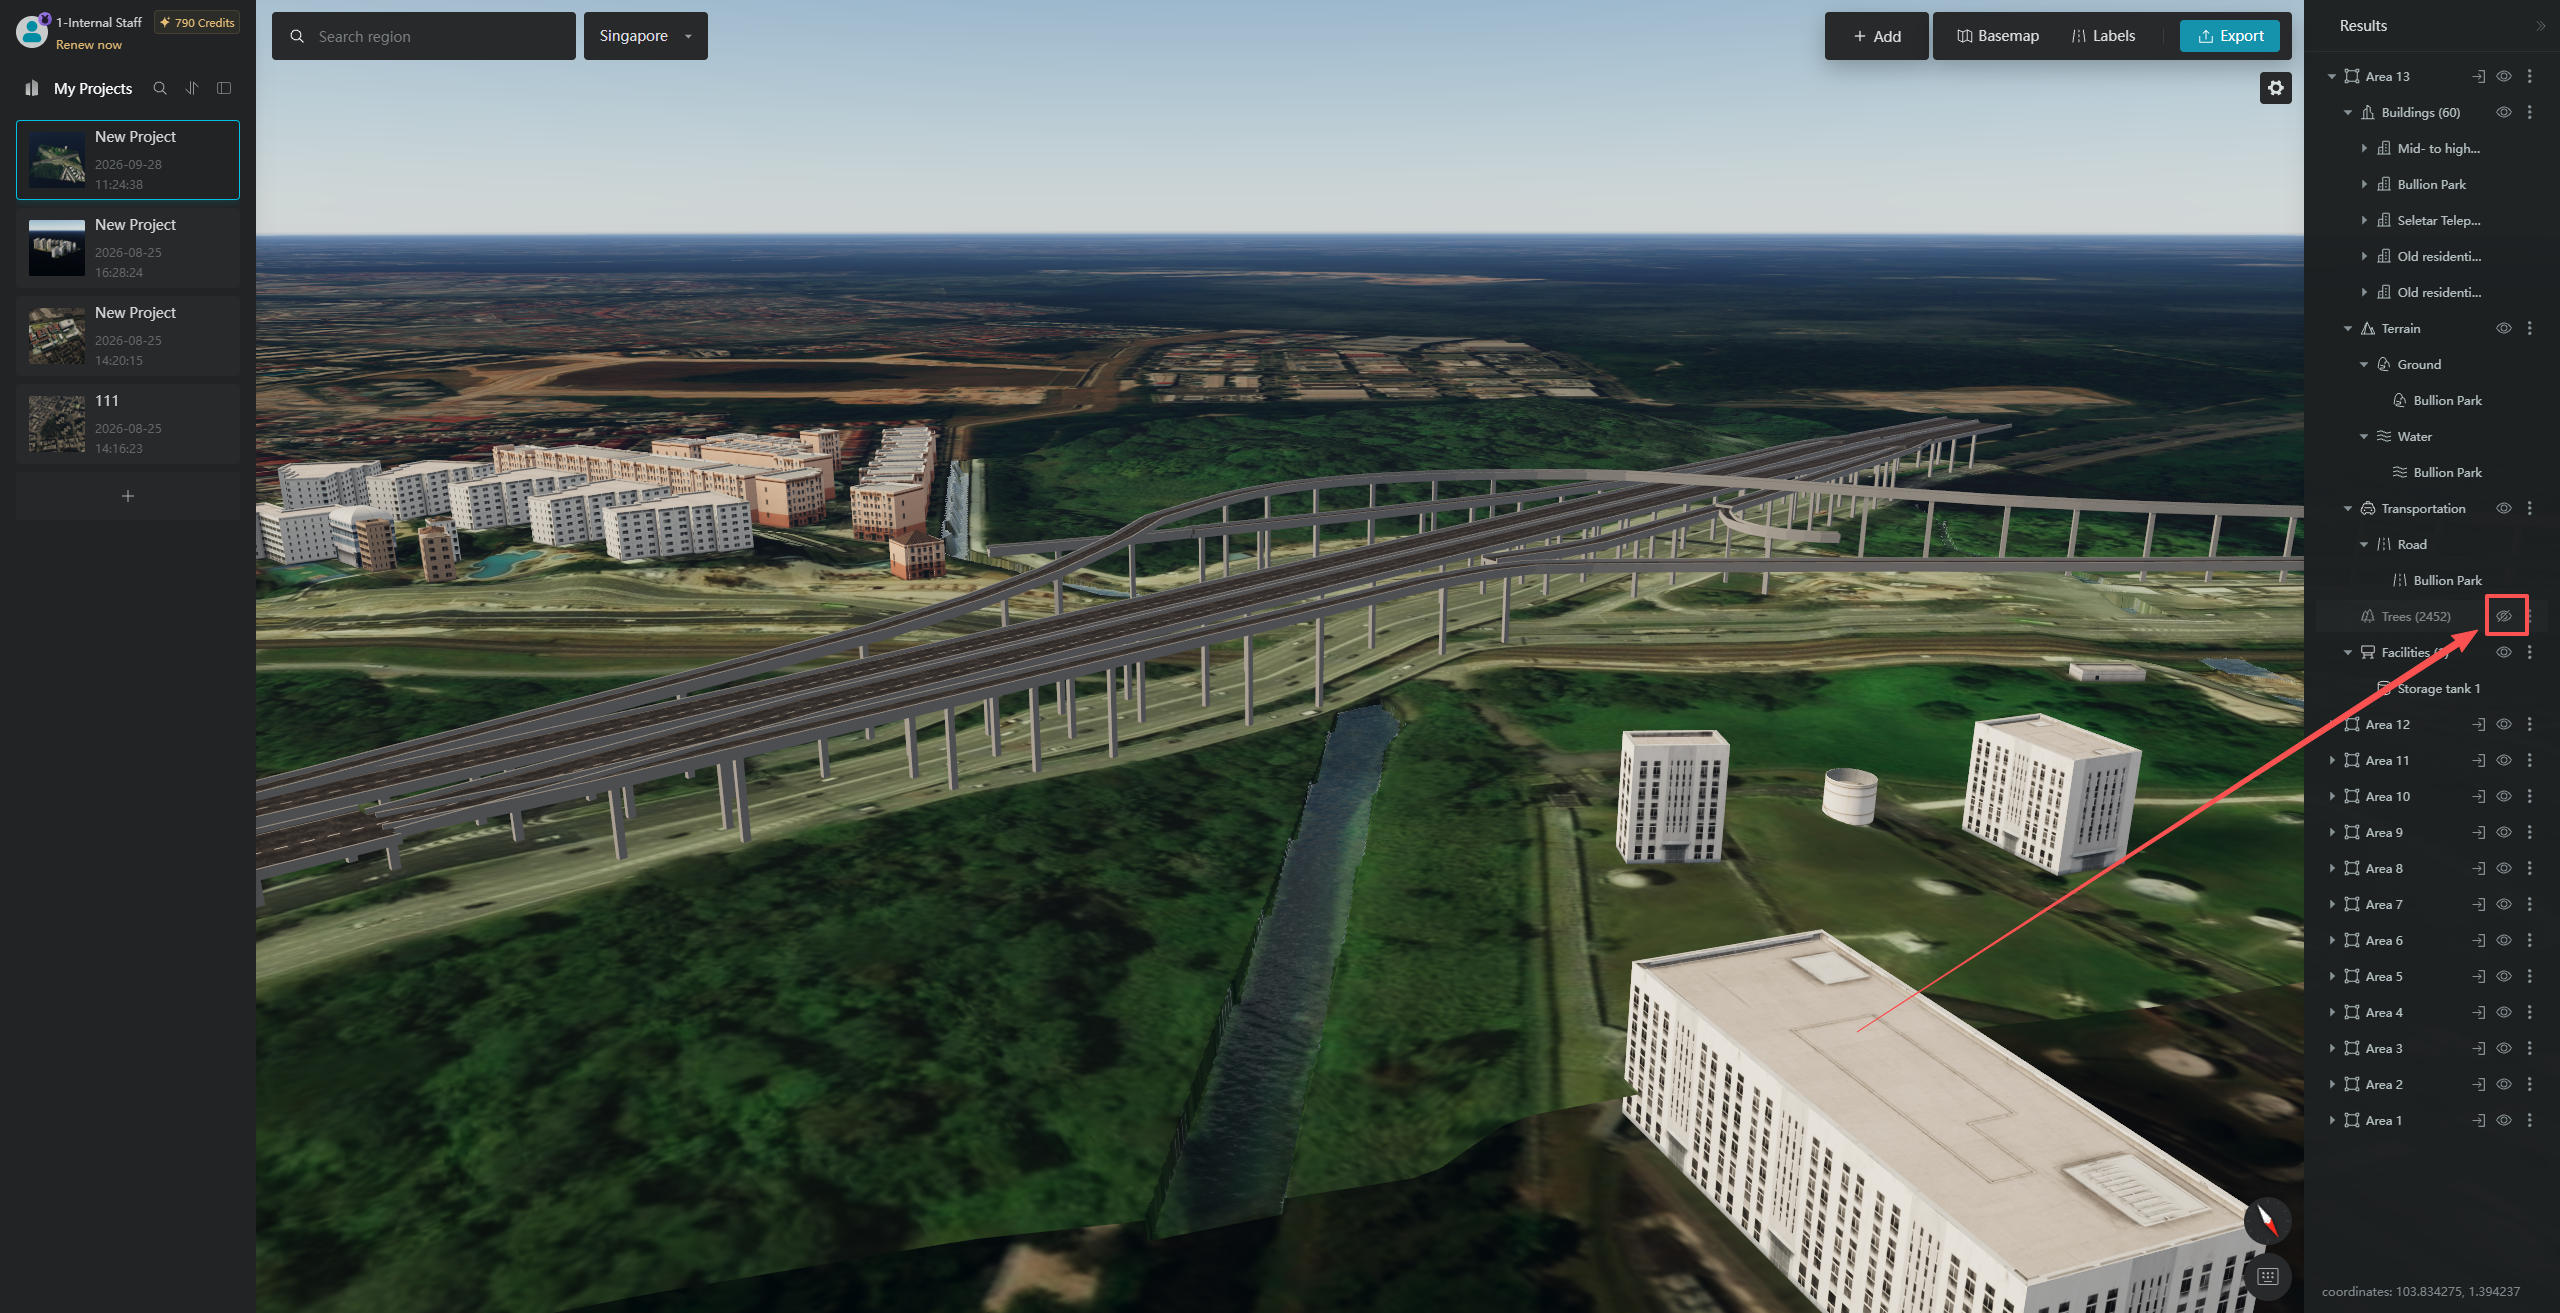
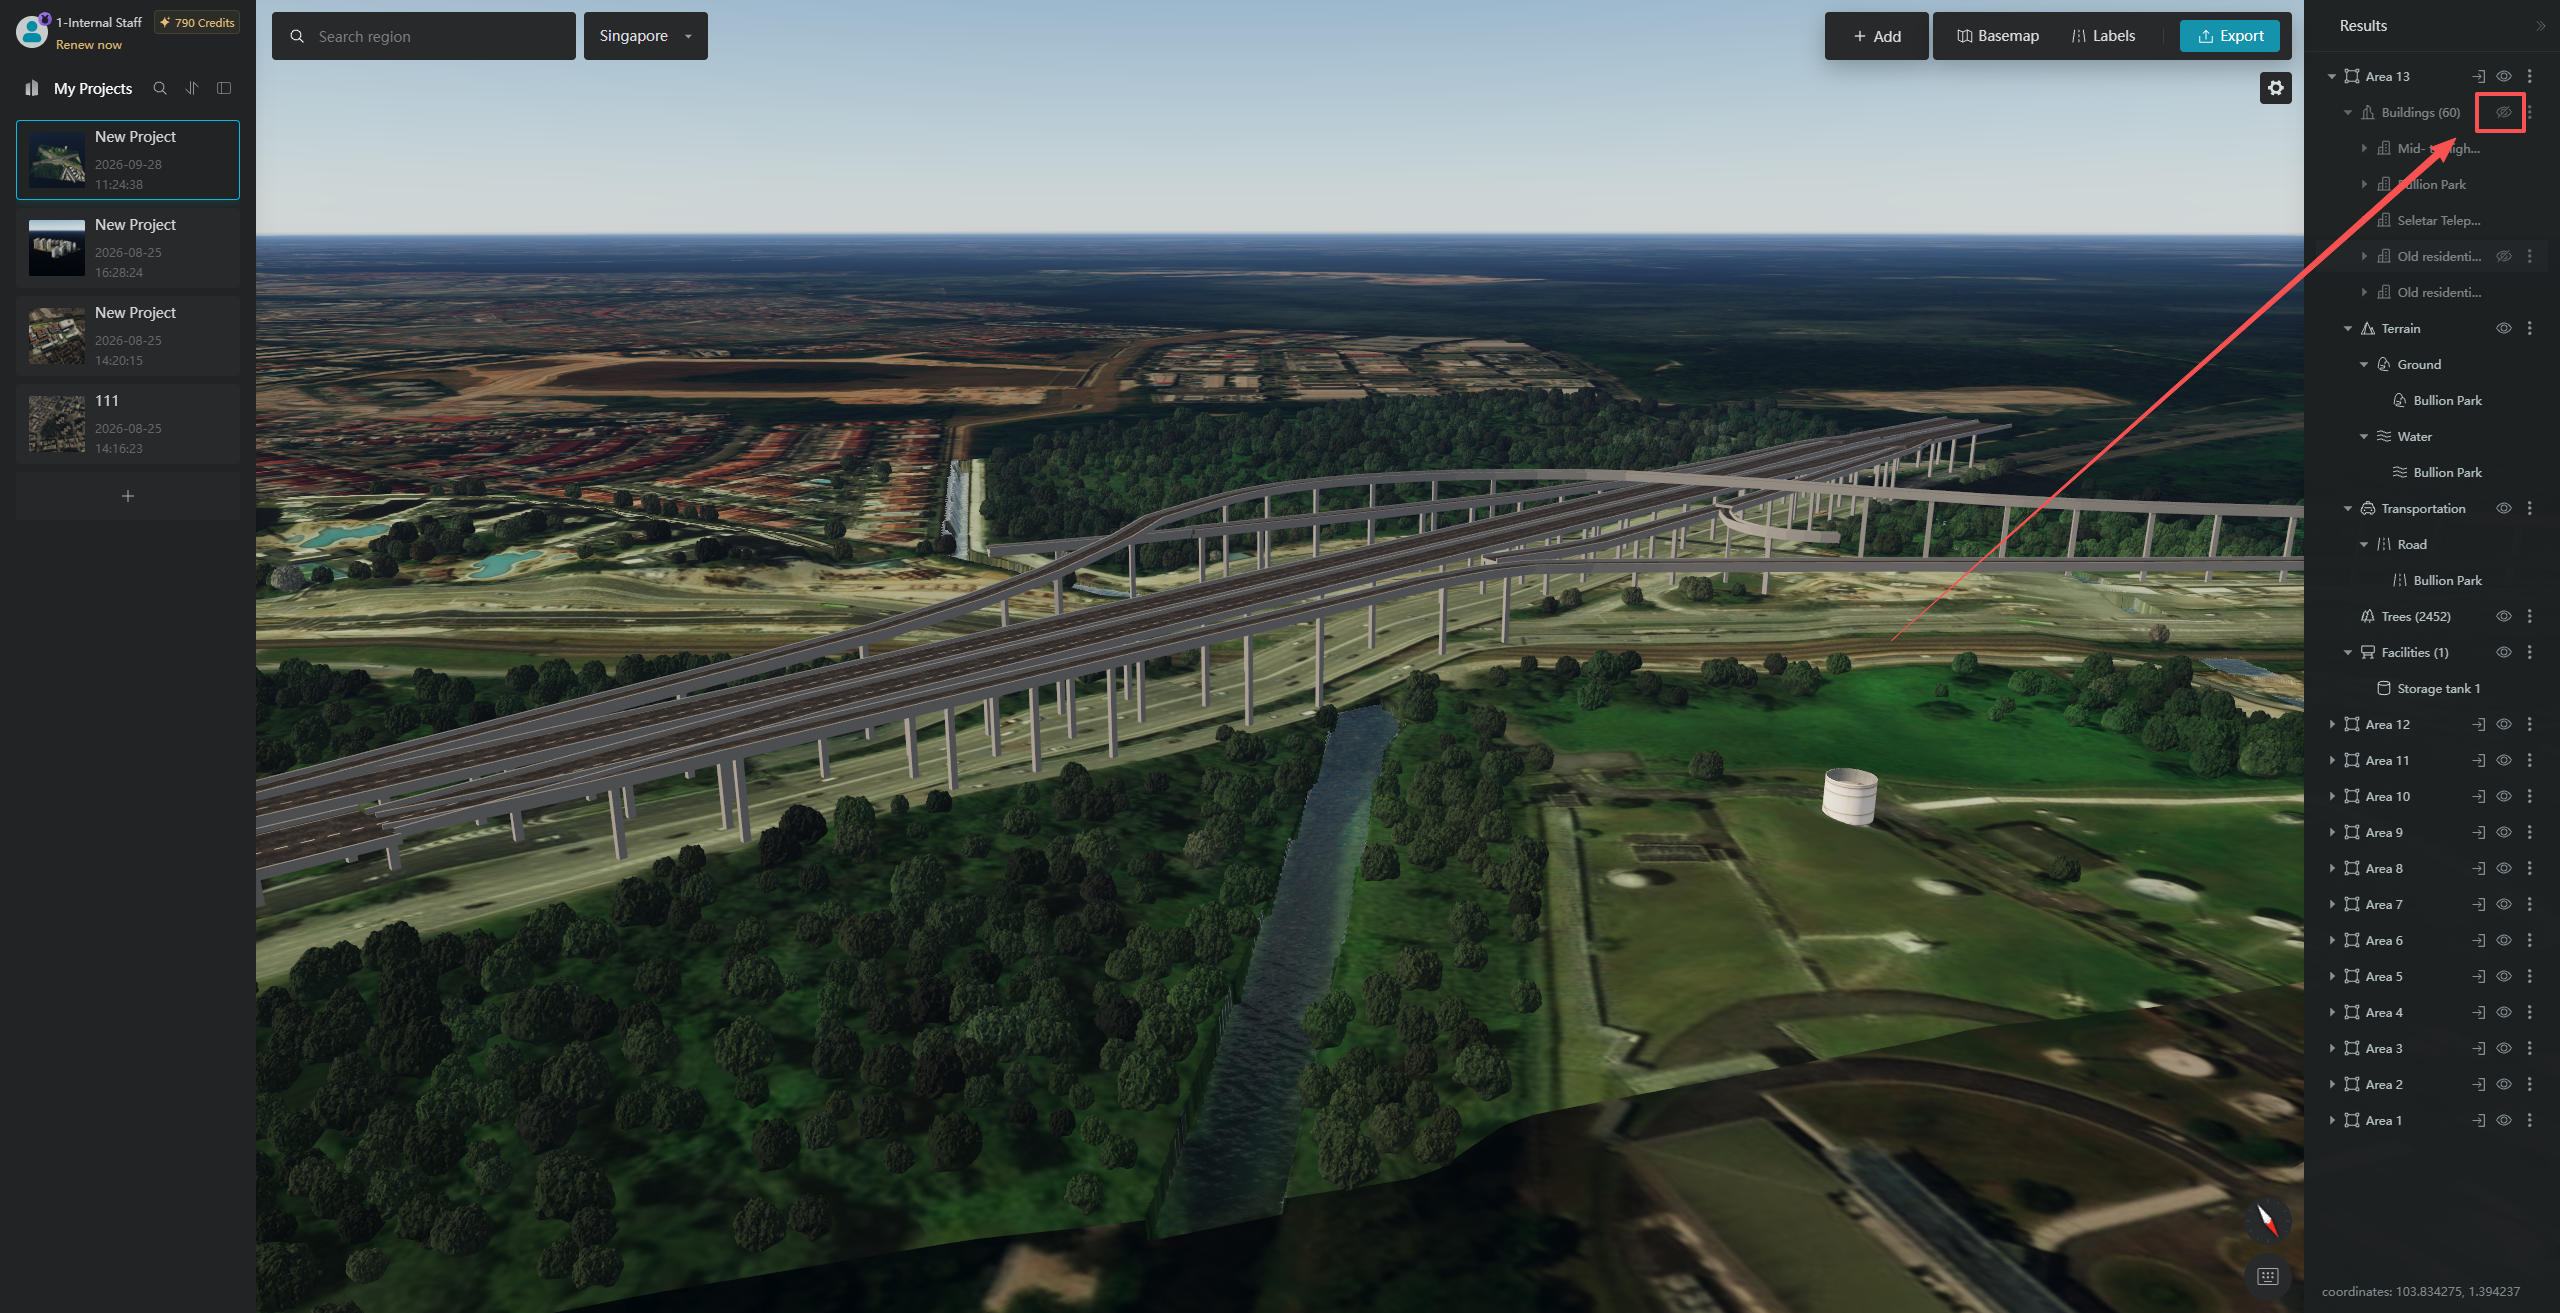
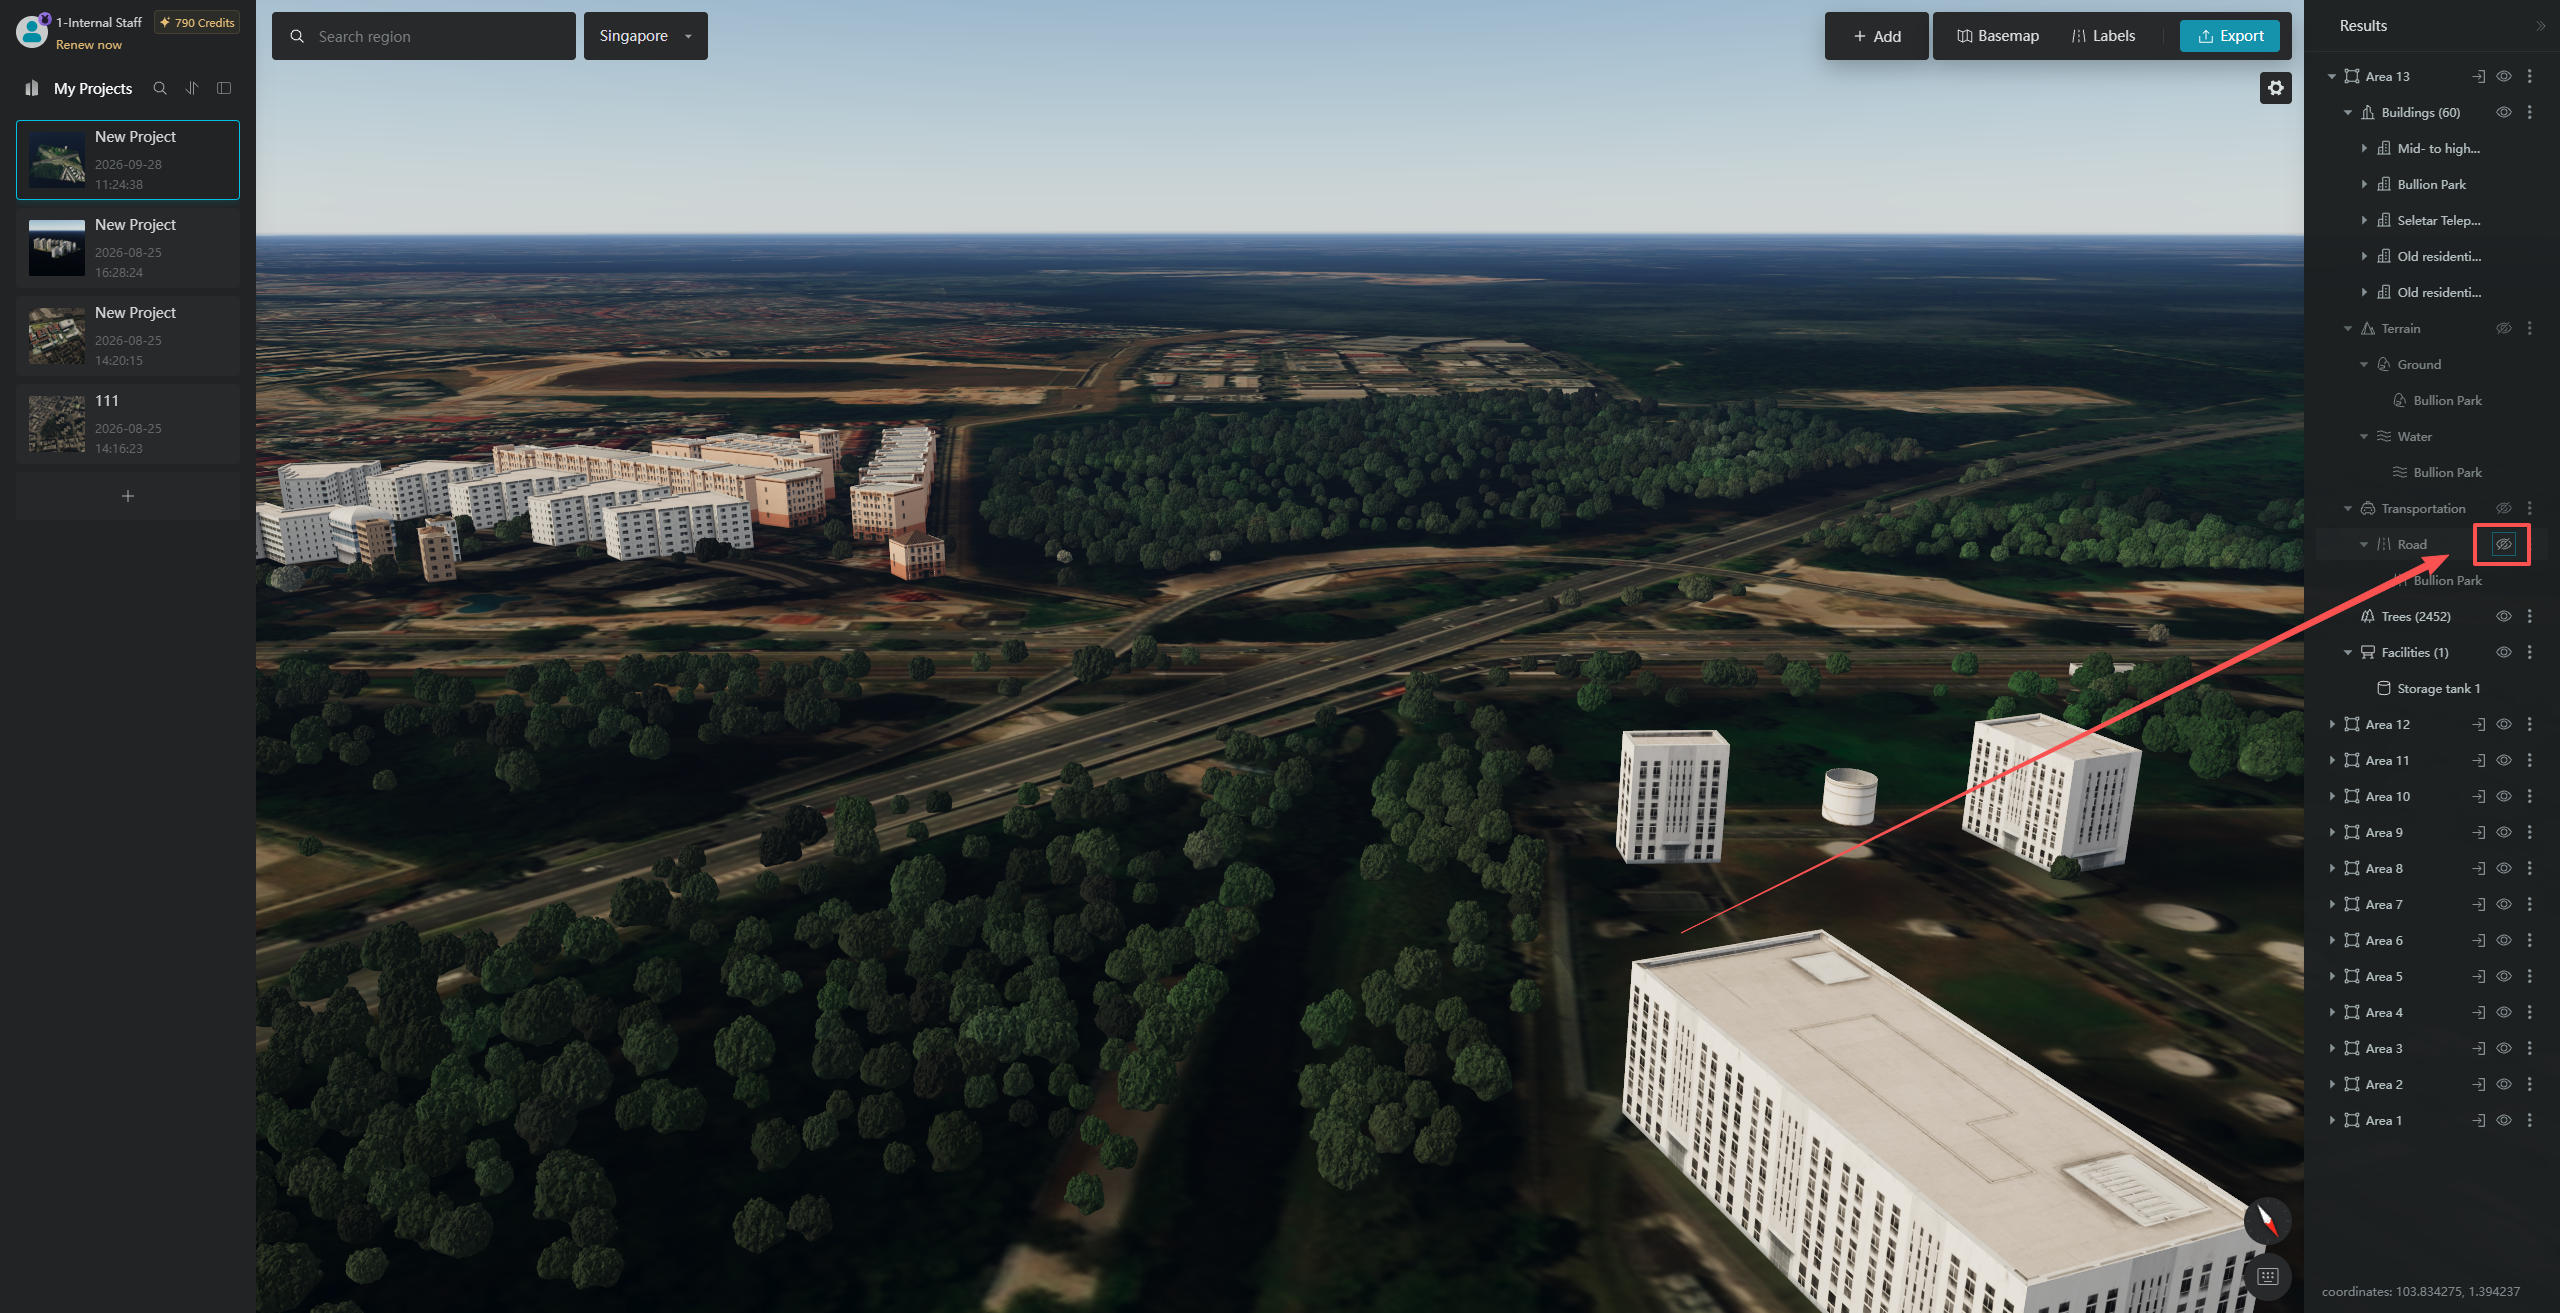
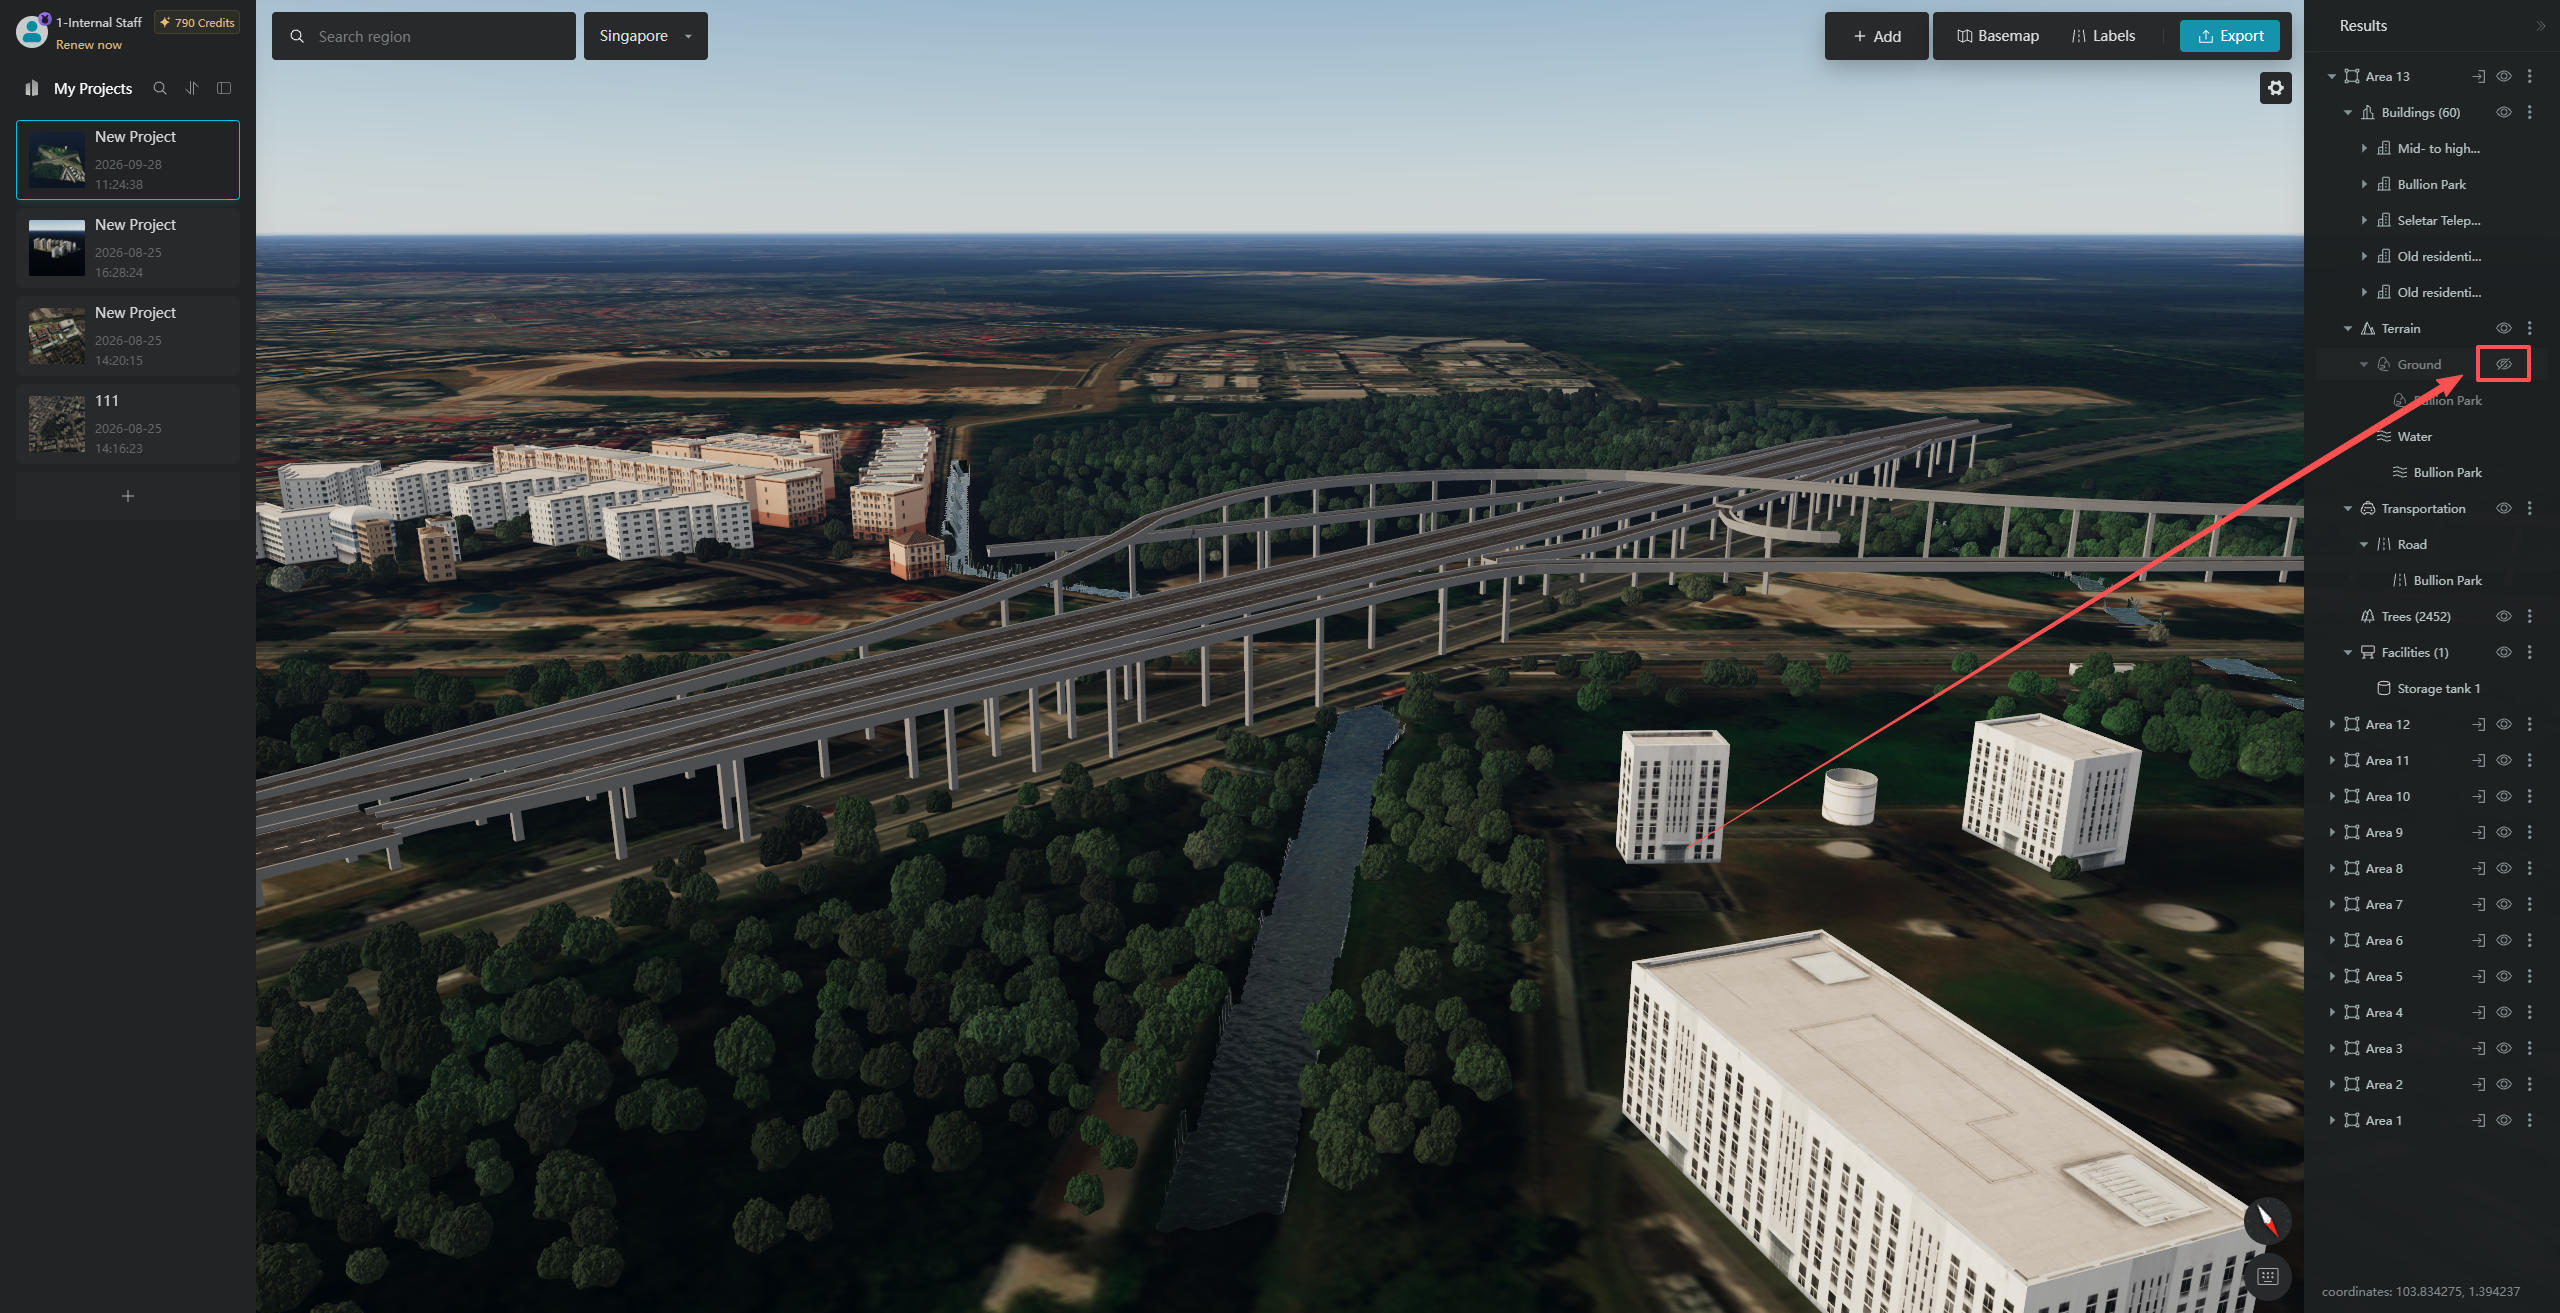
In the "Recognition Results" panel, generated buildings, terrain, road surfaces, and trees can all be hidden independently. Each layer has an "Eye" icon next to it. Click this icon to toggle the visibility of the corresponding layer.
3.1 Example: Hiding the Selected Area
3.2 Example: Hiding Buildings
3.3 Example: Hiding Road Surfaces
3.4 Example: Hiding Terrain
3.5 Example: Hiding Water Surfaces