How to Import Models Generated by GenAnywhere into GISBox
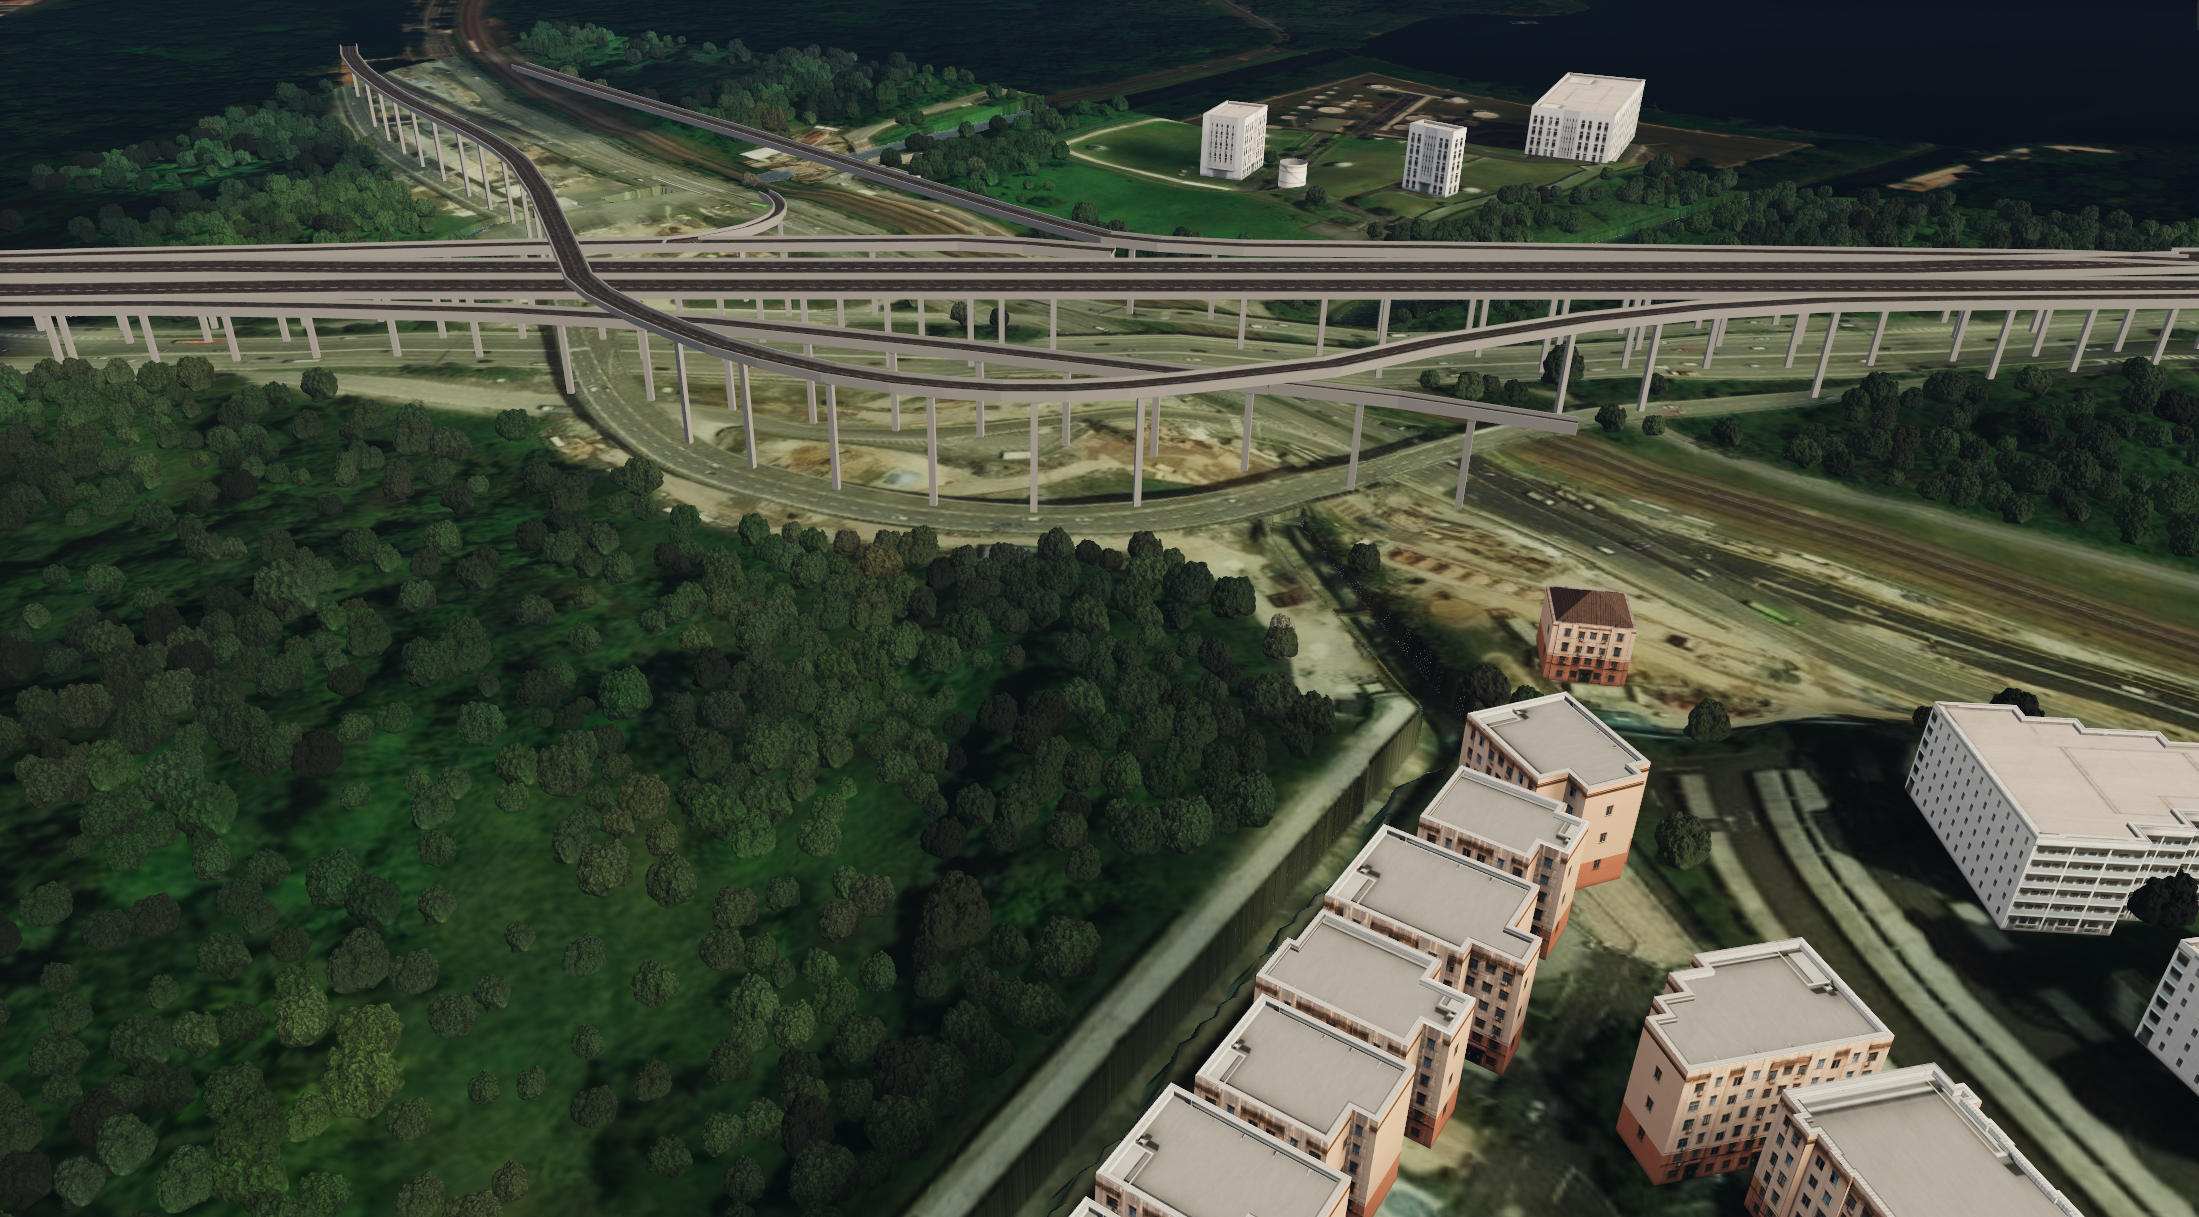
GenAnywhere is an AI-powered 3D model generation platform. By simply selecting an area on the map, it can automatically generate 3D models containing buildings, terrain, water bodies, trees, and other elements. Combining AI recognition with precise manual editing capabilities, it enables users to quickly build deliverable 3D models from map data. The generated models support import into multiple platforms and can be widely used in digital twins, GIS, game engines, BIM, and other fields, making 3D scene creation more efficient and convenient.
1. Export Models from GenAnywhere
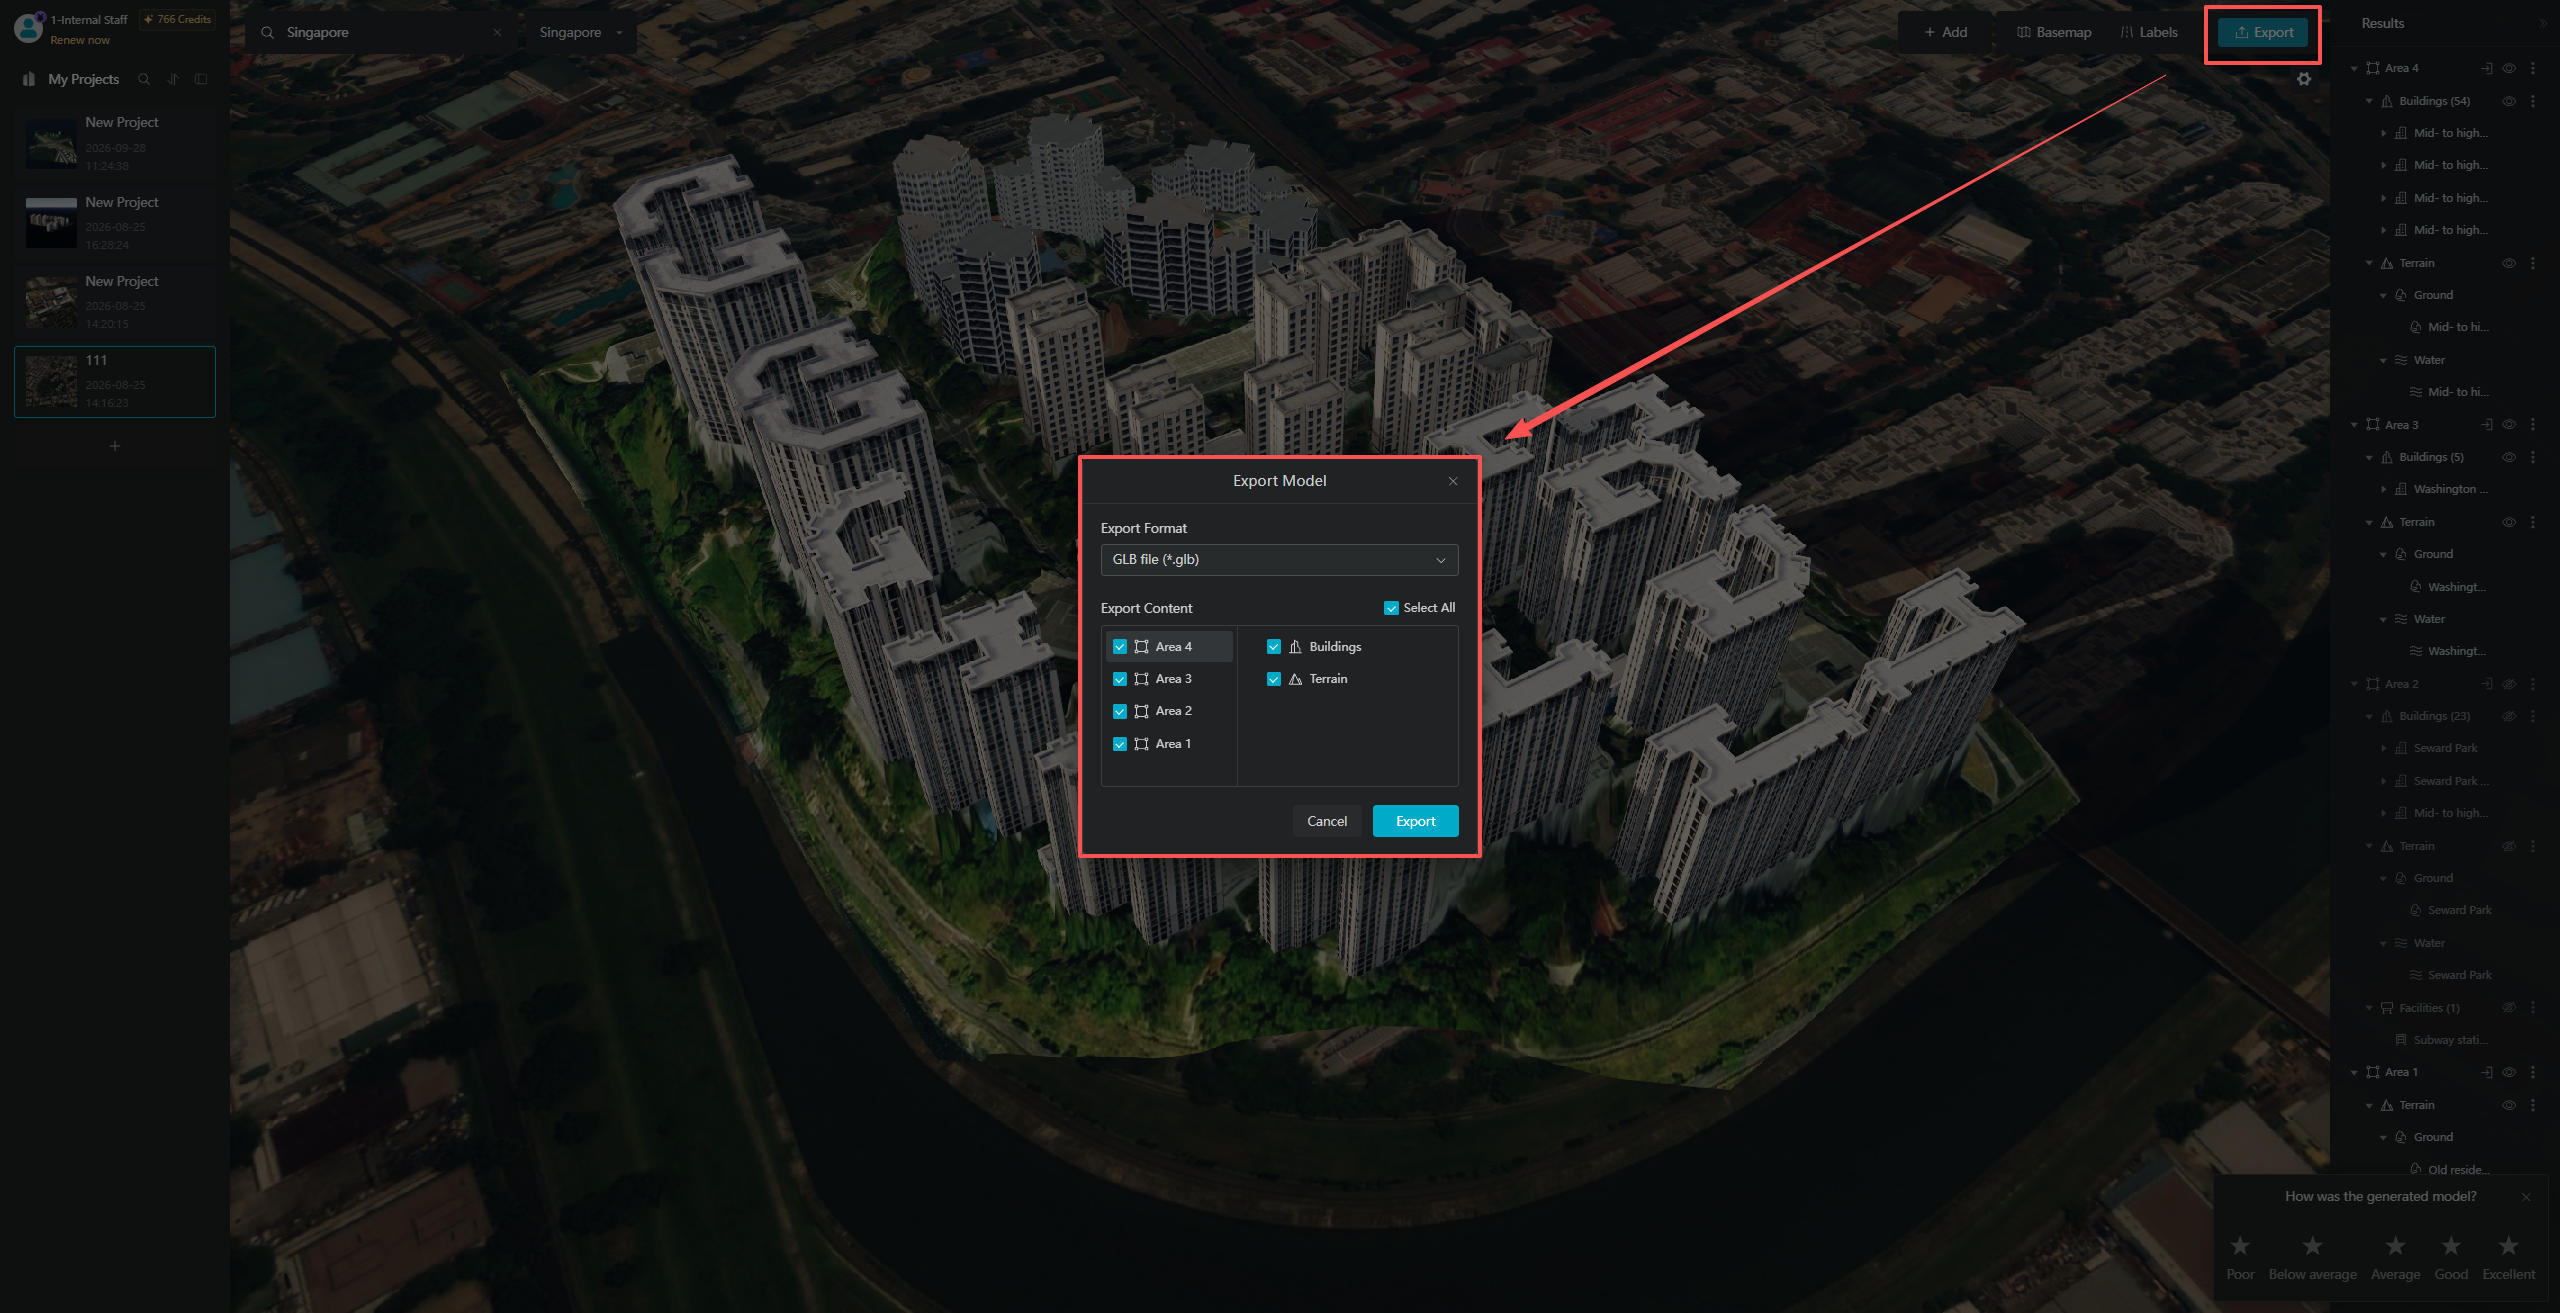
After selecting an area on the map in GenAnywhere and successfully generating a model, click the "Export Model" button at the top of the interface. In the pop-up window, you can customize the export format and select the model components you want to export. Both individual exports of single-area models and combined exports of models from multiple areas are supported.
2. Import Models into GISBox
2.1 Create a New Scene
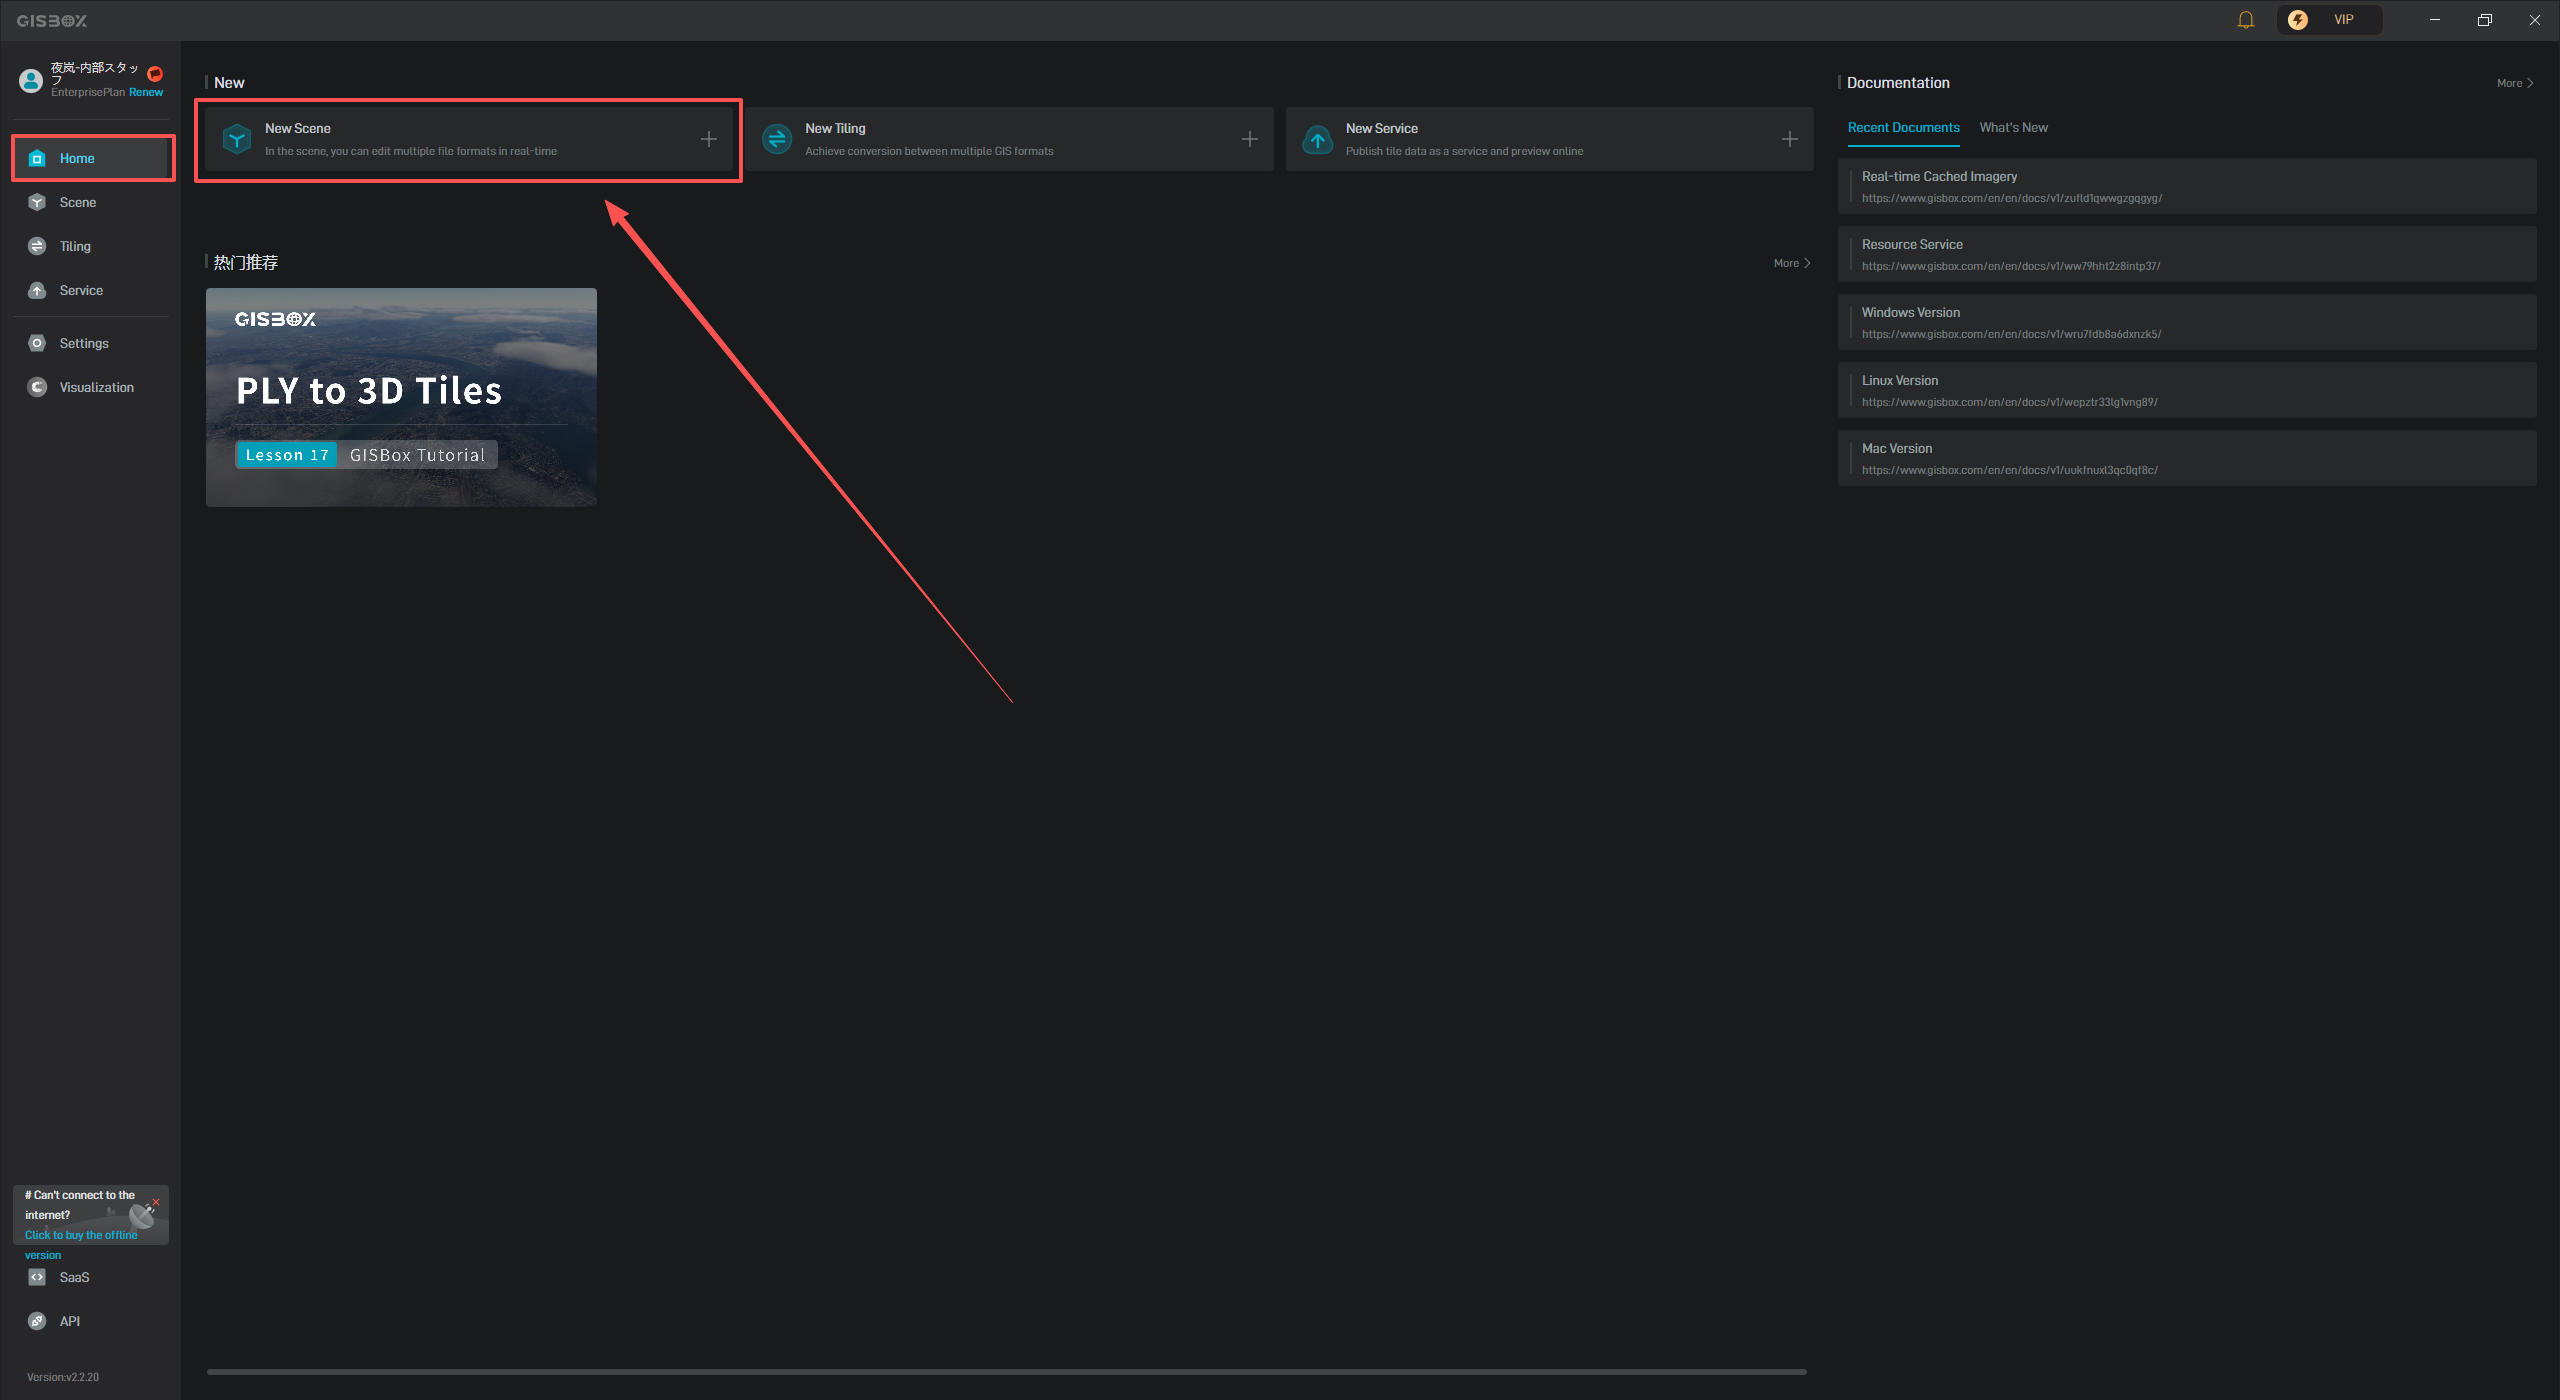
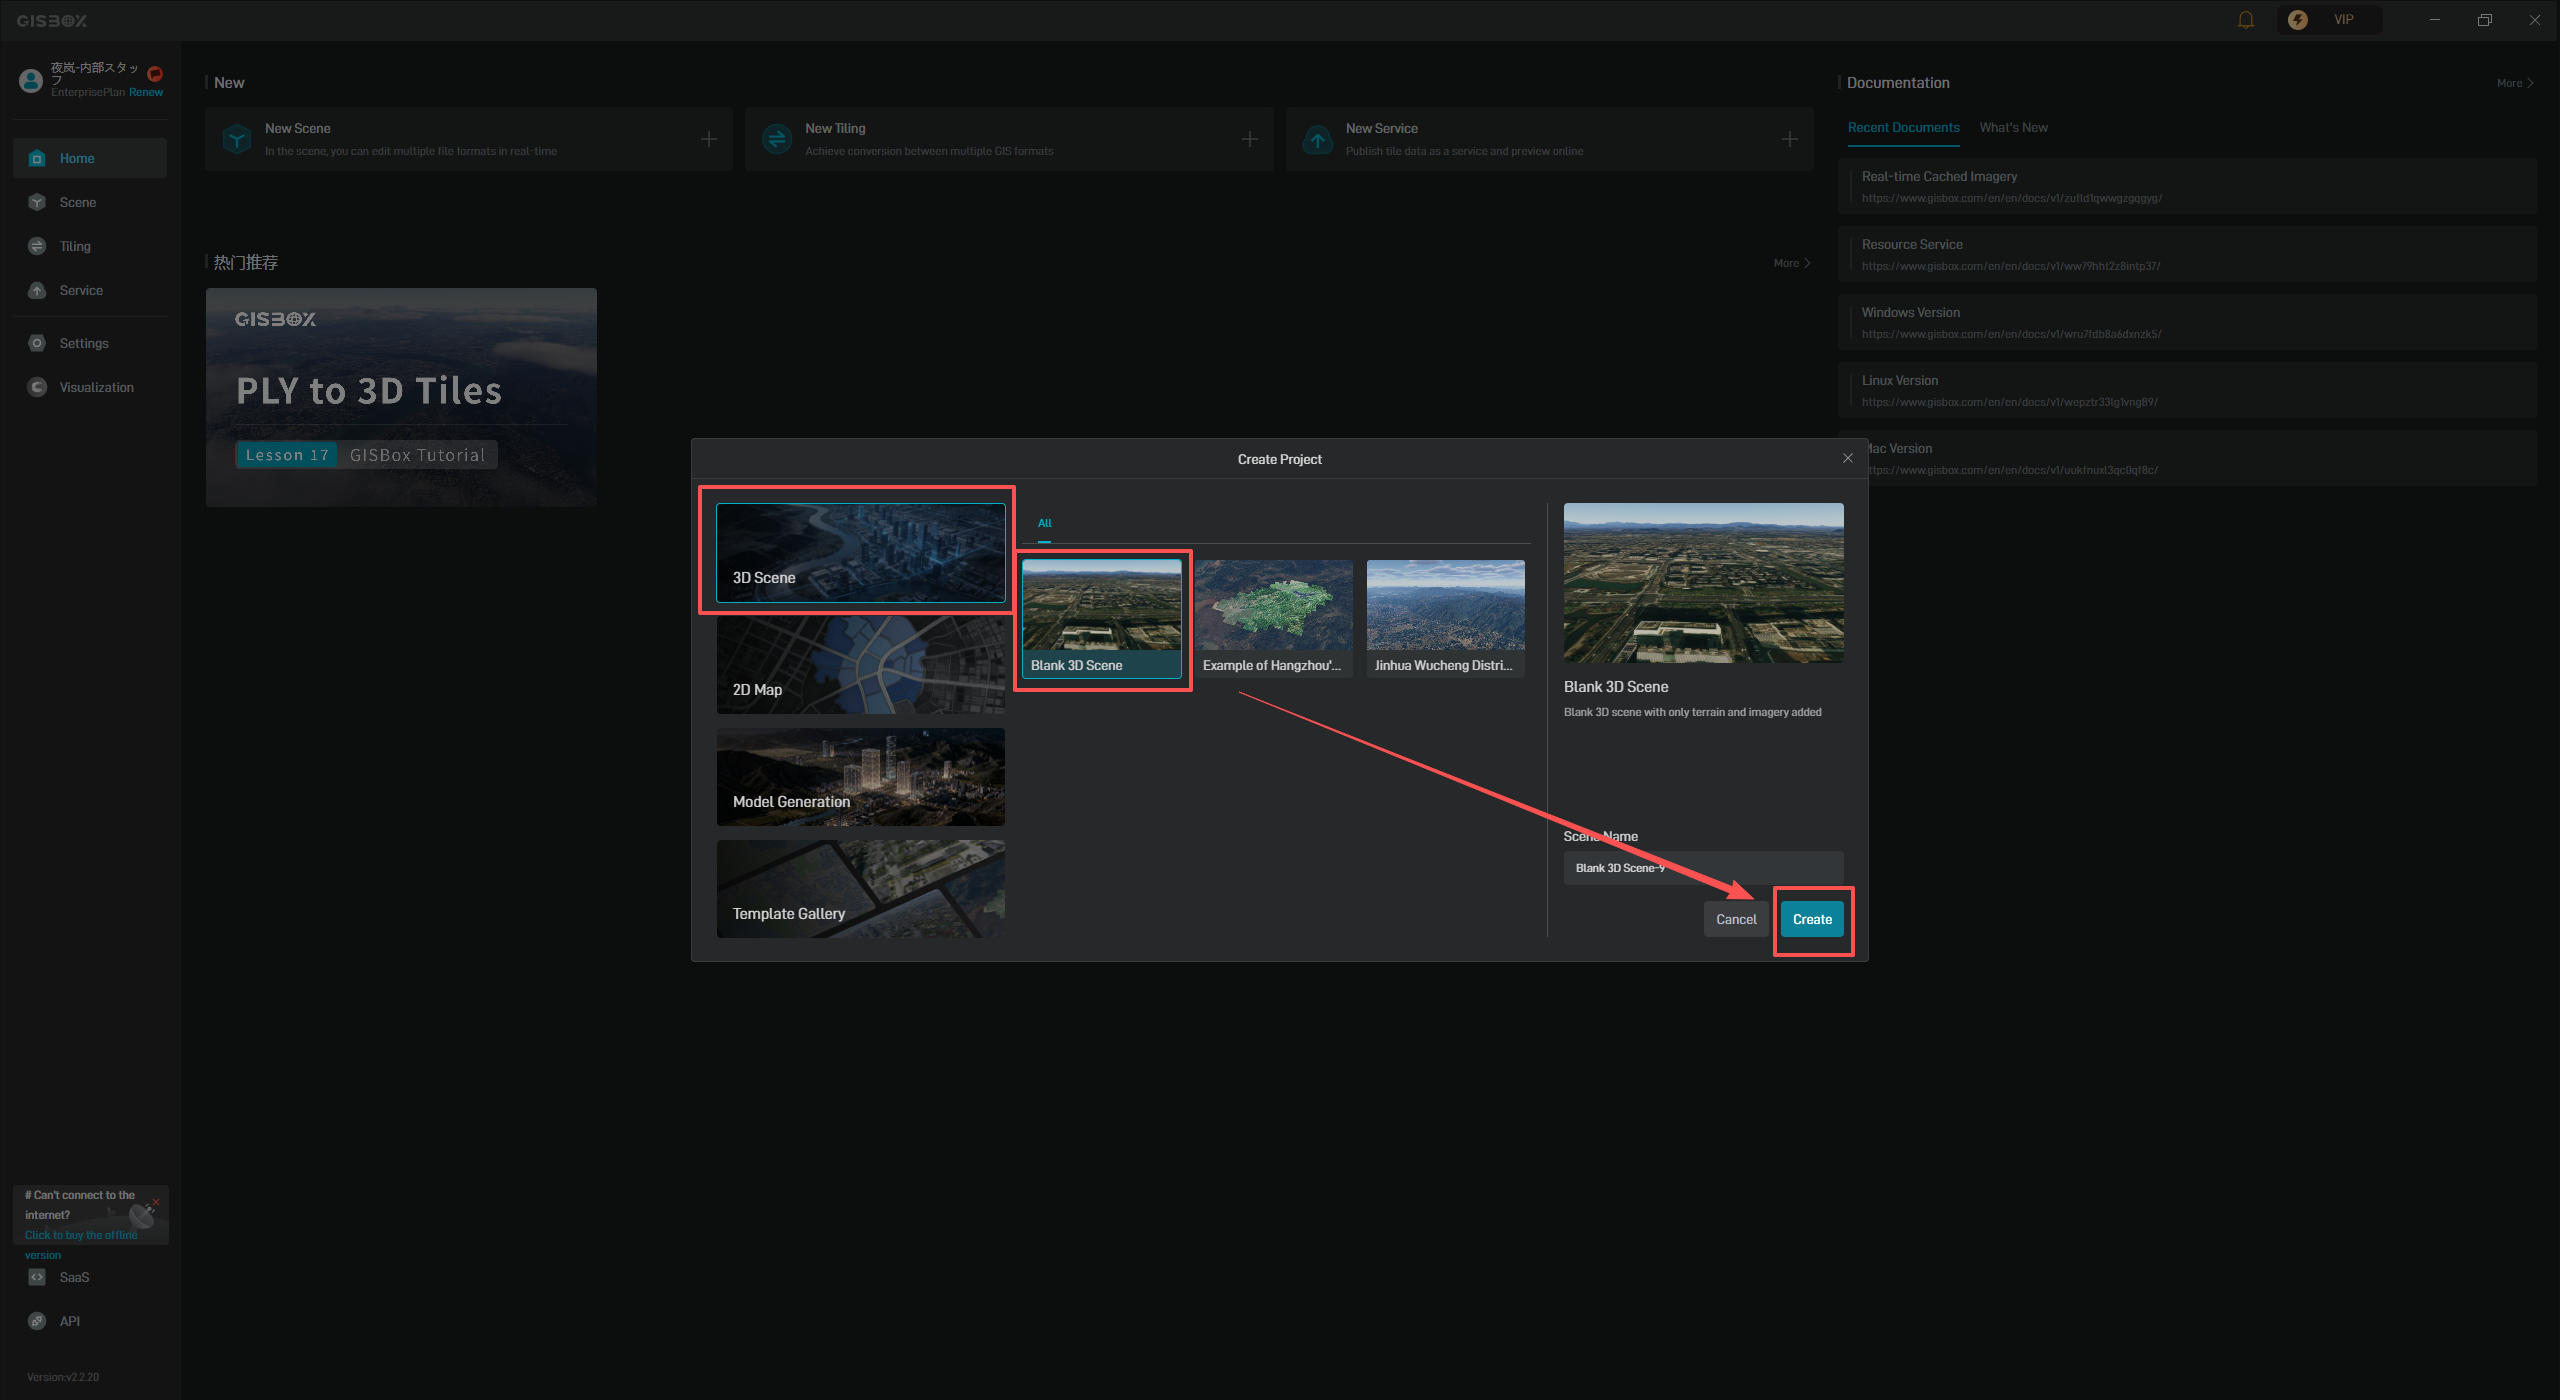
Open the GISBox software, select "Home" from the left navigation bar, and click the "New Scene" button in the corresponding interface.
After clicking the "New Scene" button, the "New Scene" pop-up window will appear. We recommend selecting the "3D Scene" category on the left (you can also choose other options as needed), then selecting "Blank 3D Scene" and clicking "Confirm" to open the scene.
2.2 Import Models
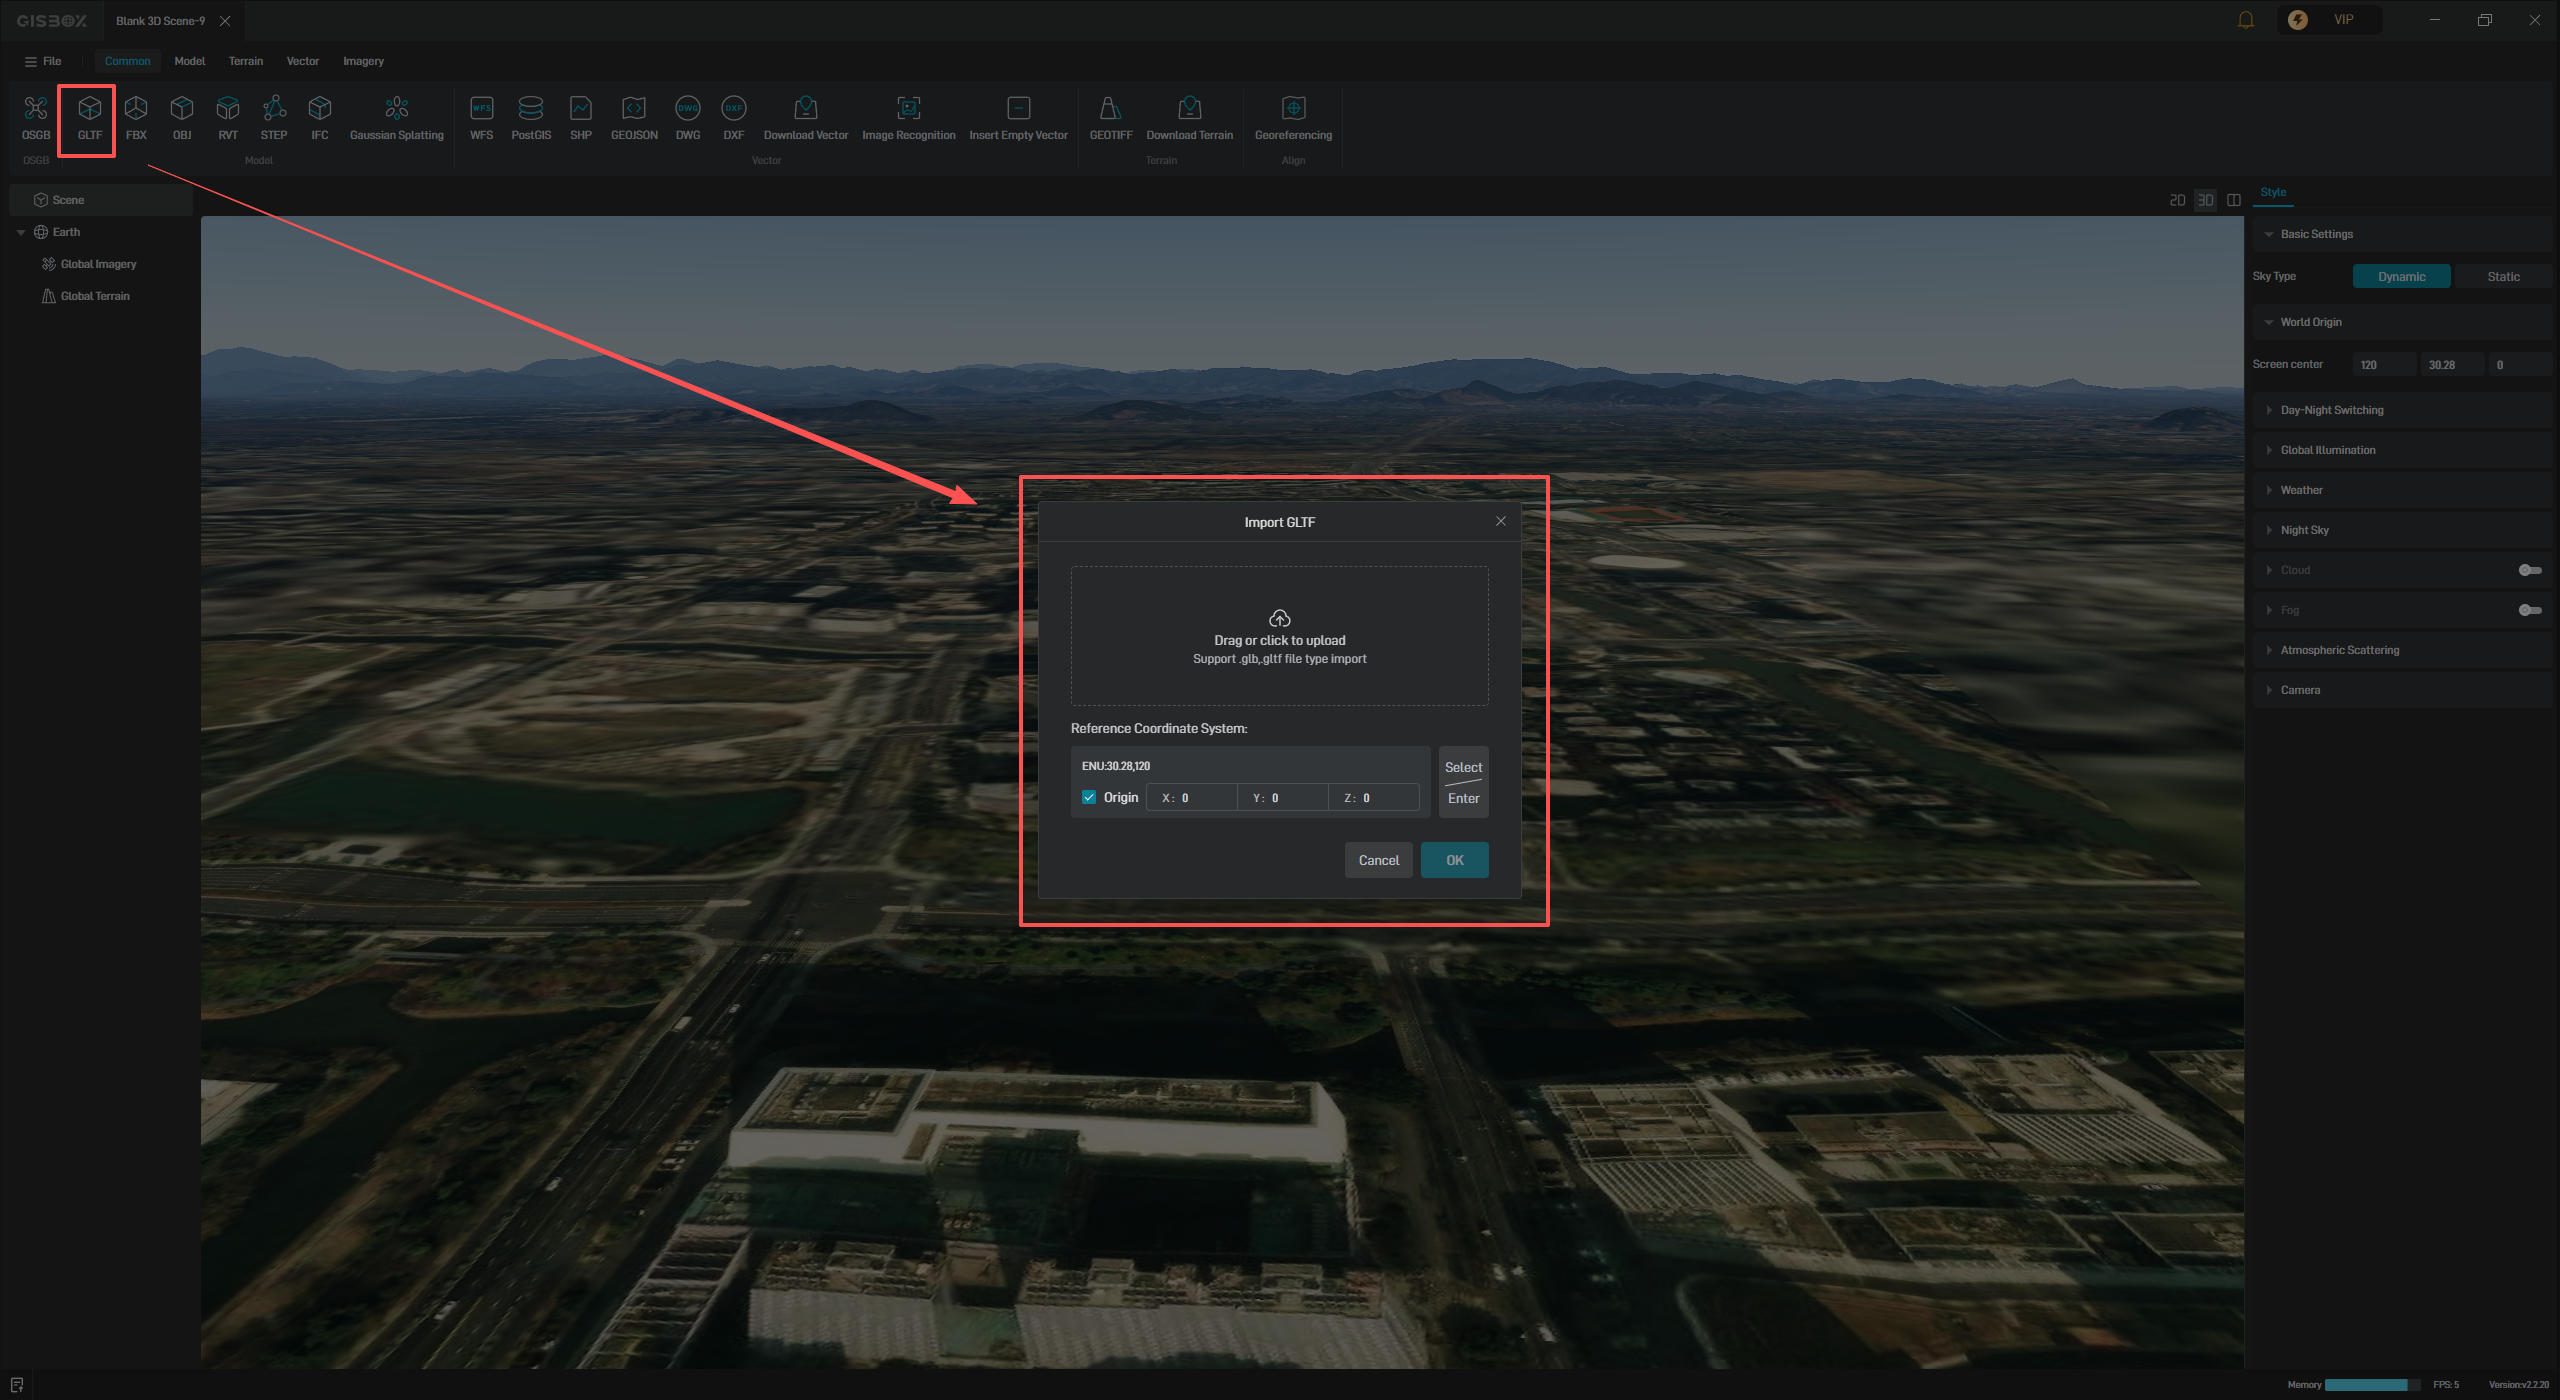
After entering the scene, click the "GLTF" icon in the top toolbar. In the pop-up window, select a local file to import the model.
[Note] The "GLTF" option supports both "GLTF" and "GLB" files.
2.3 Copy Coordinates
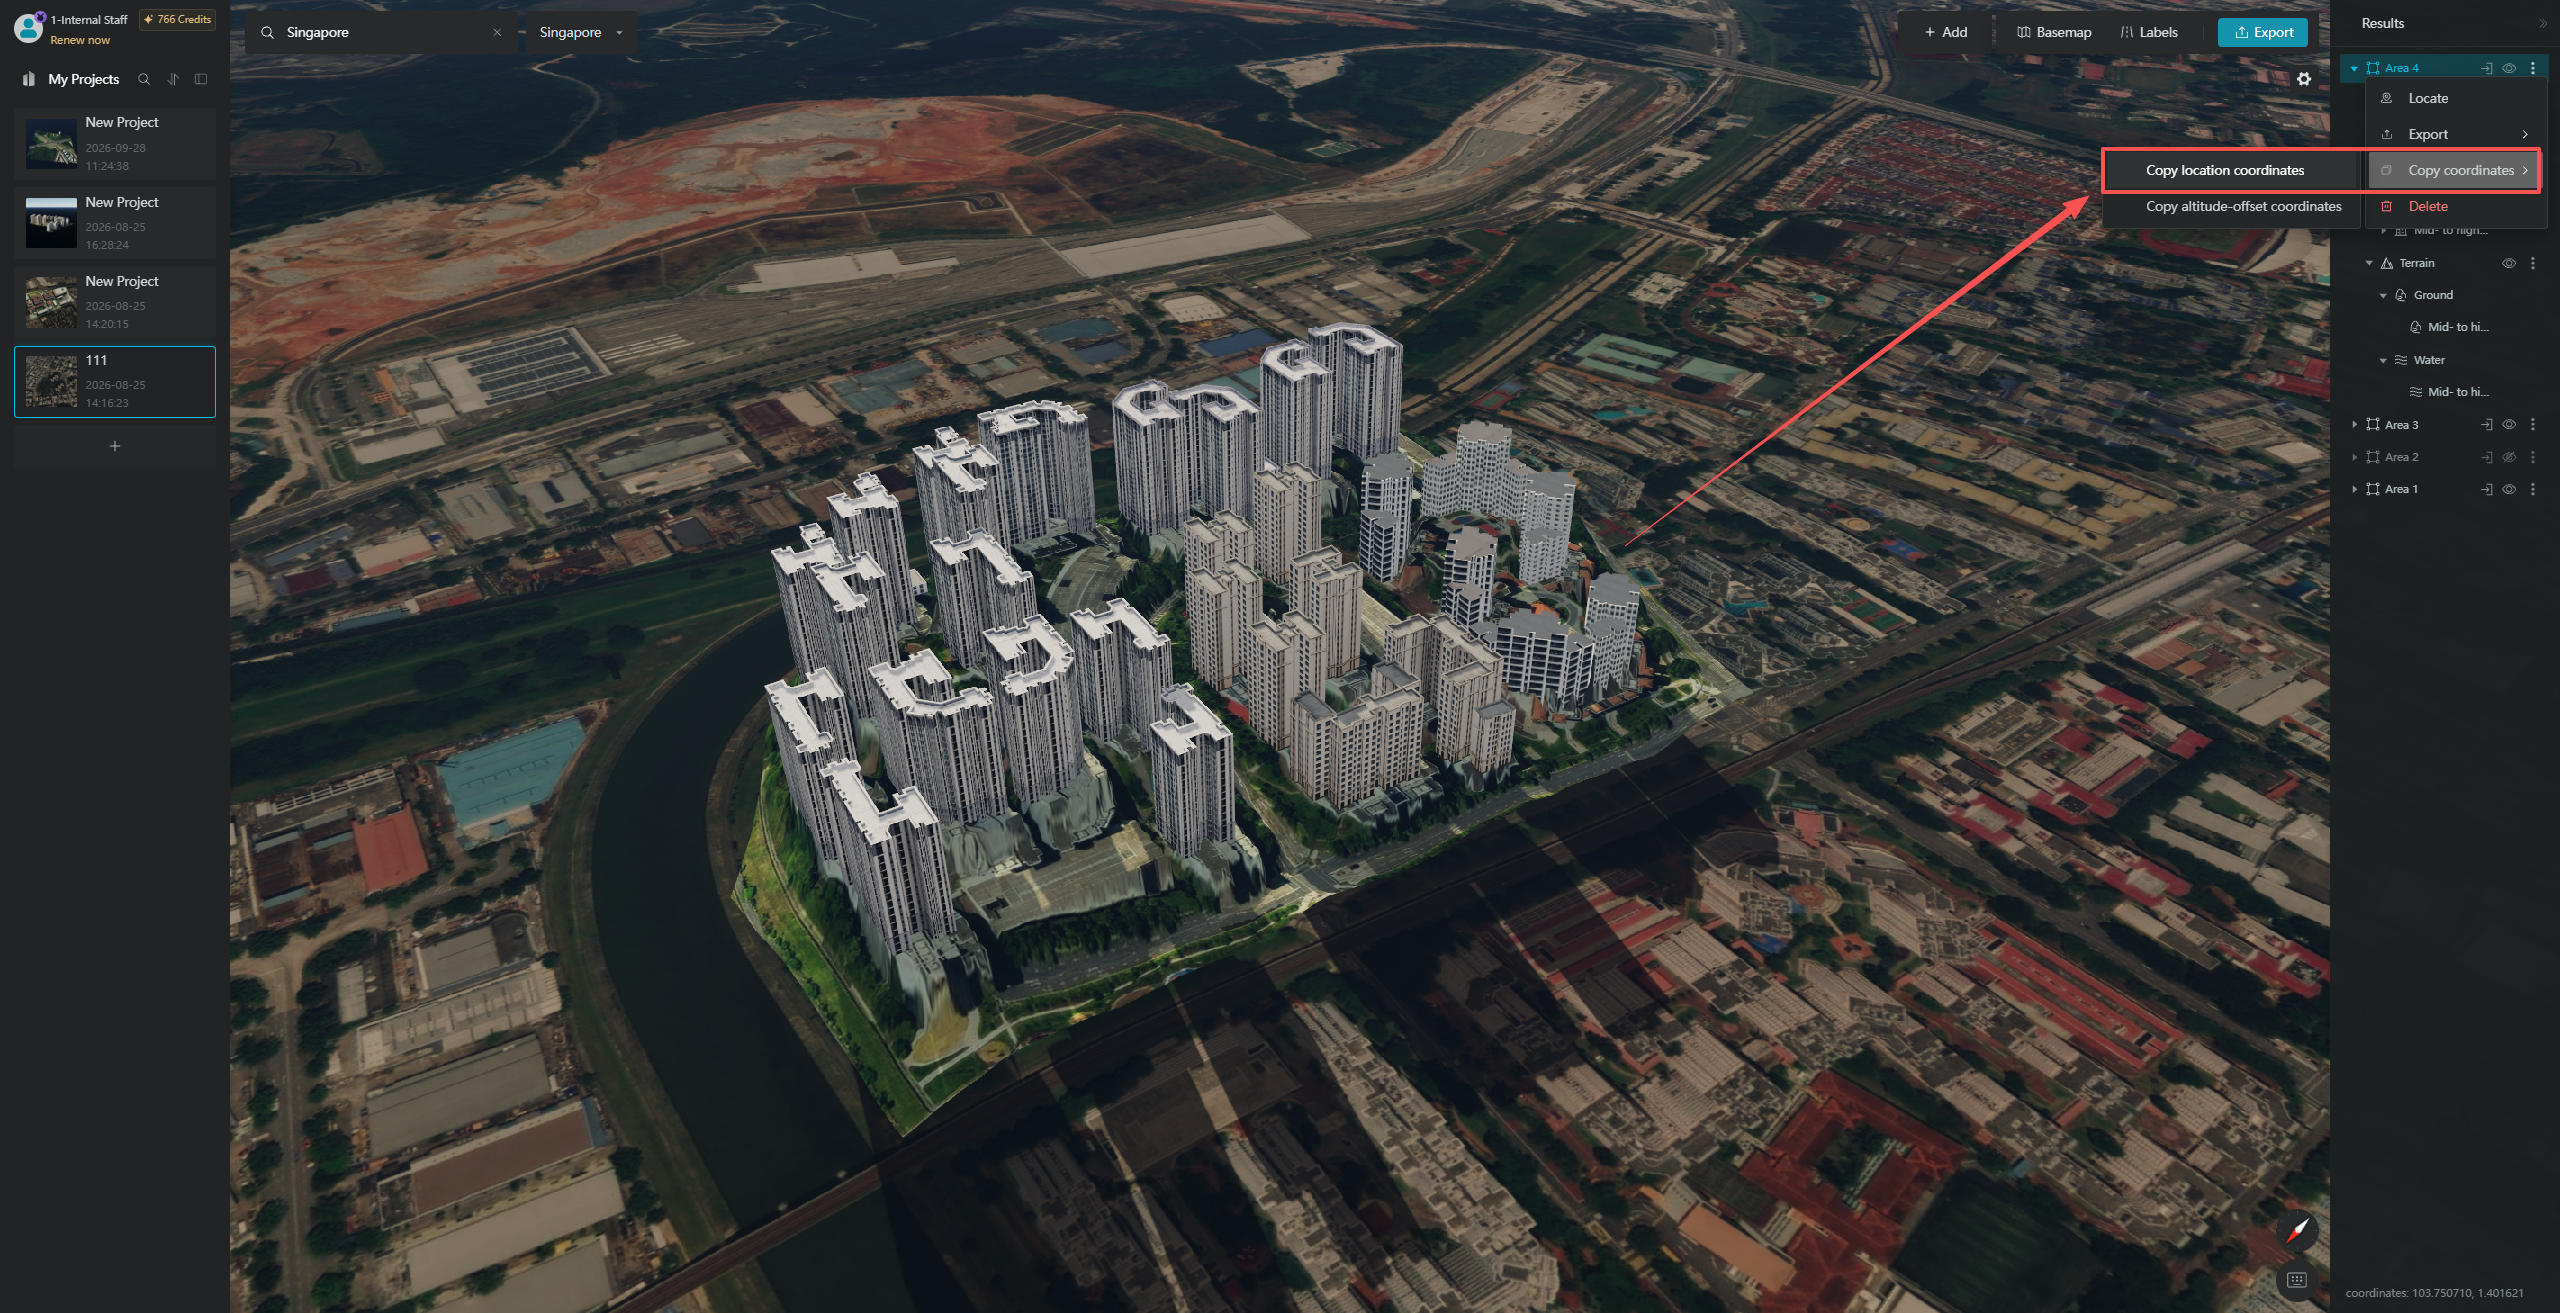
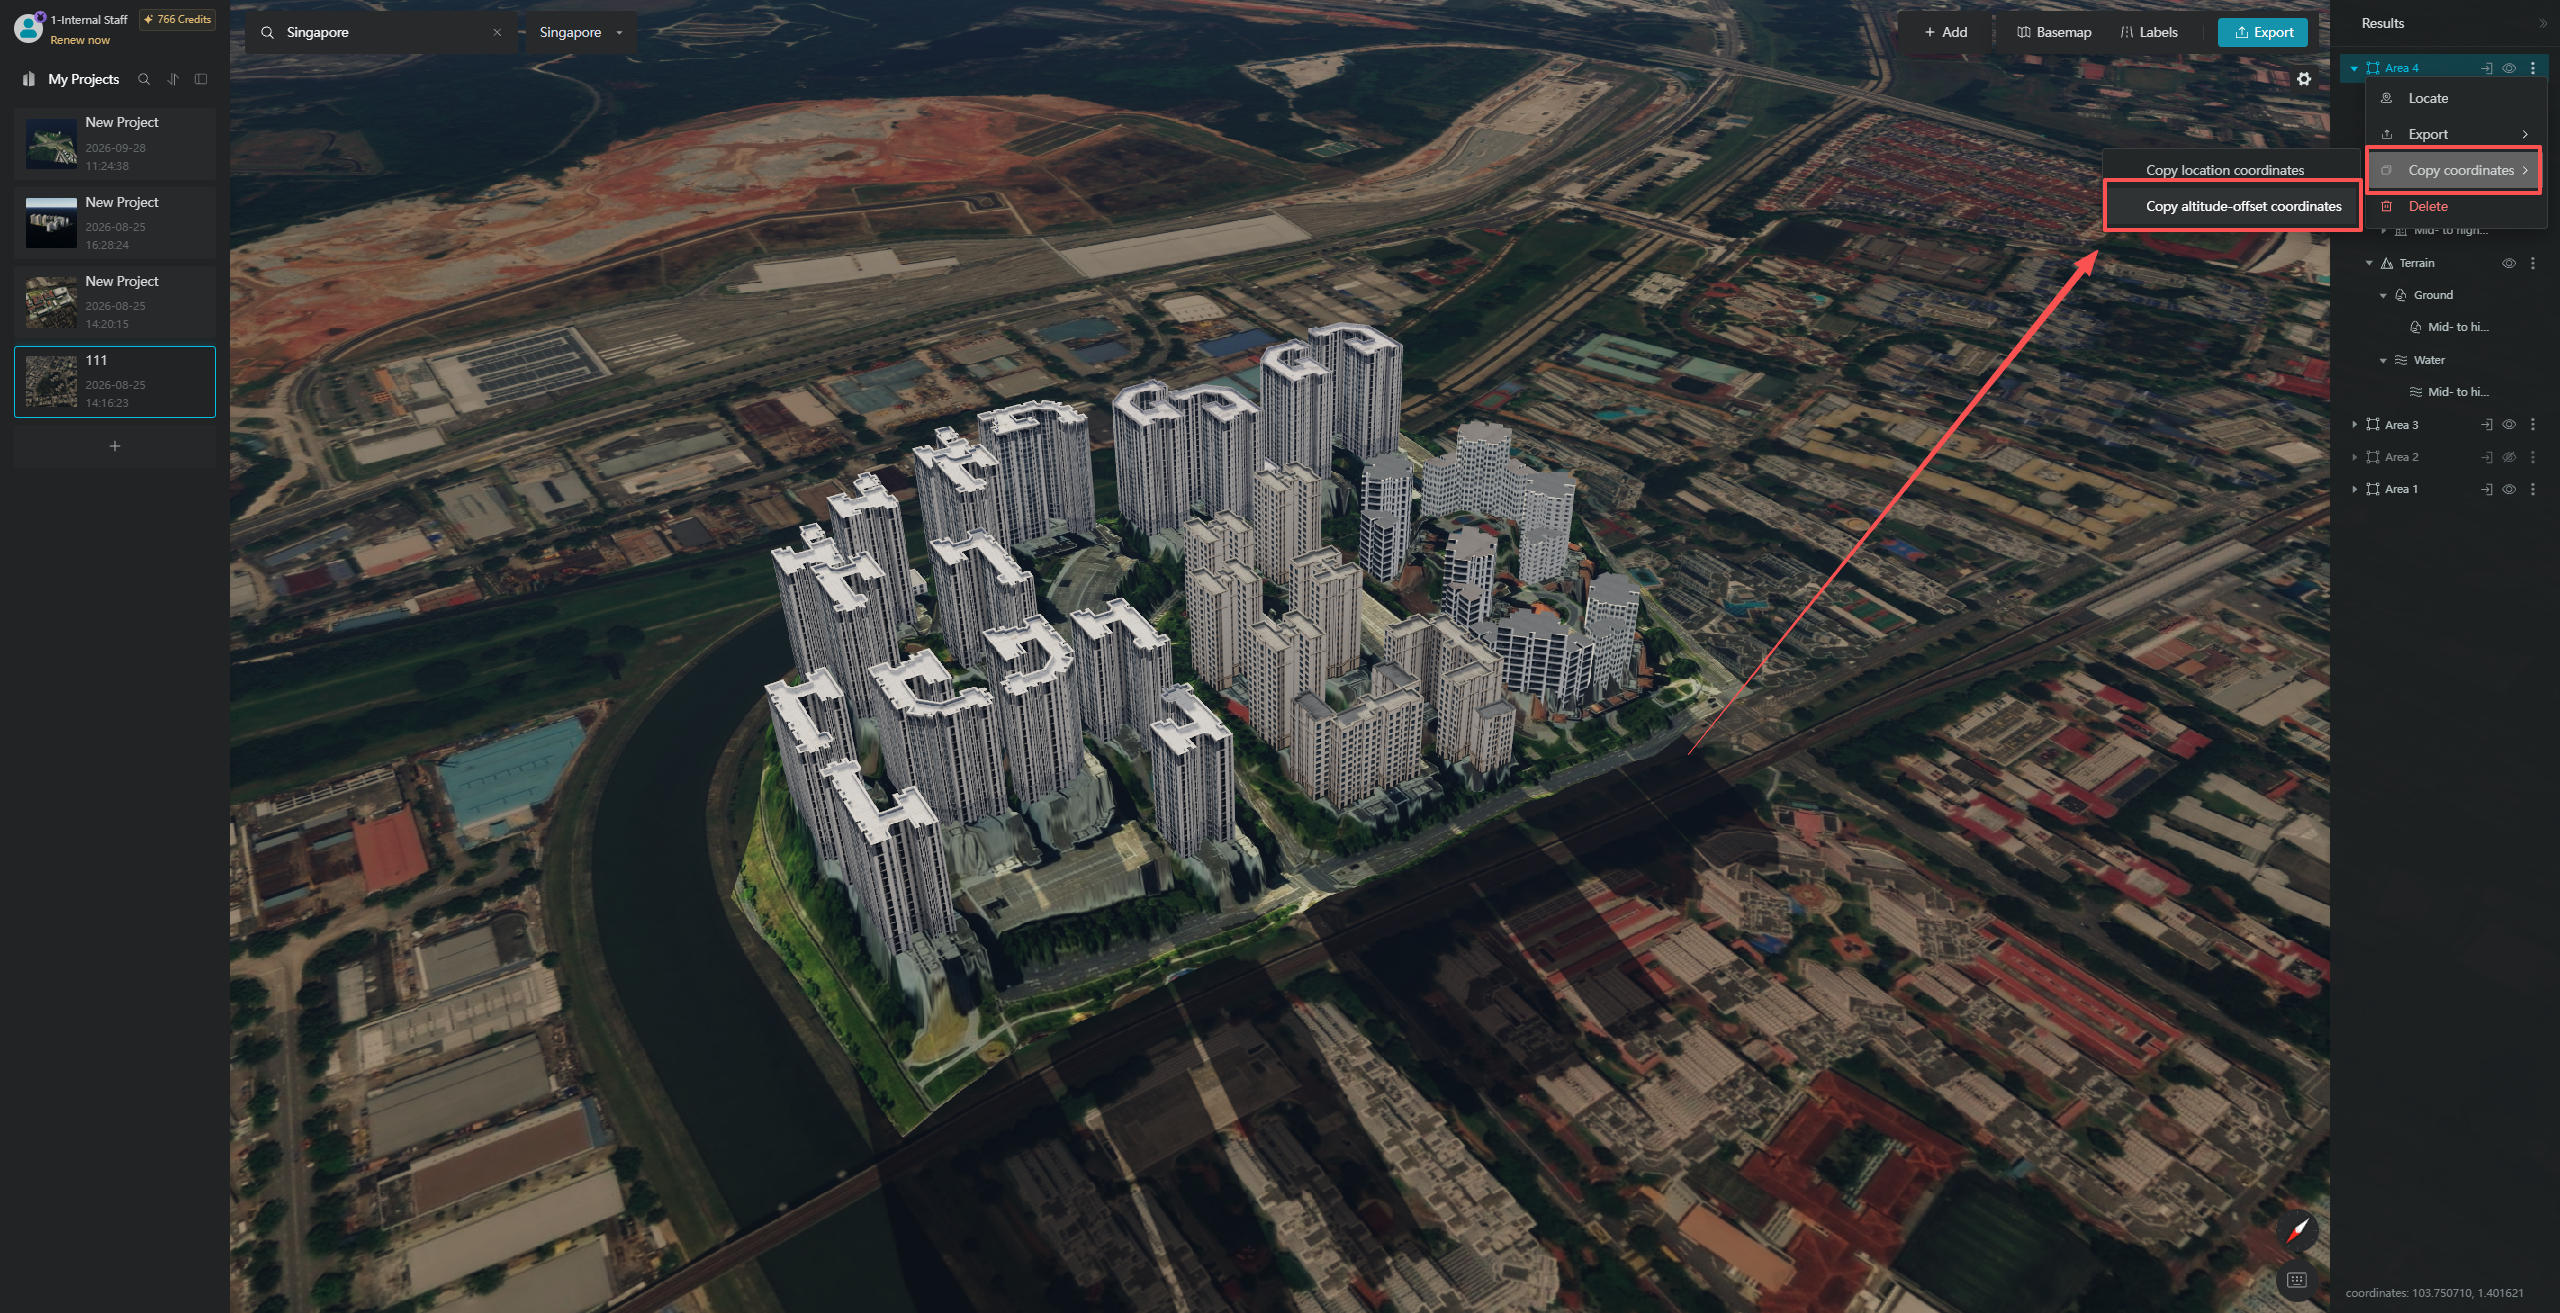
If you need to align the imported model with its actual location on the map, right-click the "Selected Area" layer corresponding to the model in GenAnywhere. In the pop-up menu, select "Copy Coordinates".
You will see two sub-options under "Copy Coordinates". If you only need to position the model at the corresponding location on the map, click "Copy Original Coordinates". This option copies the horizontal coordinate information of the model's location.
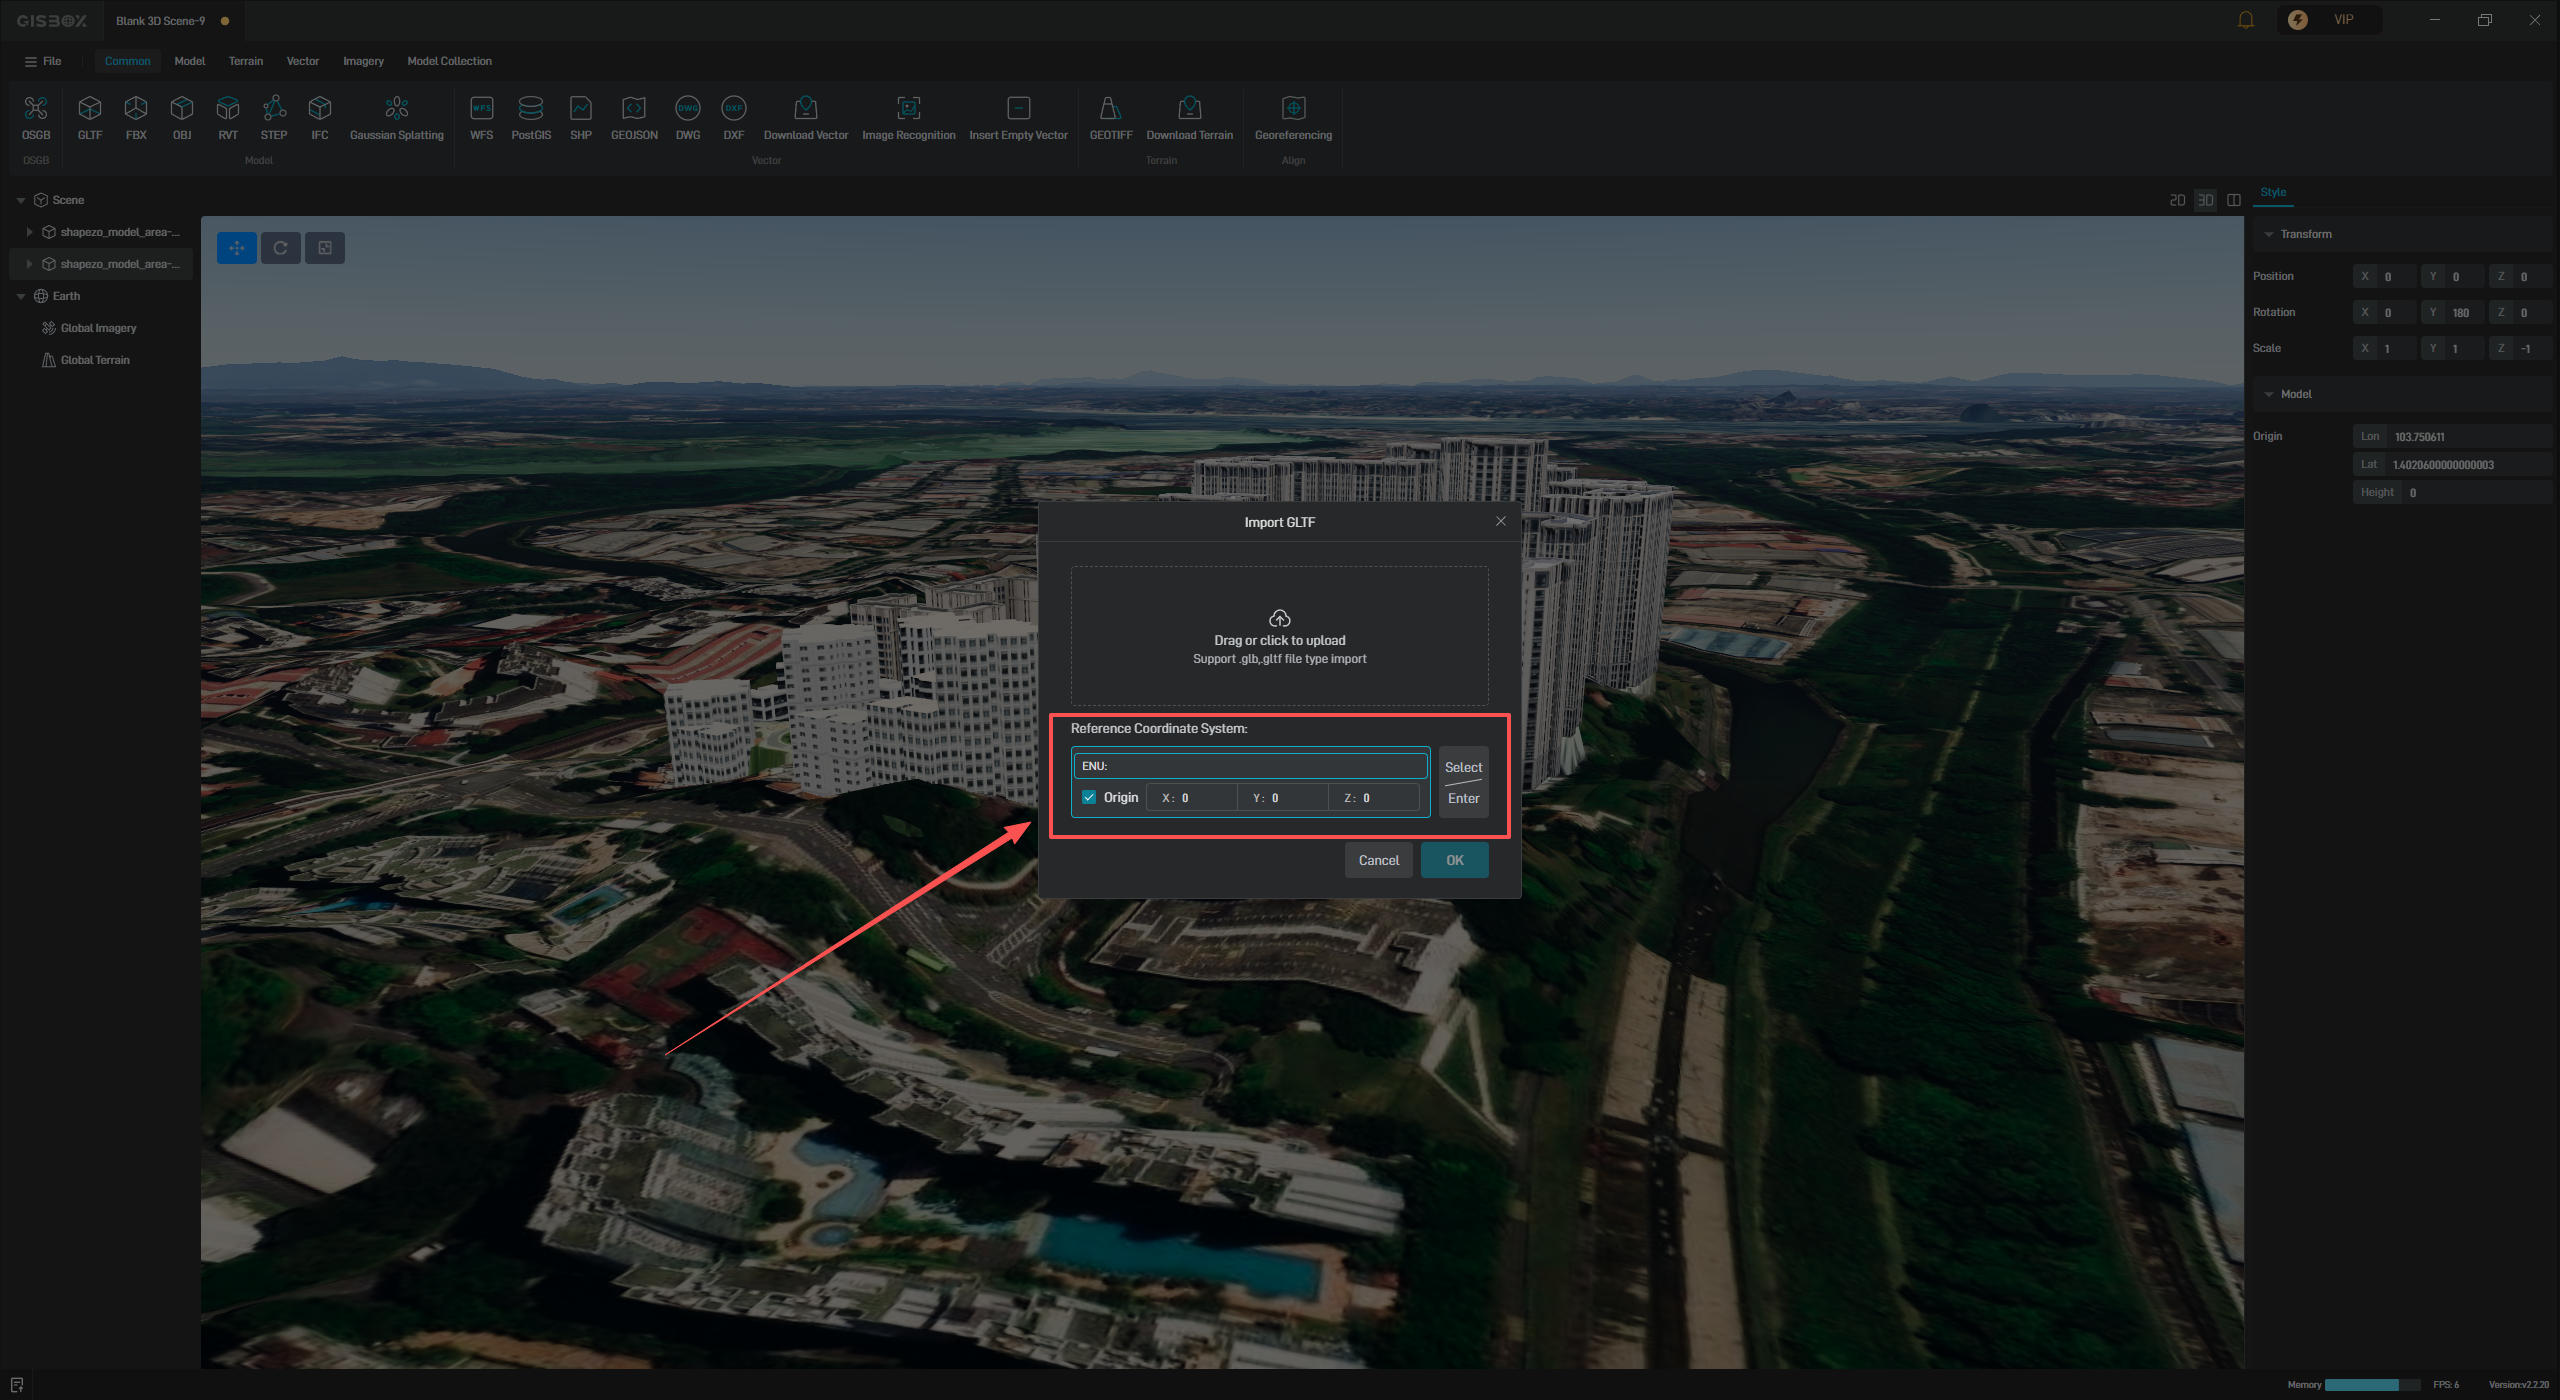
Then return to GISBox and enter the corresponding coordinate information in the coordinate system settings of the "Import Model" pop-up window.
[Note] The coordinate format required here is ENU:latitude,longitude, while the coordinate format copied from GenAnywhere is ENU:longitude,latitude. Make sure to enter the longitude and latitude in the correct order.
2.4 Align Elevation
If you need to align the model precisely with its actual geographic location and elevation, select "Copy Elevation Offset Coordinates" from the sub-options under "Copy Coordinates" to copy the elevation offset data.
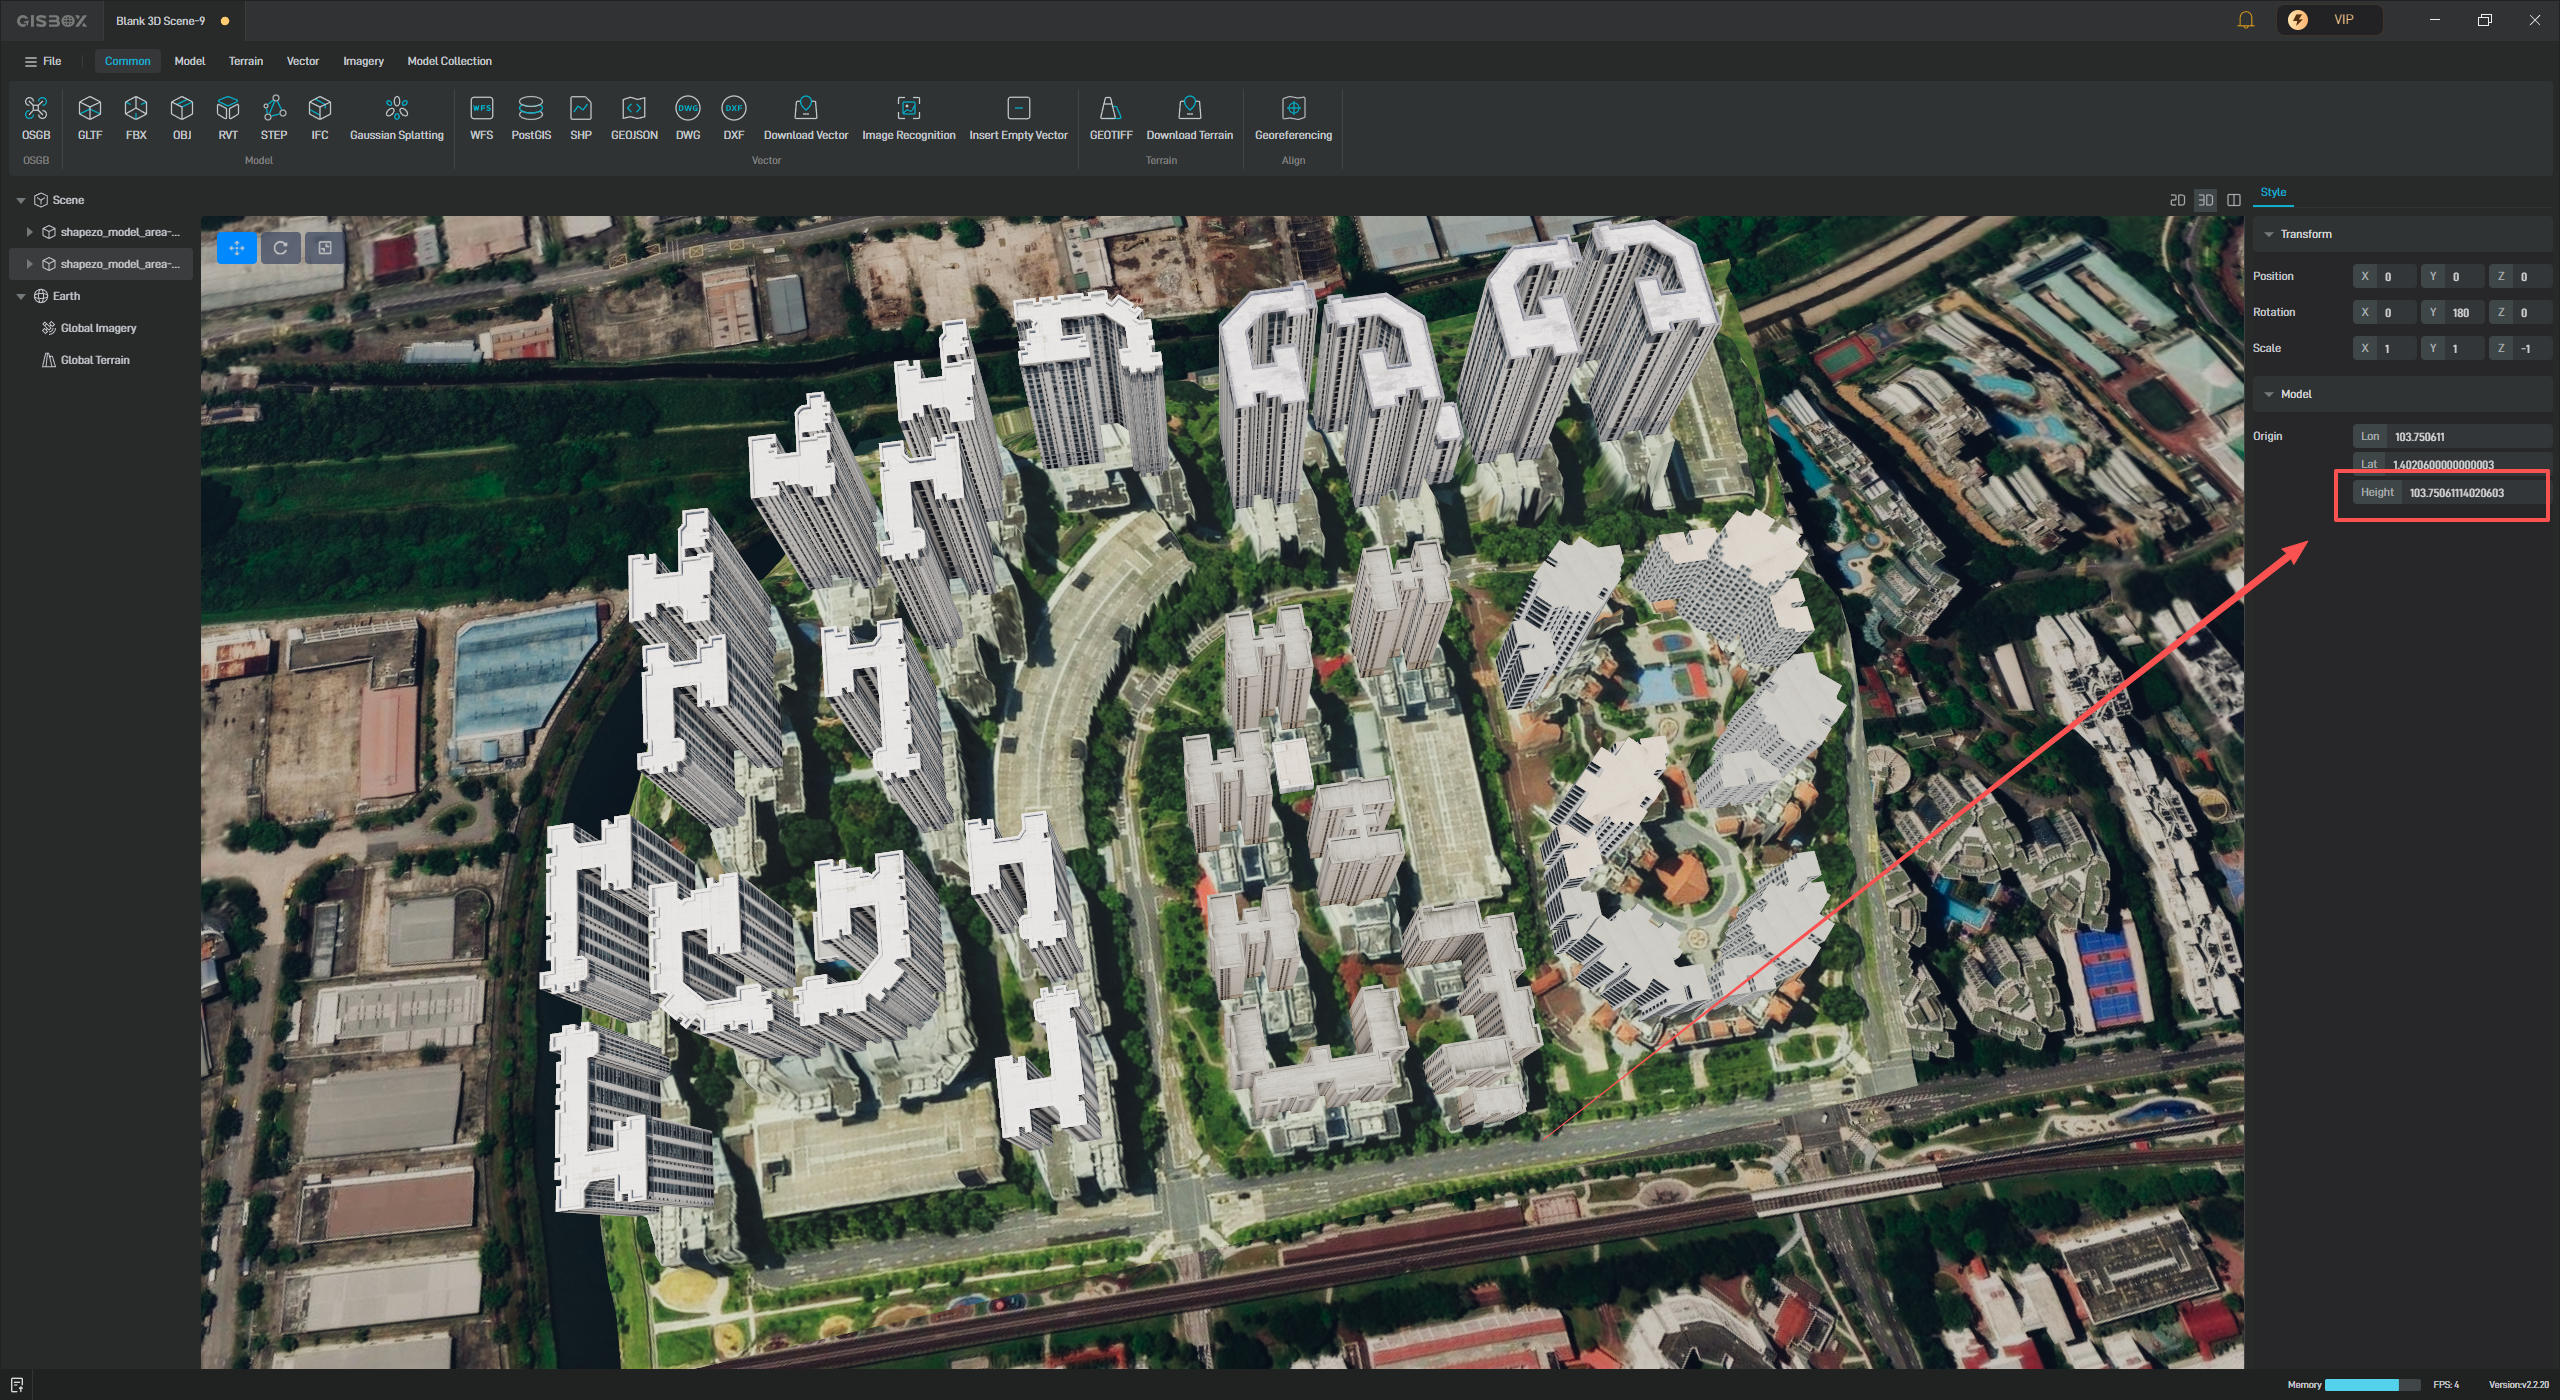
Then return to GISBox and paste the elevation data into the Height field in the style panel on the right to complete the alignment.