How to Import Pipeline Data
GenAnywhere is an AI-powered 3D modeling tool that allows users to generate 3D building scenes simply by selecting an area on a map, without the need for aerial photography. It streamlines BIM modeling and provides an efficient alternative to traditional oblique photography modeling.
In the previous advanced tutorial, we covered how to import vector data into GenAnywhere and generate building models with one click. The vector data included building footprints and area boundaries.
This tutorial will focus on how to import pipeline data into GenAnywhere.
1. Importing Pipeline Data
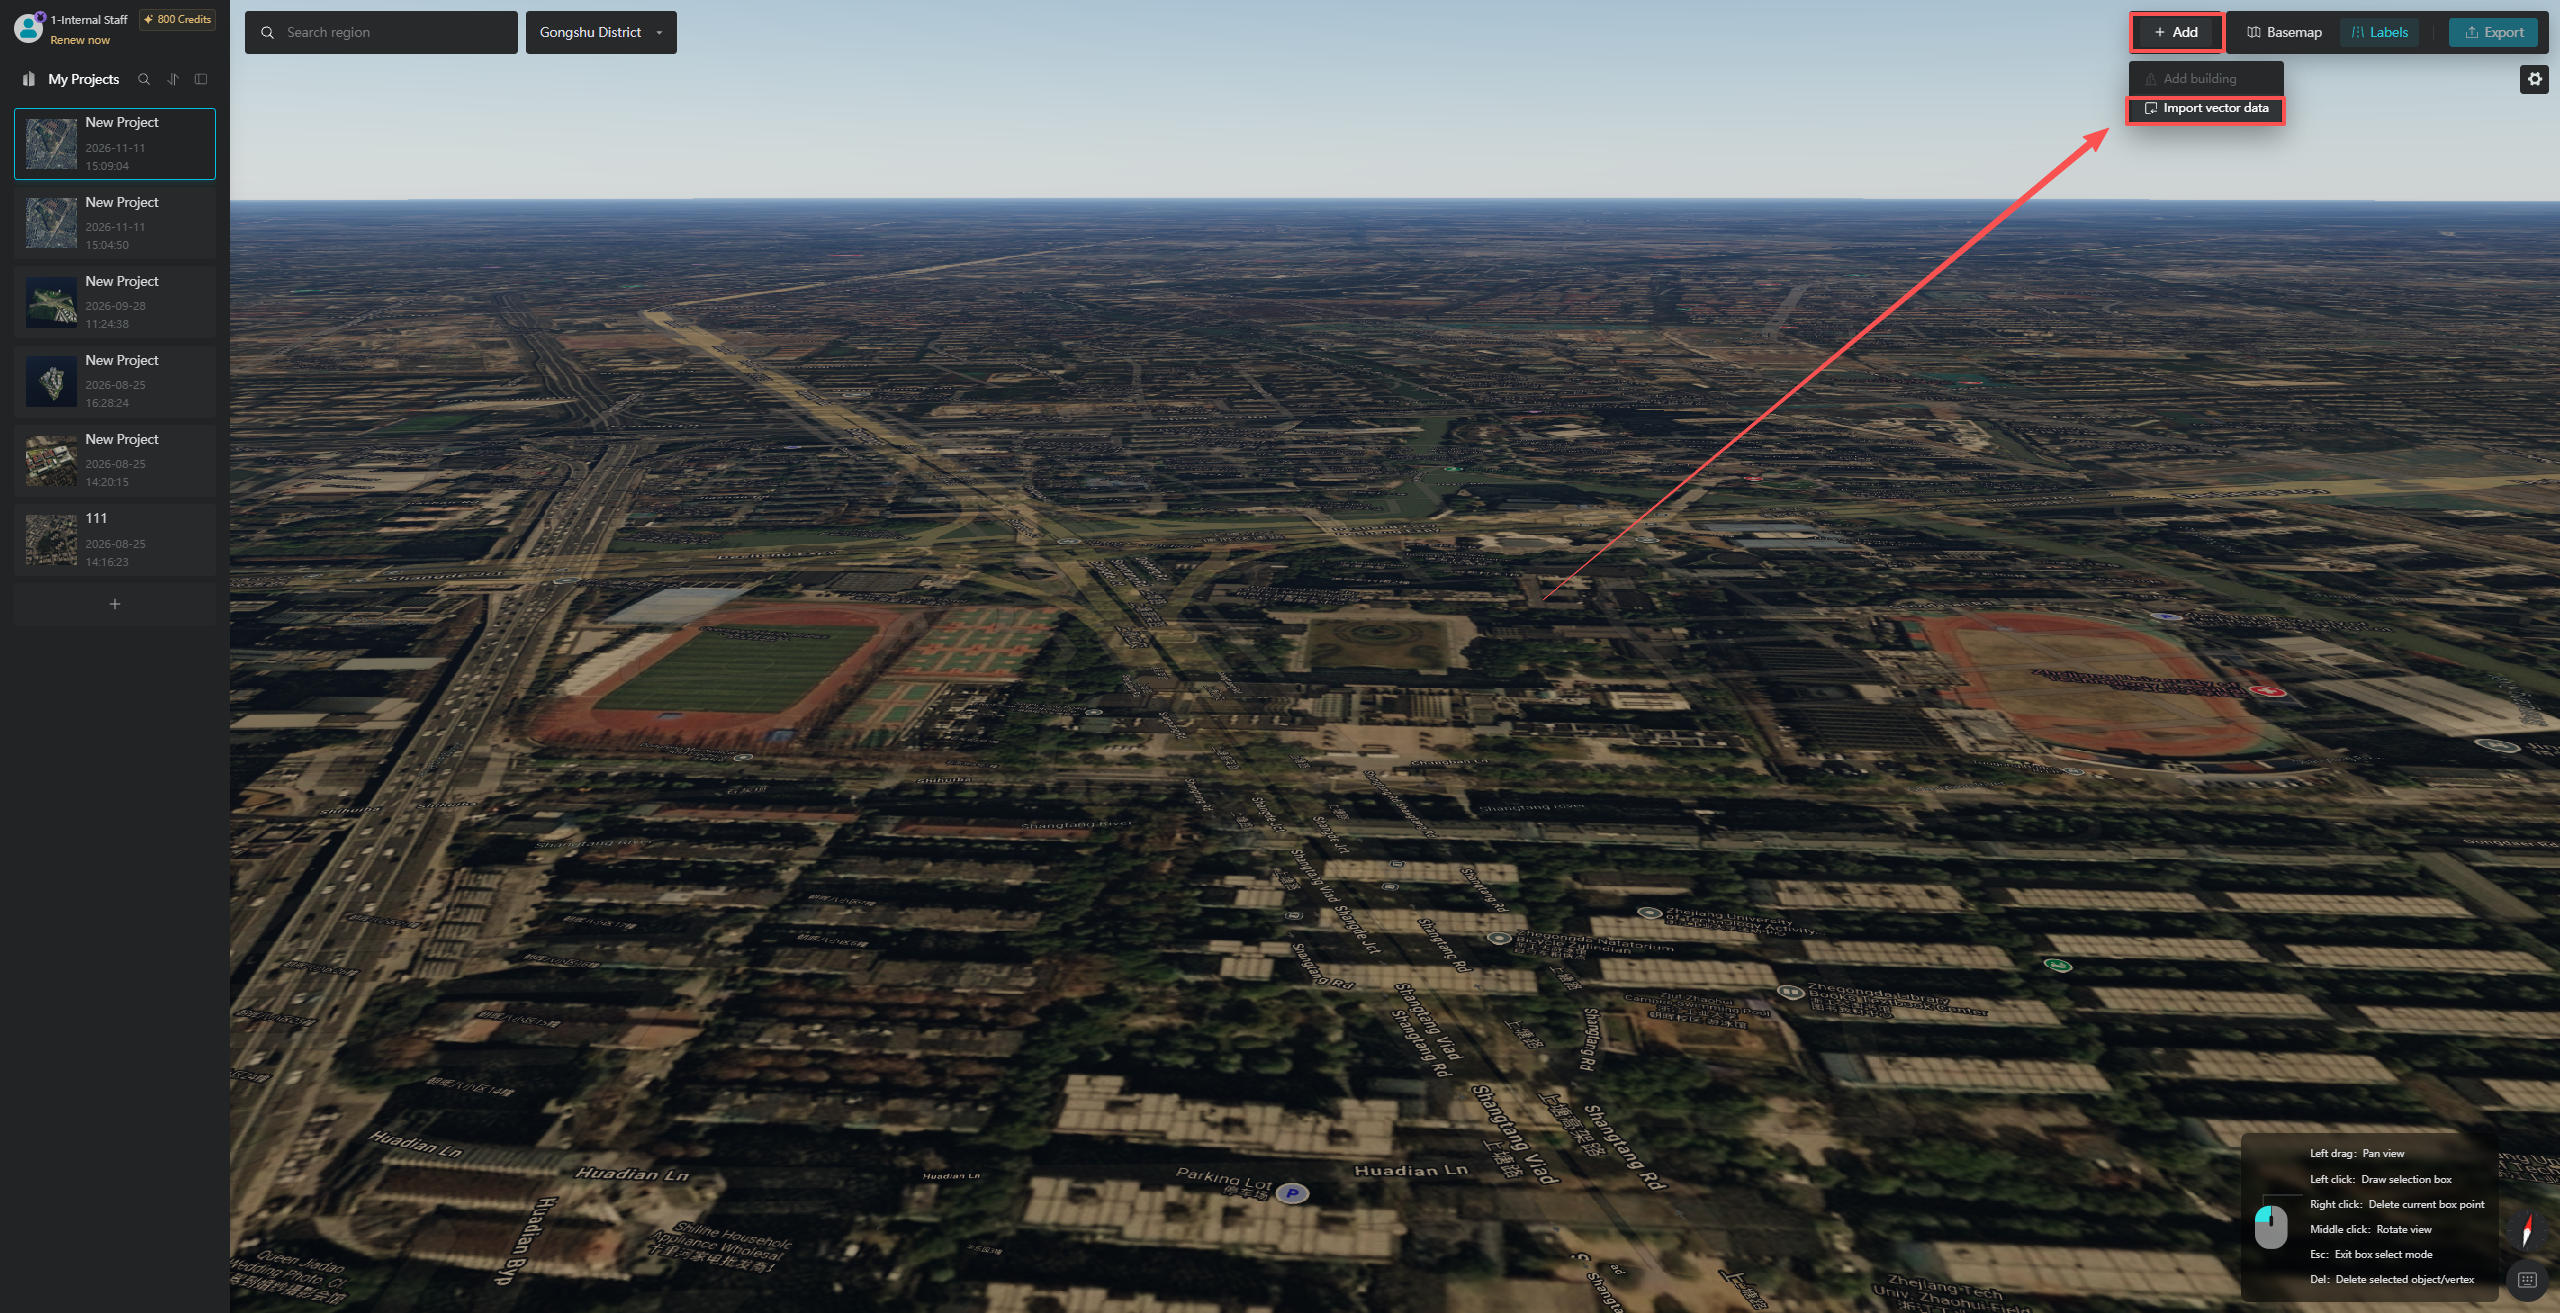
After creating a new project in GenAnywhere, click the "Add" button in the top toolbar, then select "Import Vector Data" from the dropdown menu.
Next, locate the "Pipeline Data" module in the settings panel on the right side of the "Import Pipeline Data" window.
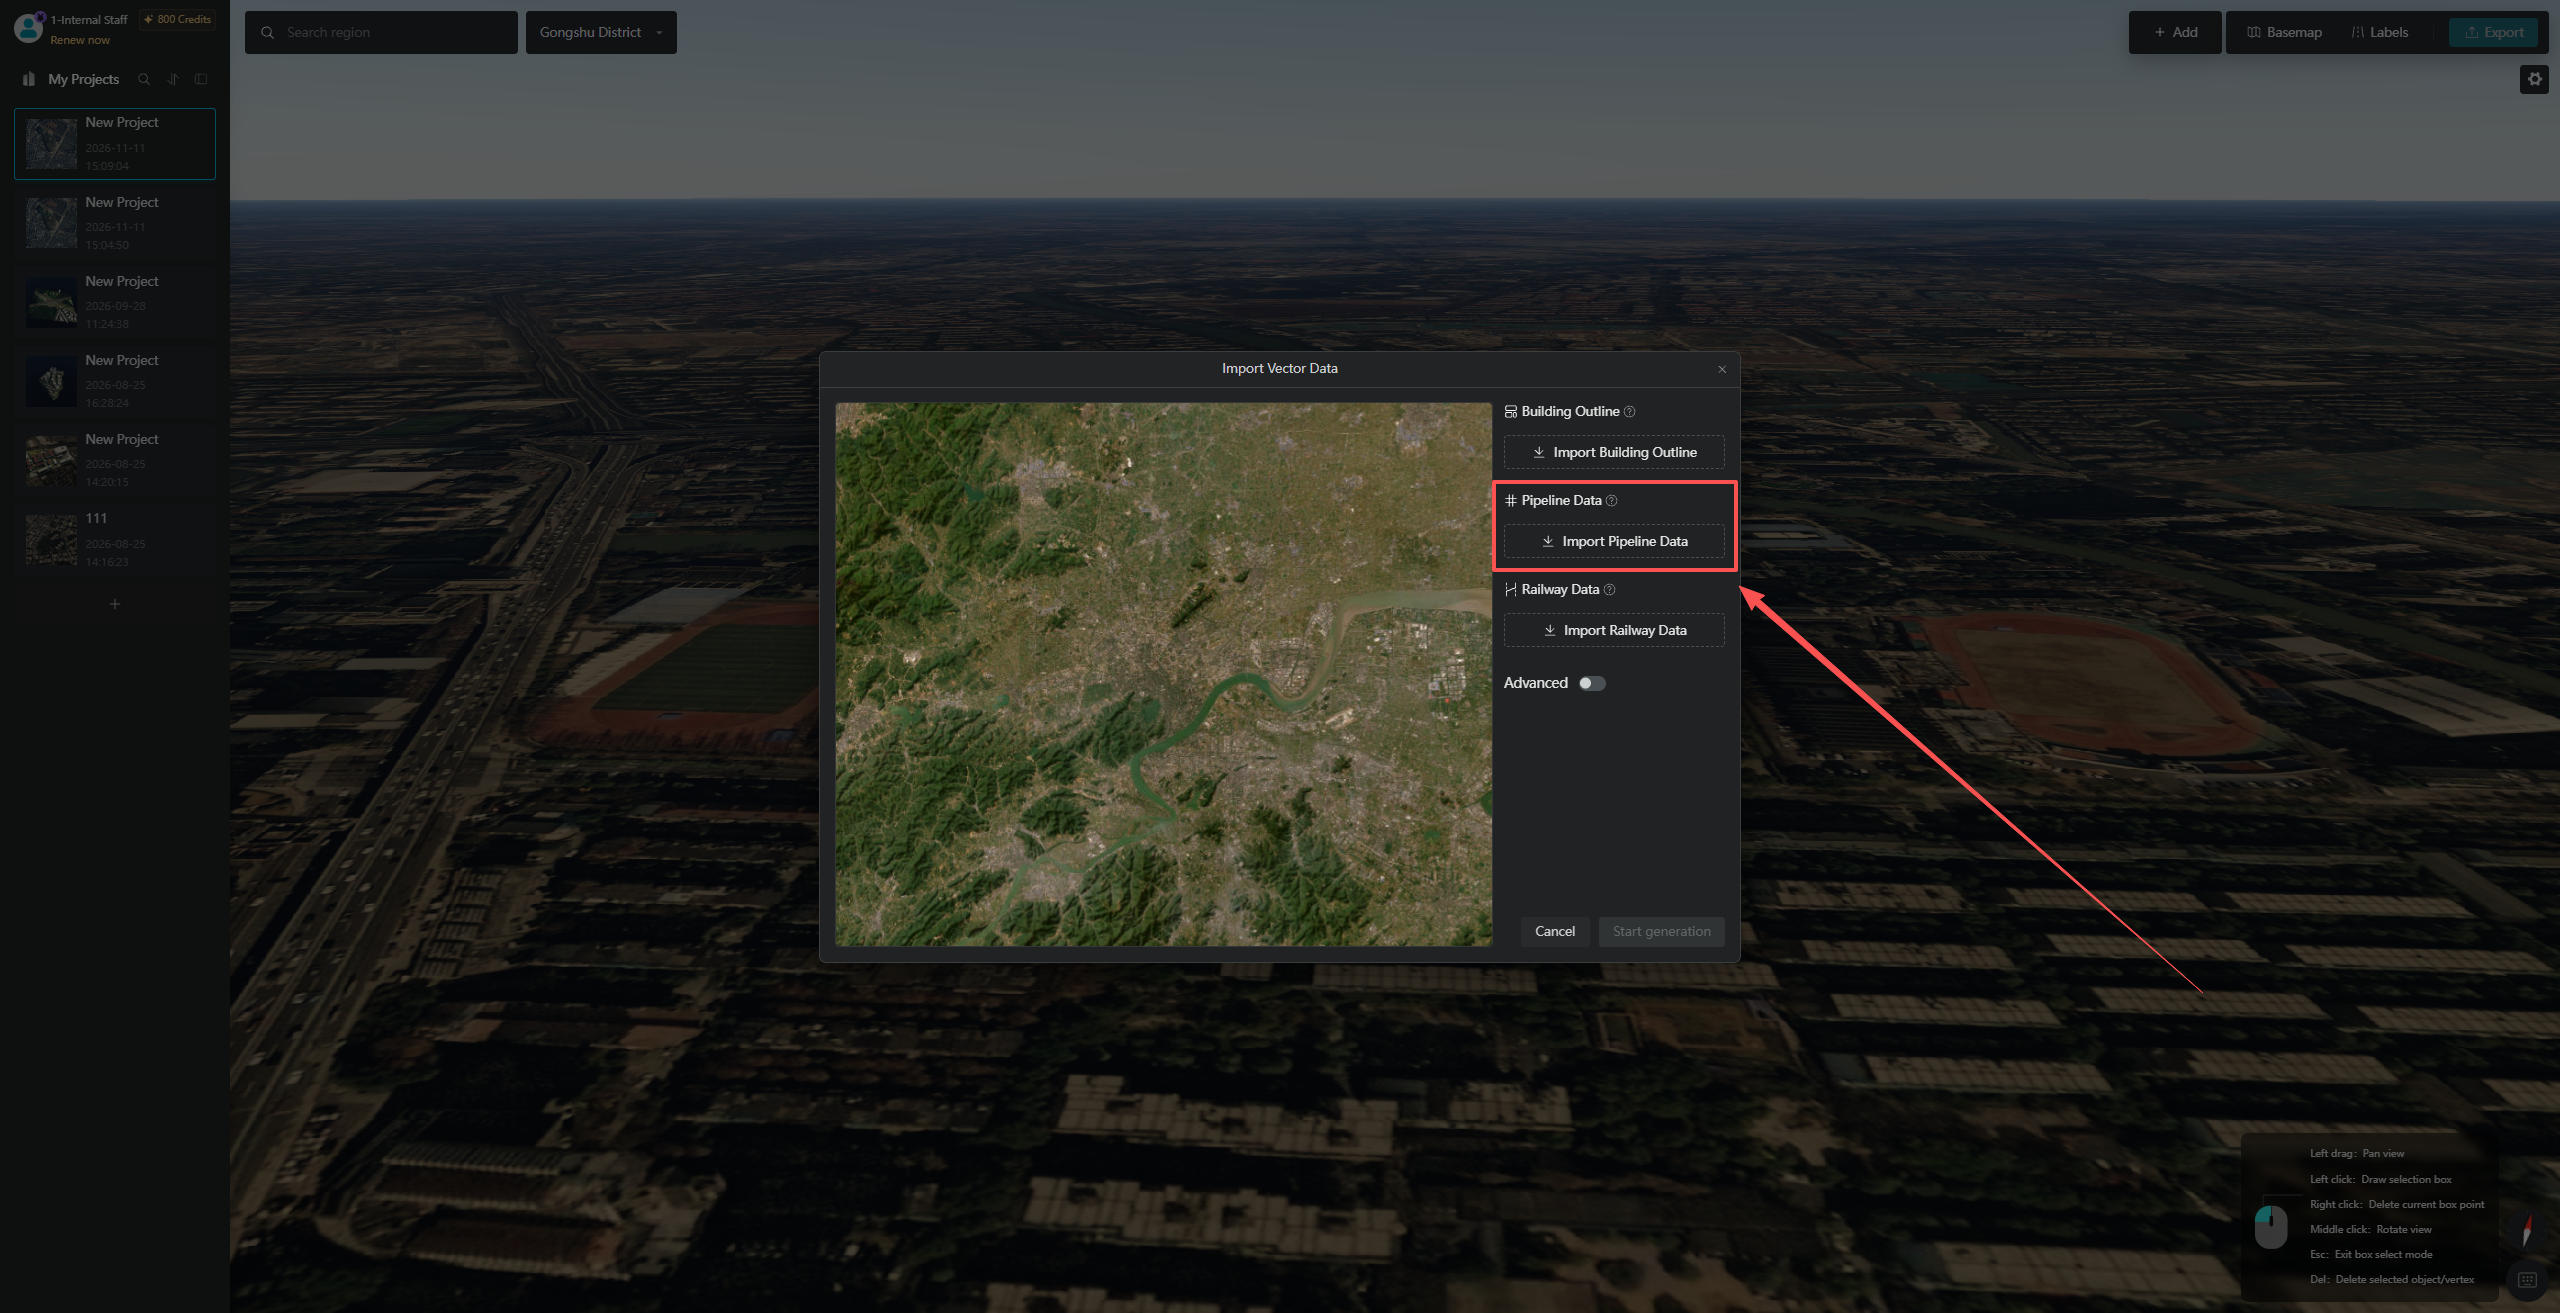
Click the "Import Pipeline Data" button in the "Pipeline Data" module. In the "Import Pipeline Data" window, you can drag and drop files or click to upload either GeoJSON files or SHP compressed packages containing all the required data.
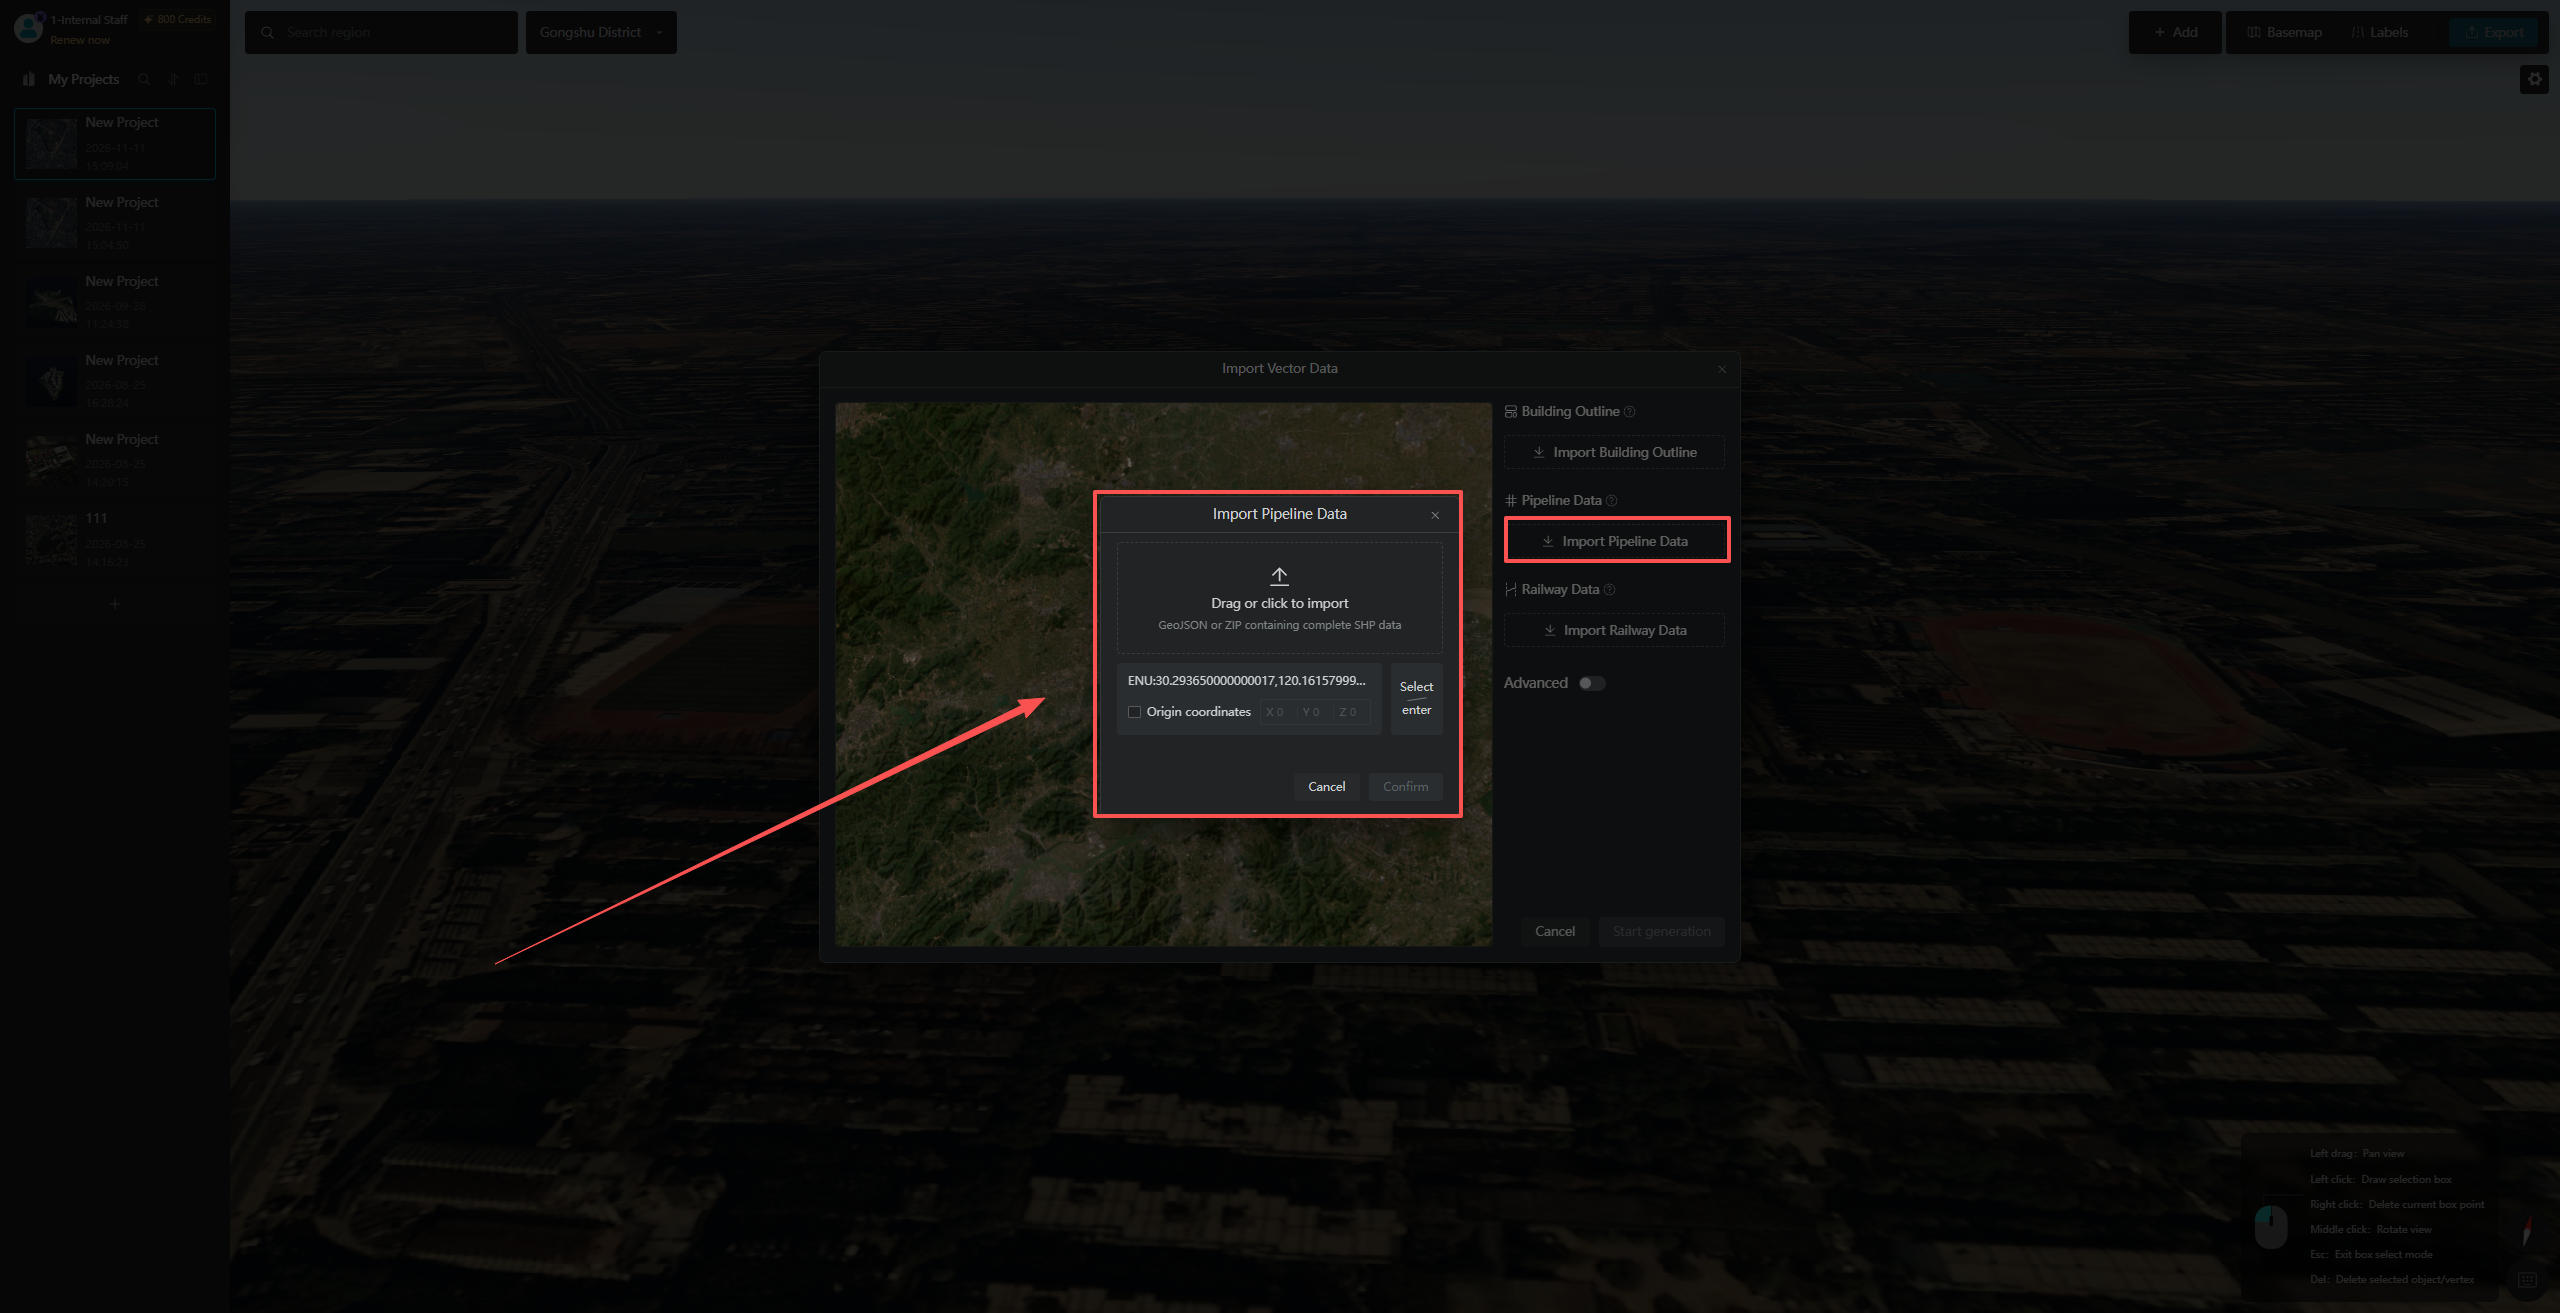
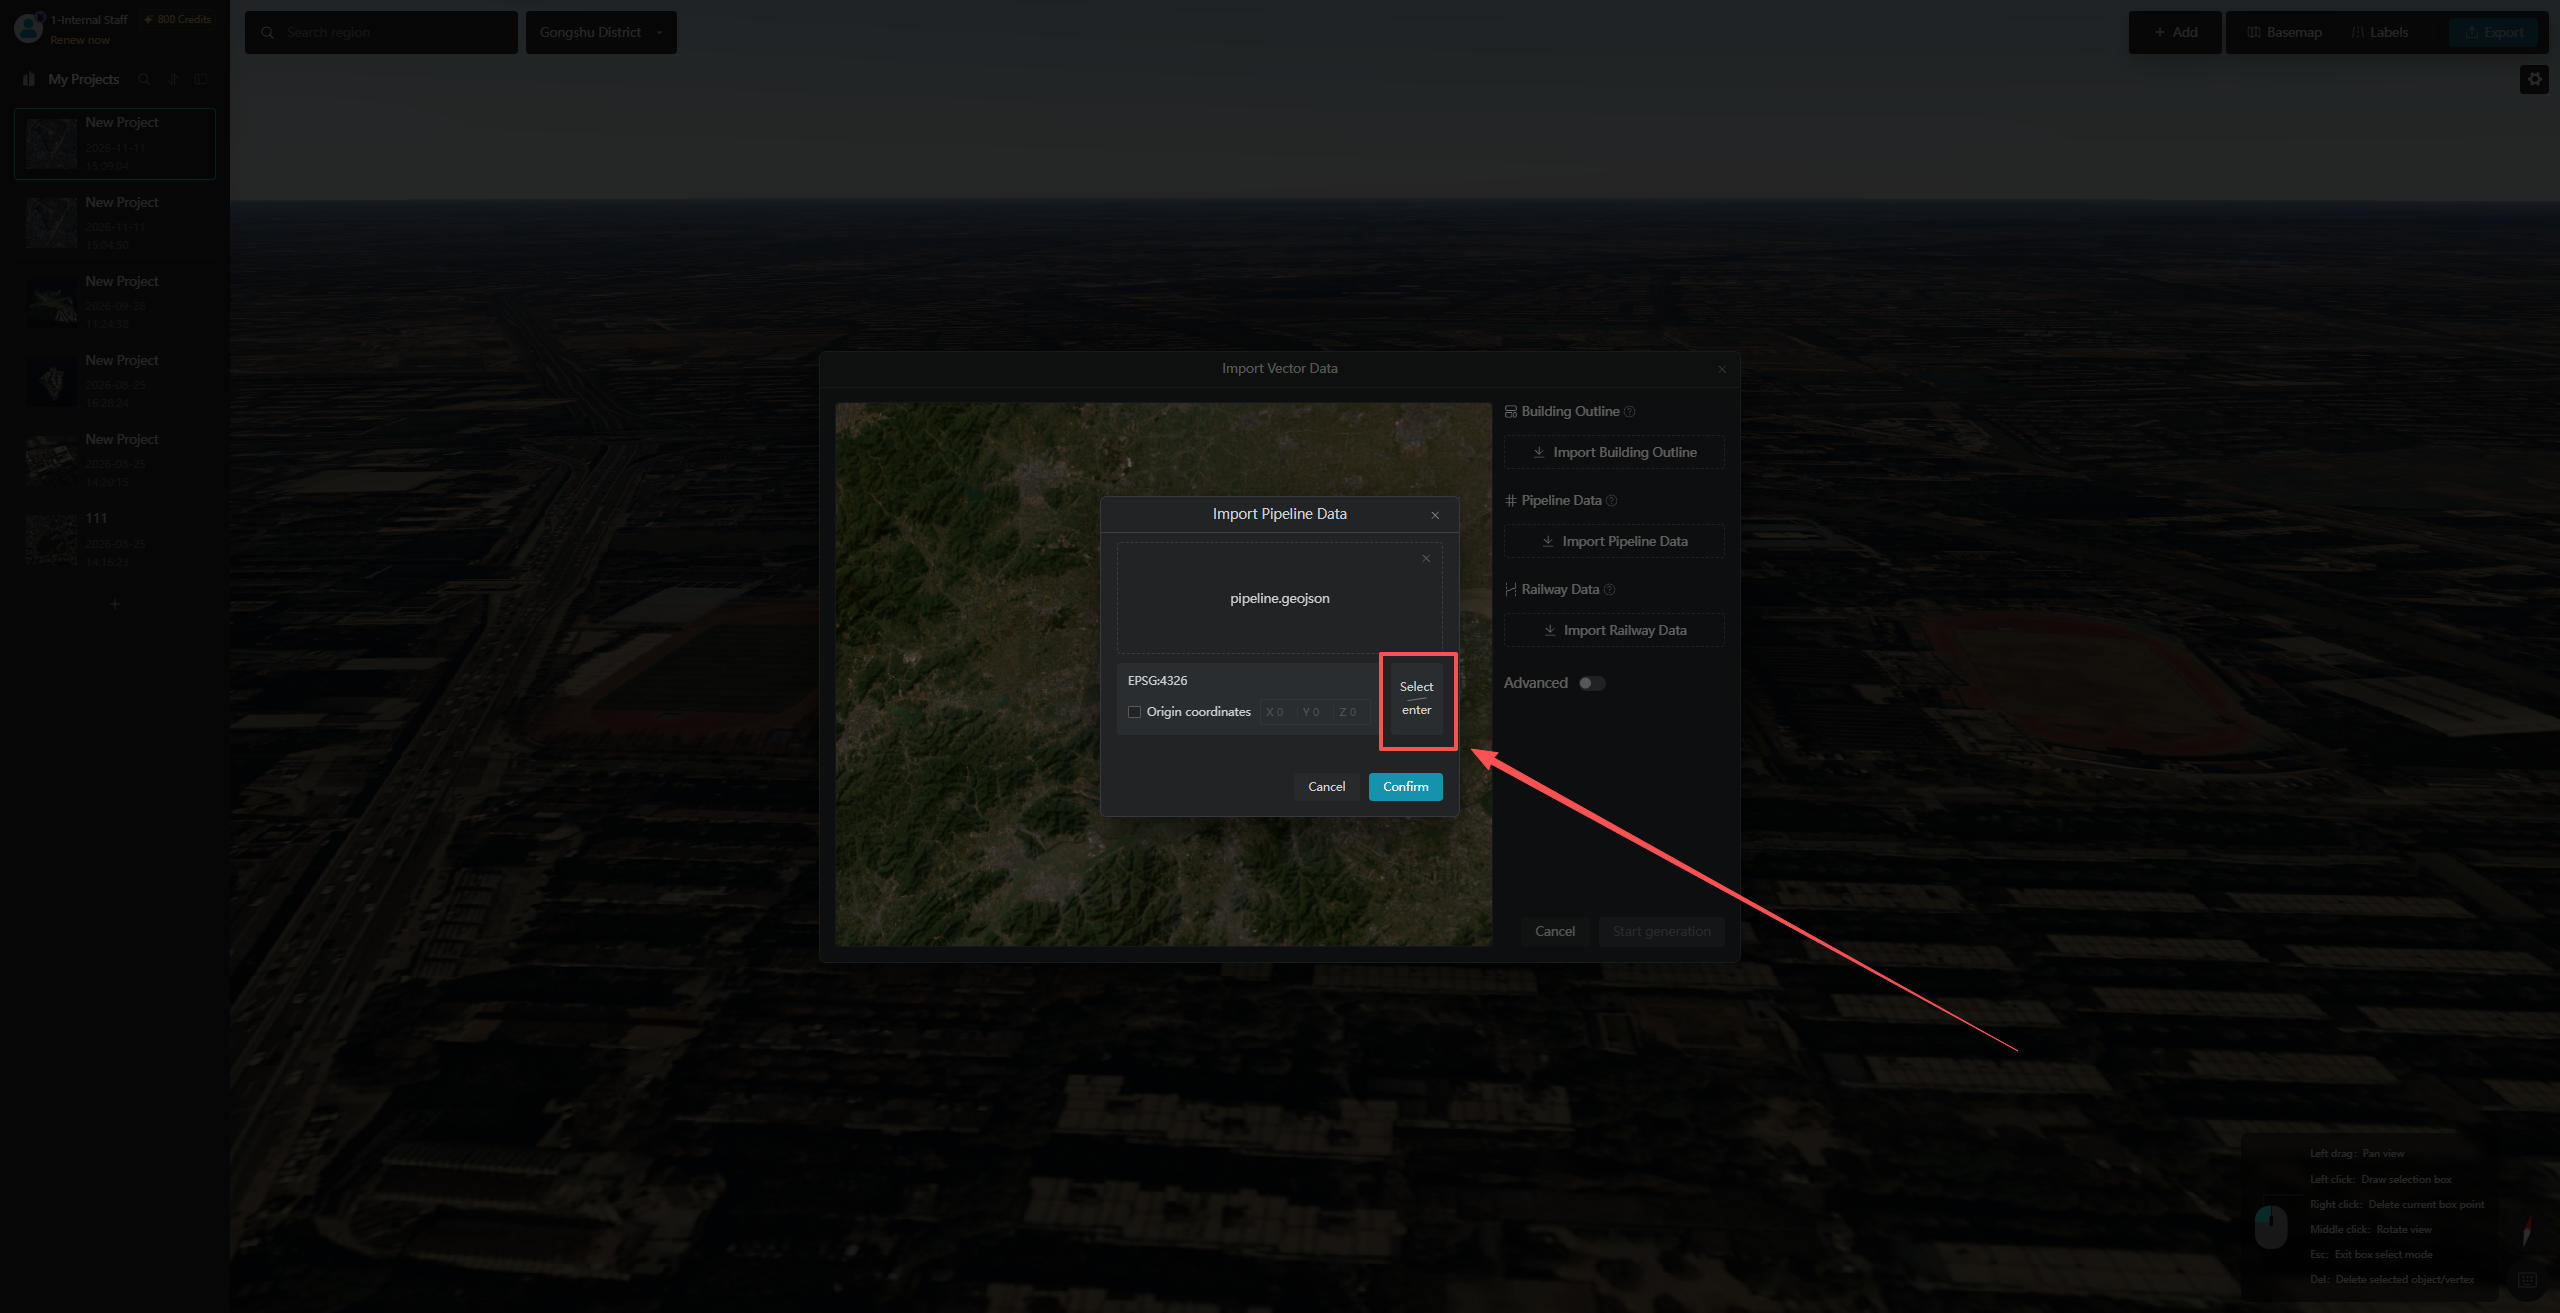
If the data already contains coordinate system information, the system will automatically detect it during import. If no coordinate system information is available or detection fails, you can click "Select/Enter" to manually specify the coordinate system.
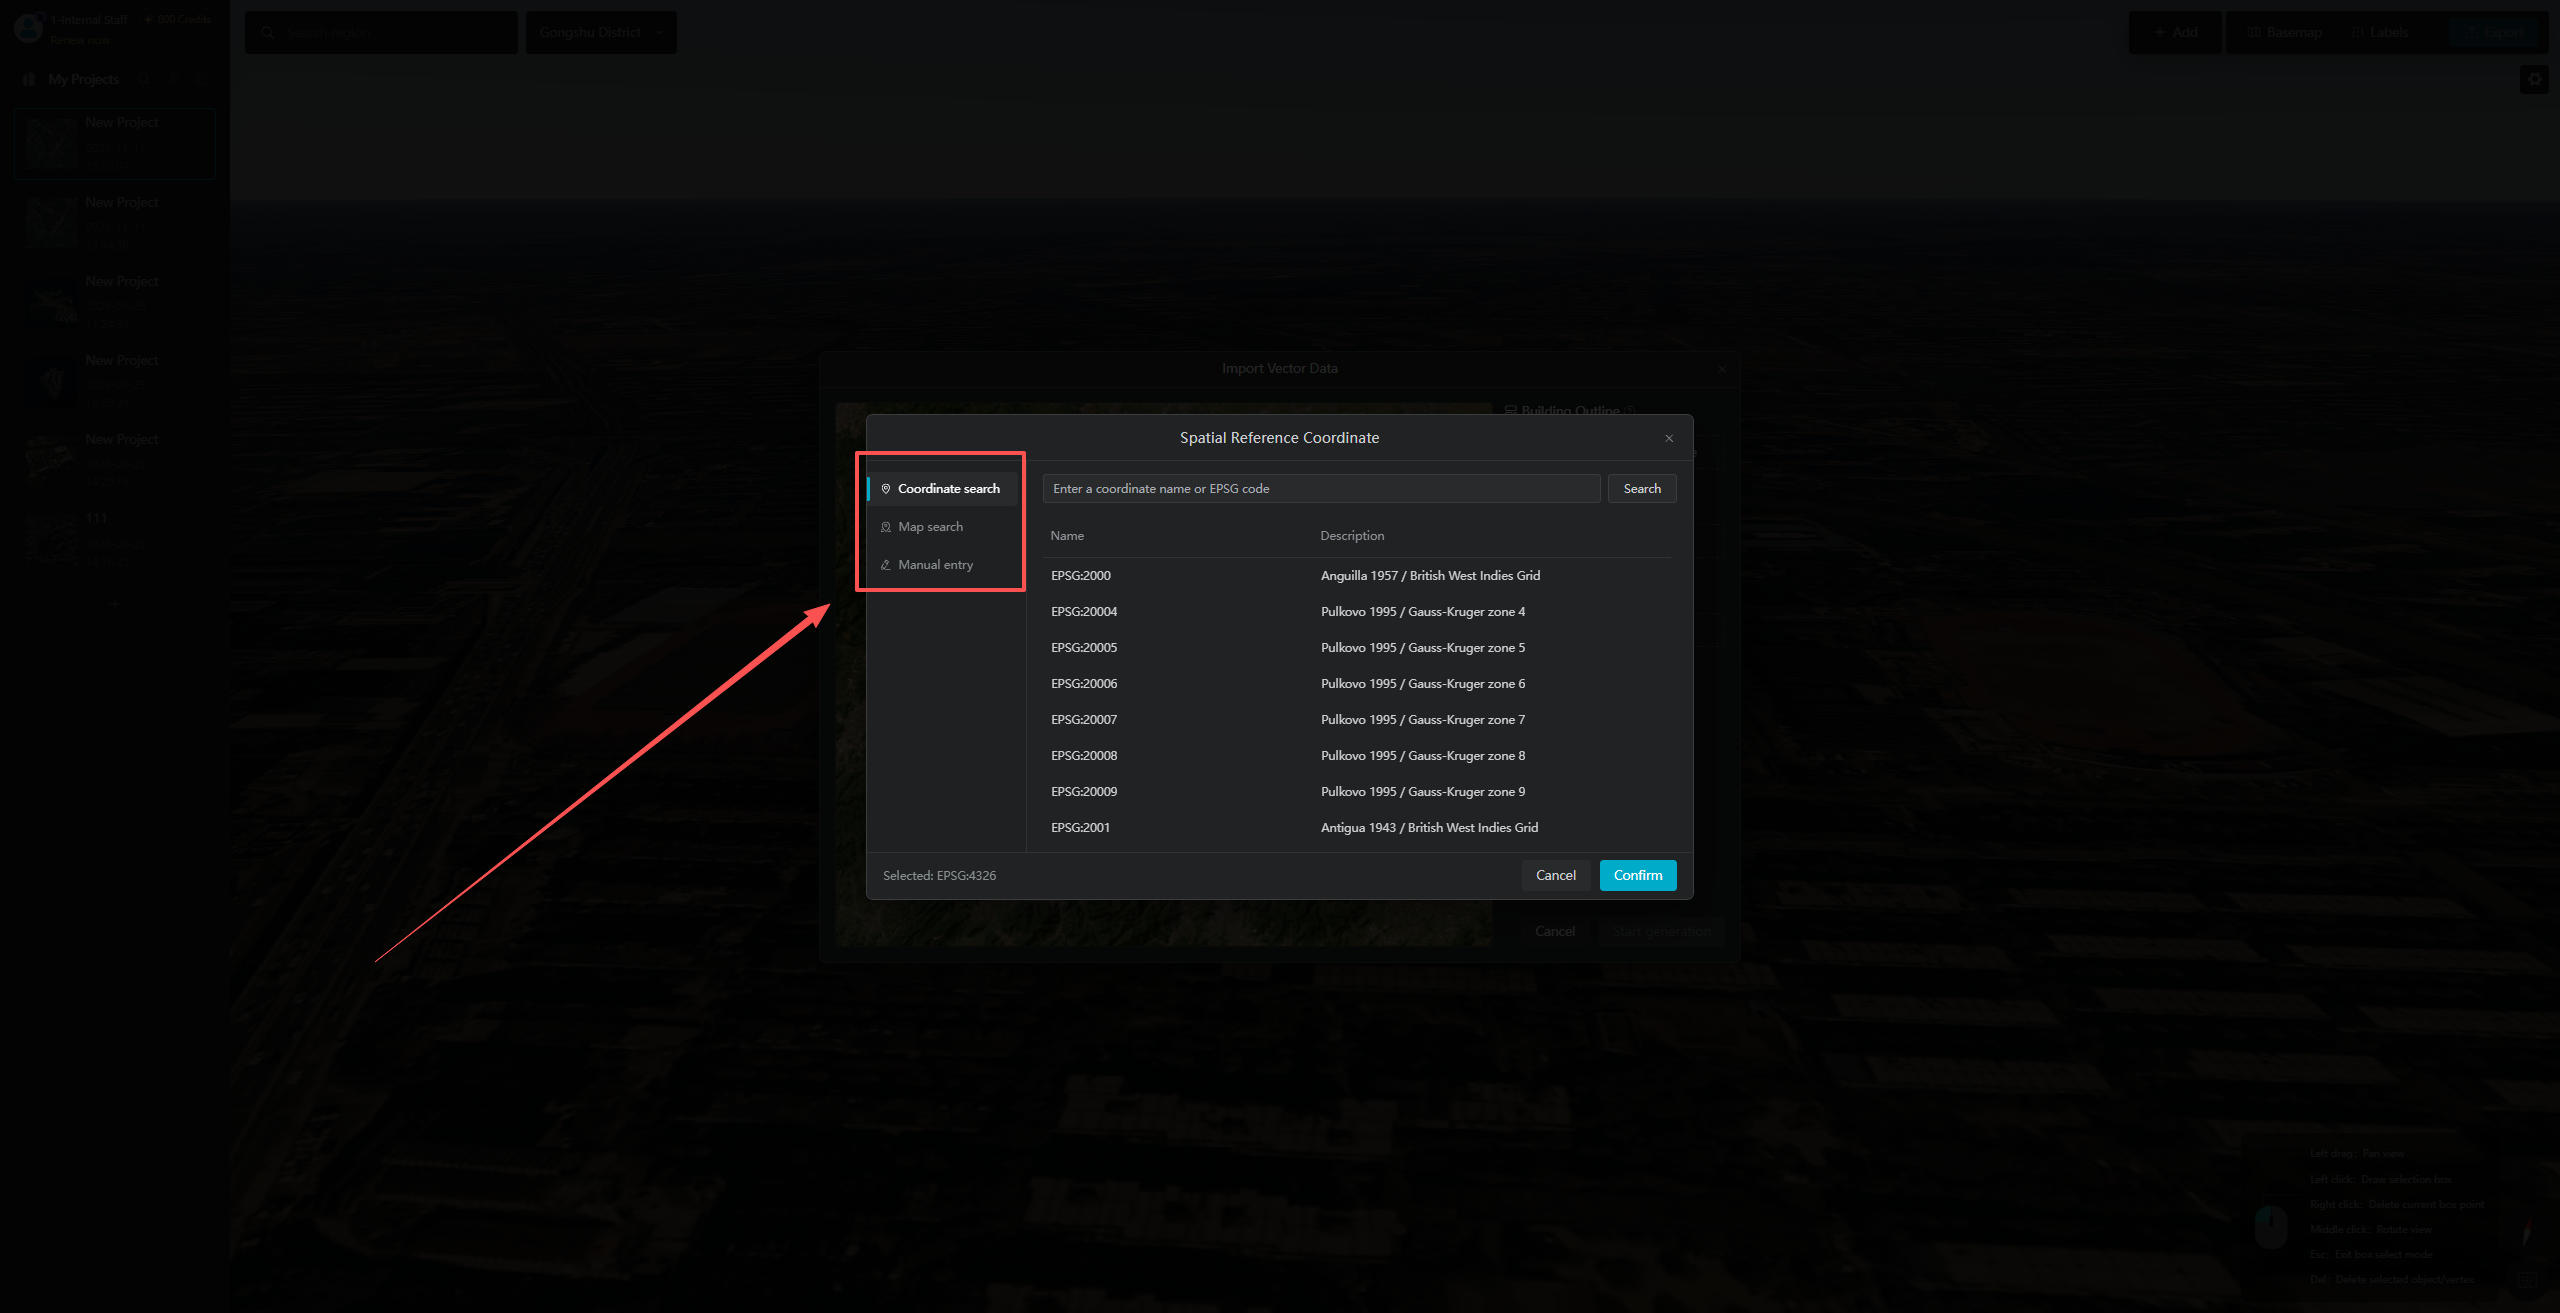
There are three ways to set the spatial reference coordinates: "Coordinate Search", "Map Search", and "Manual Entry ". Choose the method that best suits your needs.
Once the coordinate system is configured, click "Confirm". The imported pipeline data will then appear in the satellite imagery view on the left. The blue pipeline lines within the blue bounding box represent the imported data.
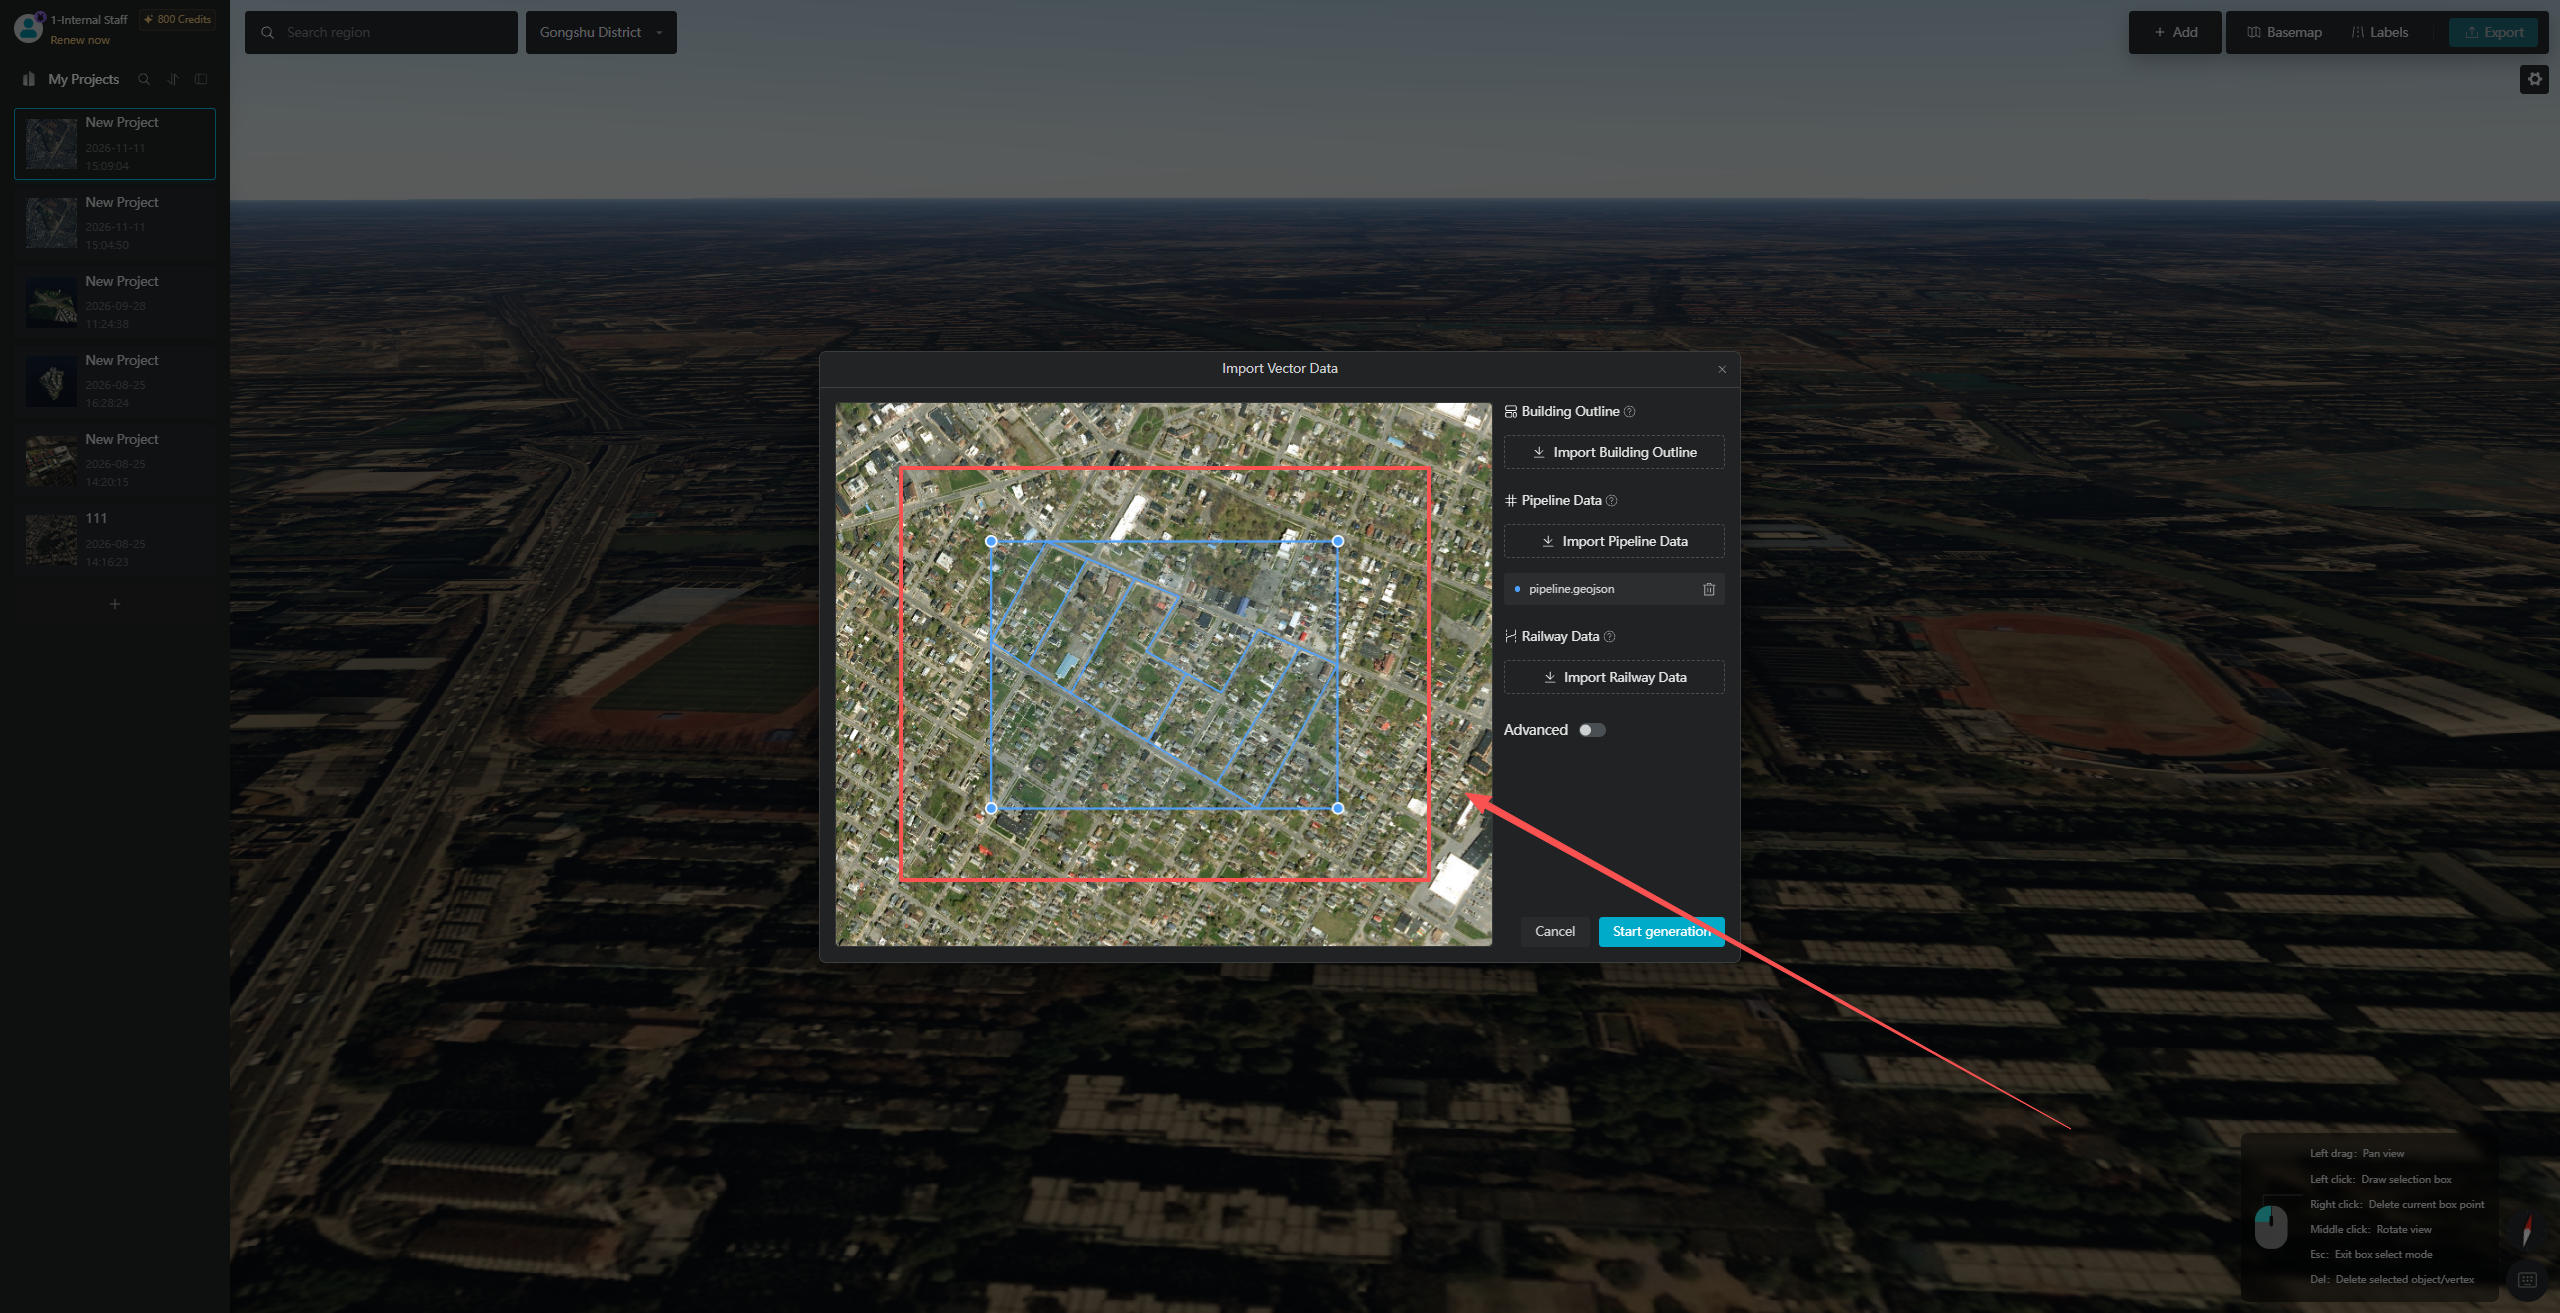
You can resize the generation area by dragging the corner points or adding new midpoint handles along the blue bounding box. In addition to generating pipeline models from the imported data, GenAnywhere will also generate a complete site model covering the area within the bounding box.
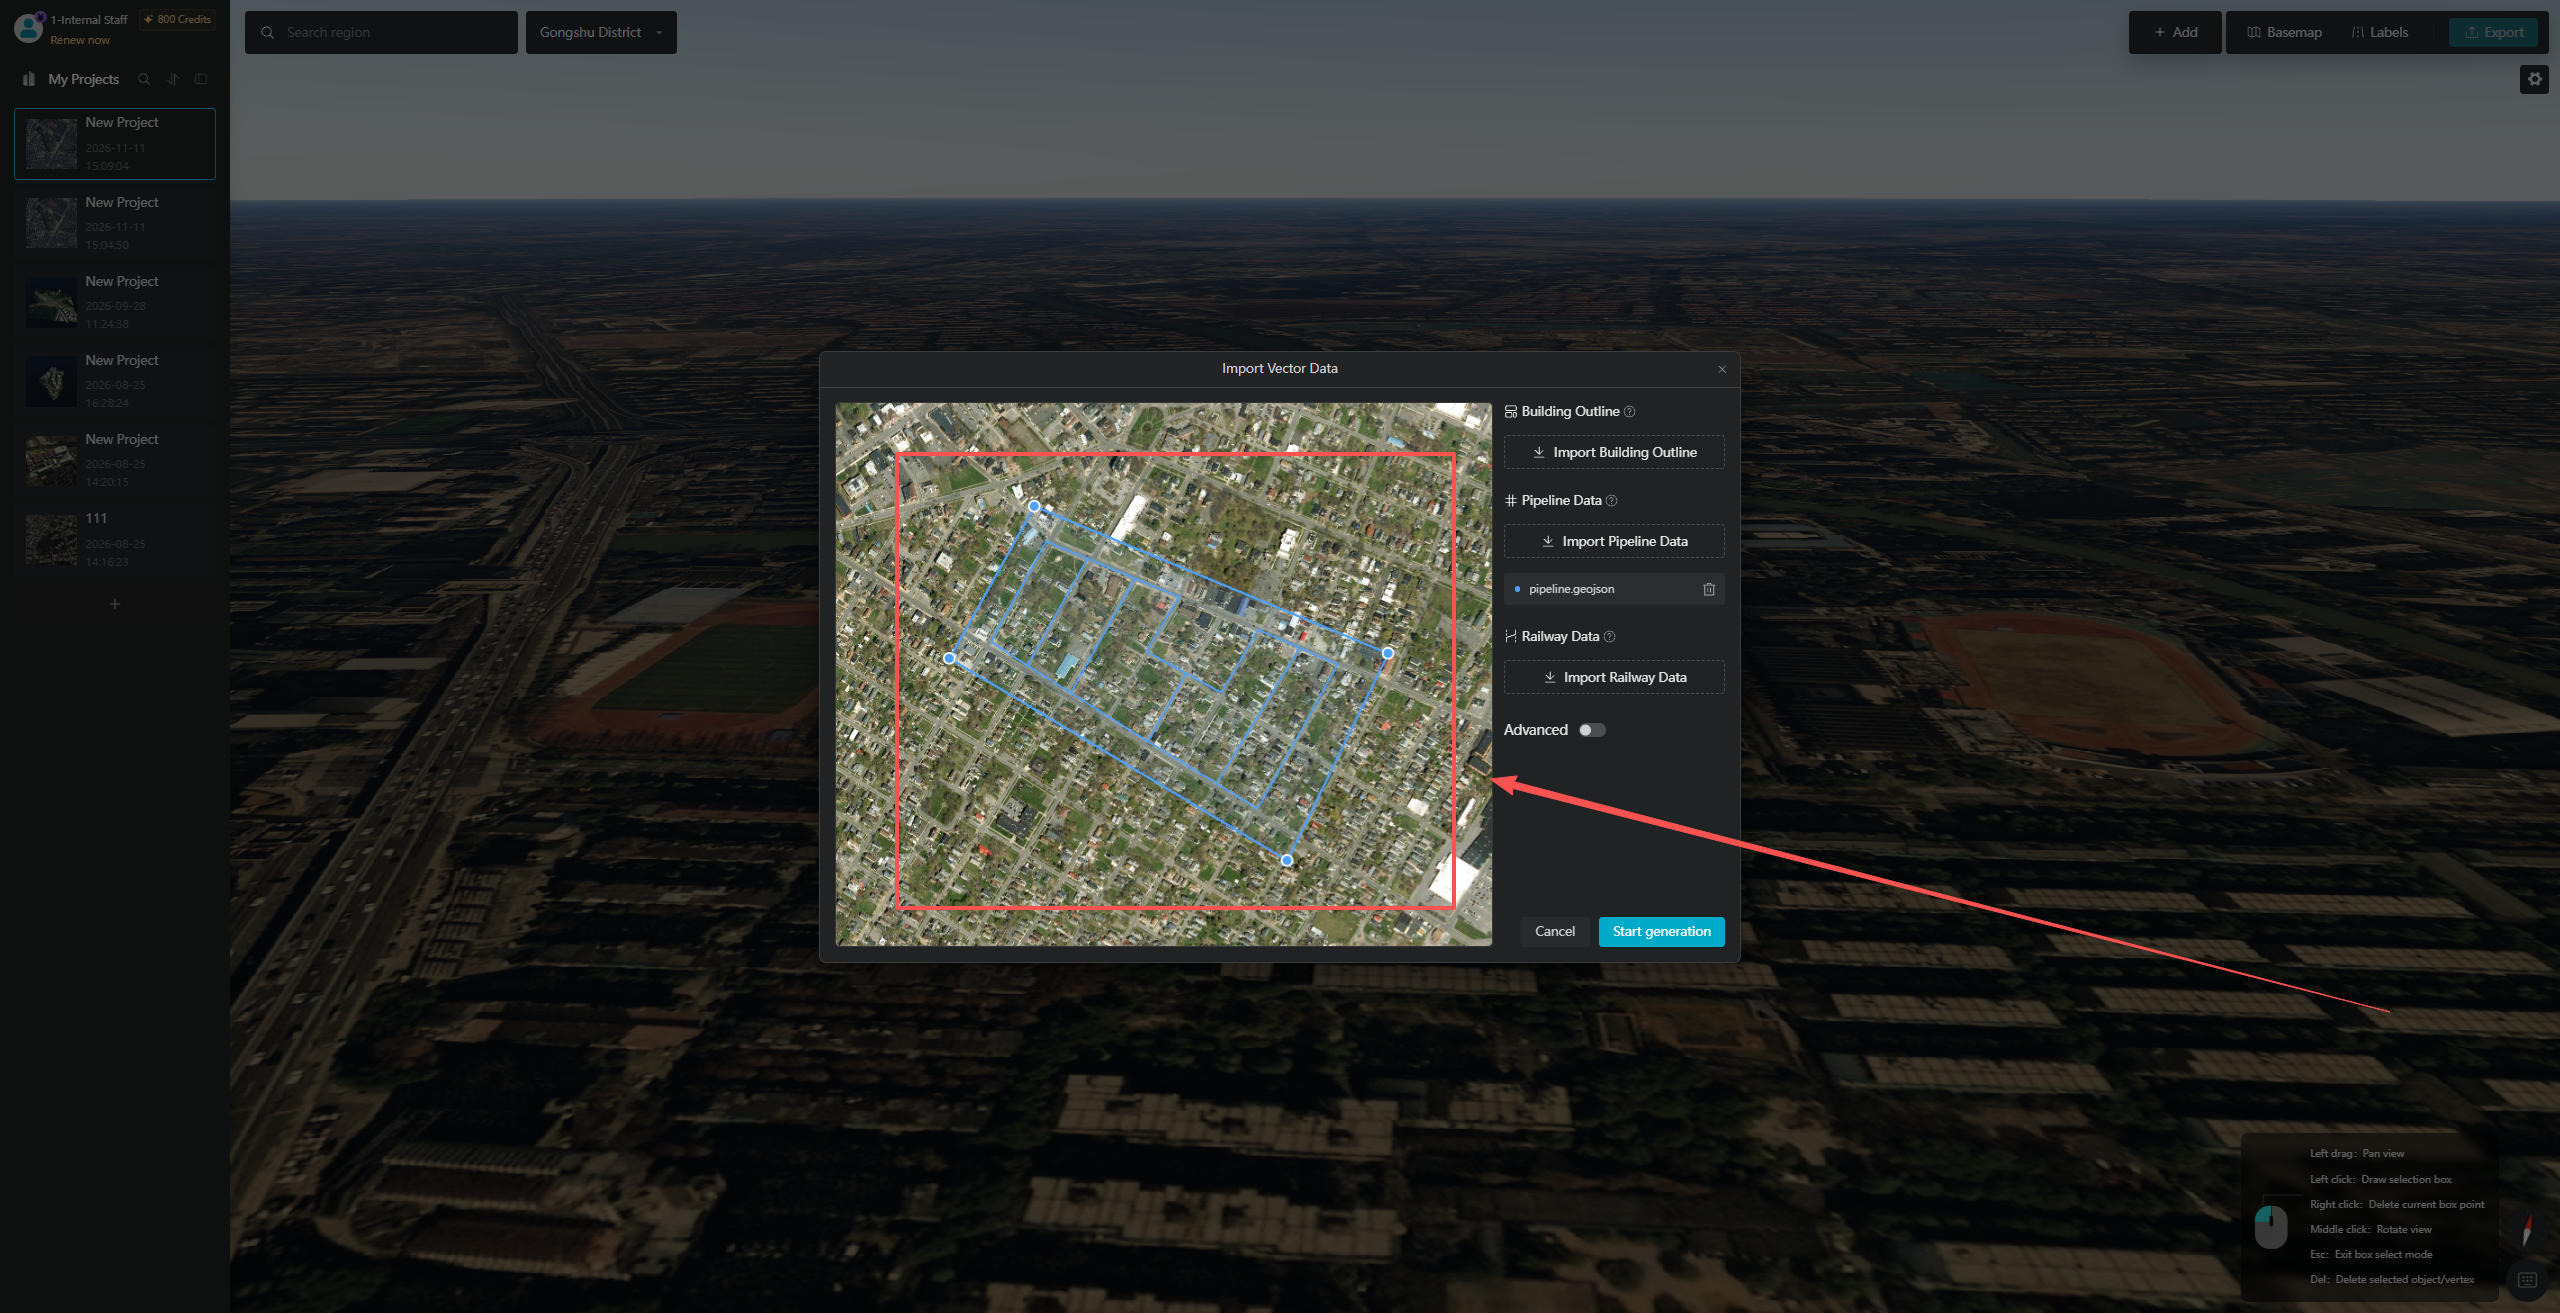
2. Generating Pipeline Models
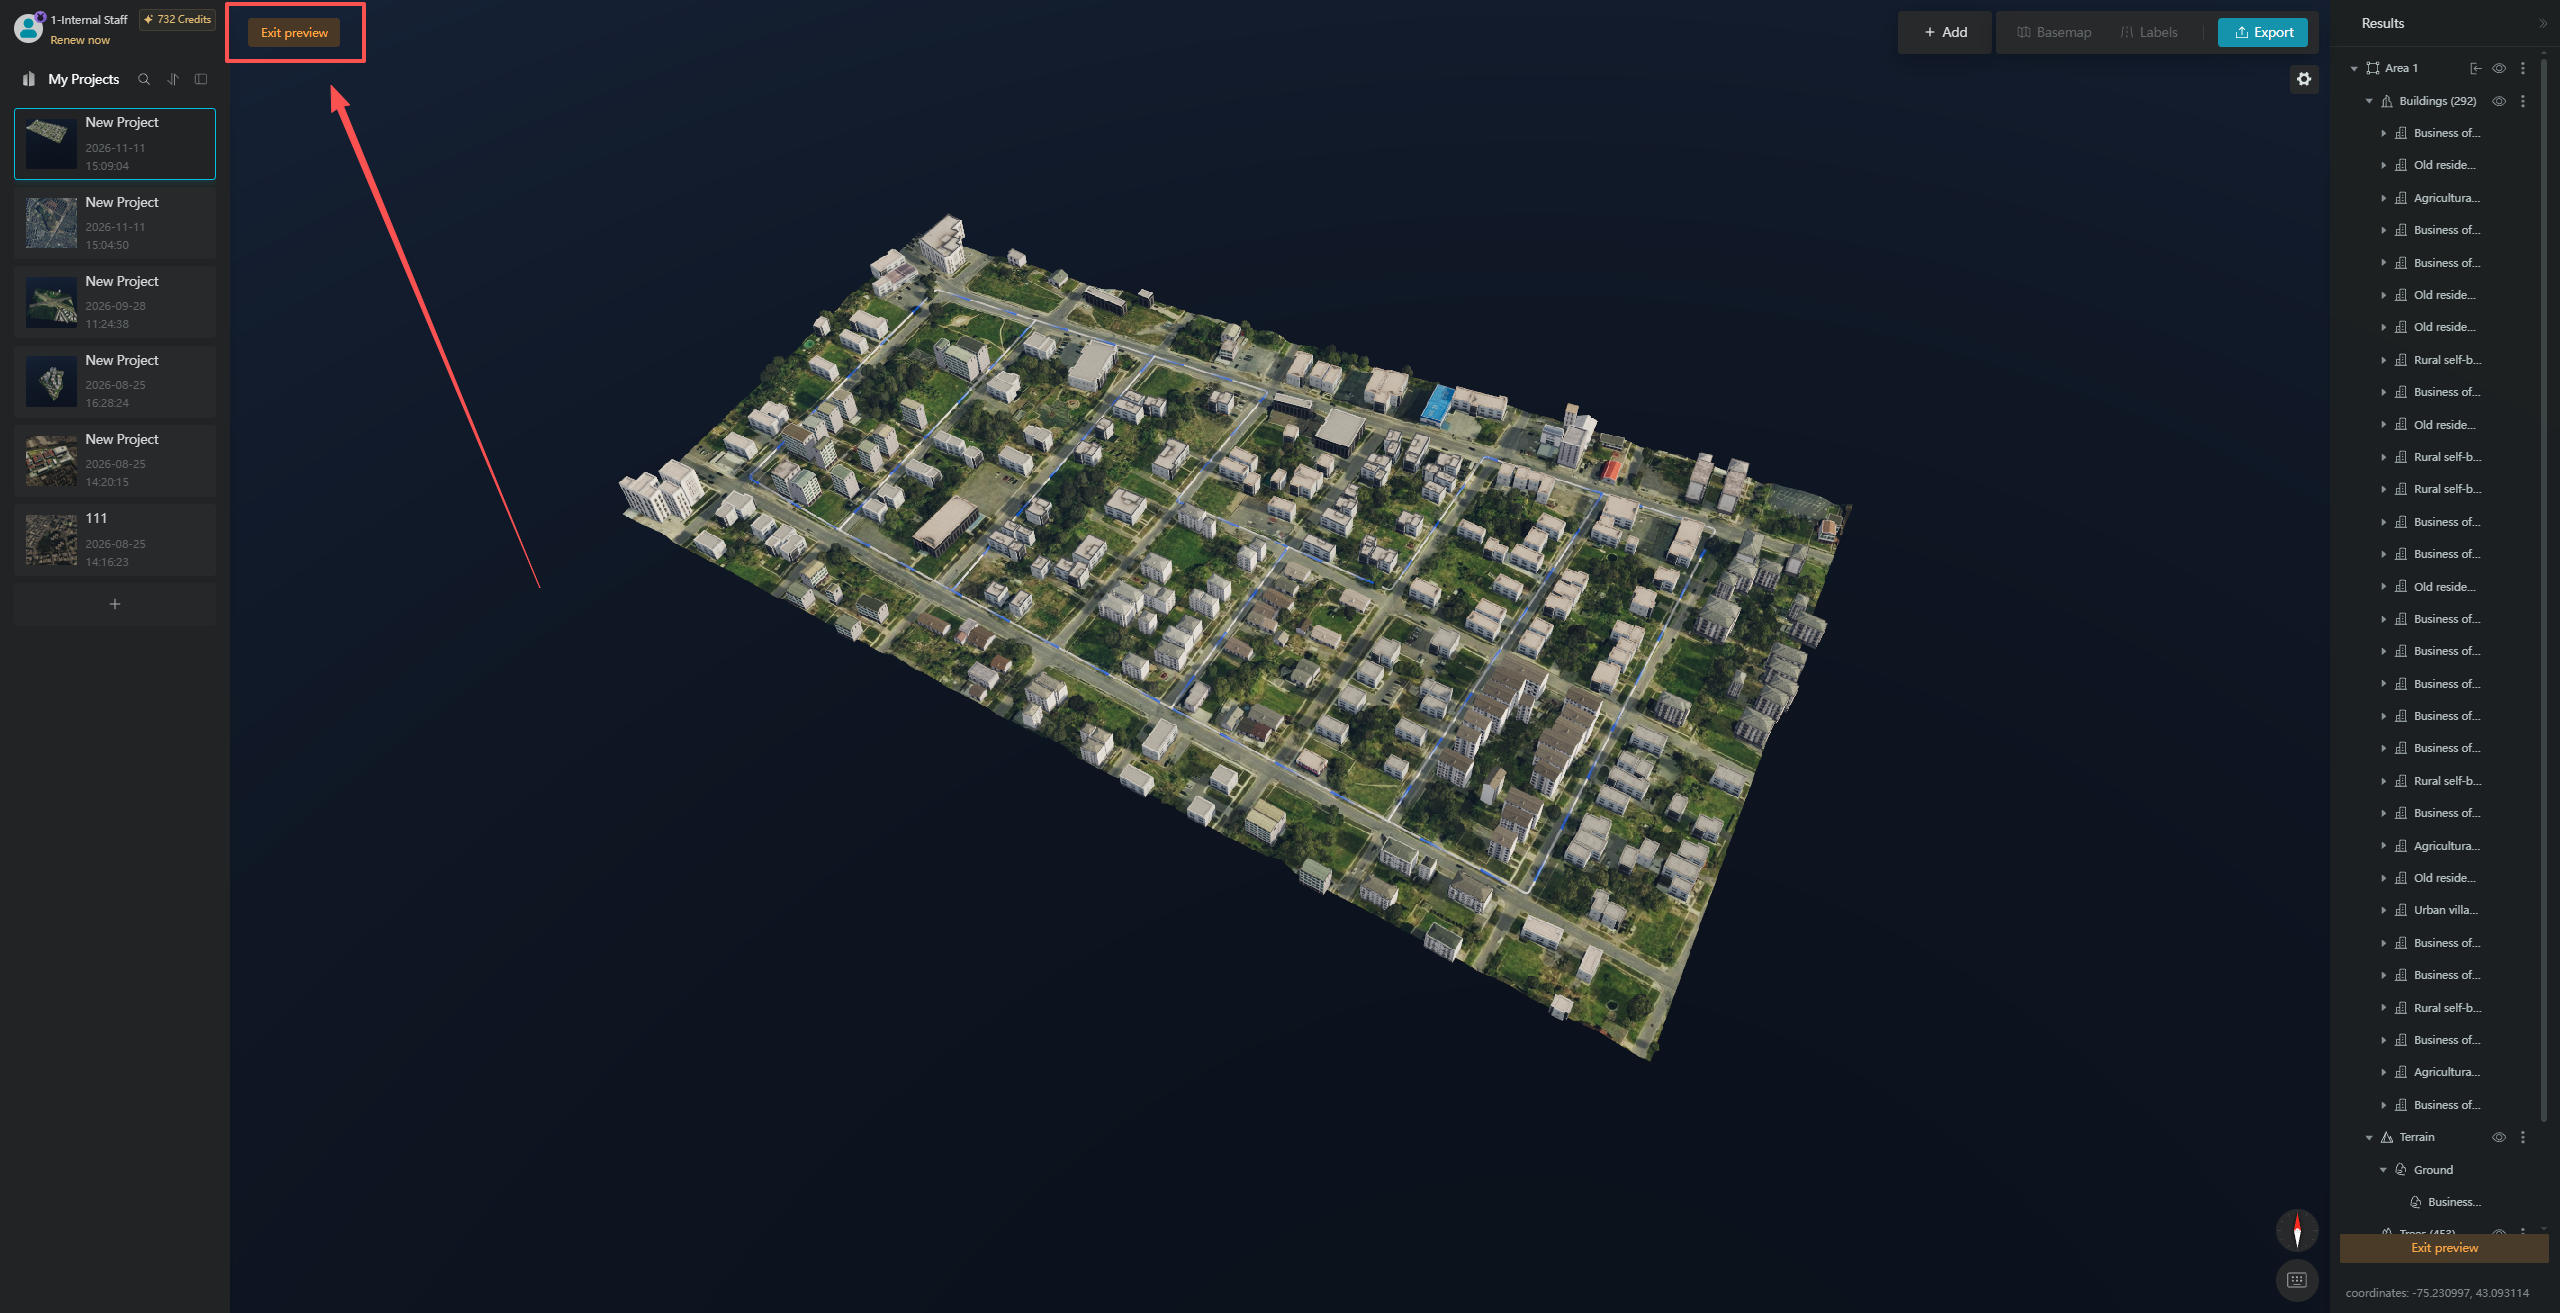
After confirming the generation area defined by the bounding box, click "Start Generation". AI will automatically identify and generate the pipelines within the selected area, along with the complete site model.
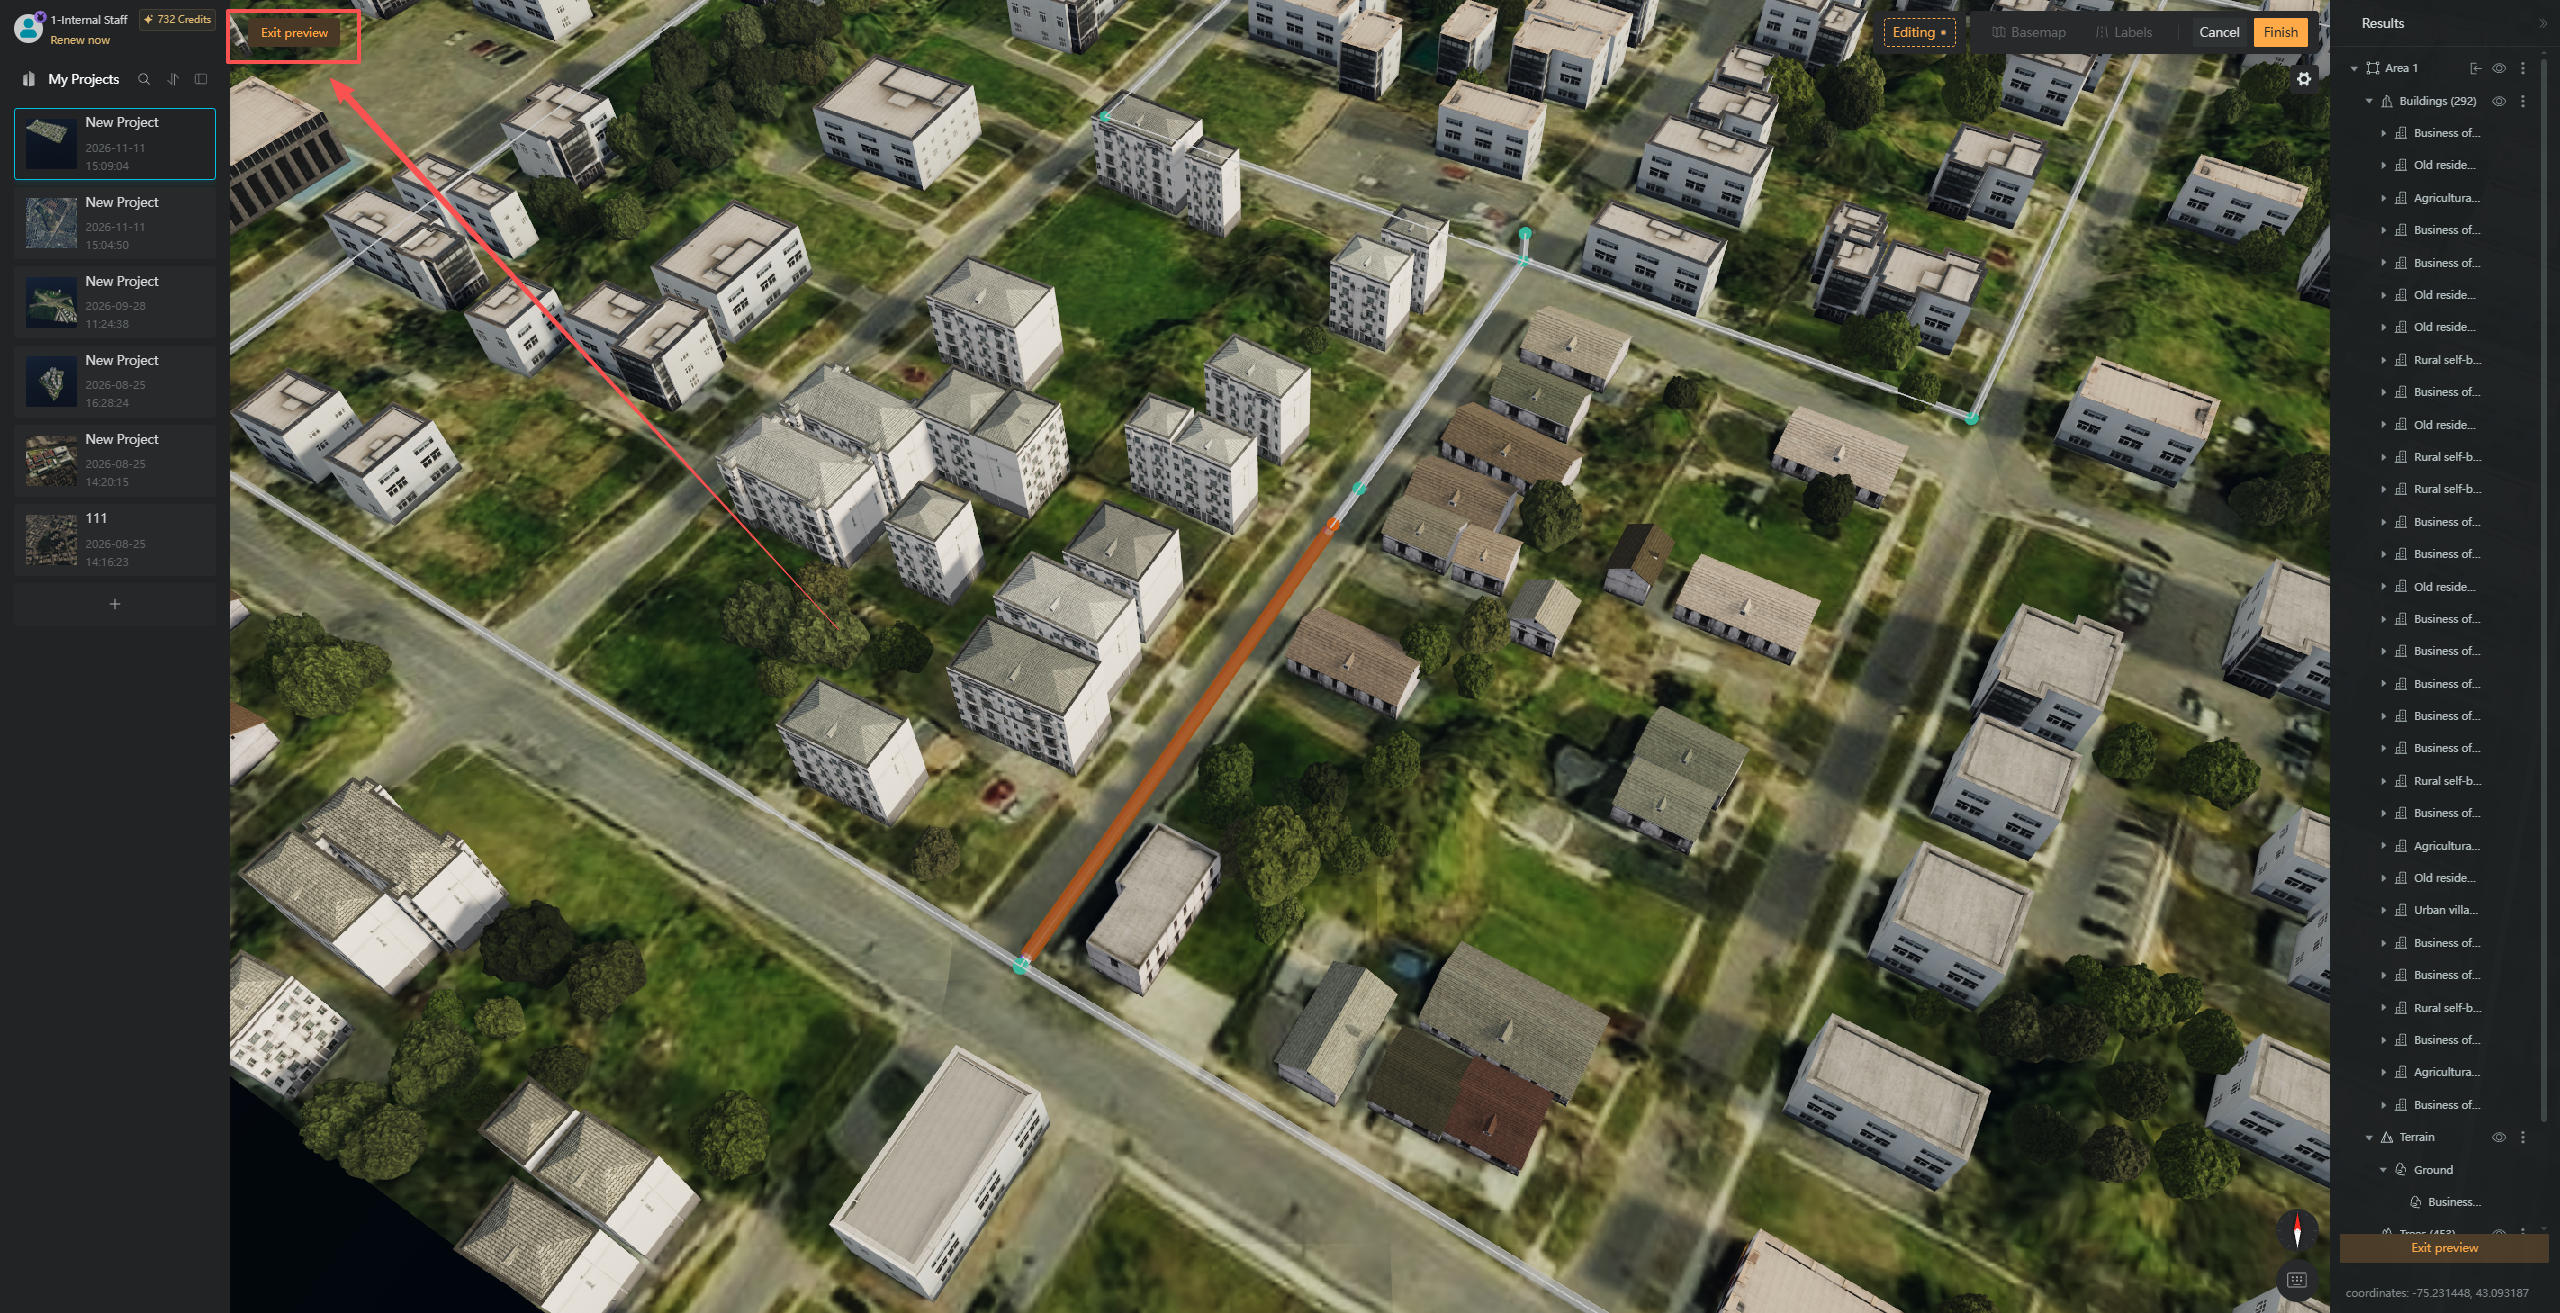
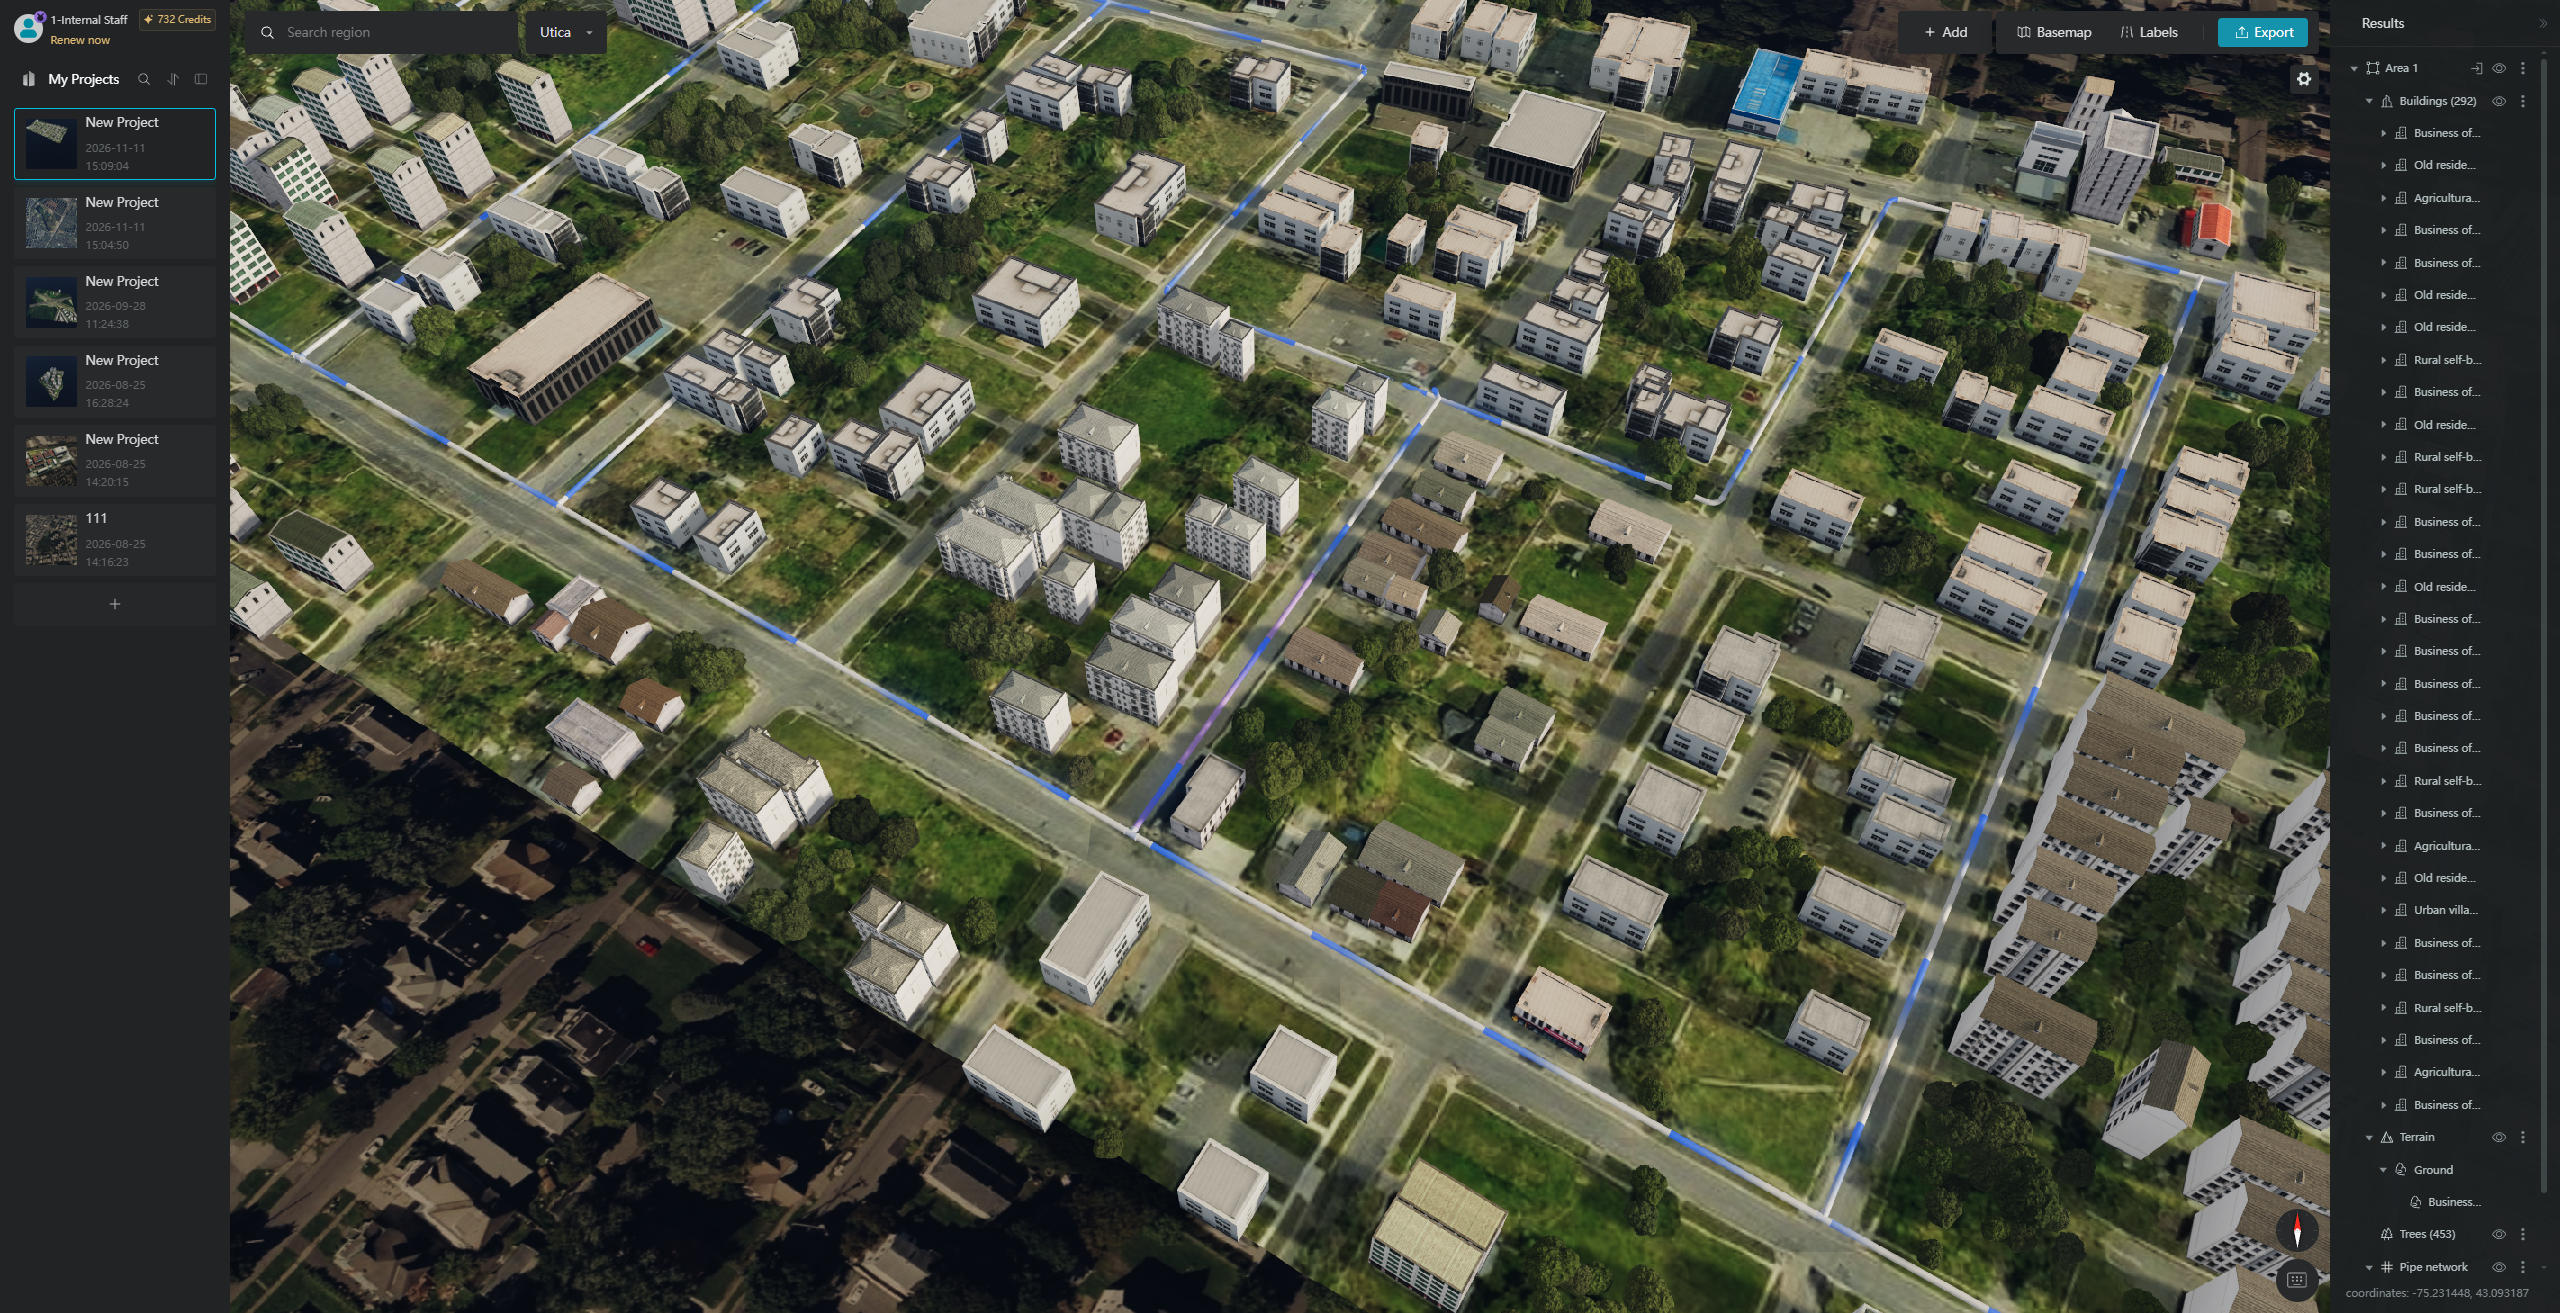
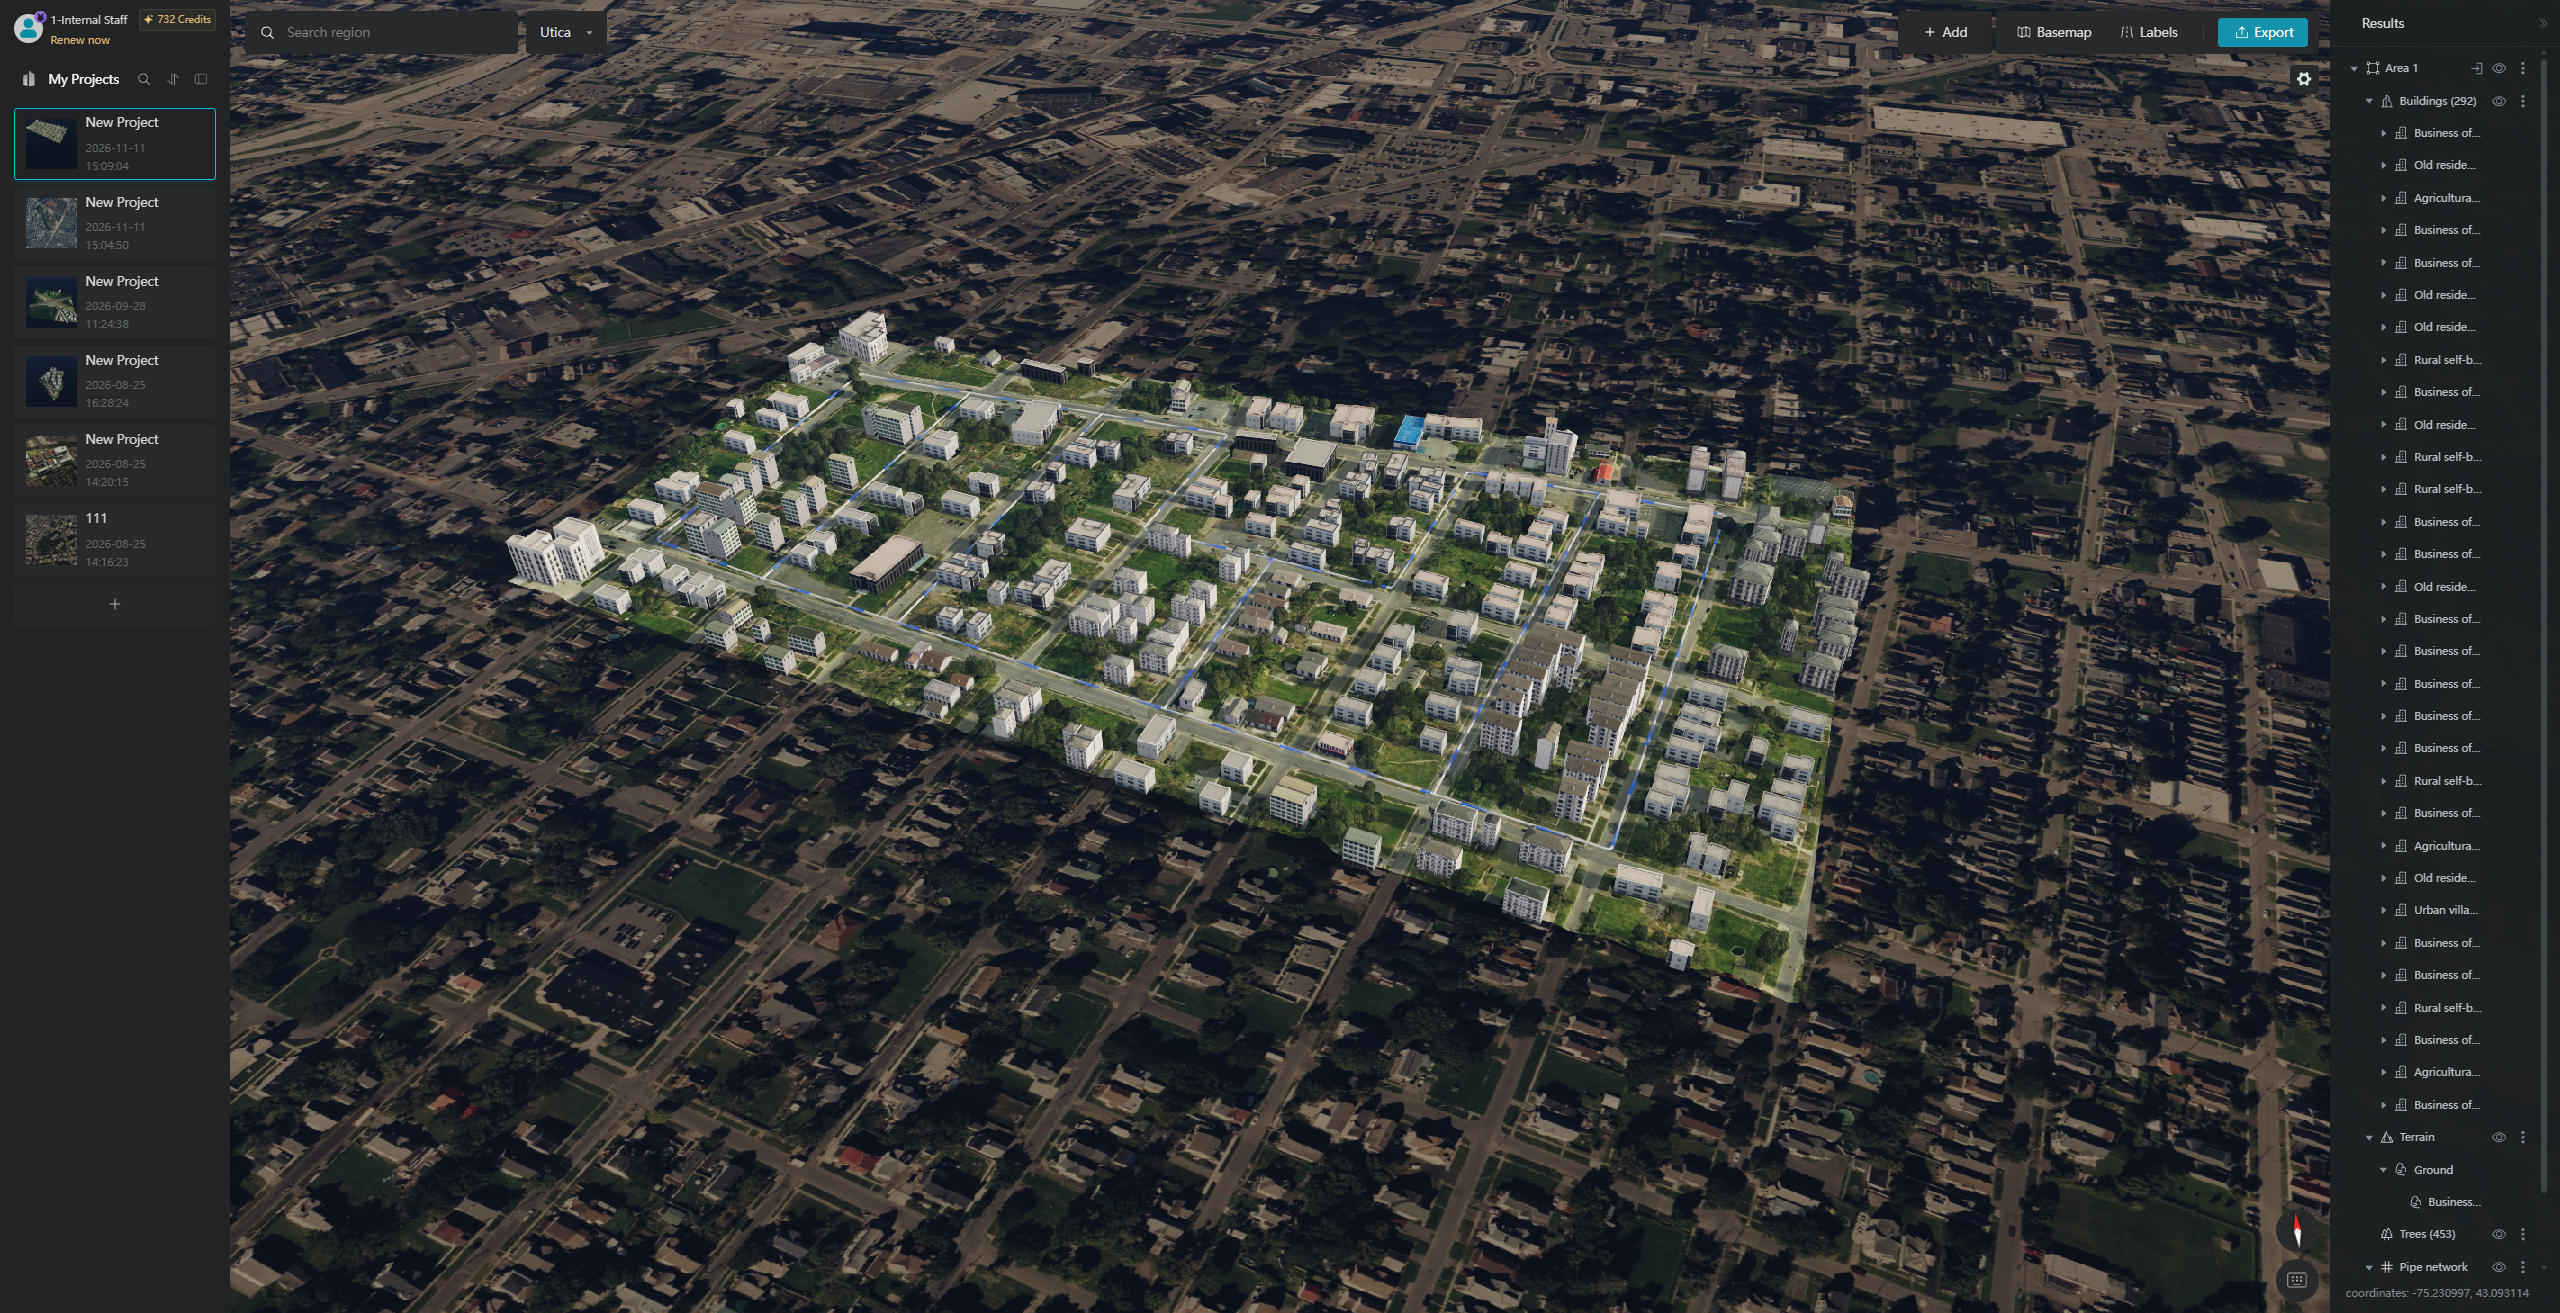
Once generation is complete, the interface will automatically enter "Single Model Preview" mode. Click "Exit Preview" in the upper-left or lower-right corner to return to Globe Preview mode.
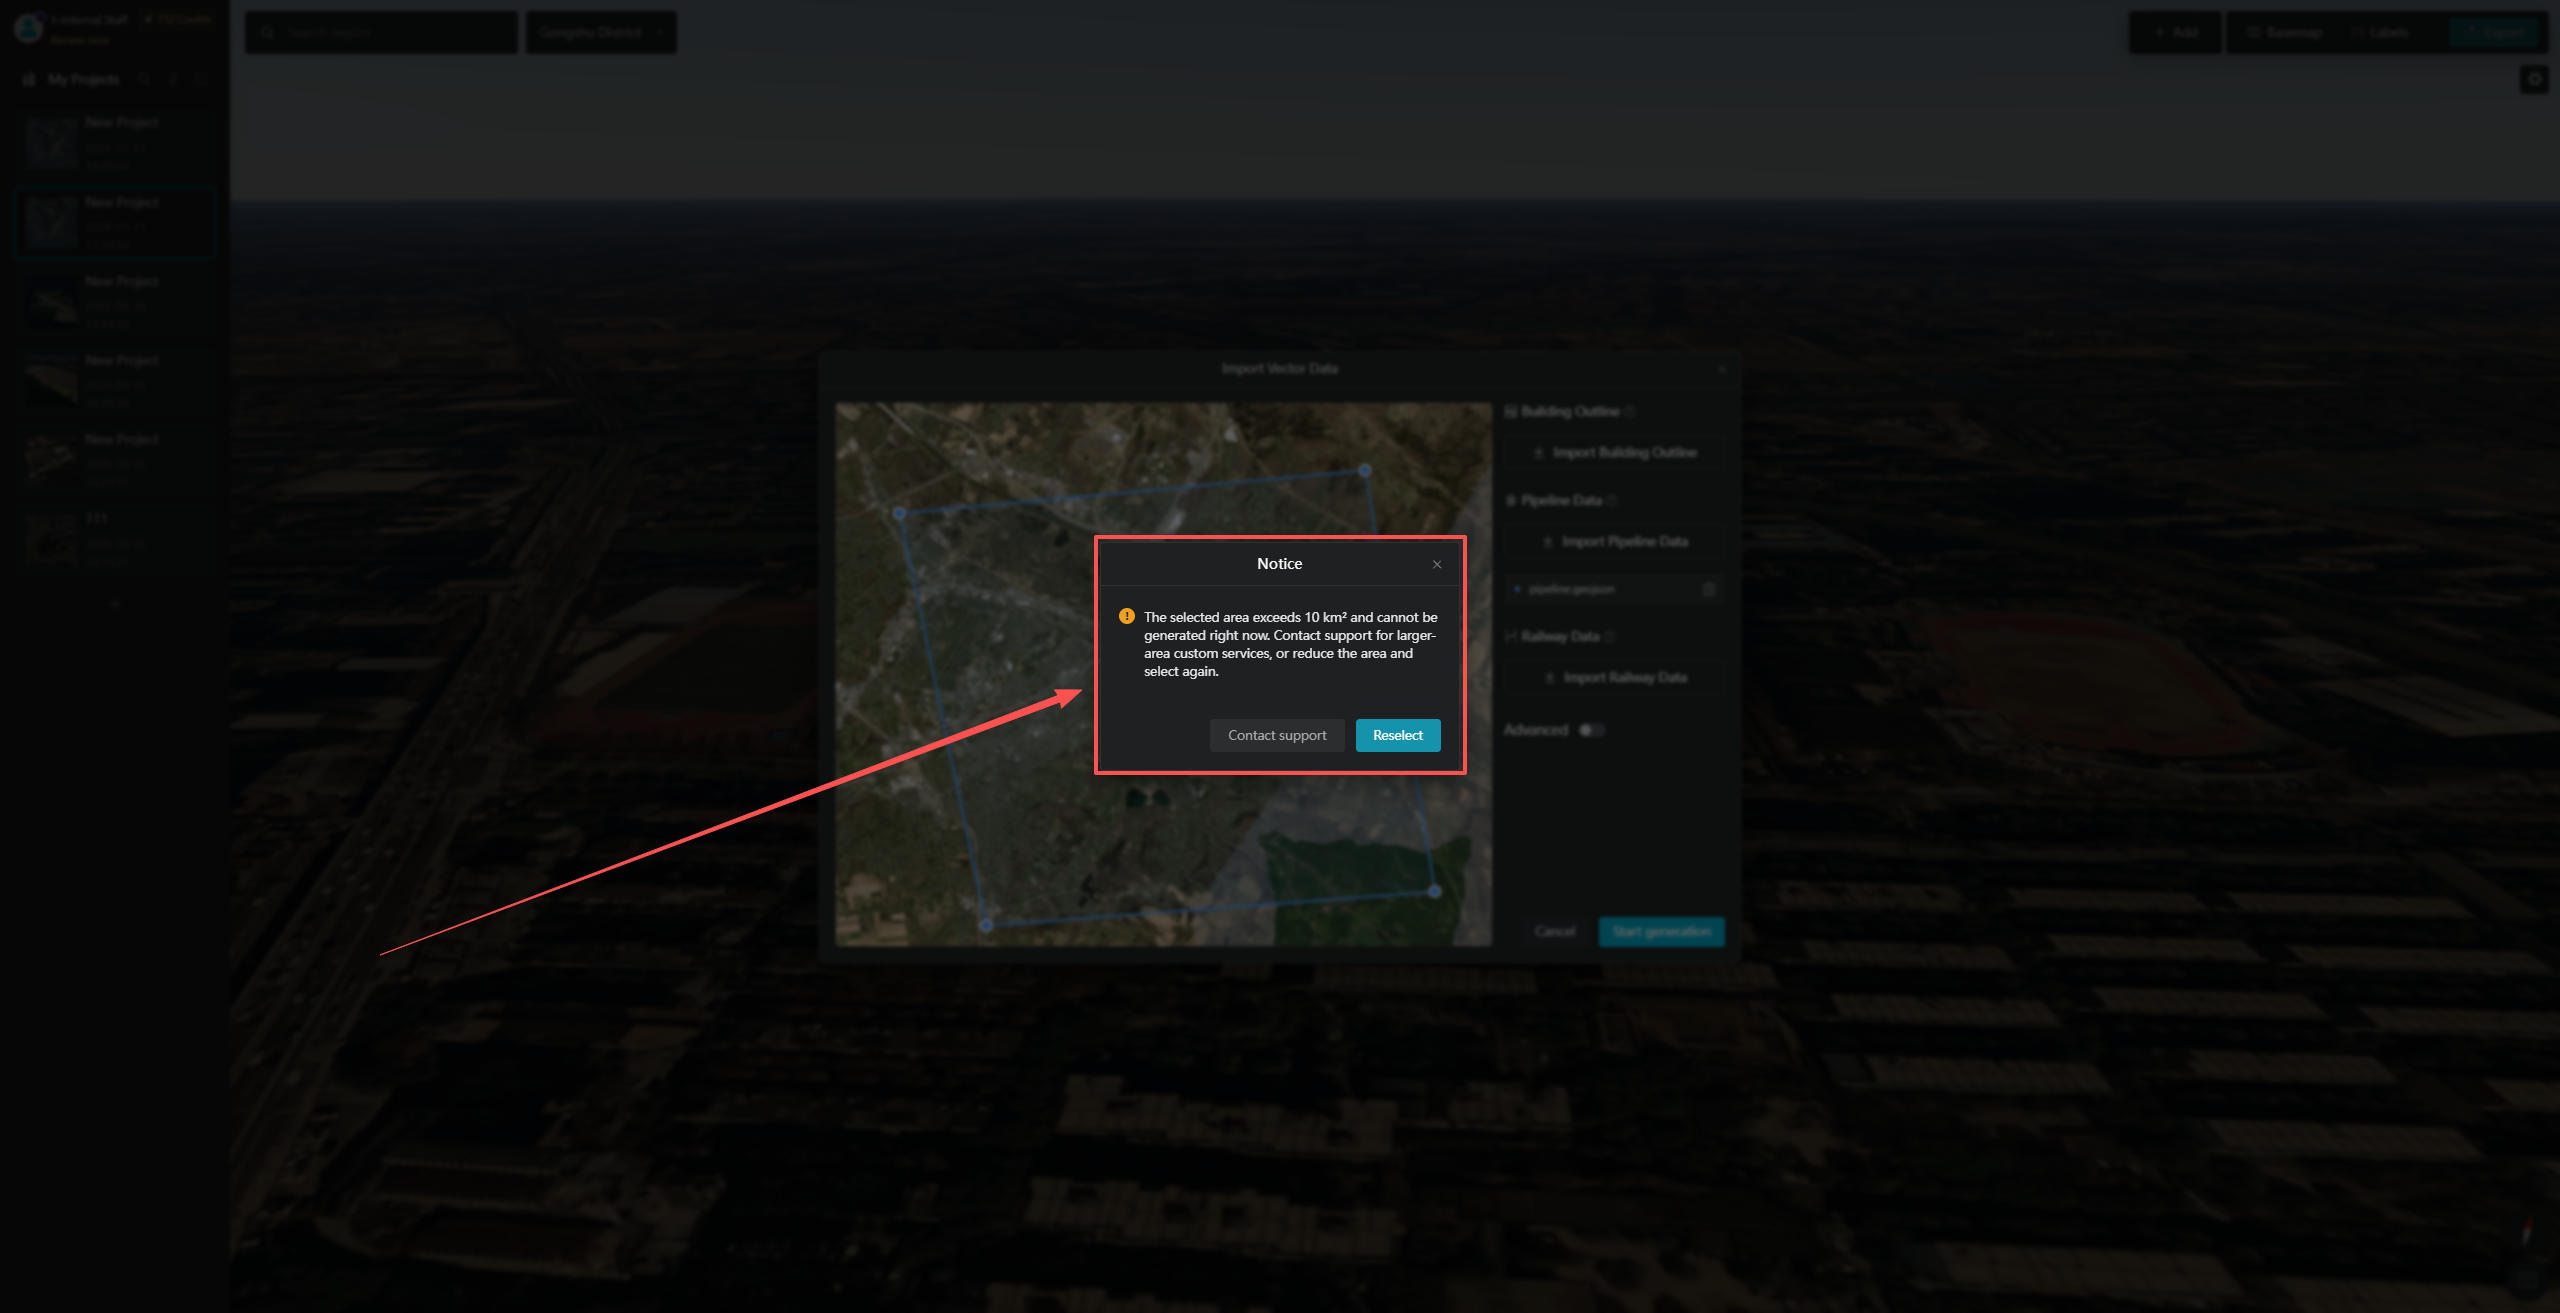
[Note] Direct generation is not supported for areas larger than 10 km². Please contact official customer support for information about large-area customization services, or reduce the selection area and try again.
3. Editing Pipeline Models
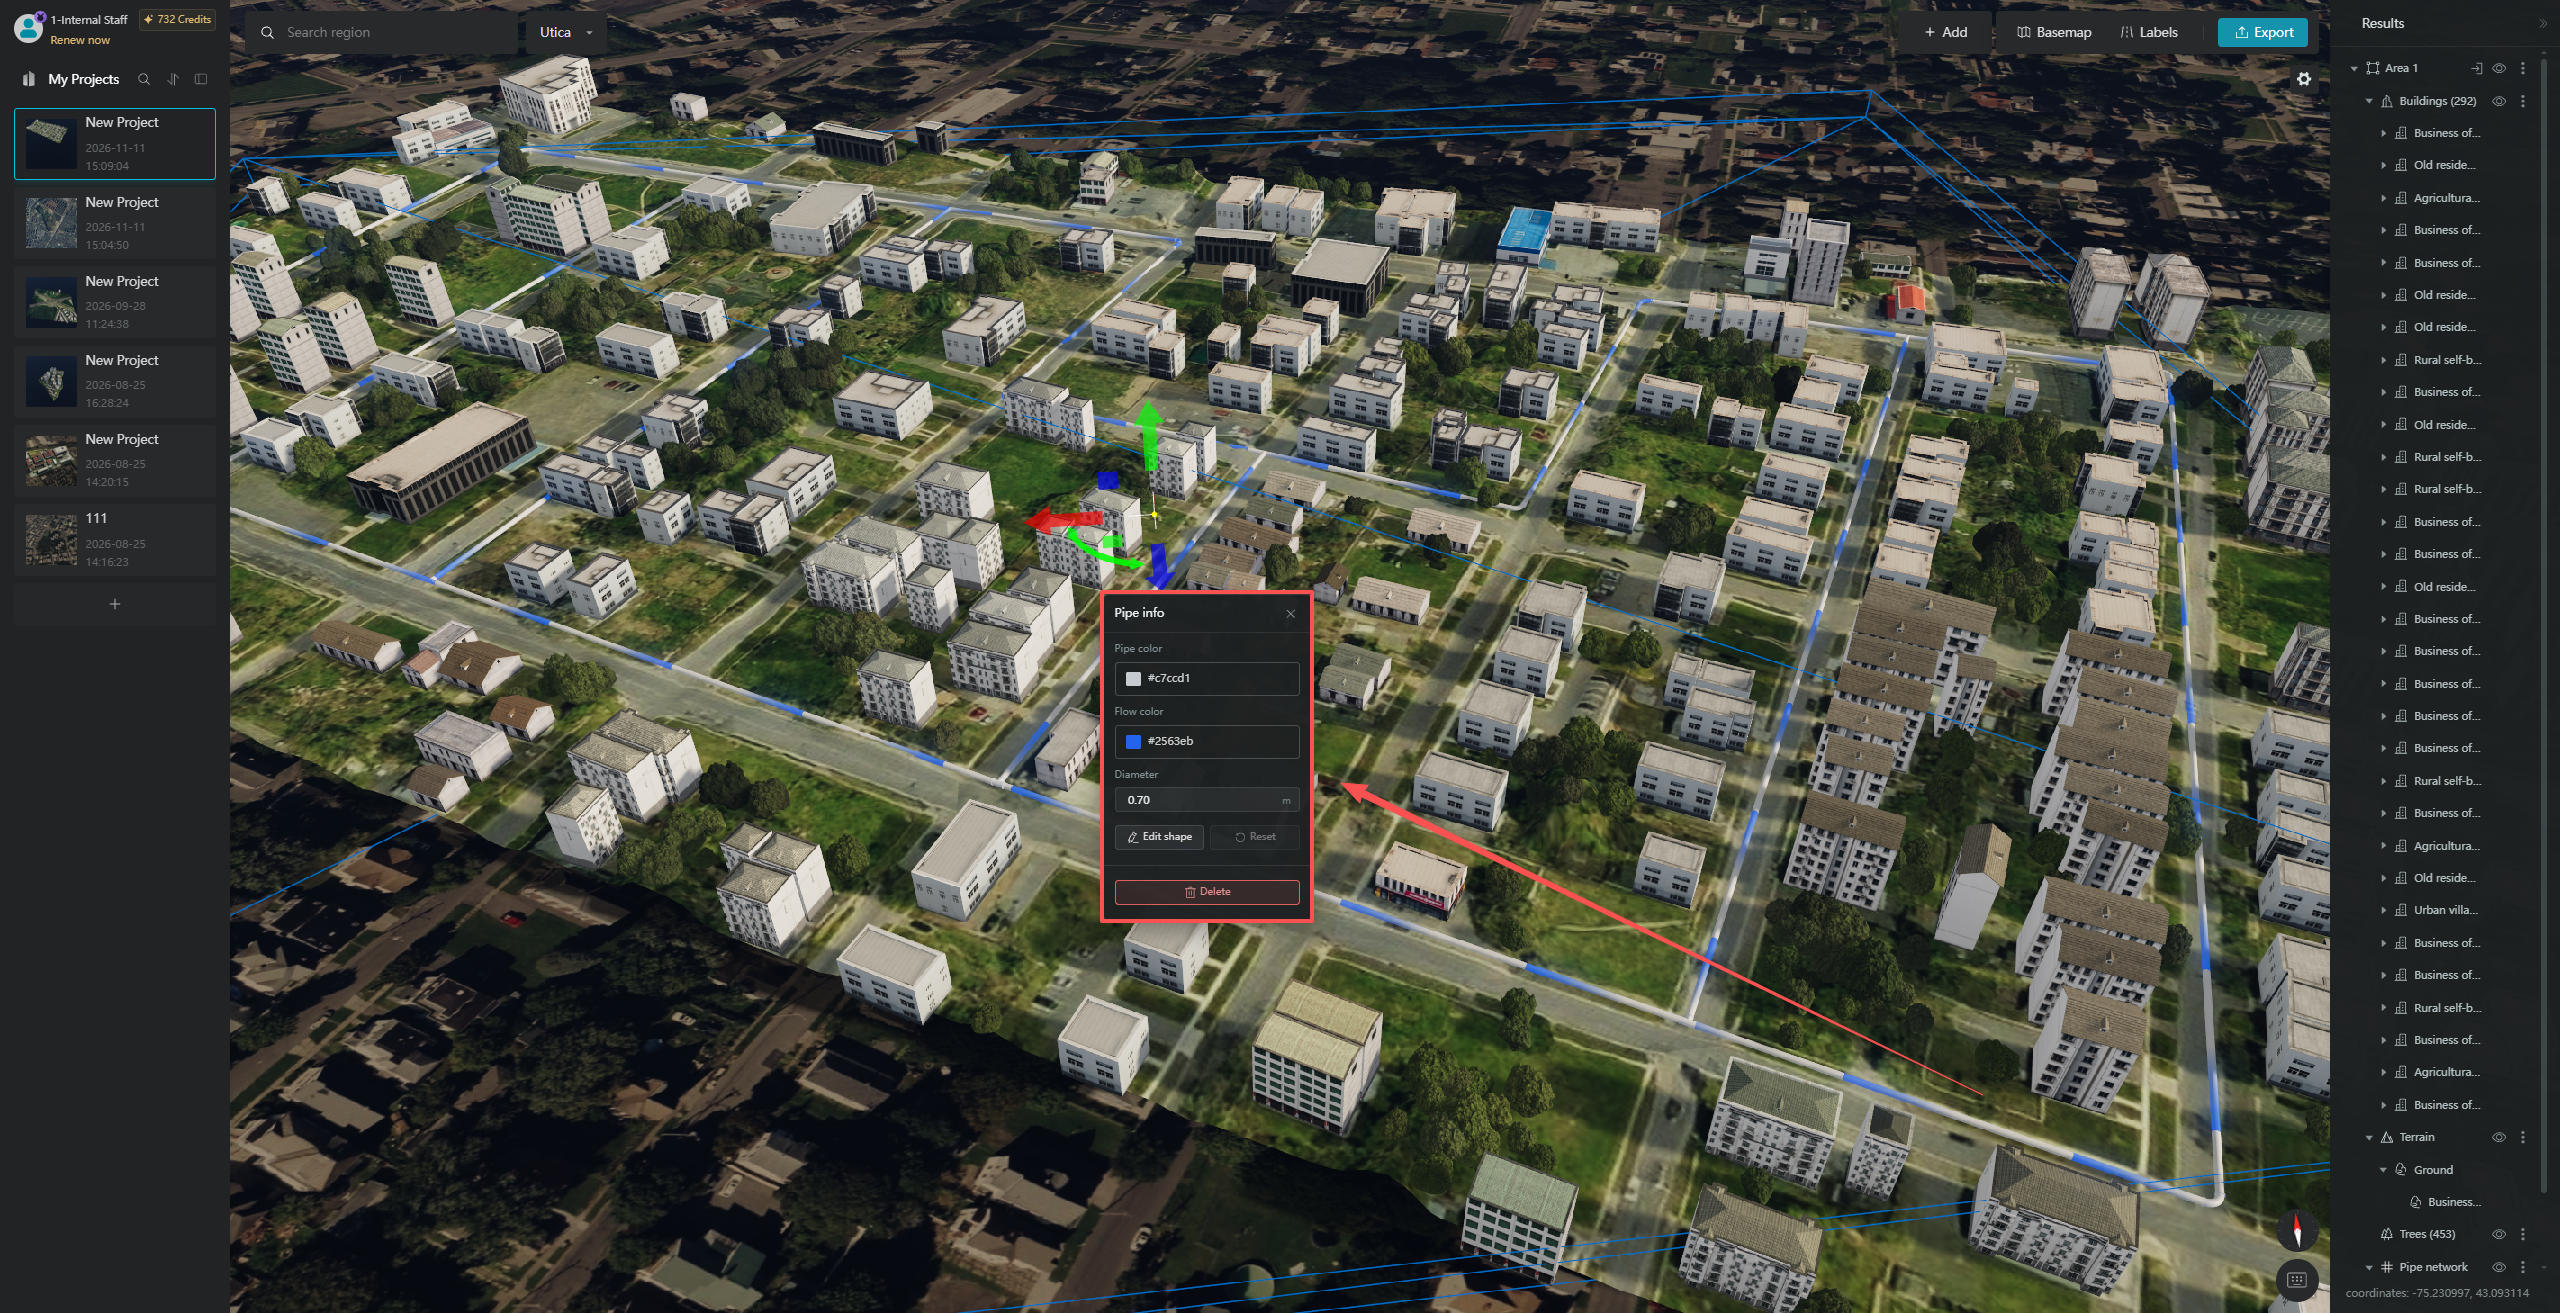
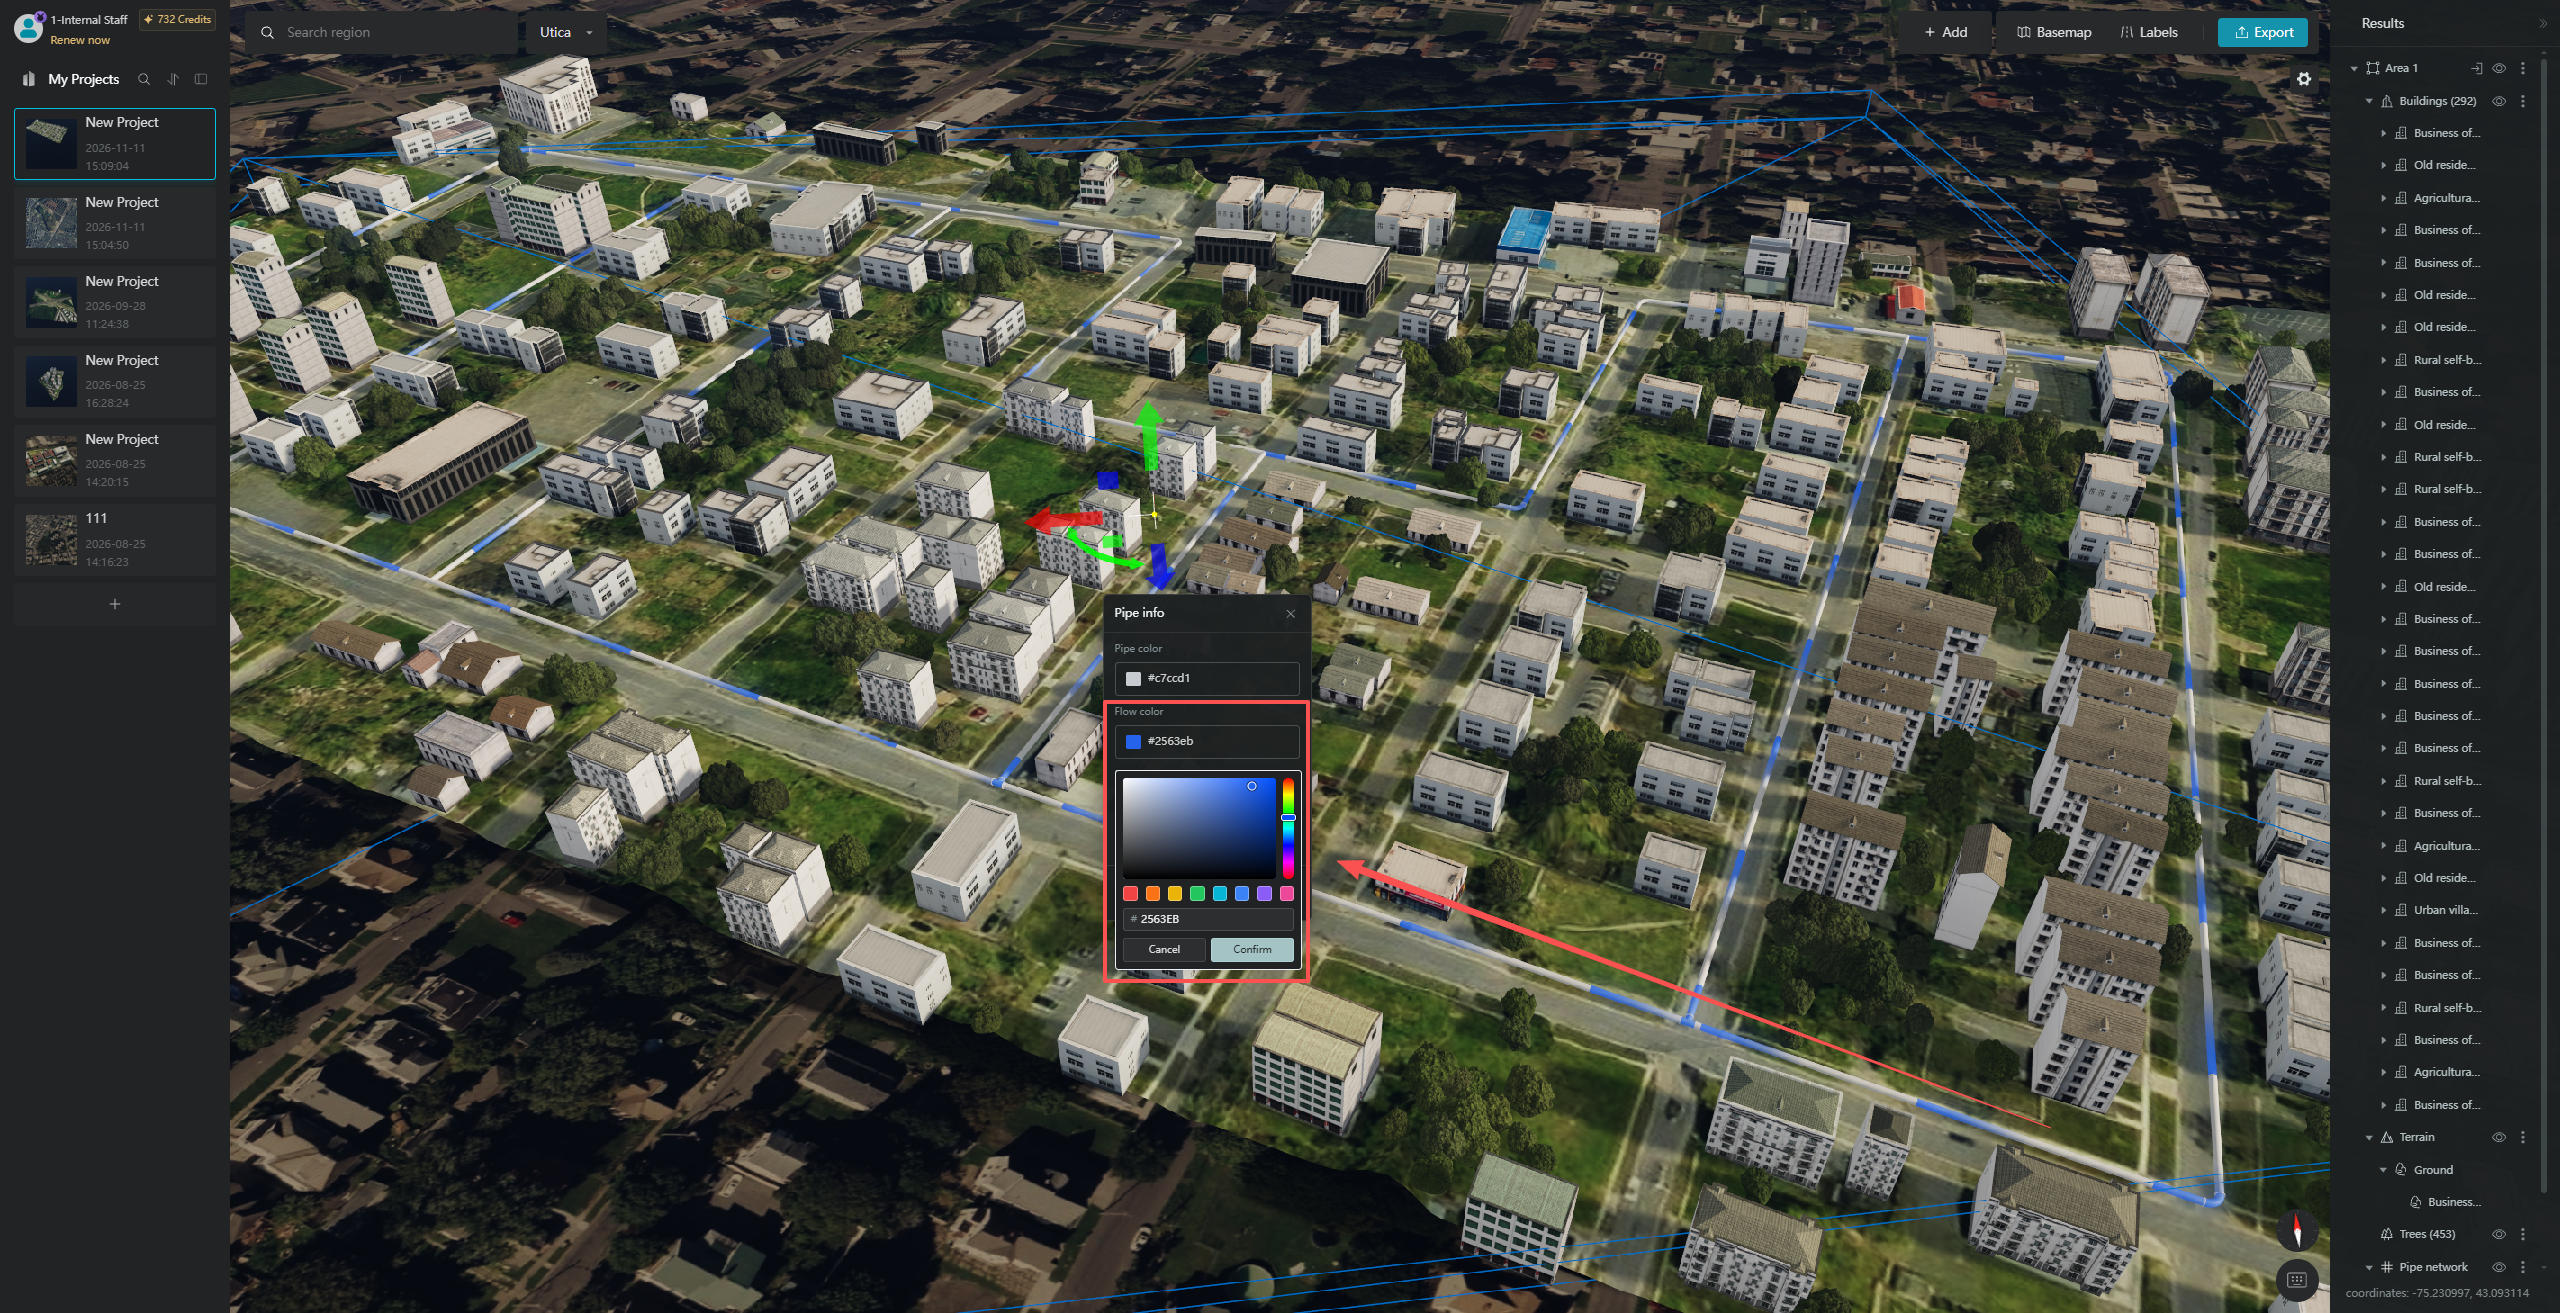
After the pipeline models have been generated, click a pipeline model in the scene. In the "Pipeline Info" window that appears, you can customize the "Pipeline Color", "Flow Color", and "Diameter".
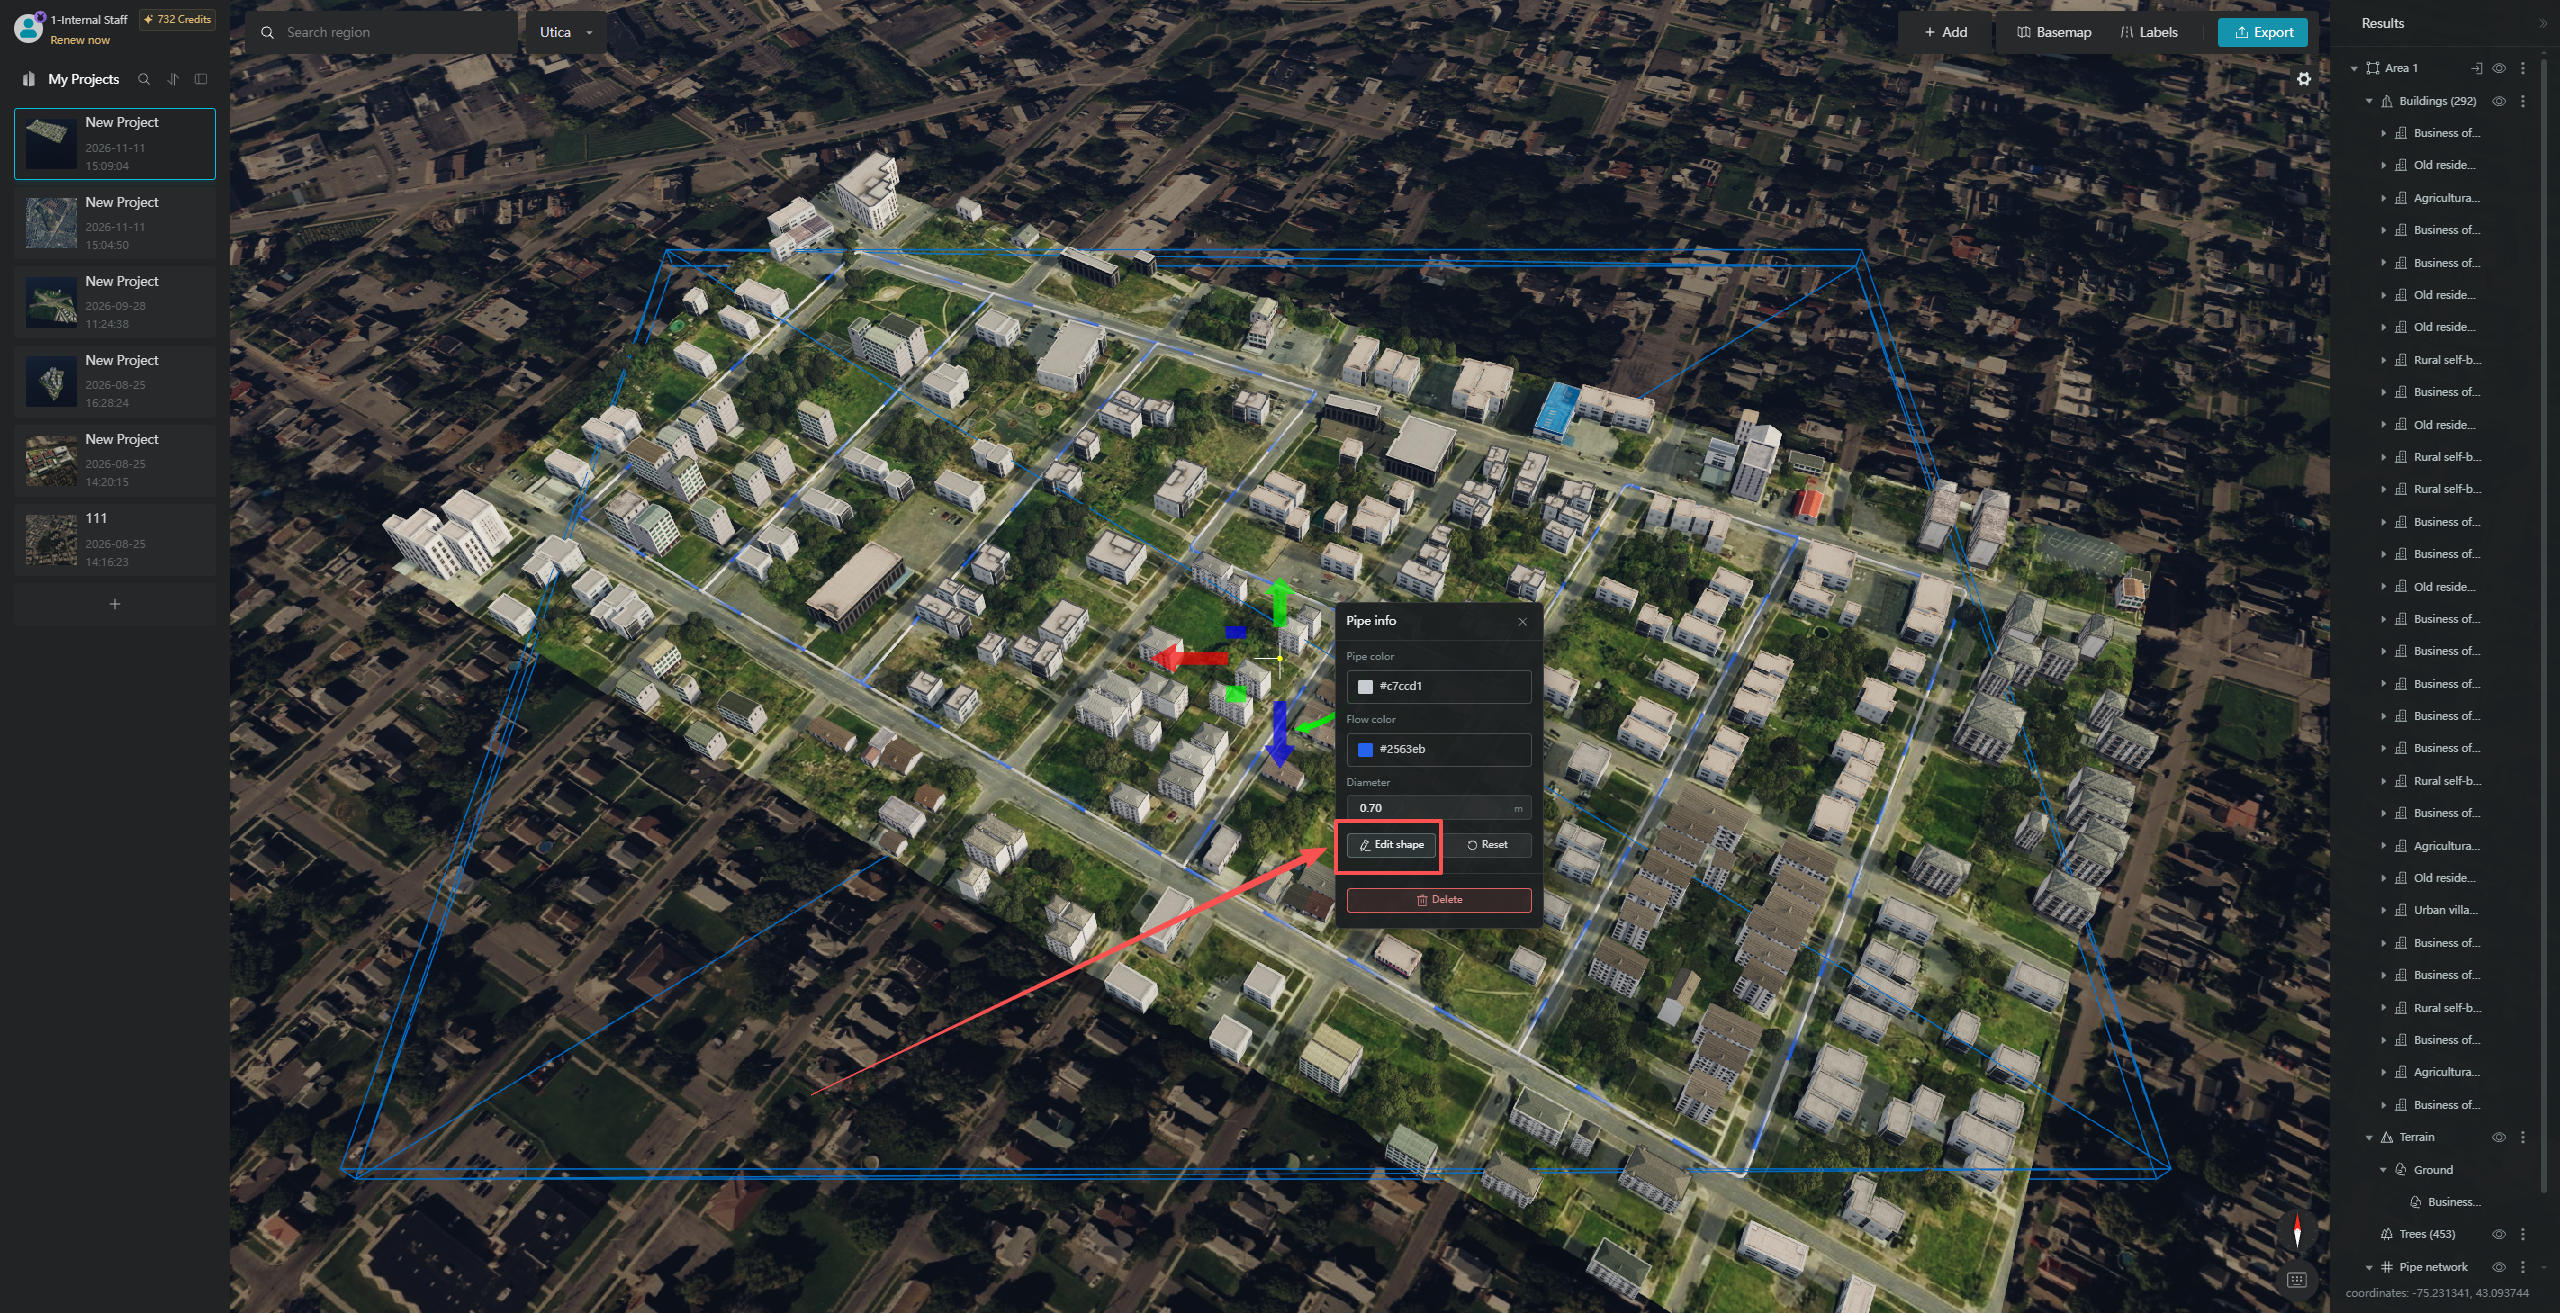
Click "Edit Shape" to modify the shape of the pipeline.
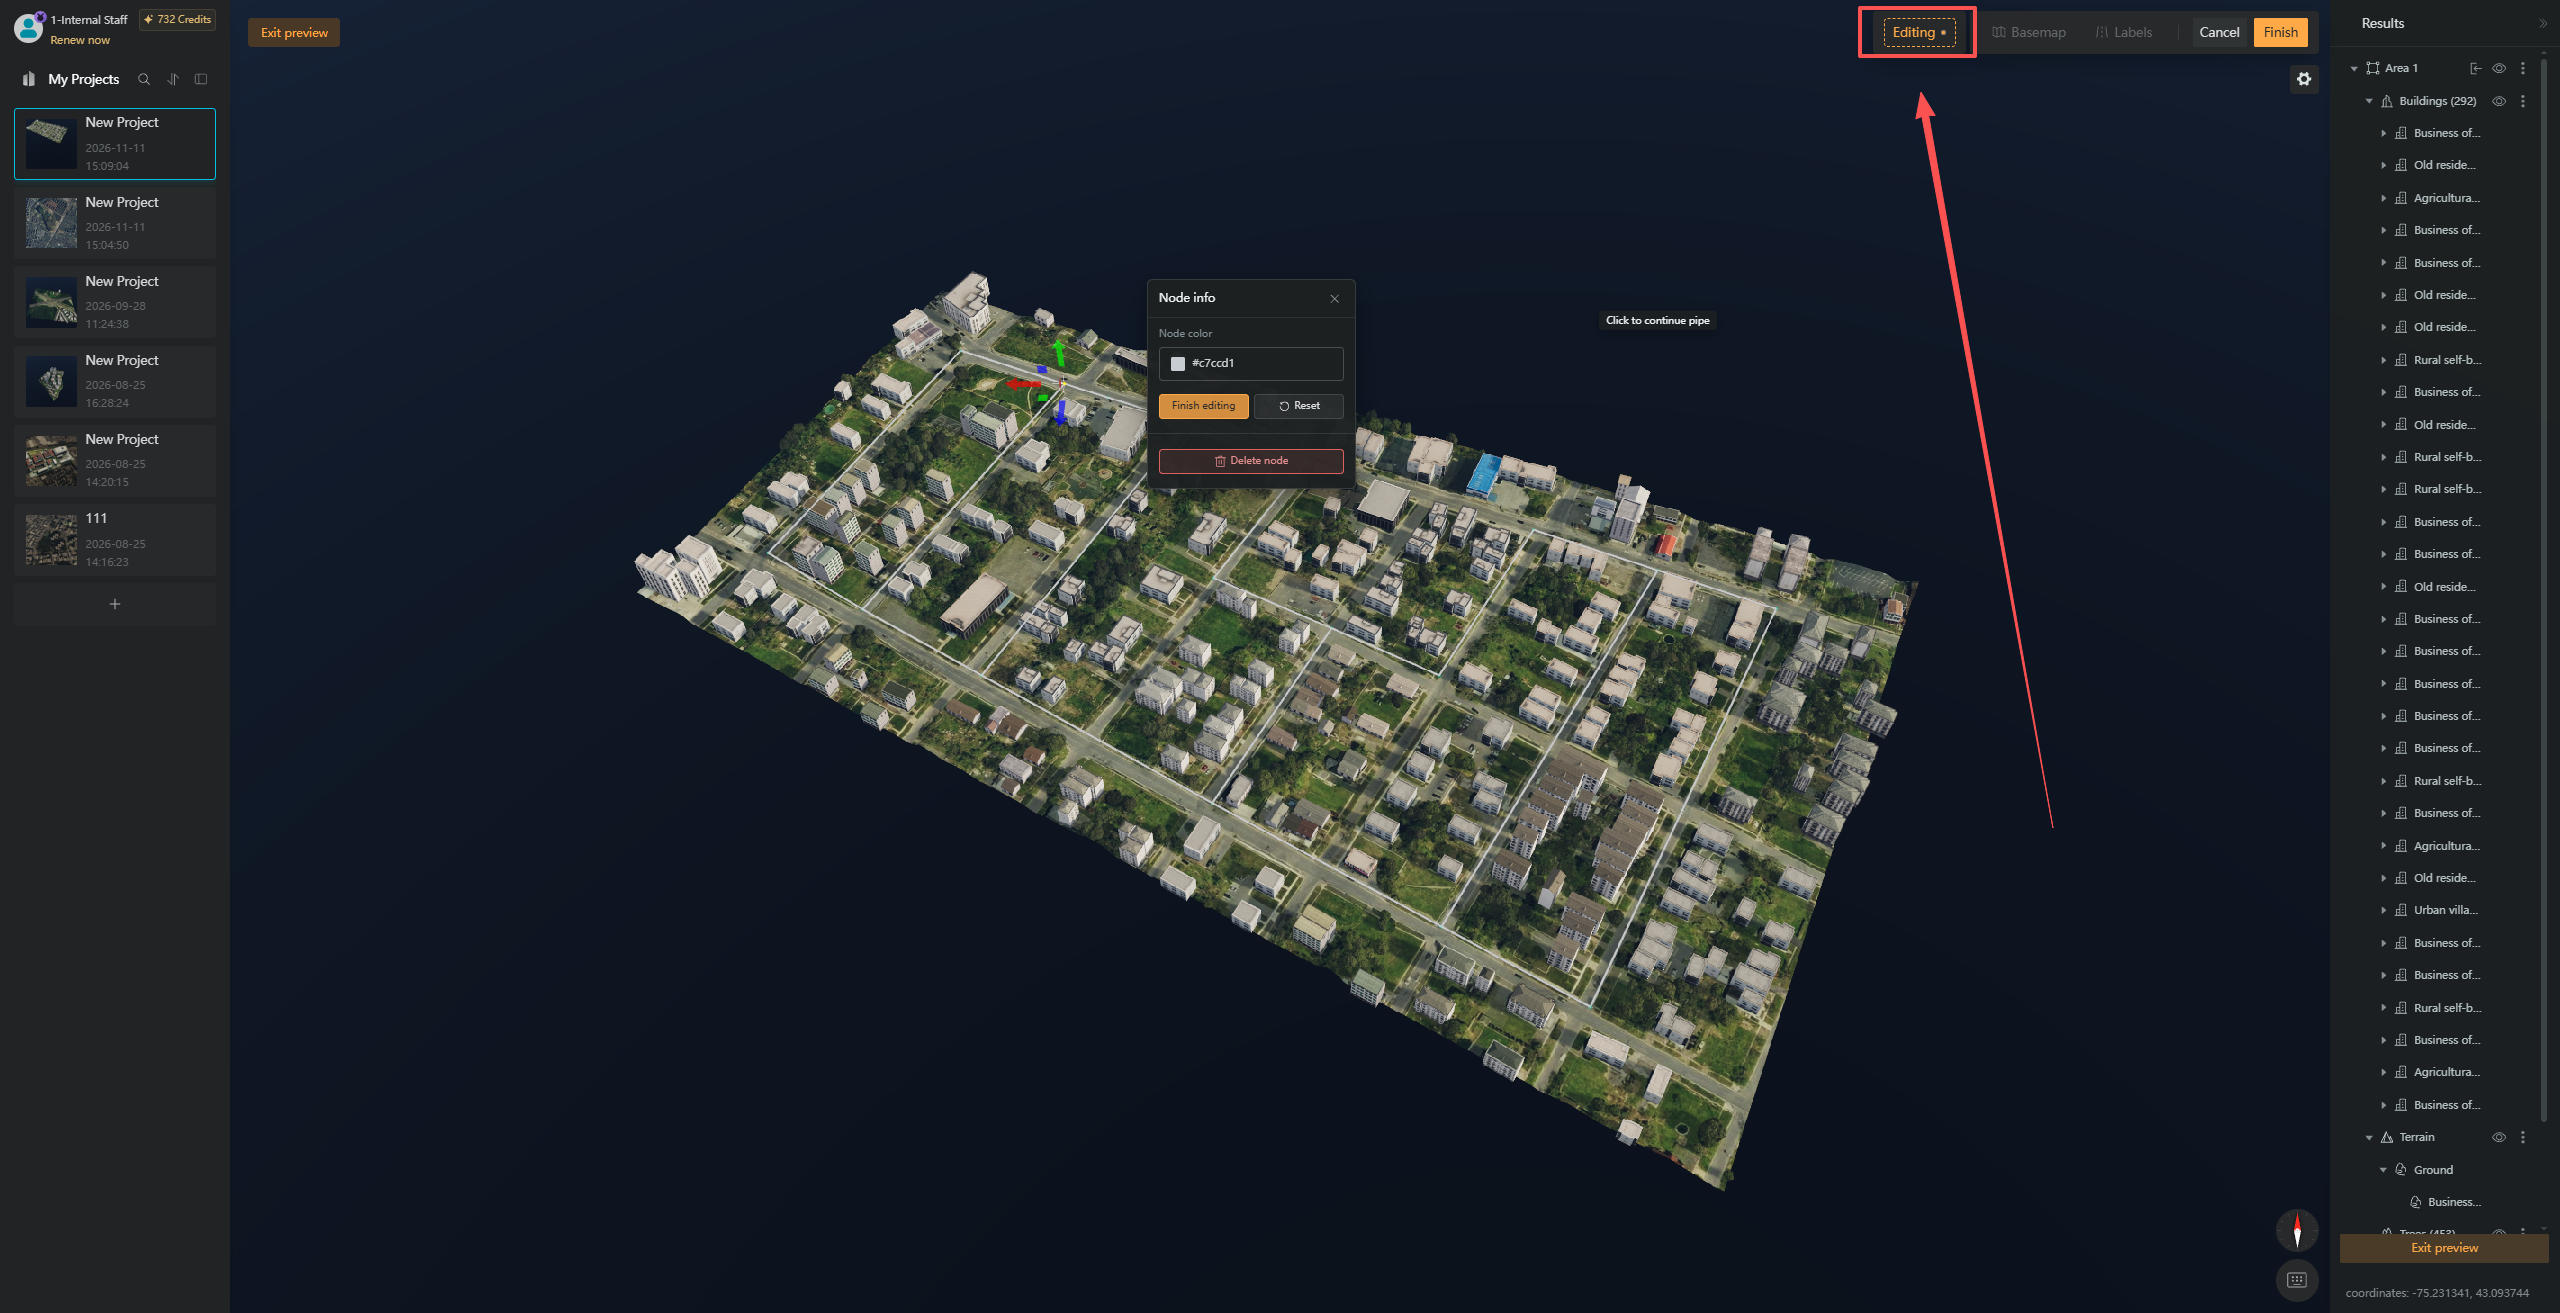
Left-click any node along the pipeline model to select it. In the "Node Infor" window that appears, you can customize the "Node Color".
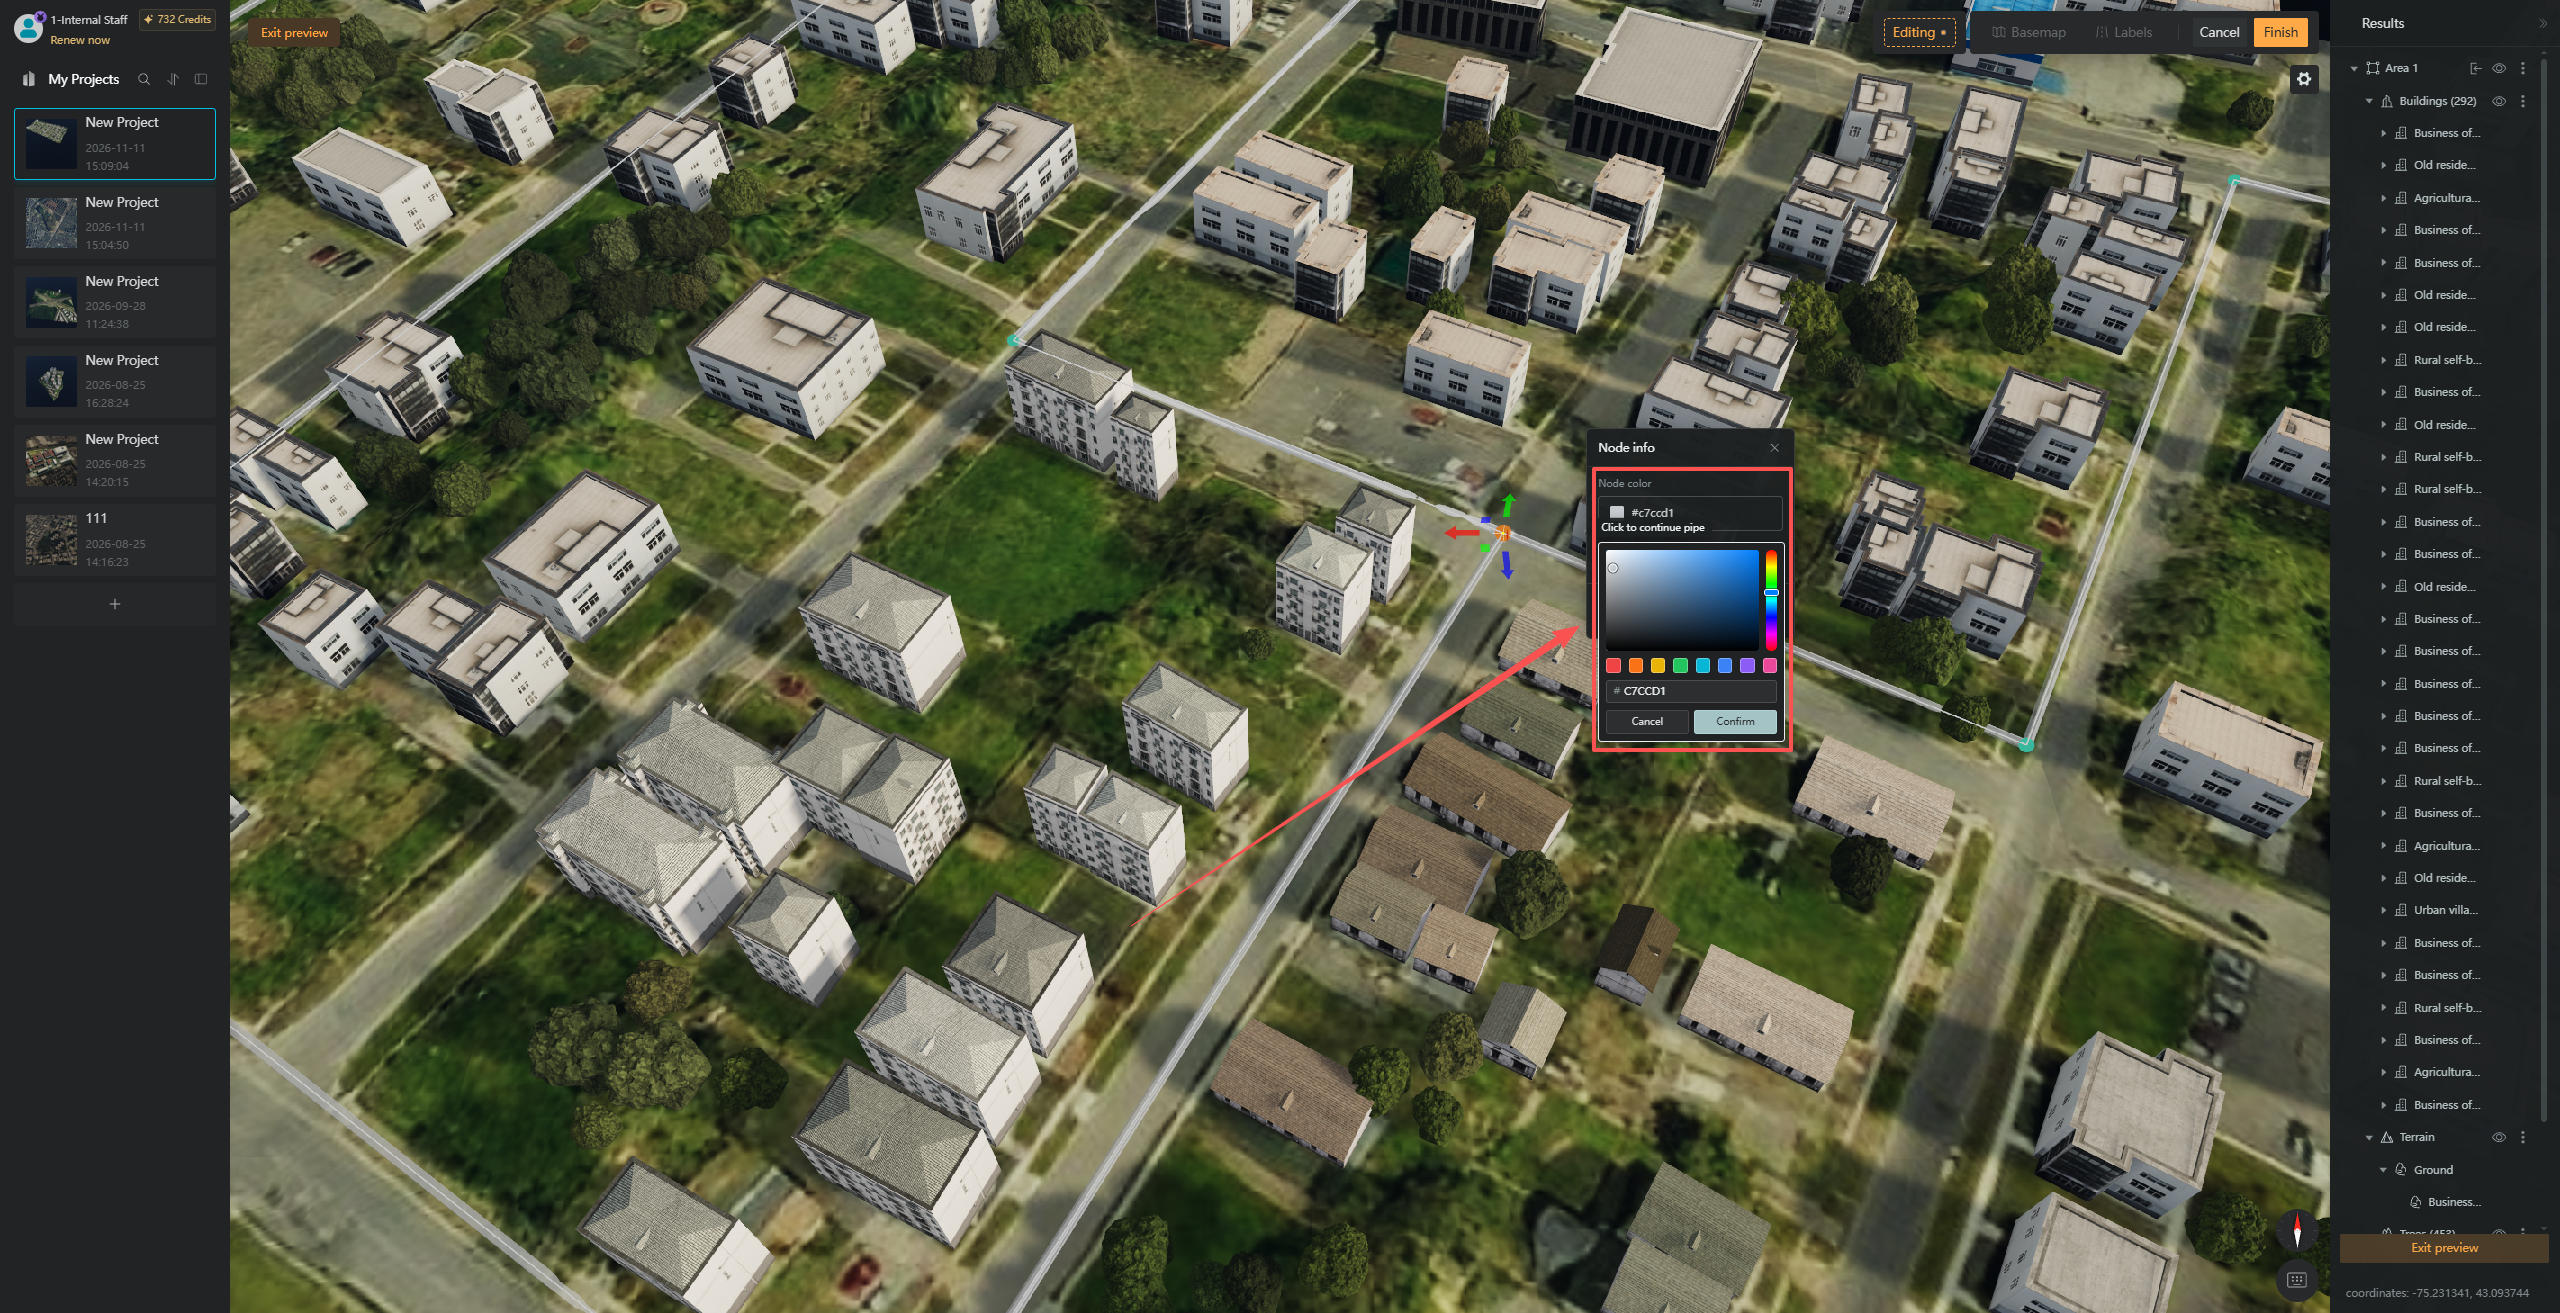
With a pipeline node selected, you can freely drag the node or use the axis gizmo arrows to adjust its position.
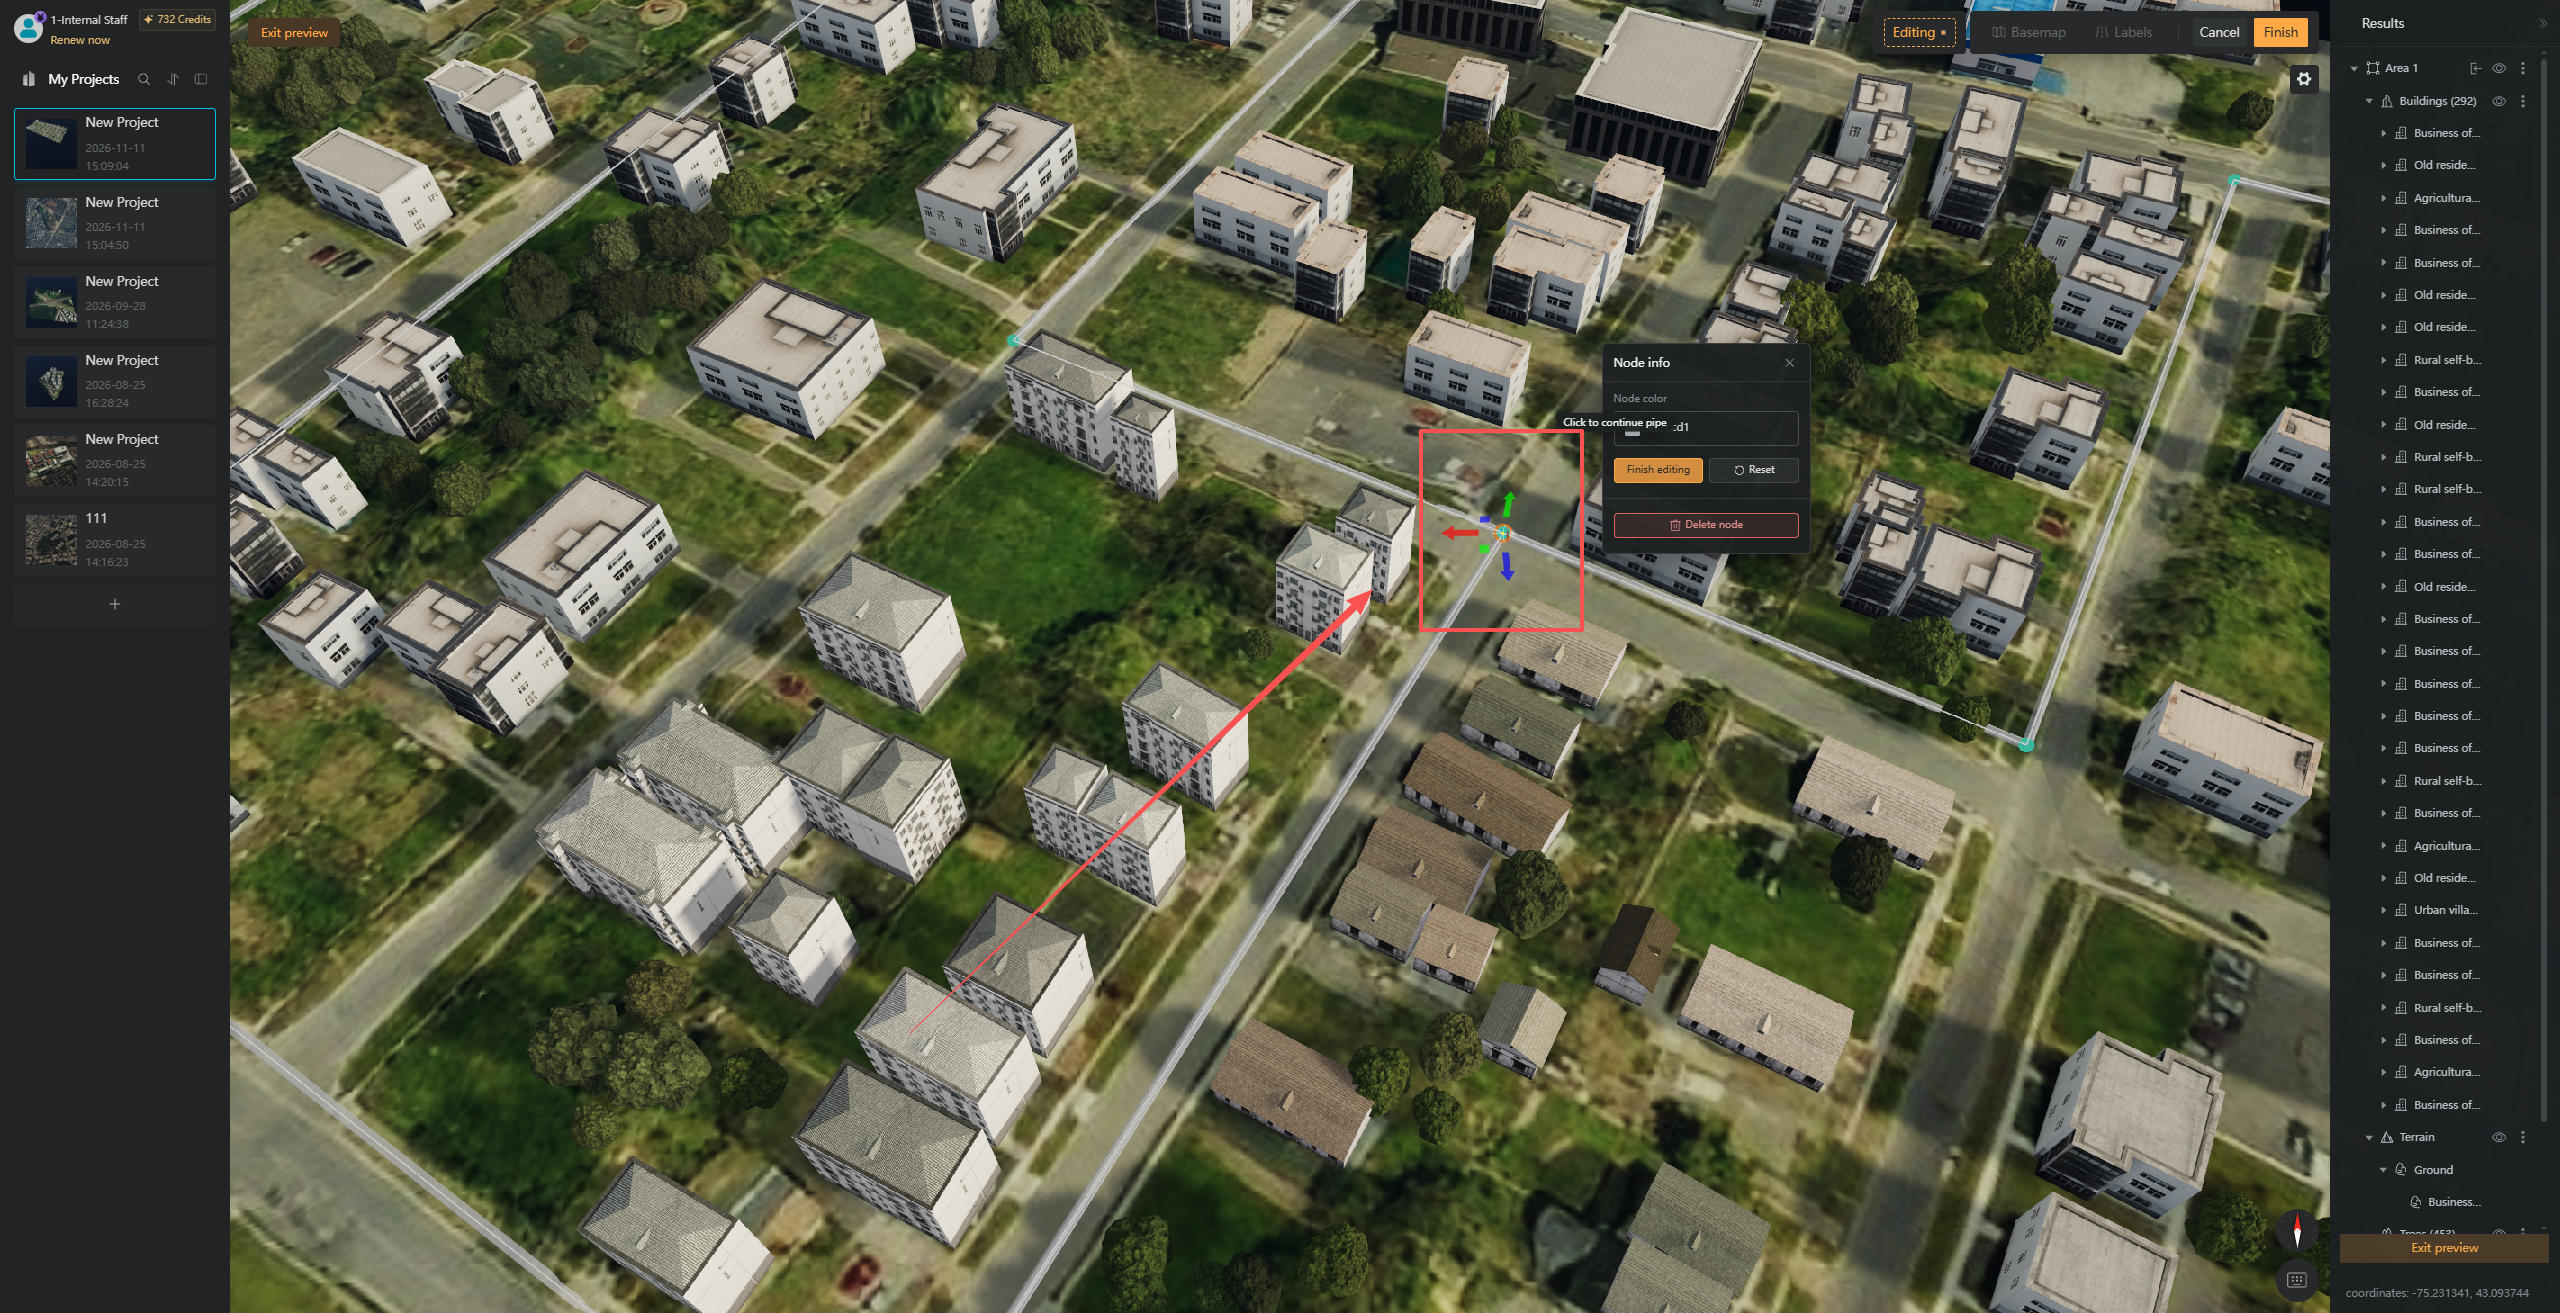
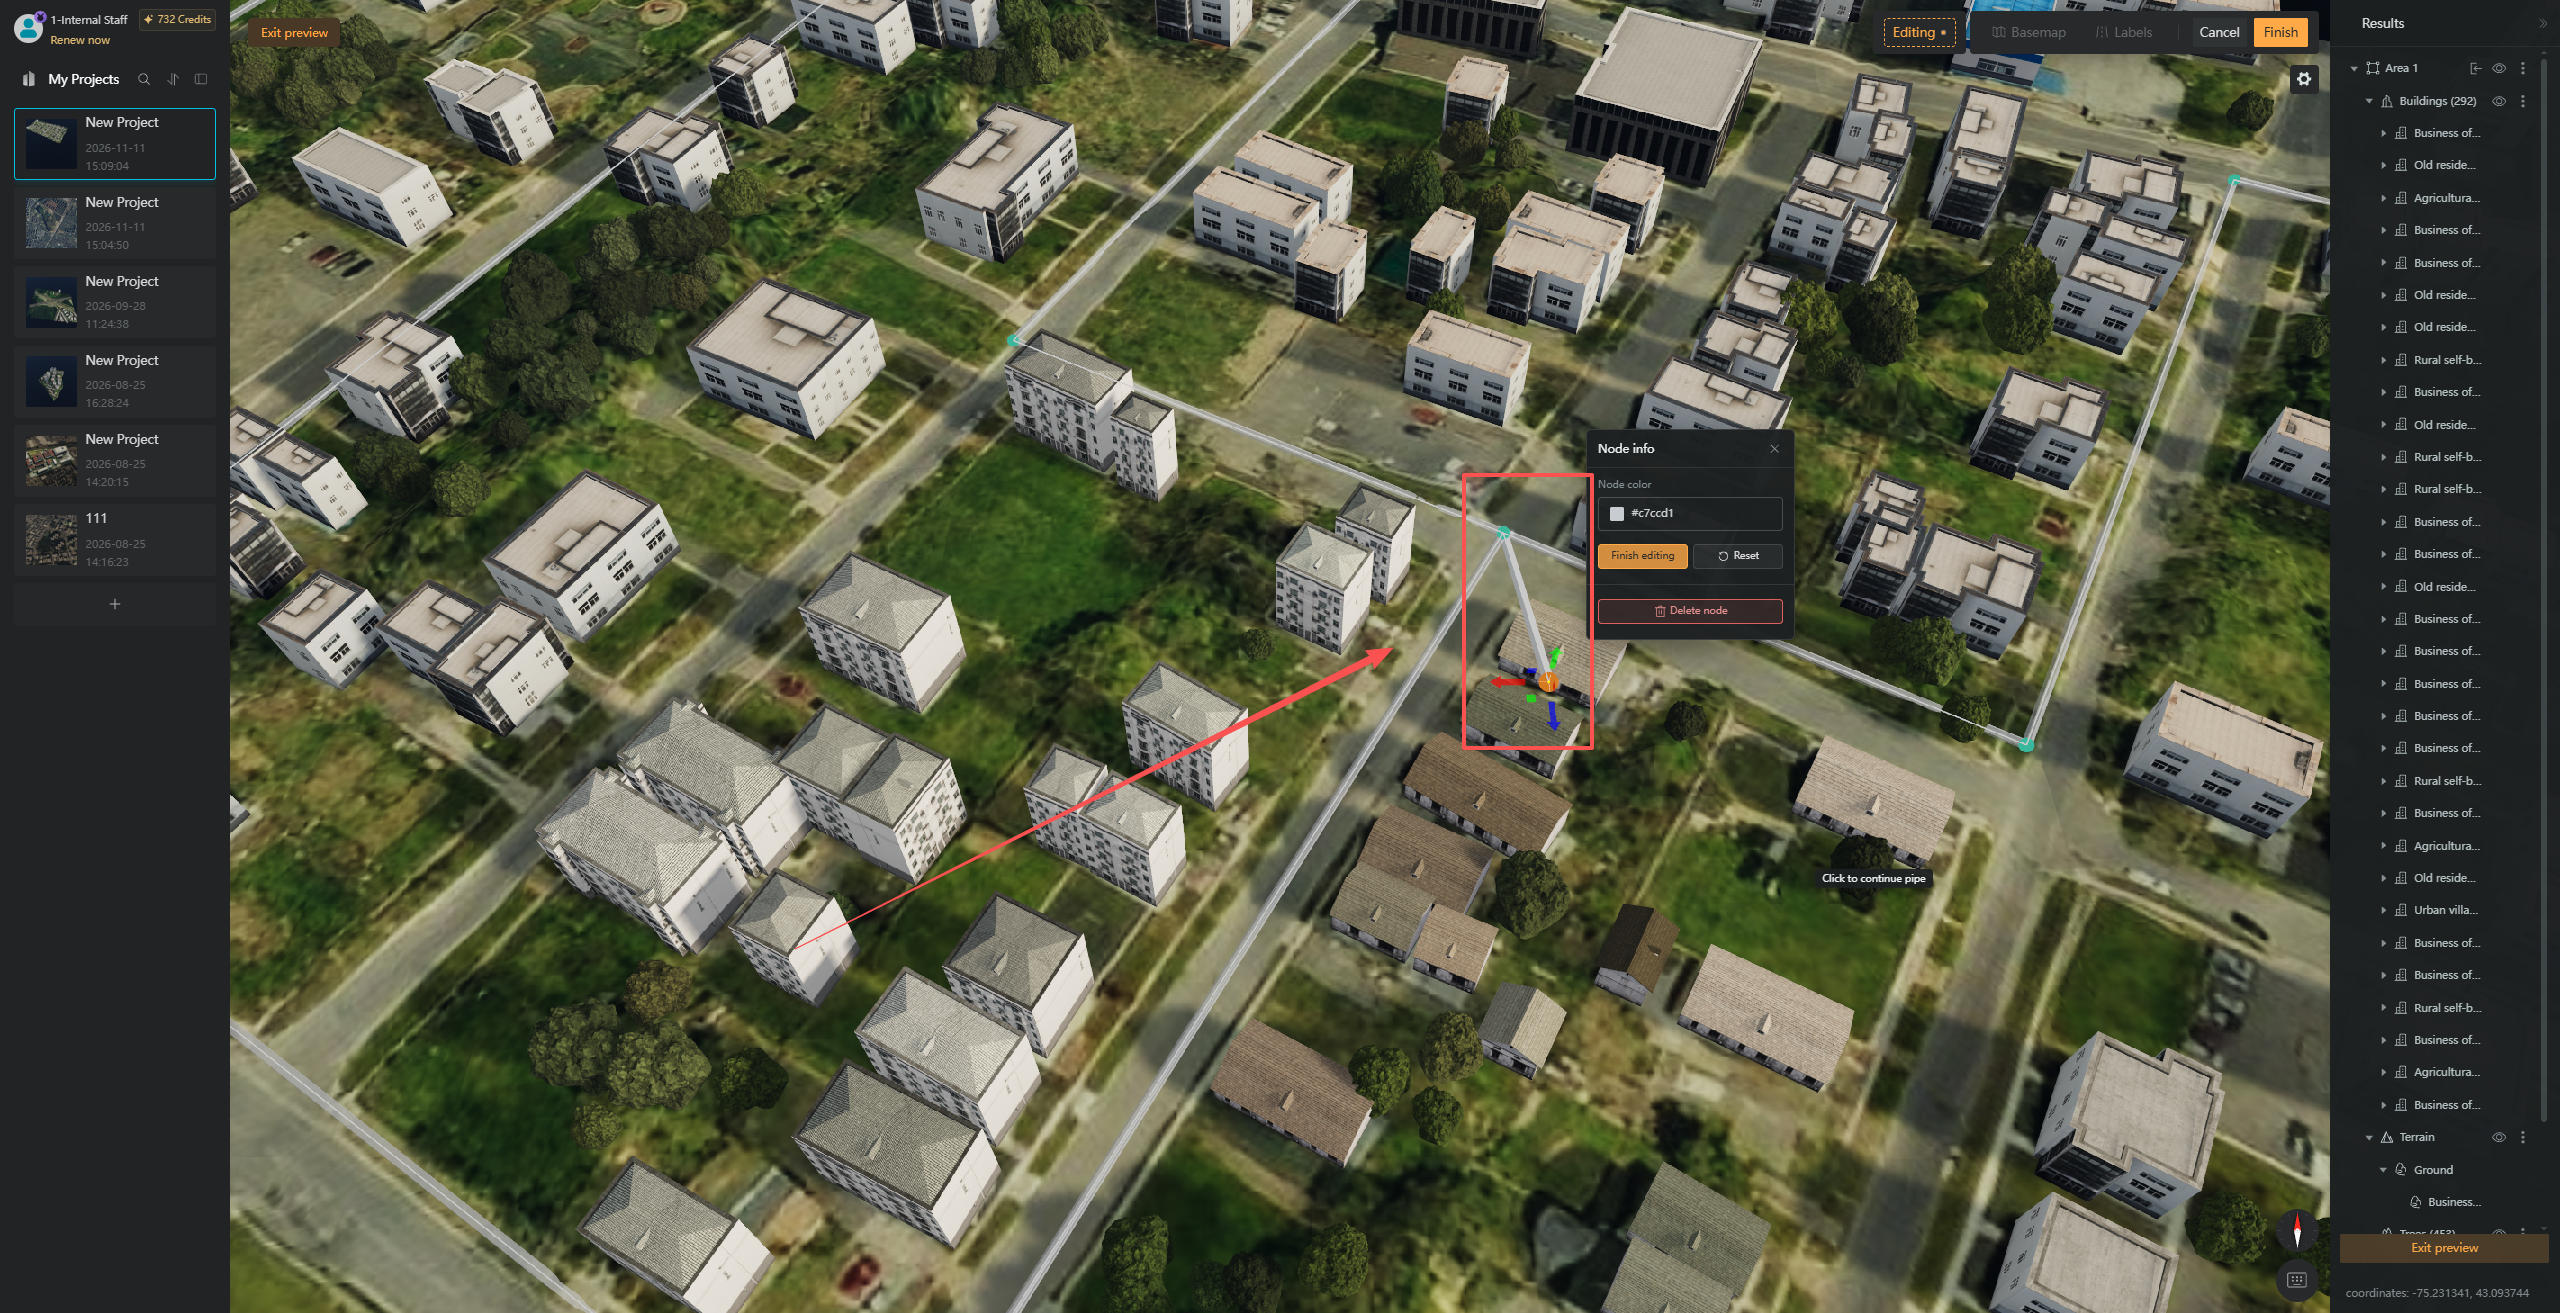
To extend an existing pipeline, simply left-click the position where you want the pipeline to continue. A new pipeline segment will be created from the currently selected node. If you want to undo the extension, right-click to revert to the previous step.
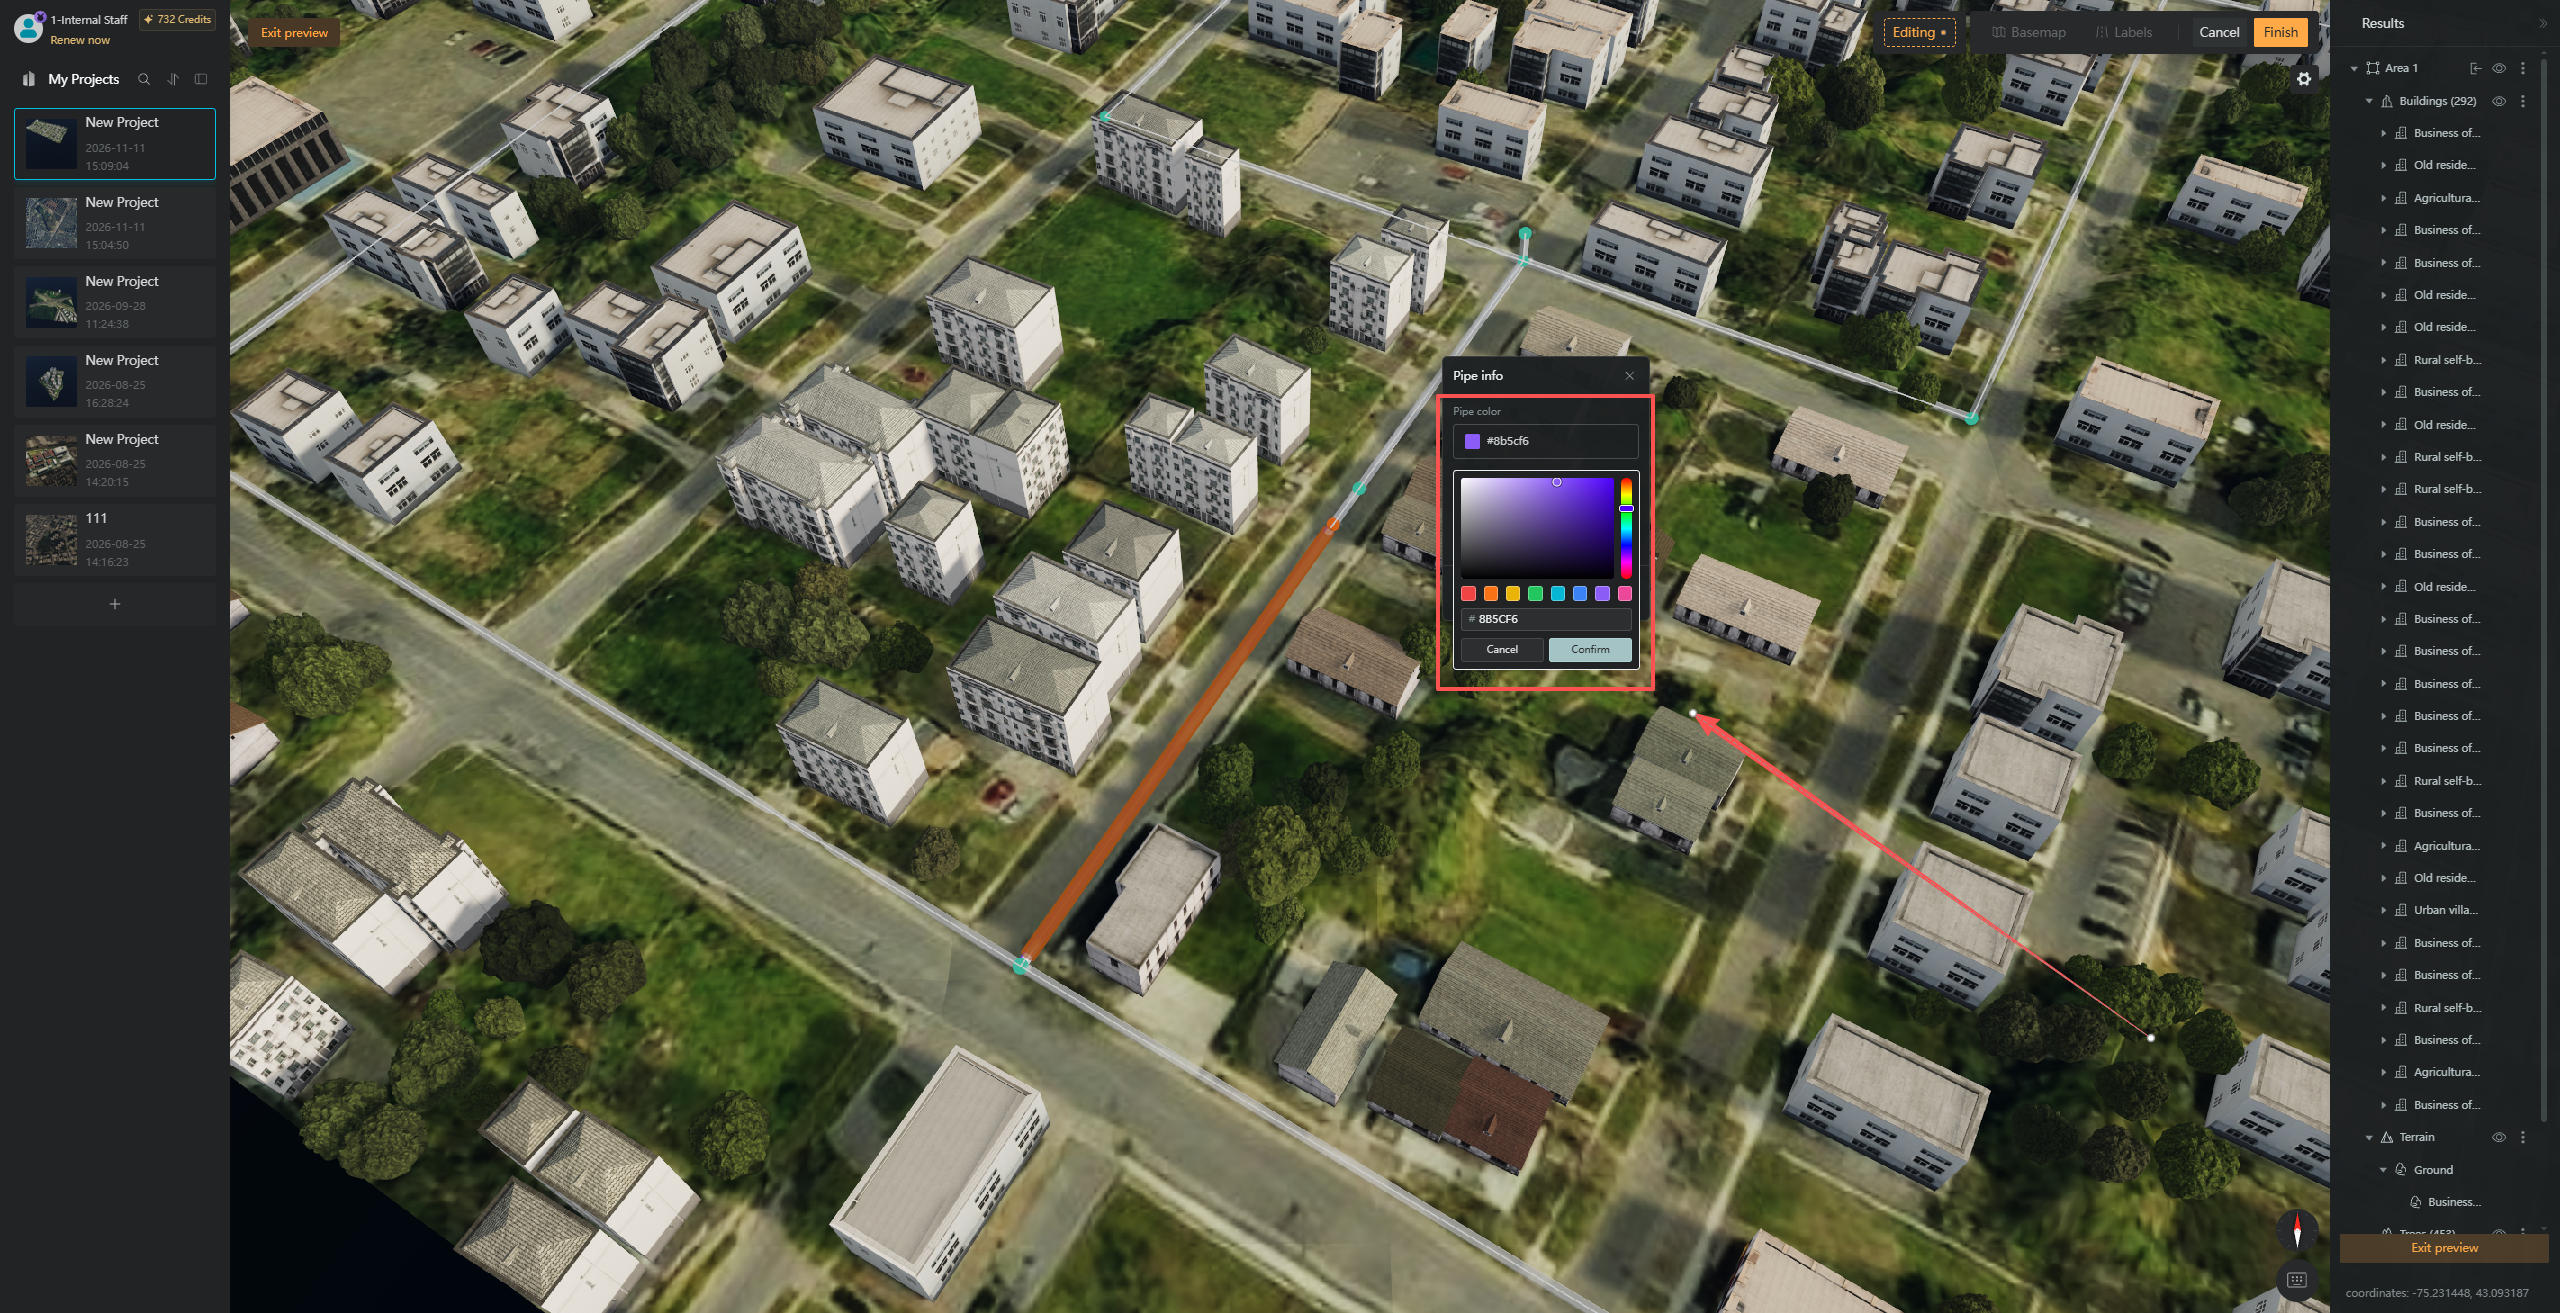
Right-click anywhere along a pipeline to select an individual pipe segment. In the corresponding "Pipeline Infor" window, you can adjust its "Pipeline Color" and "Pipe Diameter".
Once you've finished editing the pipeline model, click "Finish Editing" to save your changes.
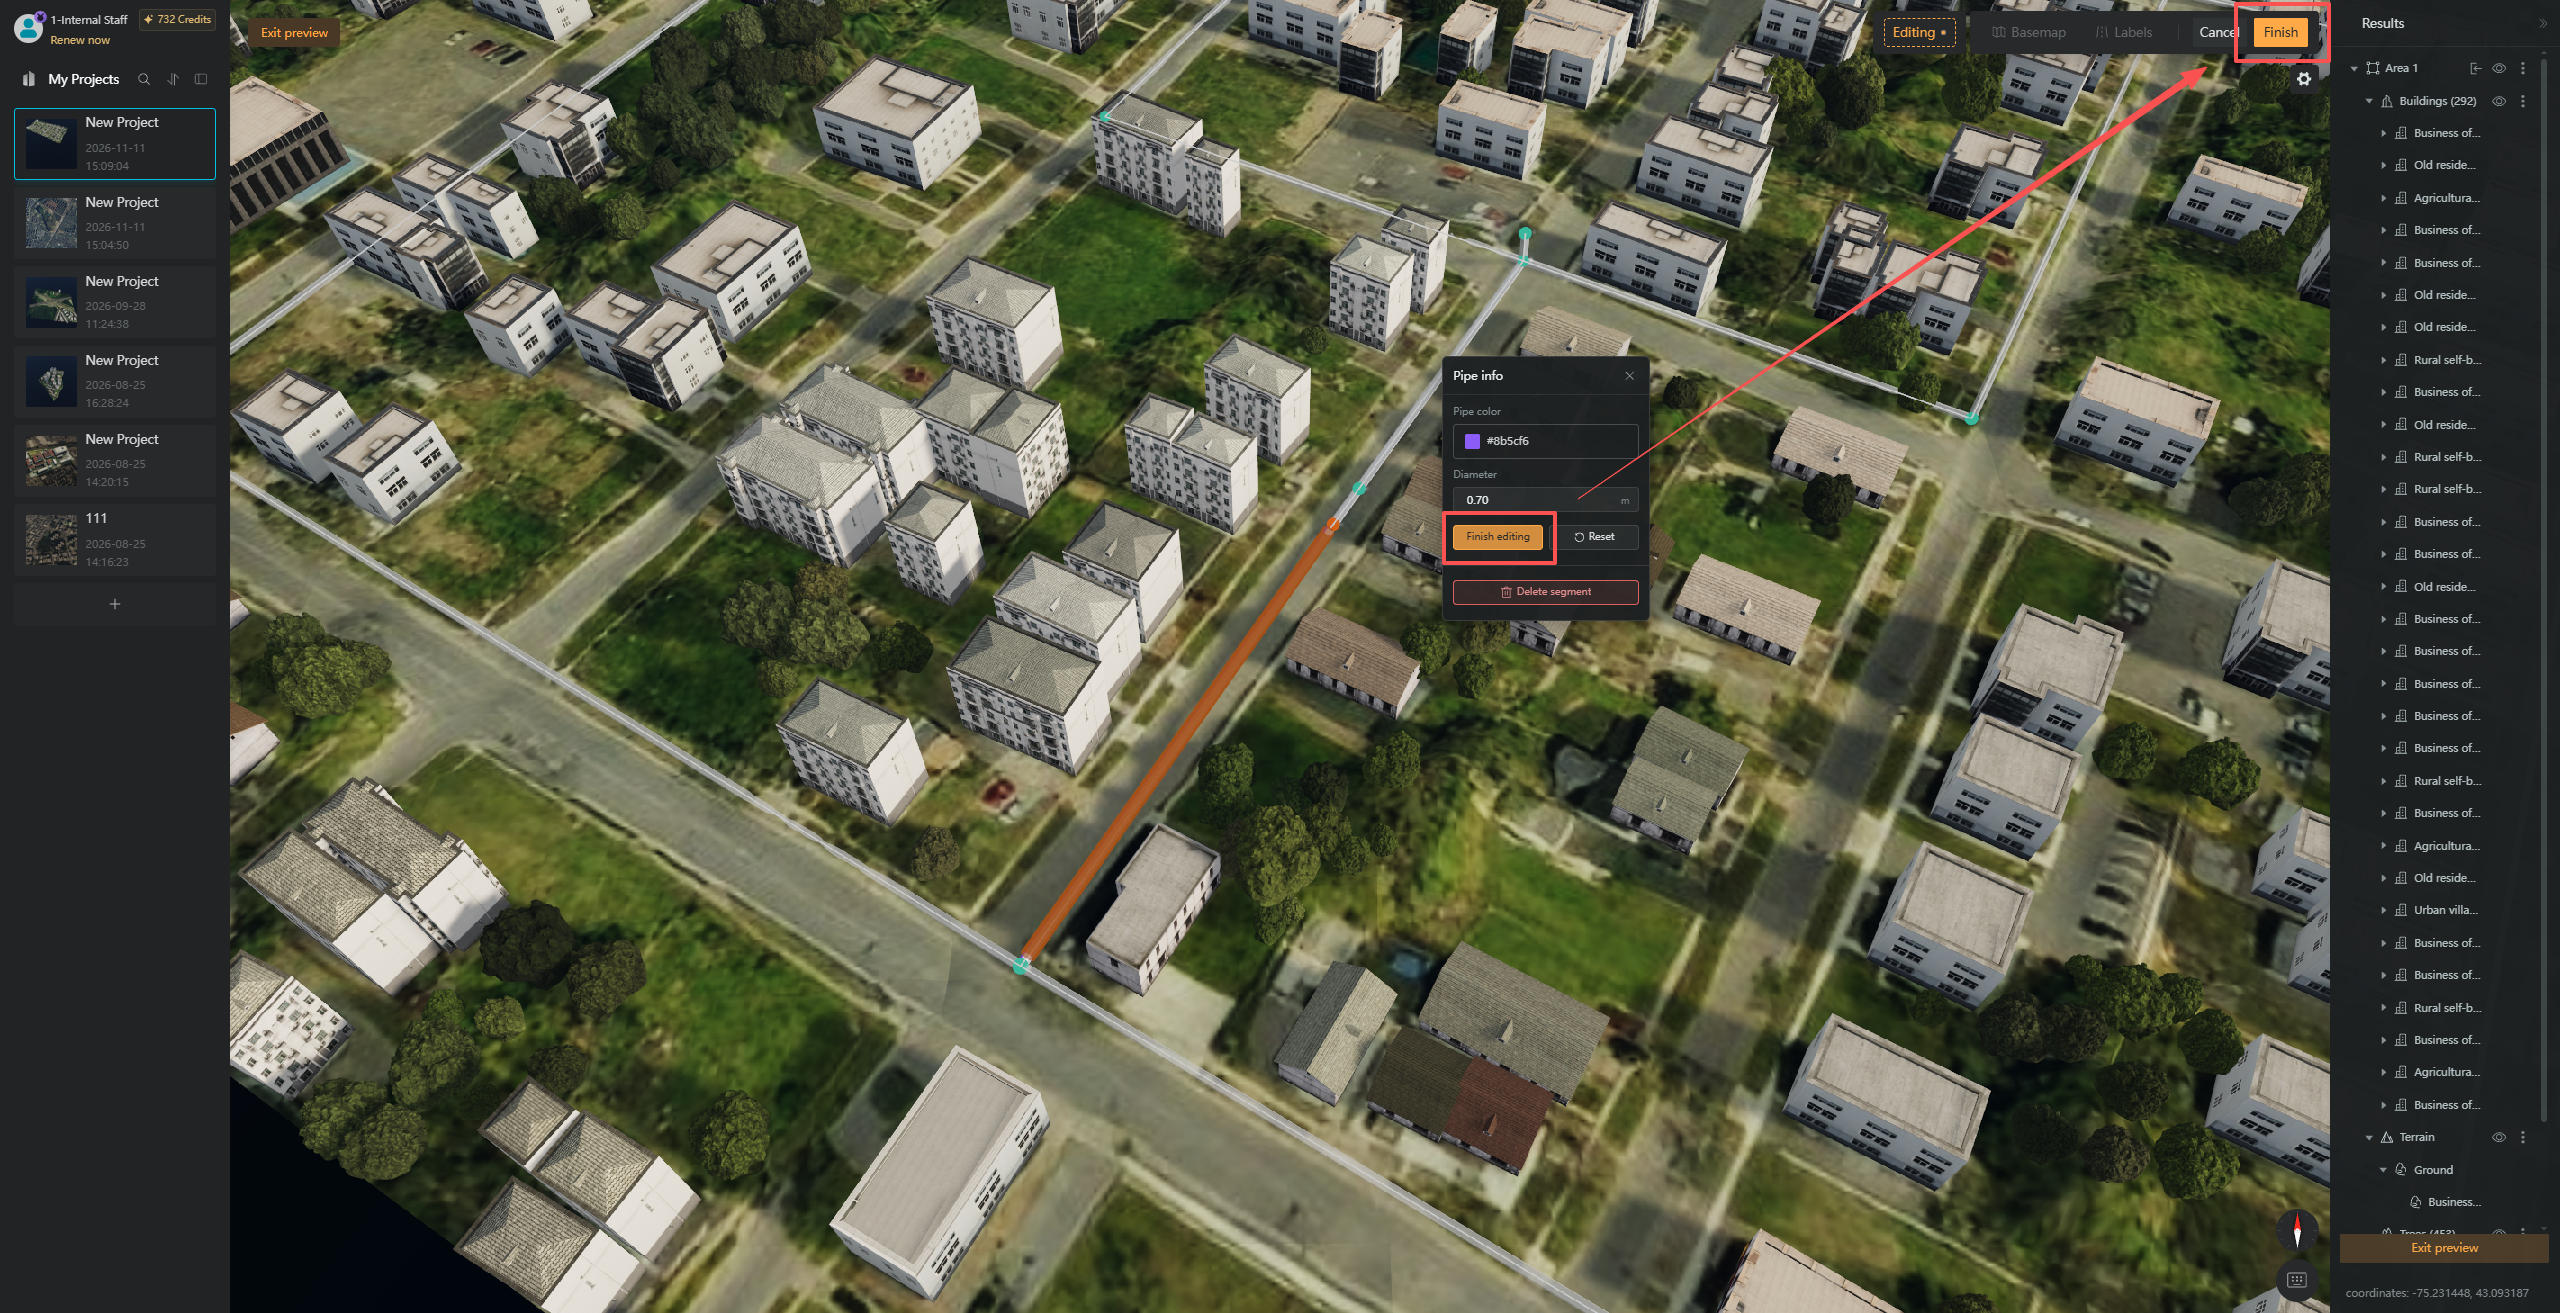
After editing is complete, click "Exit Preview" in the upper-left or lower-right corner to return to Globe Preview mode. You can then preview how the pipeline models integrate with the surrounding environment.