Add Building and Building Outline Editing
GenAnywhere is a tool that requires no aerial photography — just select an area on the map to AI-generate 3D building scenes, streamlining BIM modeling and providing an efficient, cost-effective alternative to oblique photogrammetry.
In the process of using area selection and AI algorithms to batch-generate building models, two common issues often arise
First, some individual buildings fail to be recognized and are missing from the generated model, or you may want to add a model separately within the generated building area;
Second, the basemap data version is older, causing the generated buildings to be incomplete, or the building shapes and outline styles to be inconsistent with the real-world scene.
To address these scenarios, we can use the "Add Building" feature to fill in missing building objects, and then use the "Outline Editing" tool to modify and adjust the outer outlines of existing building models, thereby fixing issues such as missing buildings and inconsistent styles.
This article describes the specific operation flow of the two features: "Add Building" and "Building Outline Editing."
1. Add Building Feature
1.1 Enter Single-Building Preview Mode
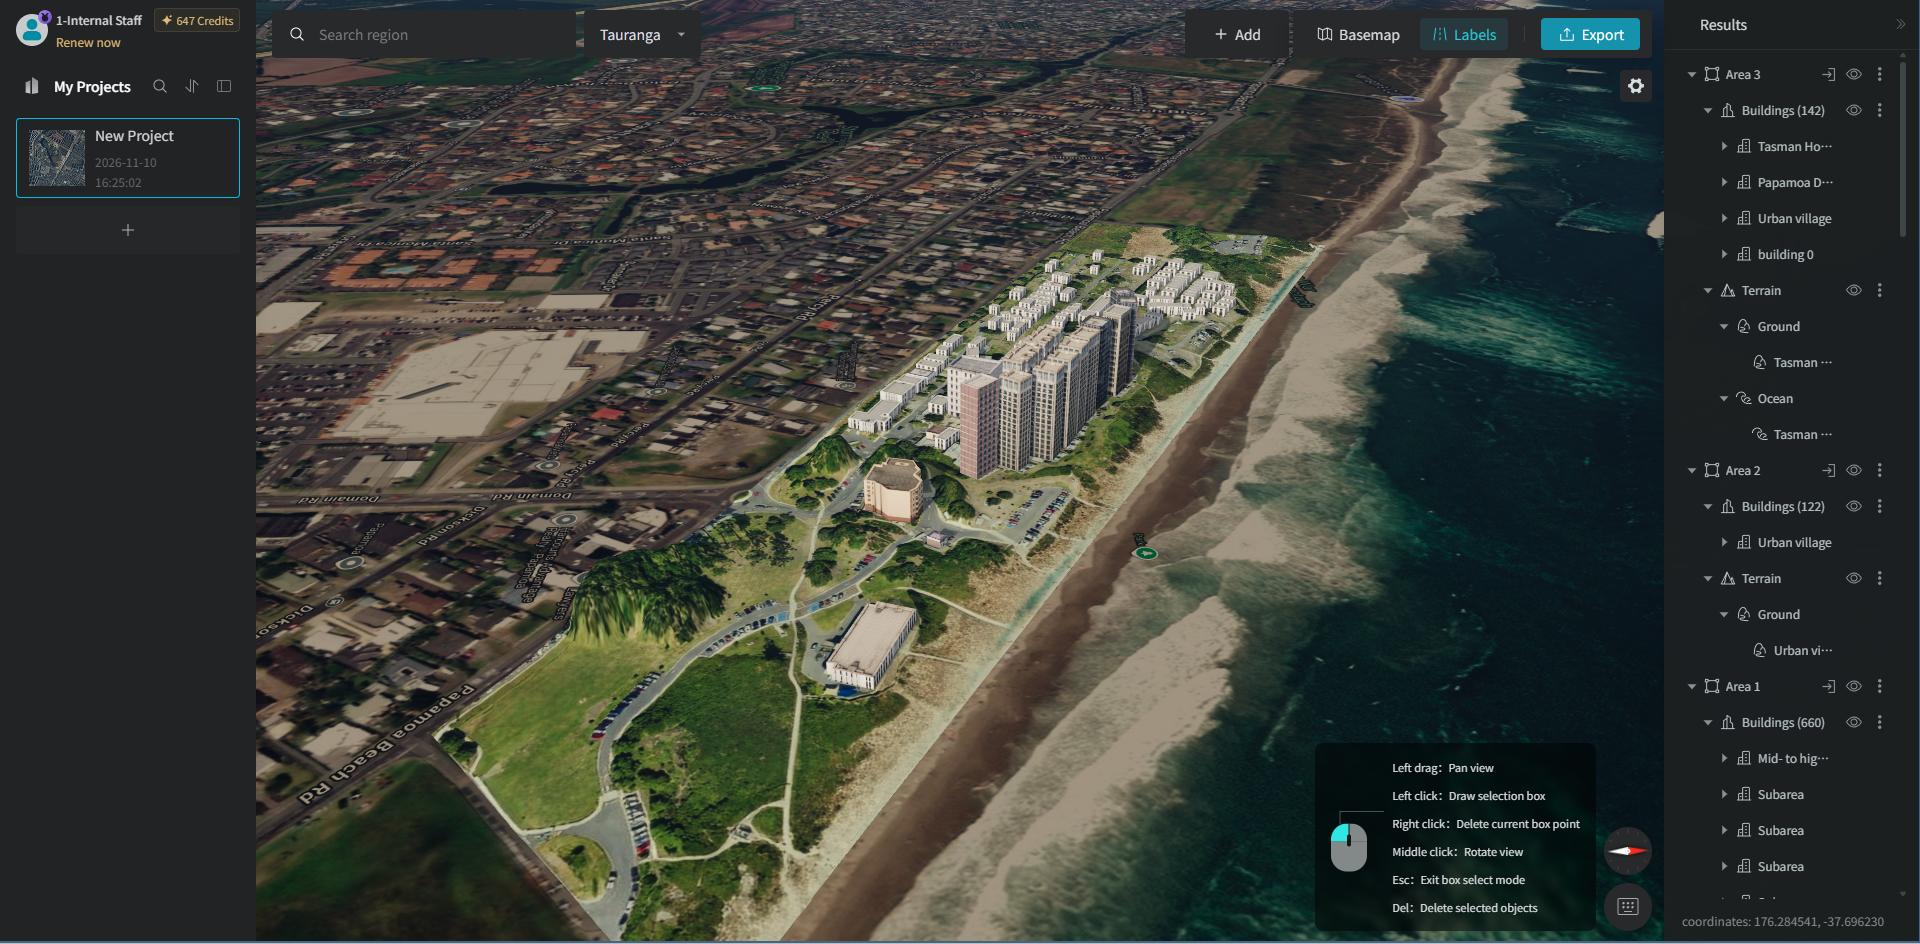
Once we have selected an area on the basemap and generated building models, in the "Area" layer of the "Results" on the right, click the "Enter Preview" button to enter the single-building preview mode of the corresponding generated model.
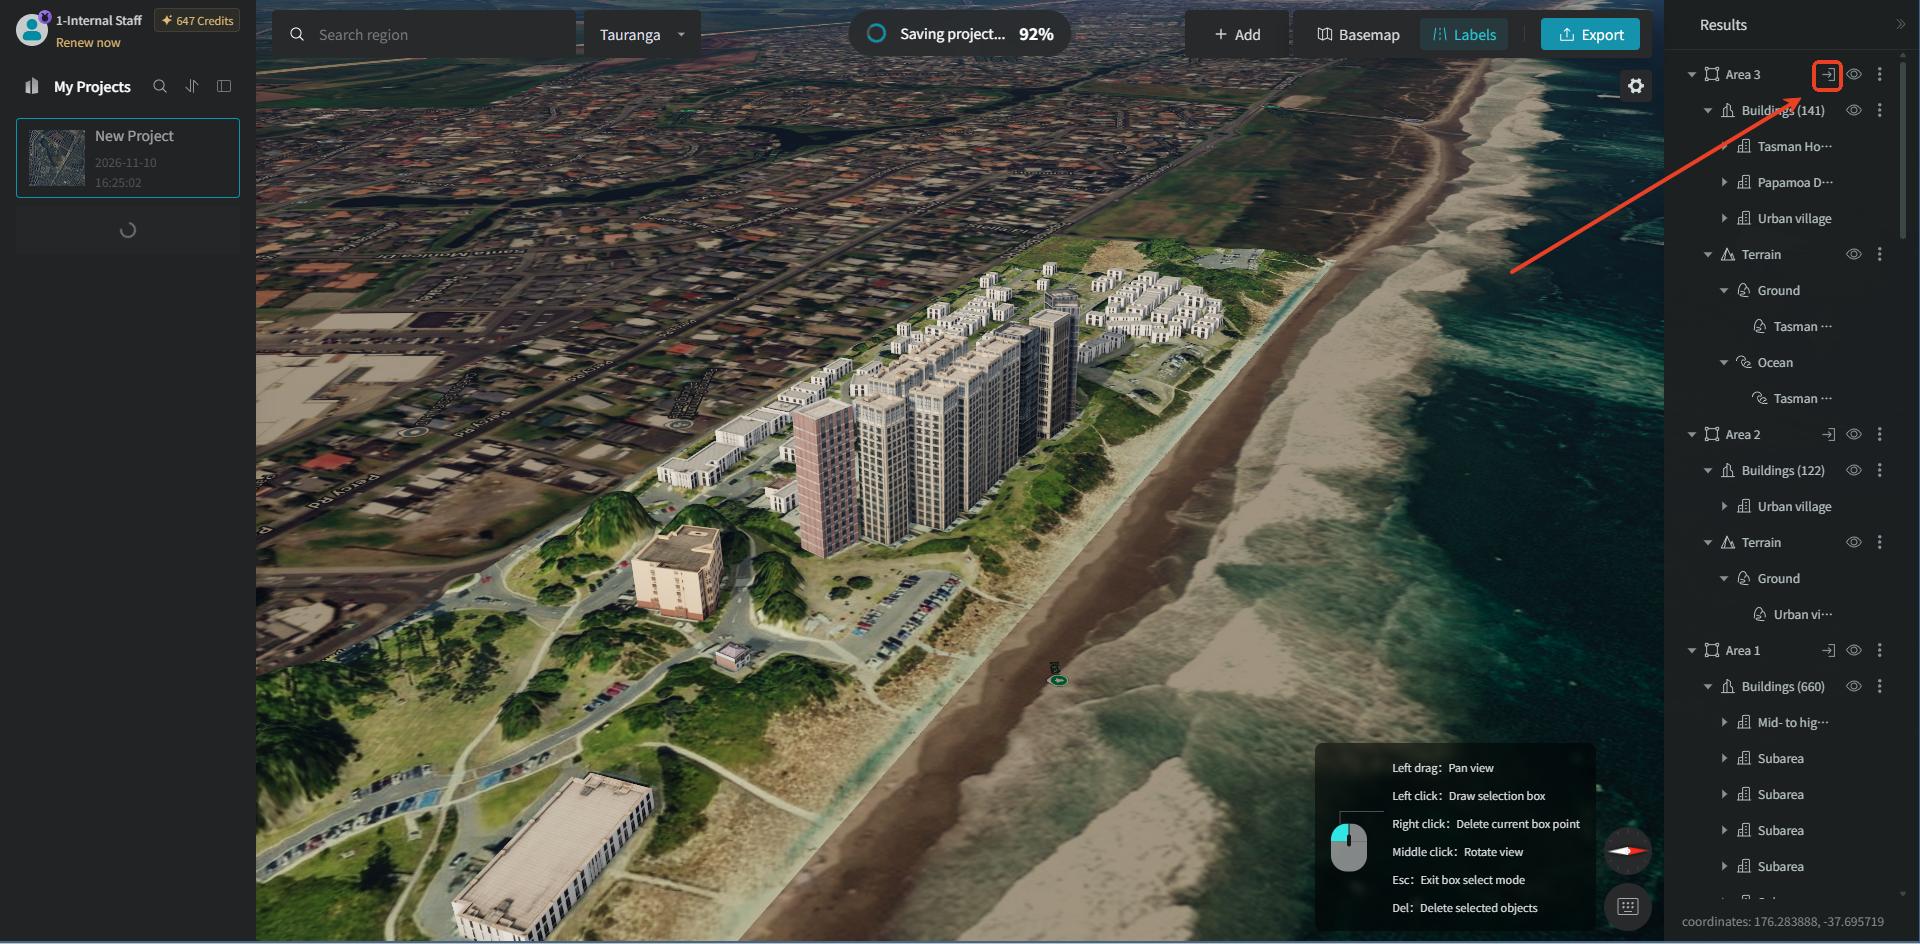
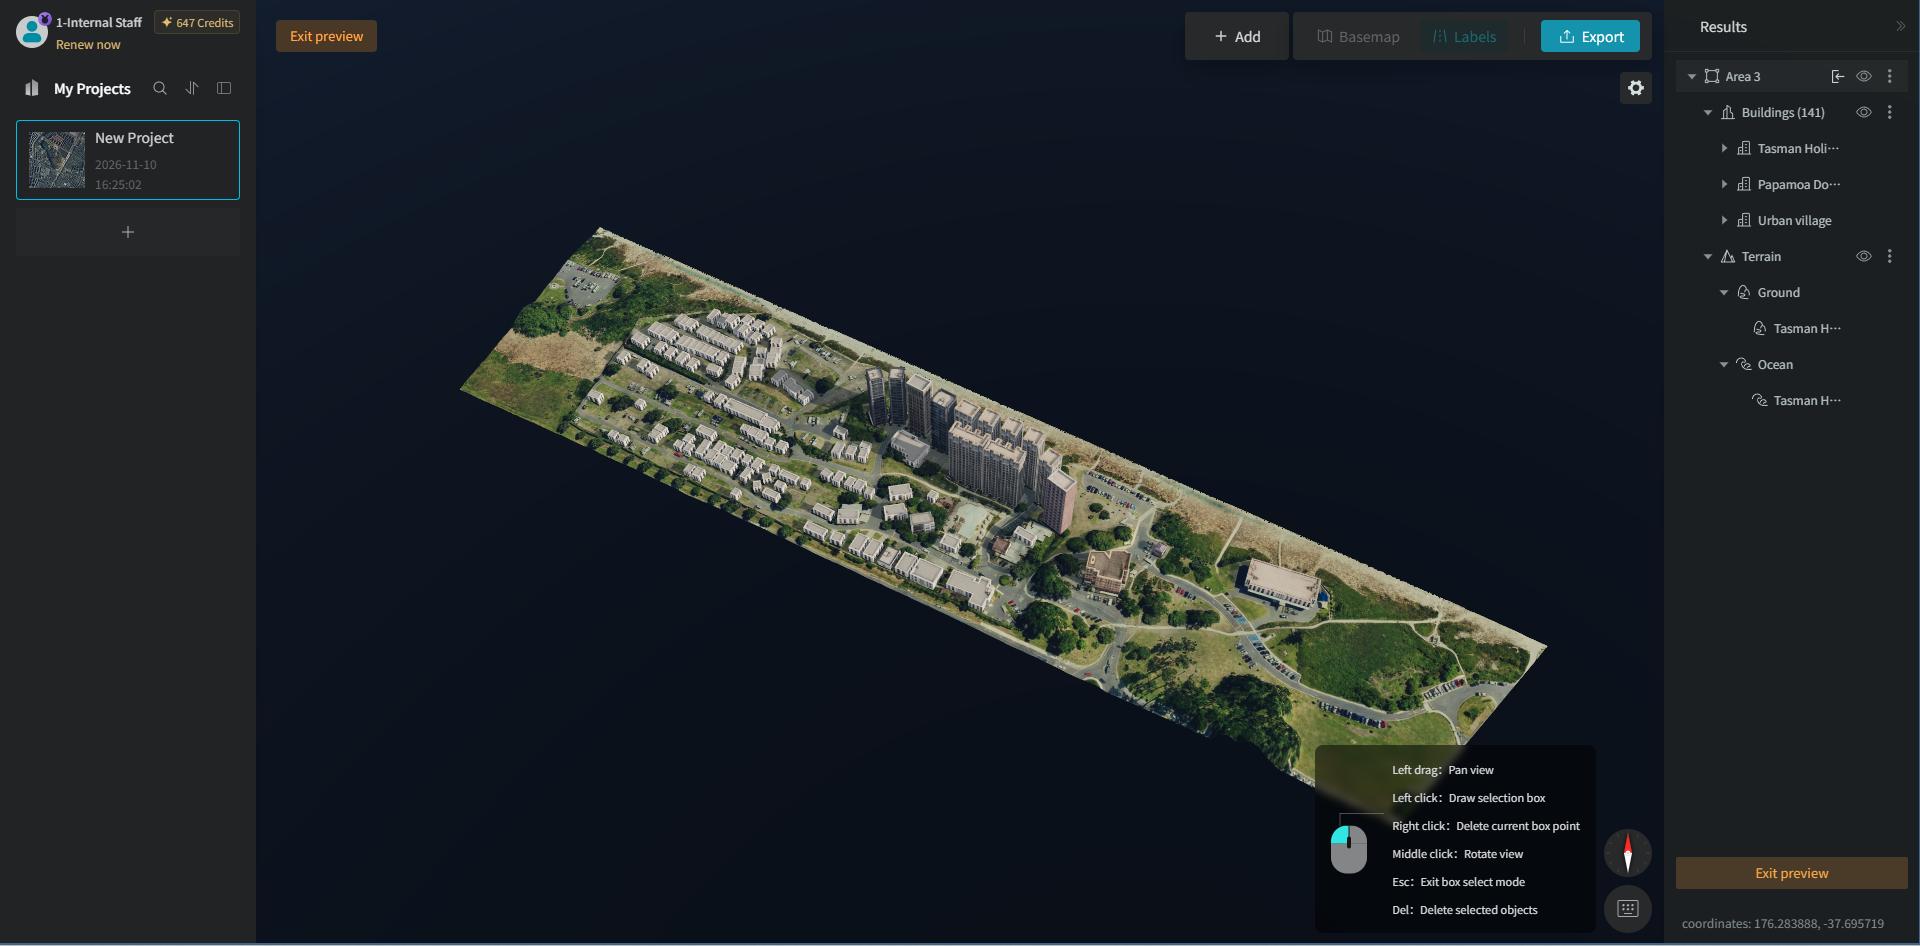
1.2 Add Building
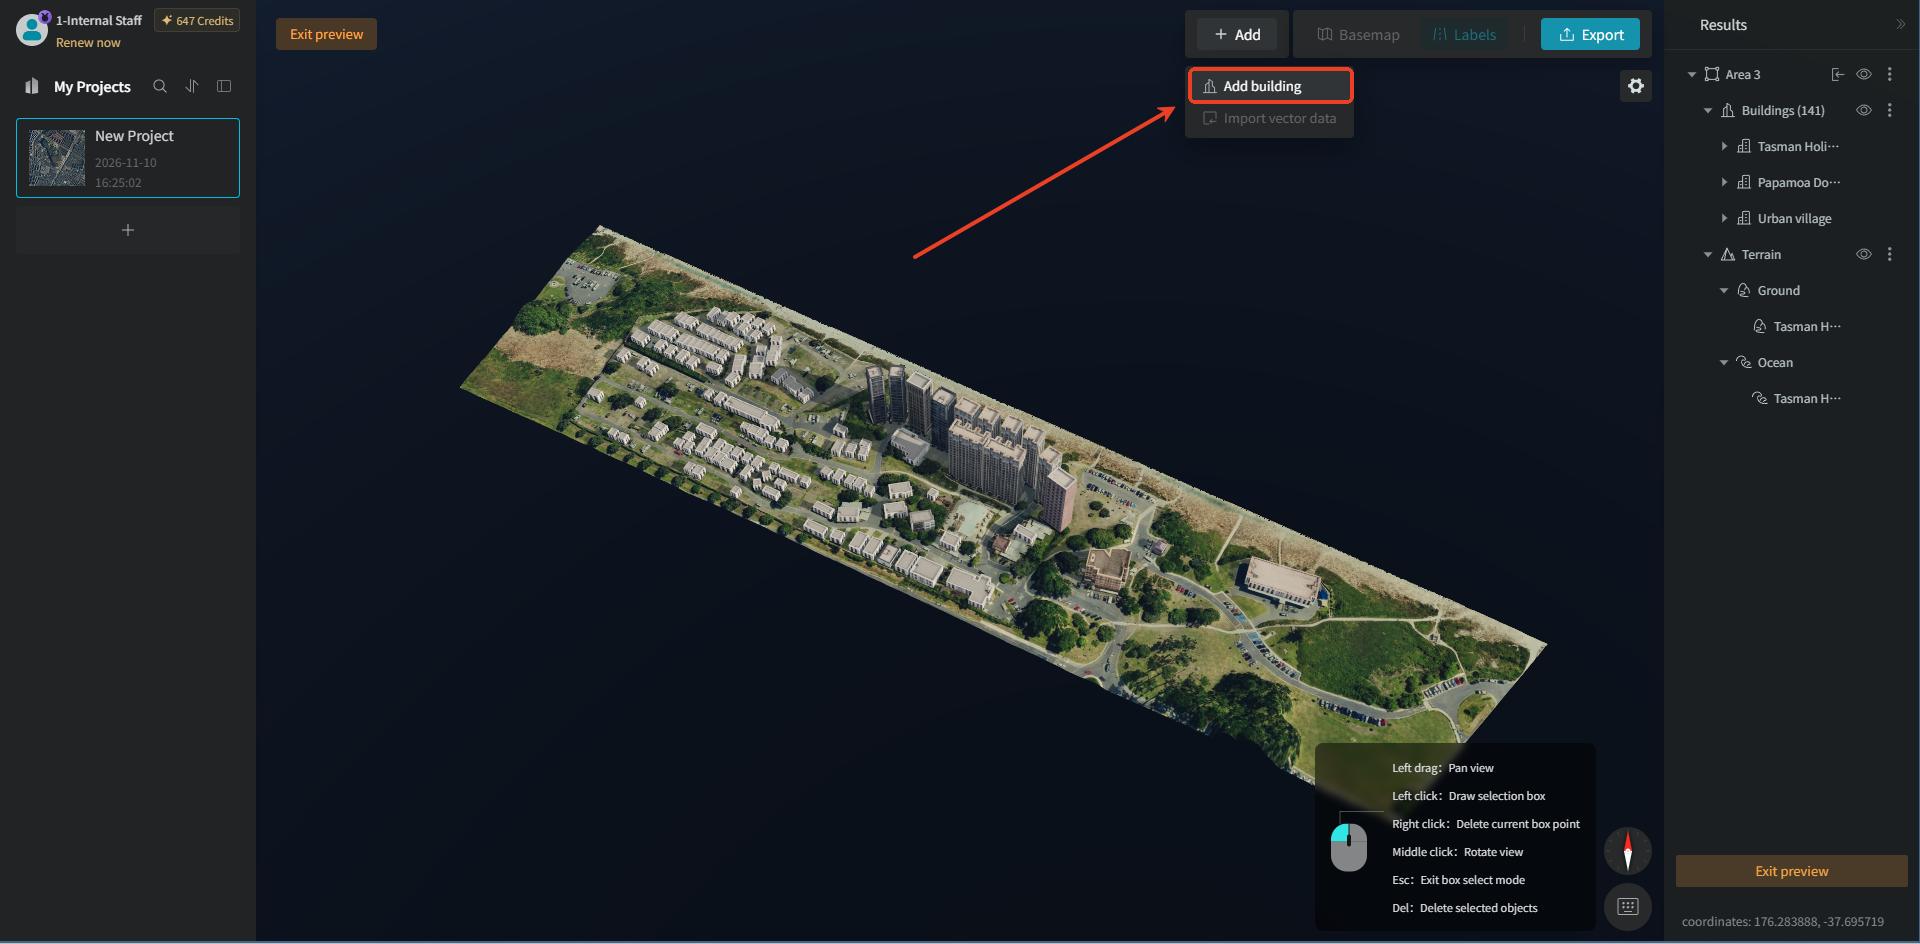
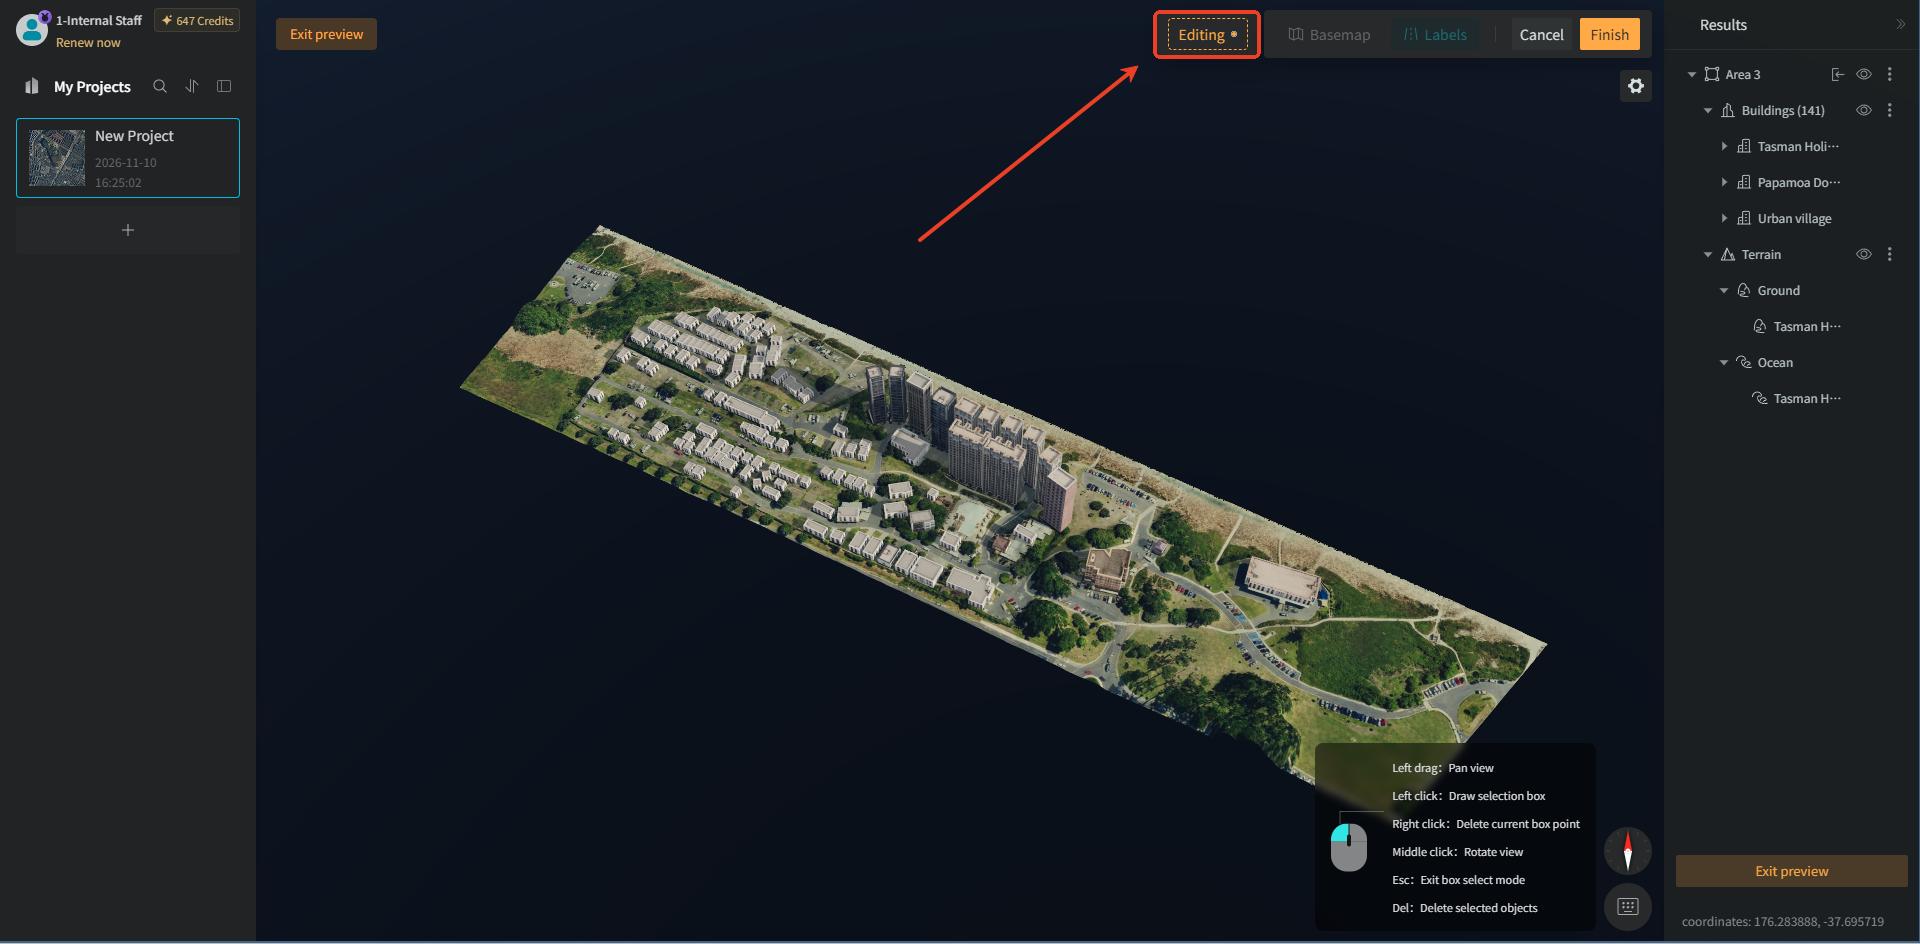
In single-building preview mode, click the "Add" button at the top of the interface, and an "Add Building" menu option will pop up. After clicking this option, the "Add" button at the top switches to the "Editing" state, in which you can perform the add-building operation.
1.3 Select an Area
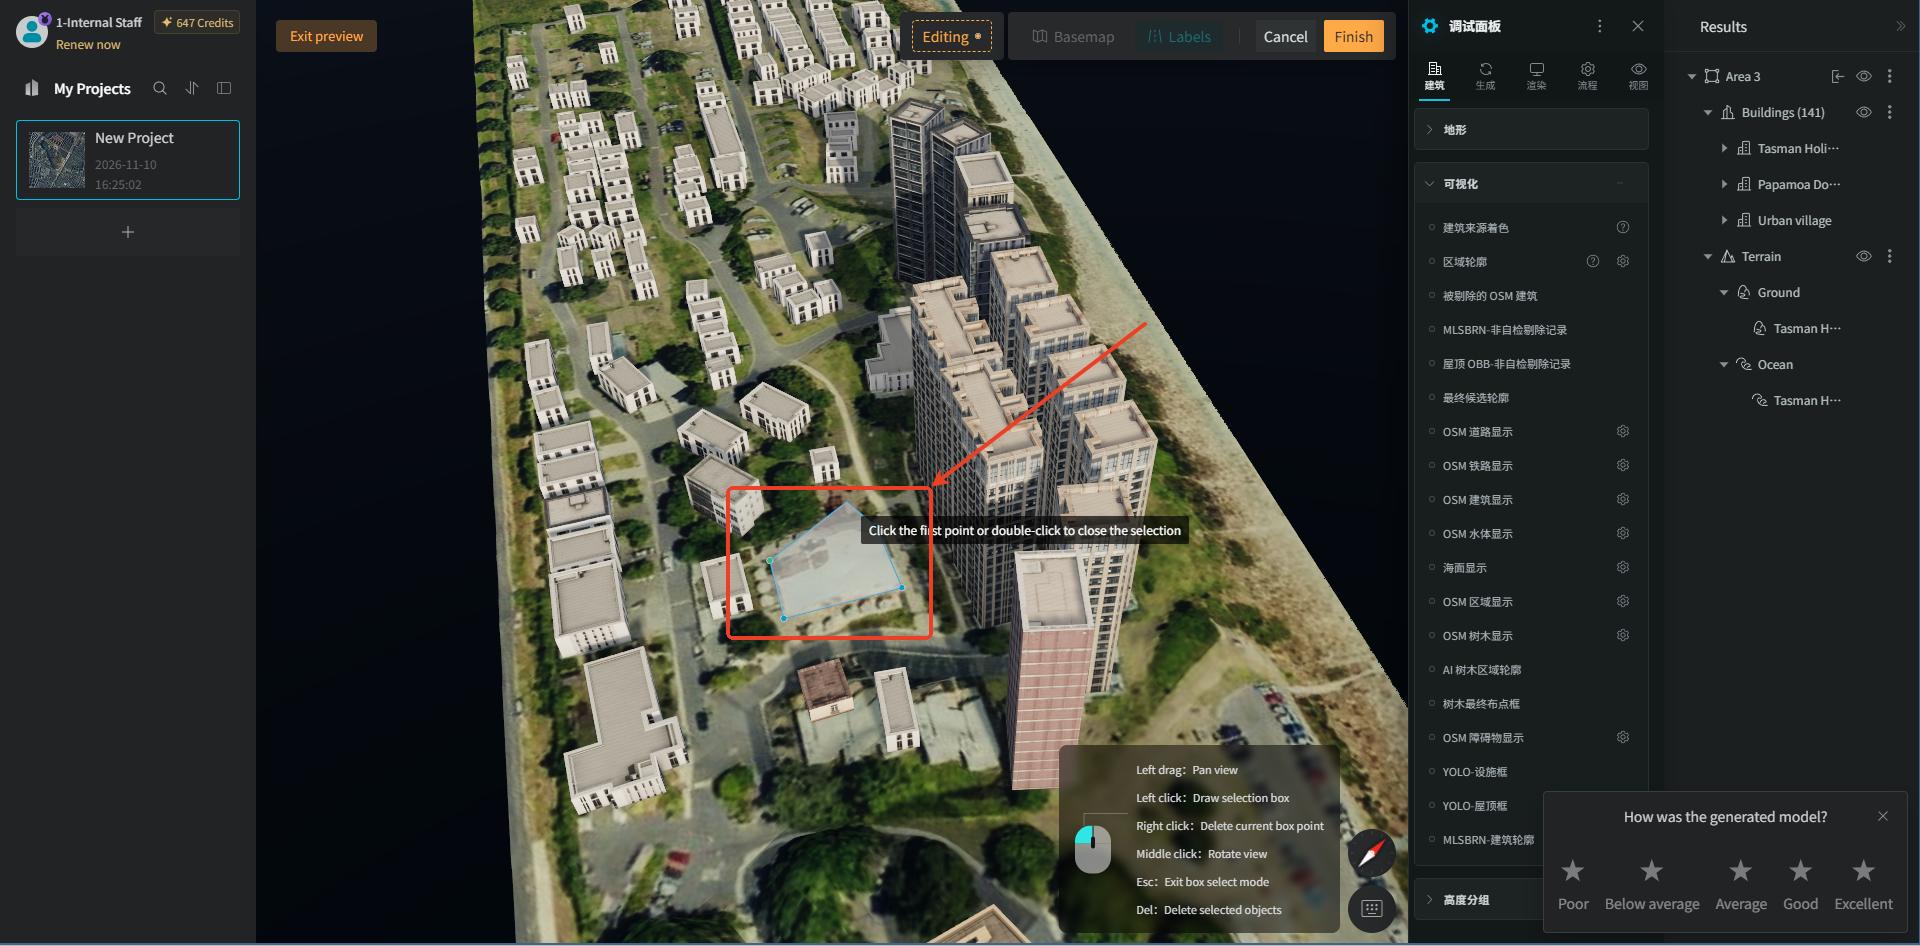
In the editing state, we left-click on the map to select an area. After the selection is complete, left-button double-click or left-click on the starting point will immediately generate a single building model, with the model type defaulting to "High-Rise Residential."
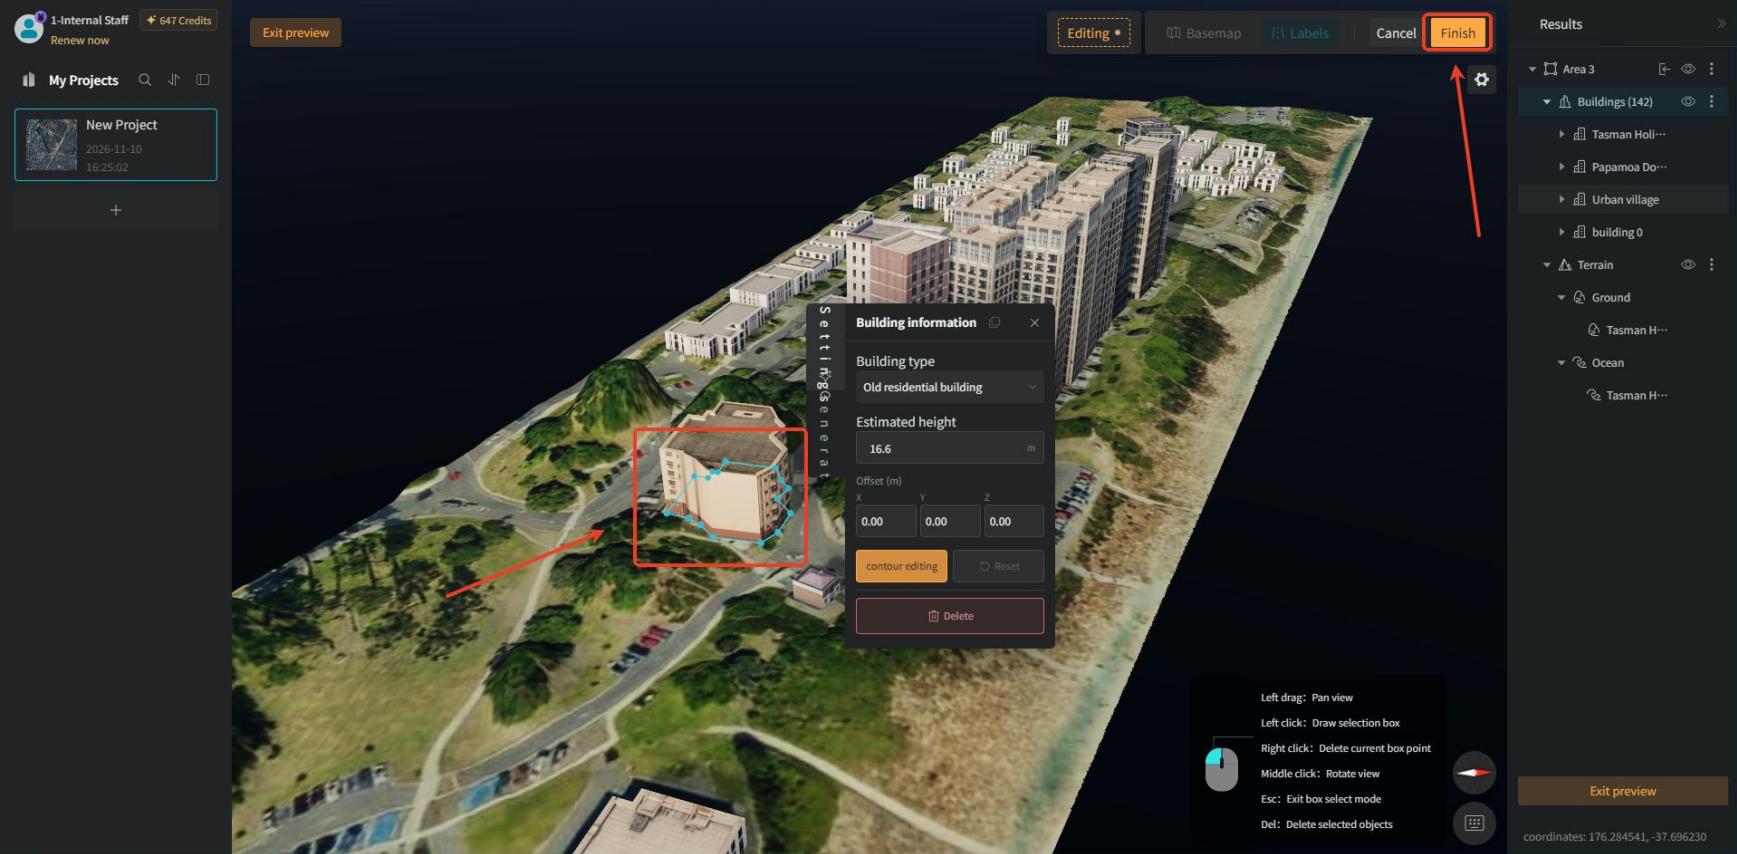
We can modify the "Building Type" and "Estimated Height" in the "Building Infomation" popup that appears.
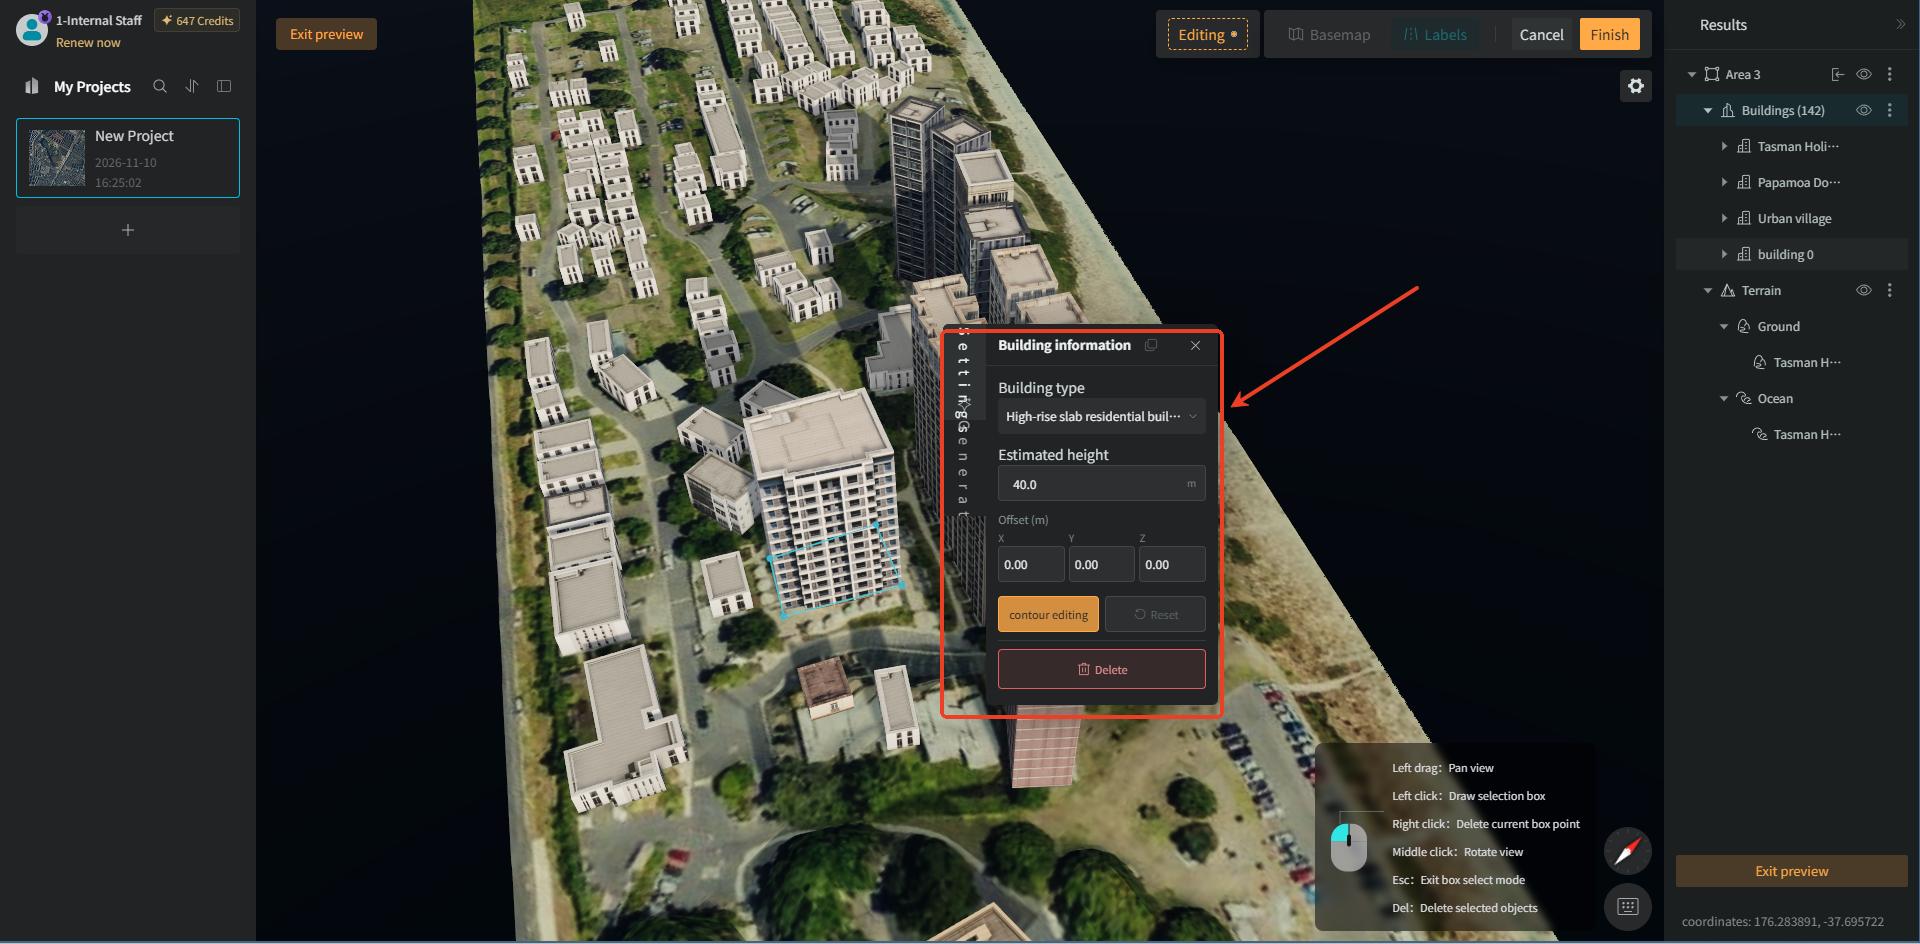
If you don't want to keep the added building model, you can also click "Delete" in the "Building Infomation" popup.
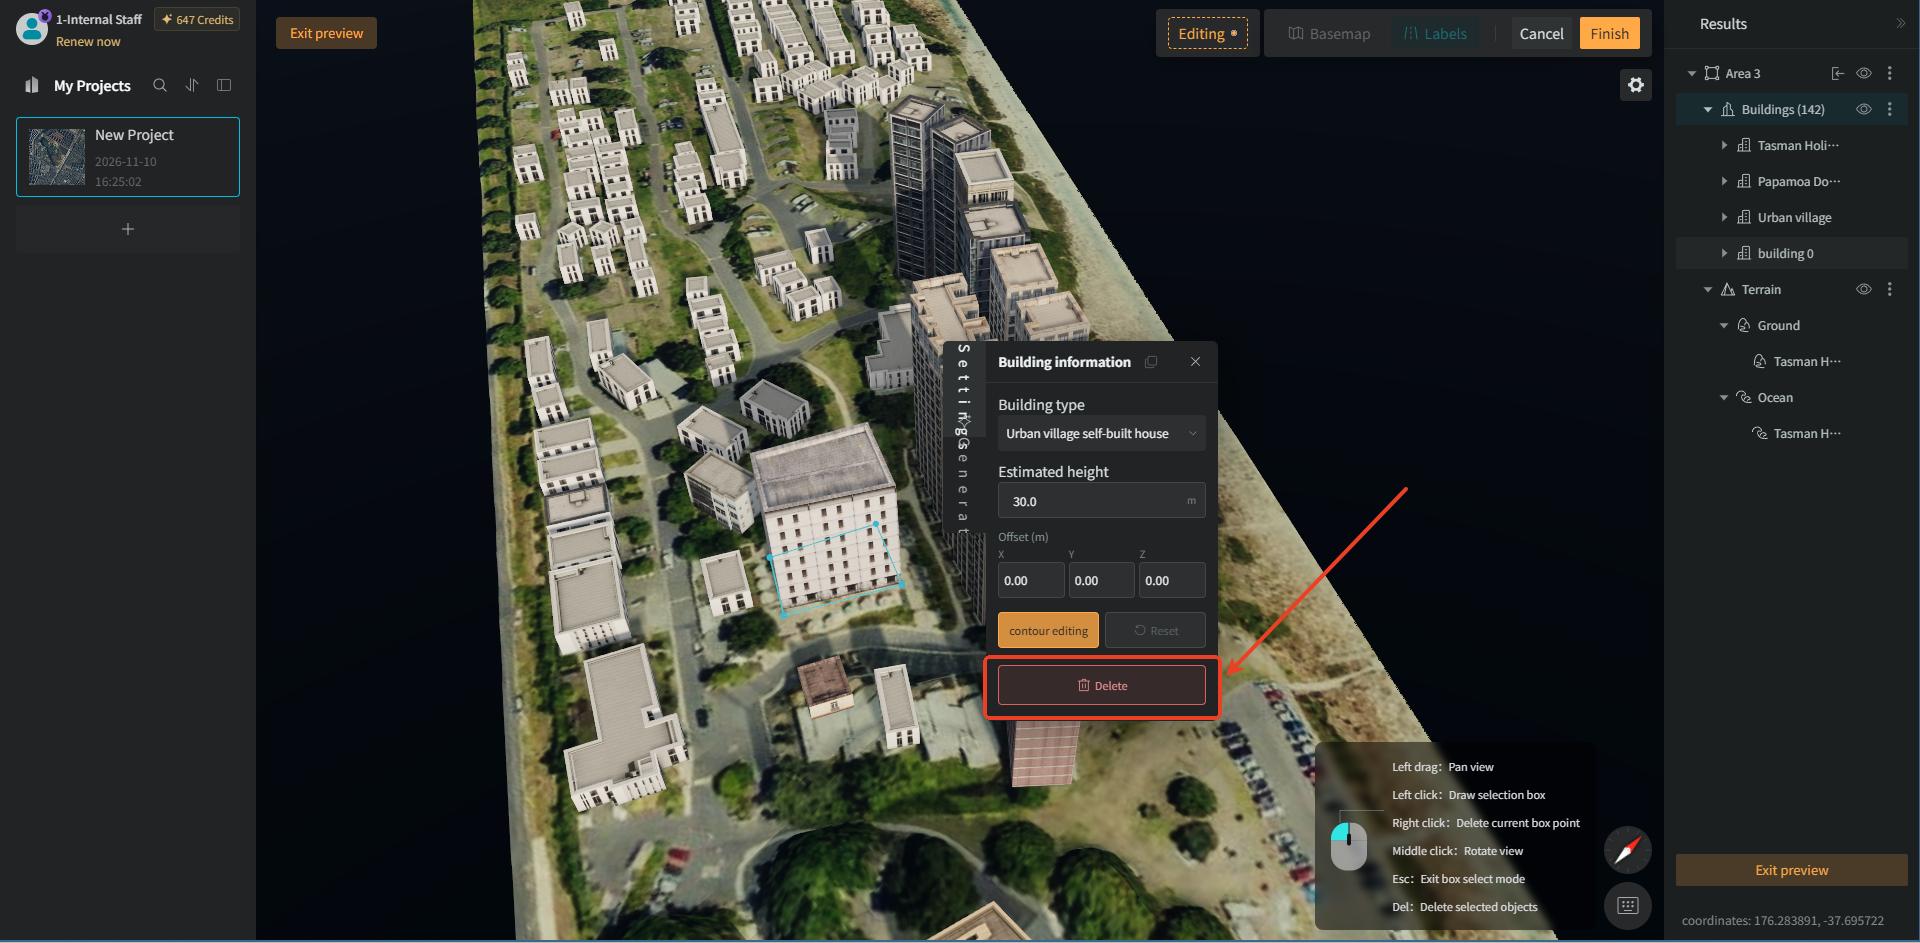
【Note】While in the editing state, you are not allowed to close the "Building Info" popup; you must click the "Finish" button to return to the default state before you can close the popup.
2. Building Outline Editing
2.1 Outline Editing for Added Buildings
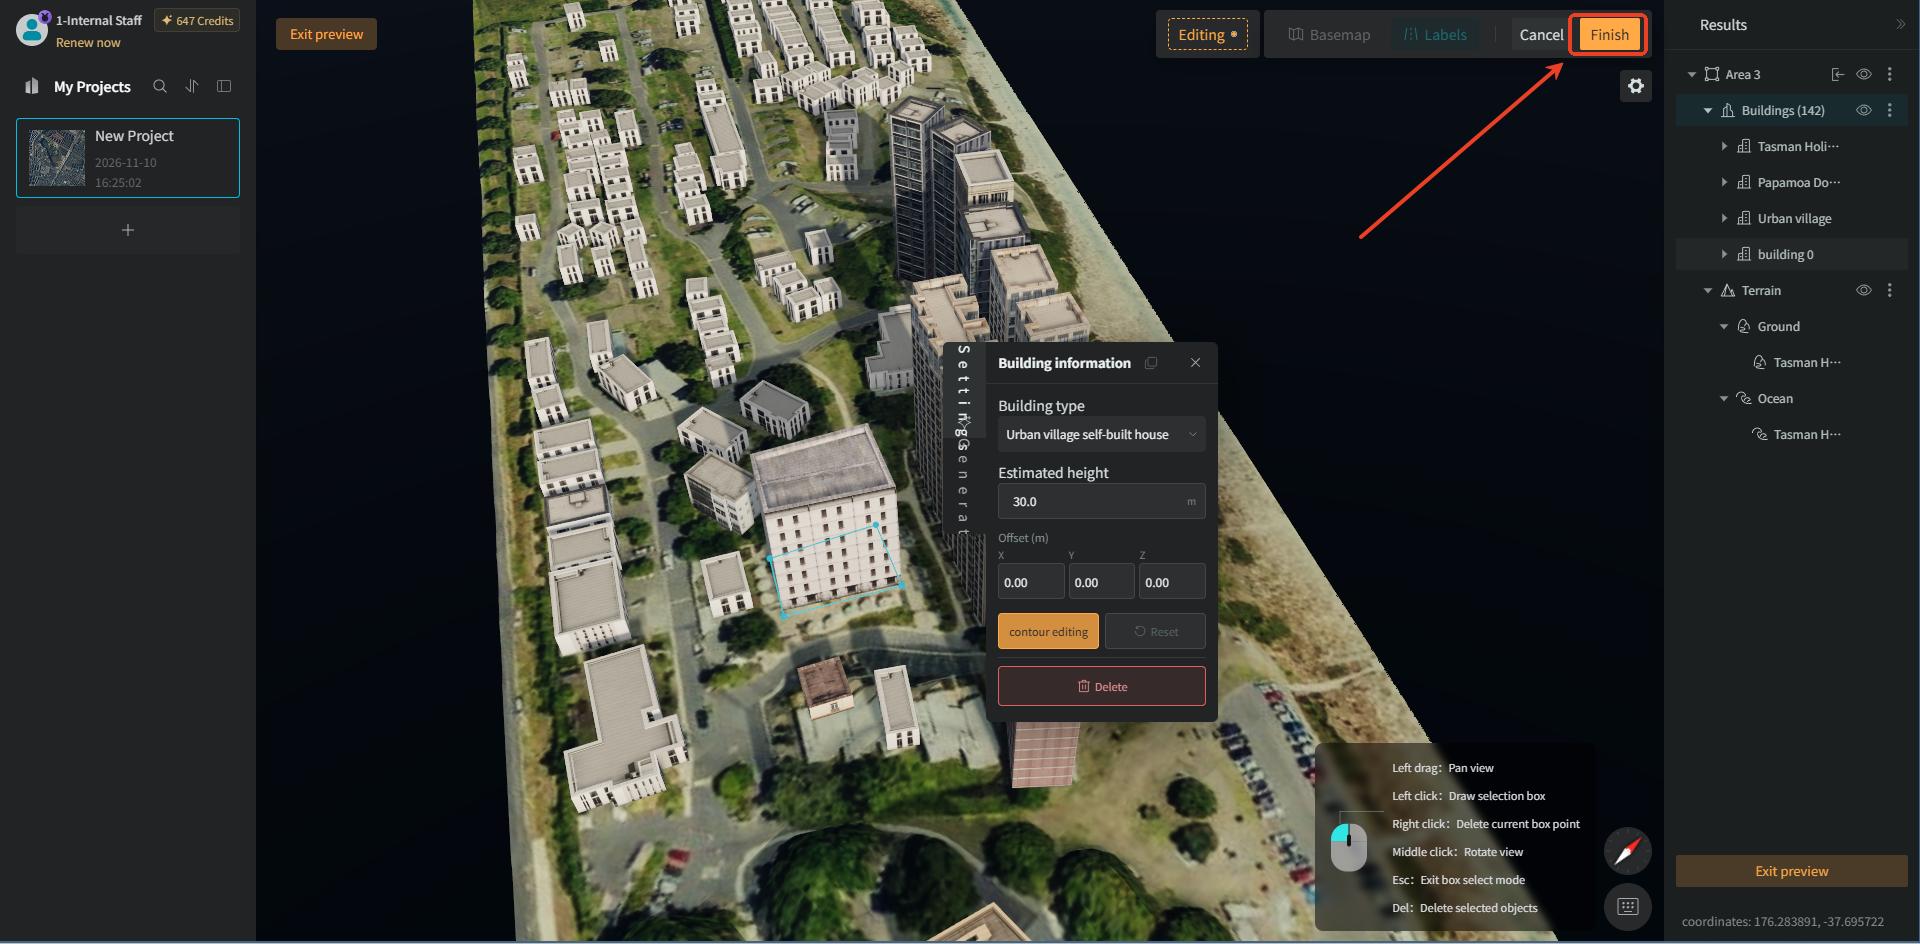
Once the single building model is generated, it directly enters the "Outline Editing" state, and the corresponding button prompt is also shown in the "Building Info" popup.
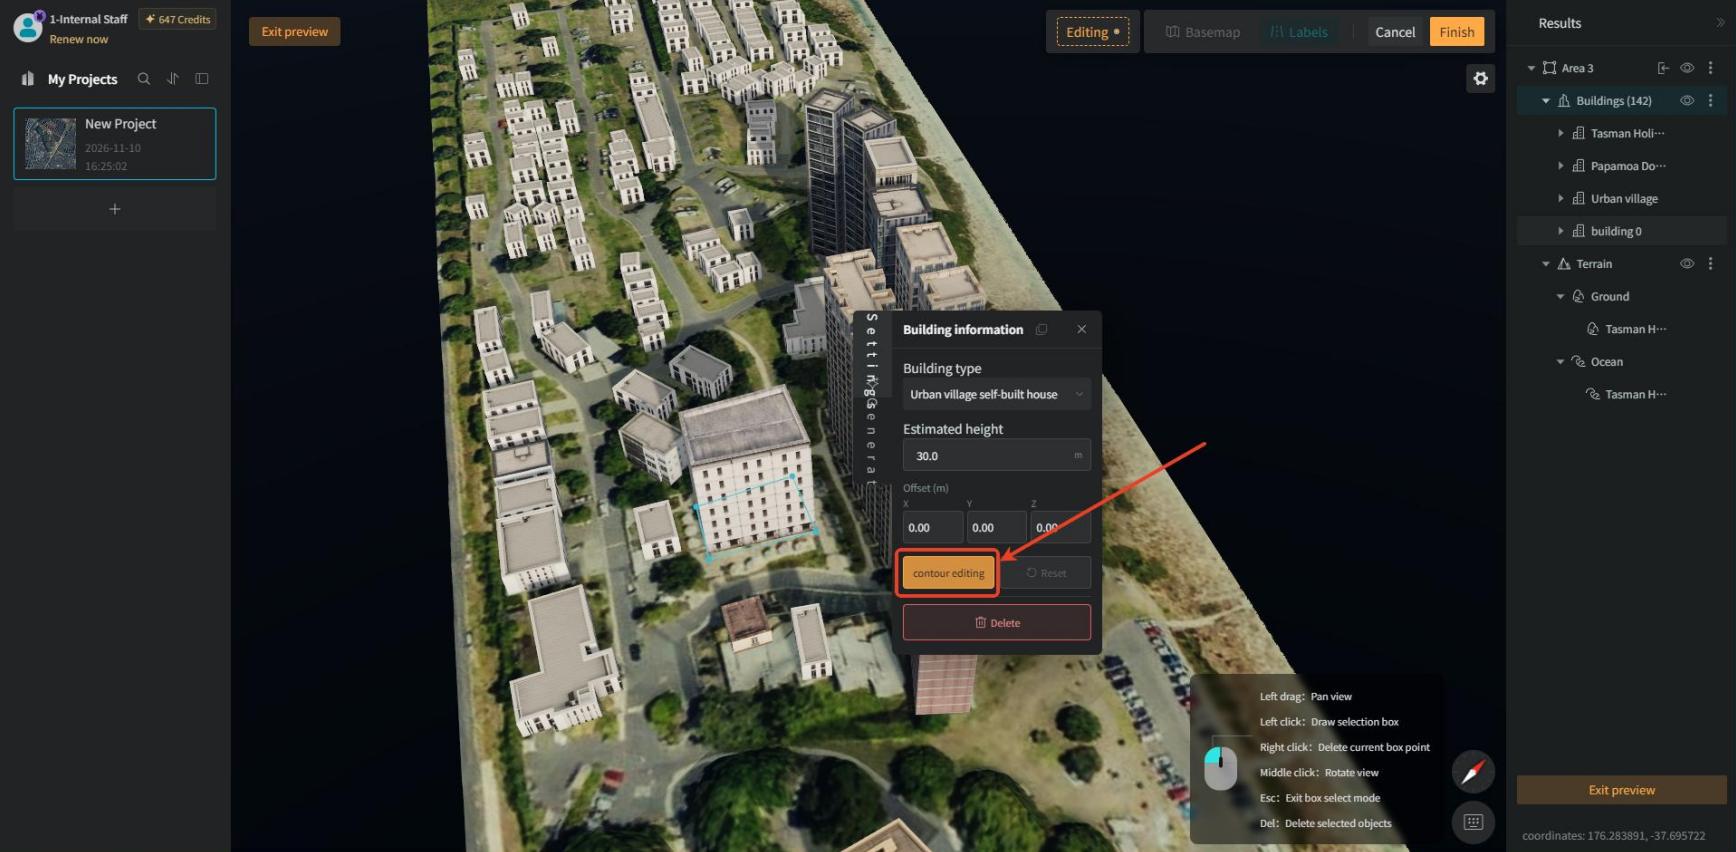
A single building model in the "Outline Editing" state displays blue outline edges in front of it. When the mouse cursor moves to an outline edge, its orange center point is shown; you can drag the endpoints or center points with the mouse to finely adjust the building's outline details.
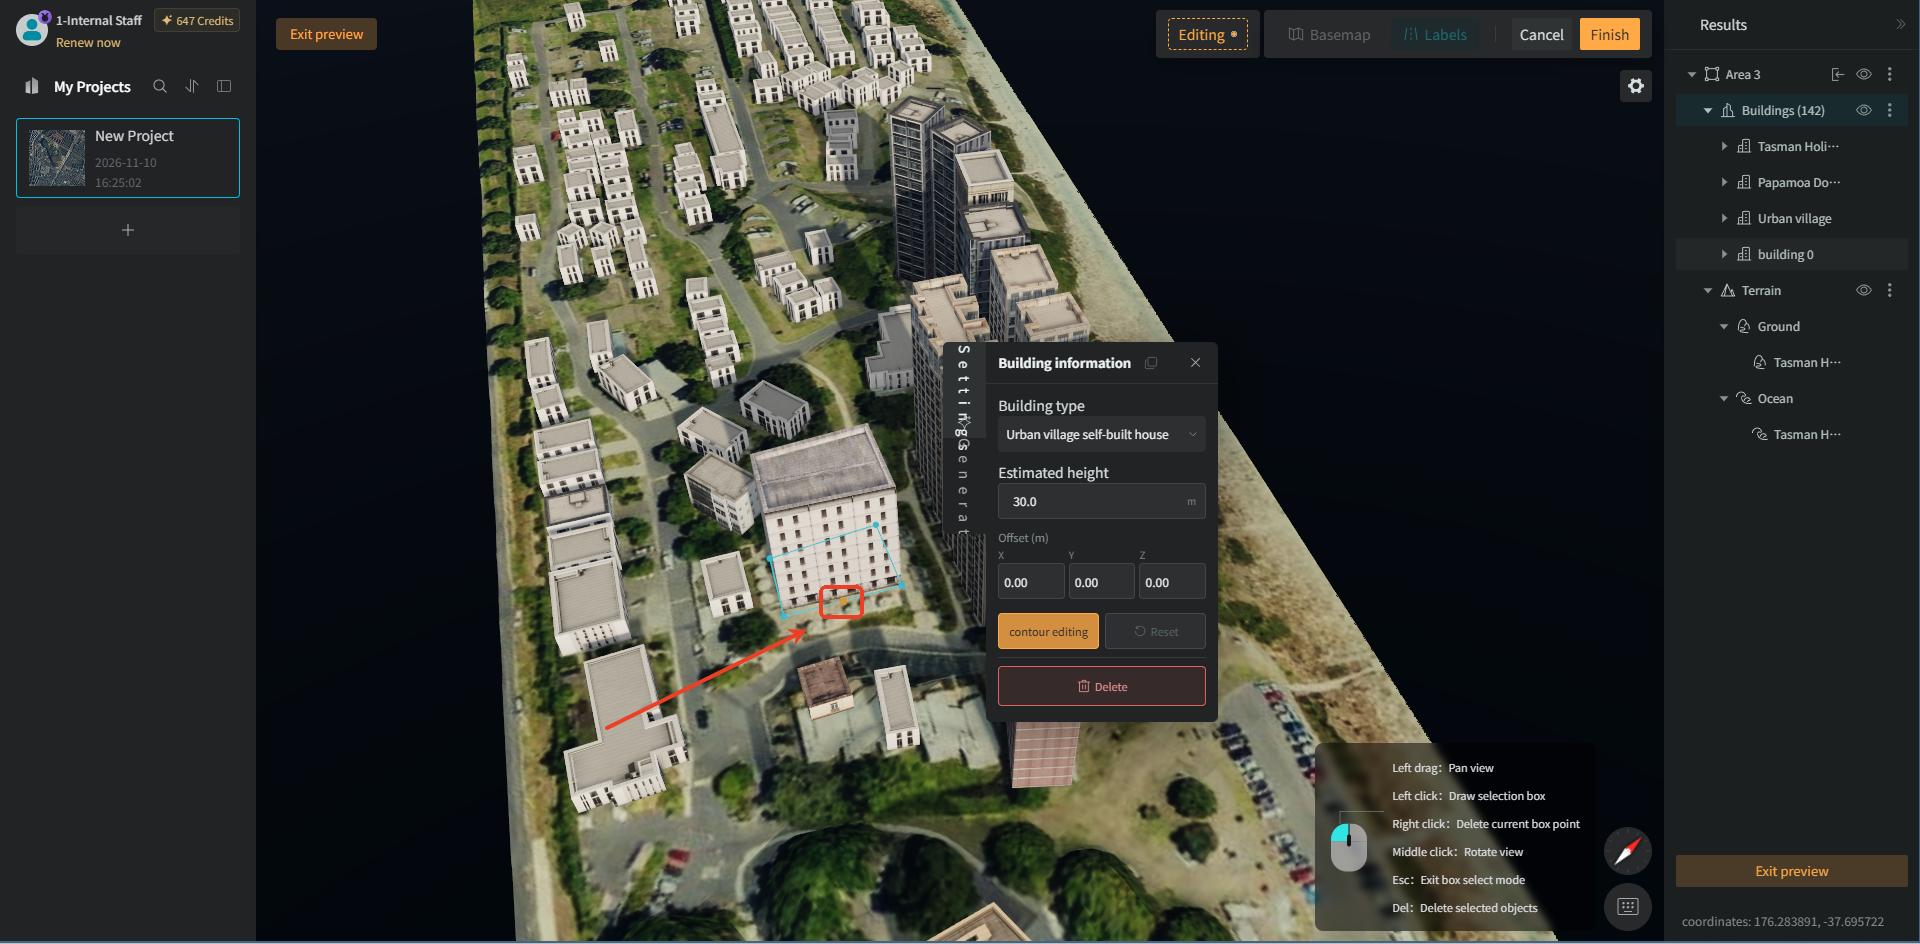
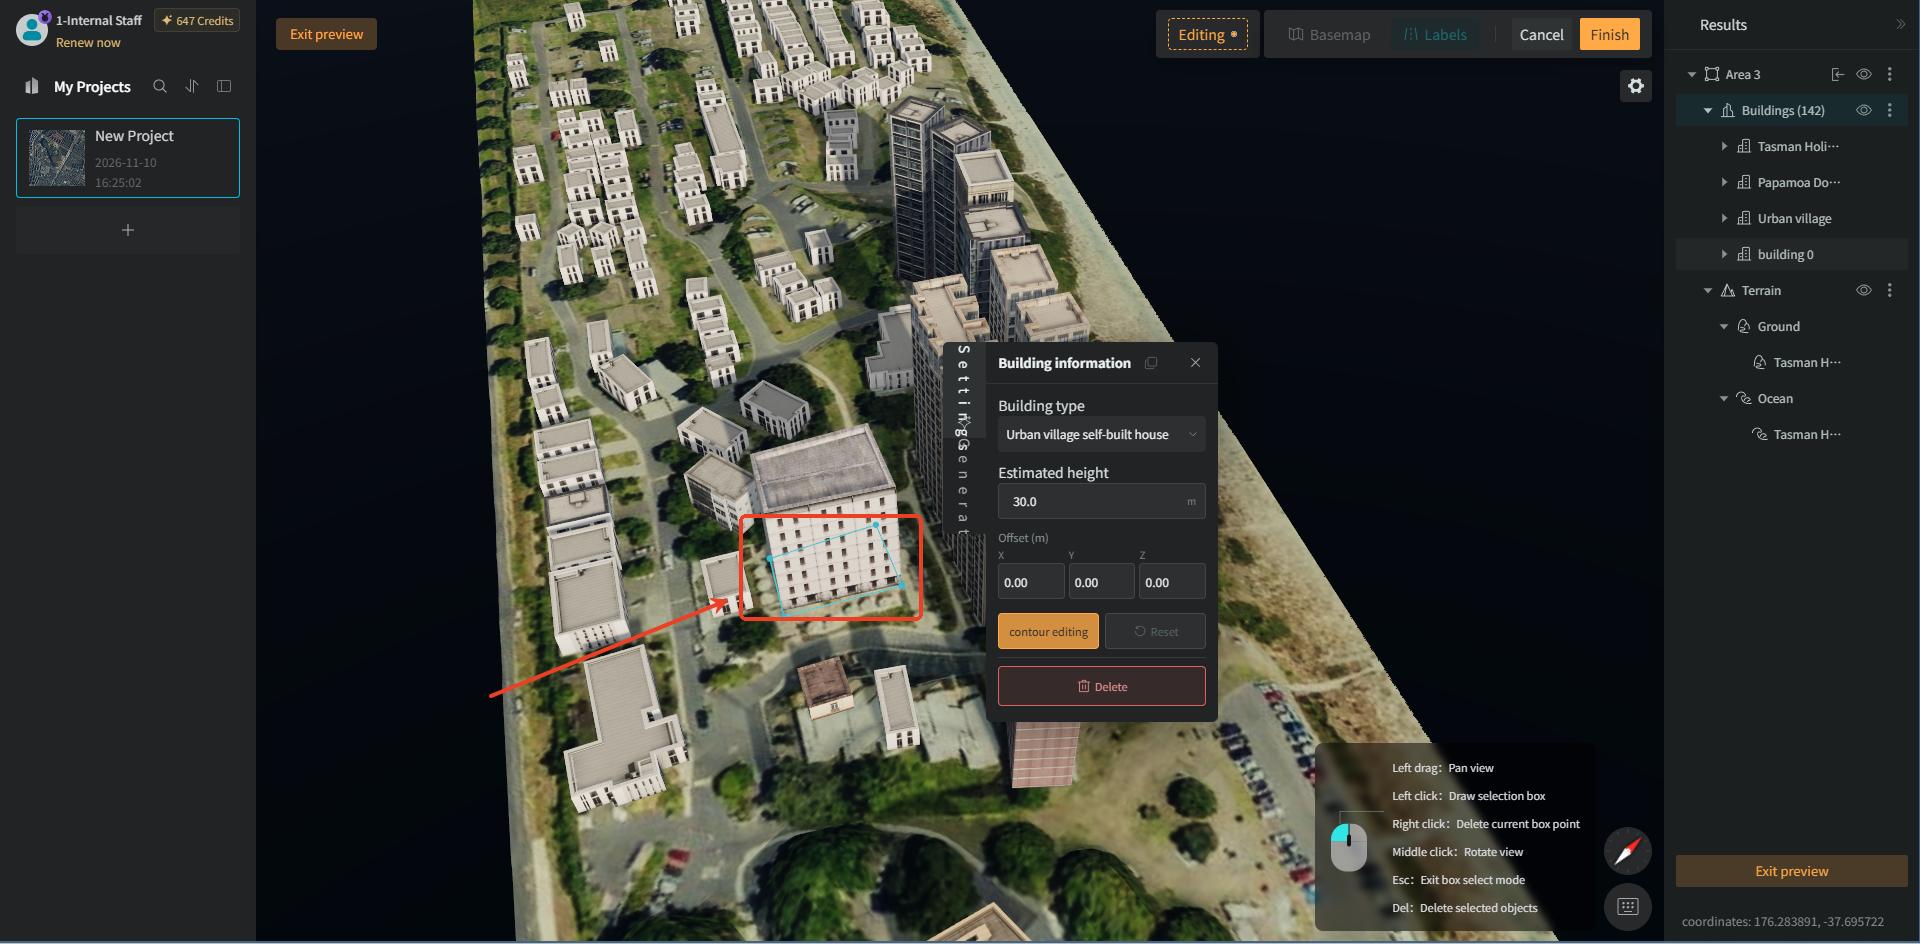
After finishing the adjustments, click the "Finish" button in the top-right corner of the interface to exit the editing state.
2.2 Outline Editing for Existing Buildings
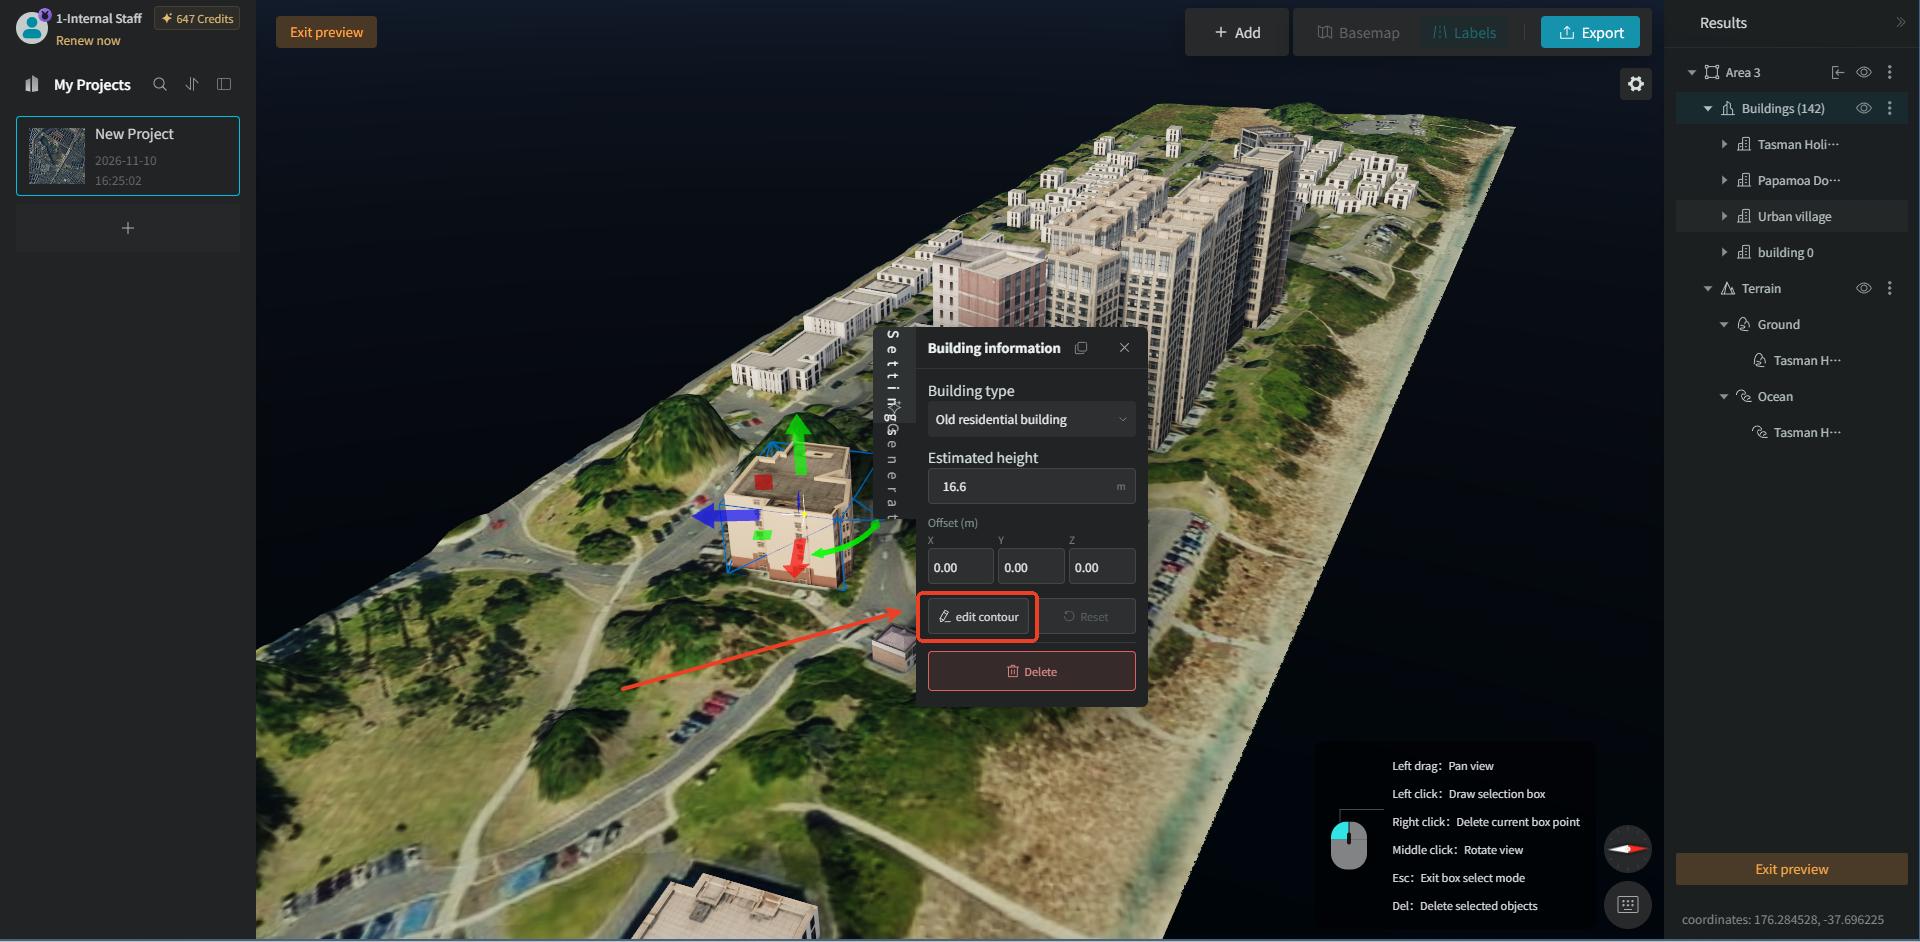
In the default state of single-building preview mode, select an existing building model that needs outline editing, and click the "Edit Outline" button in the "Building Info" popup that appears — this directly enters the "Outline Editing" state.
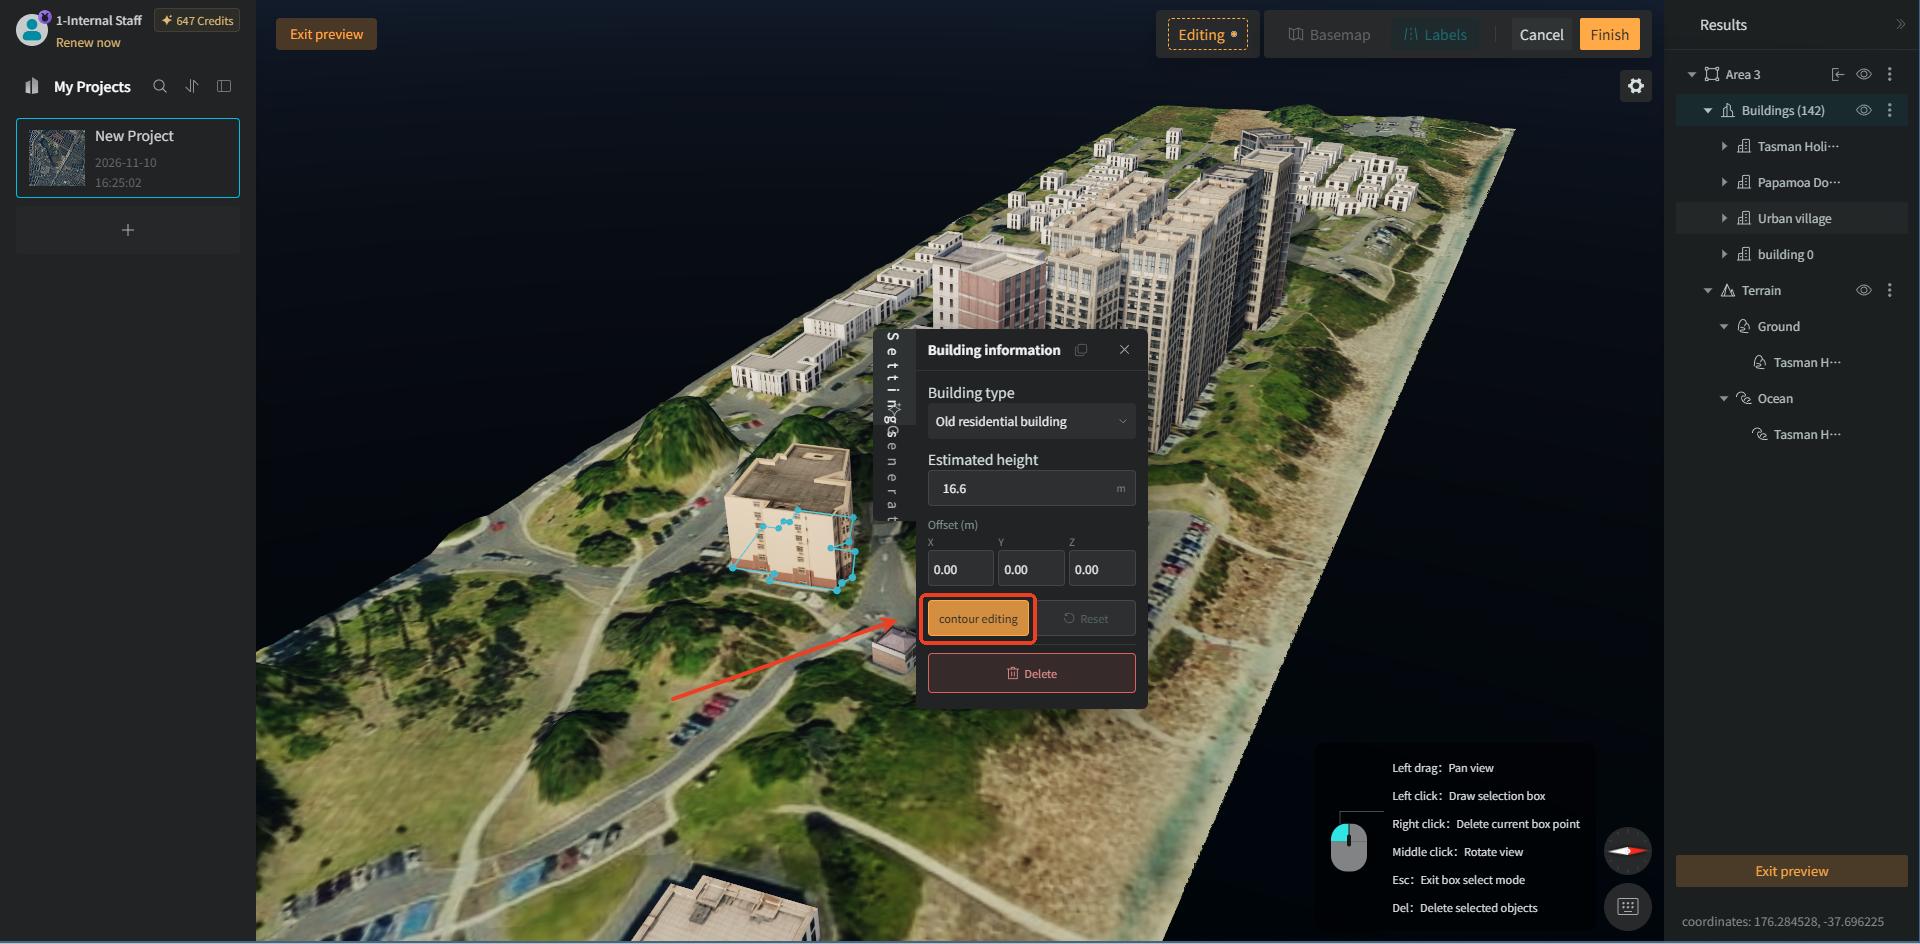
Adjust the building's outline edges by dragging the endpoints of the outline lines, then click "Finish" when finished.